All products were chosen independently by our editorial team. This review contains affiliate links and we may receive a commission for purchases made. Please read our affiliates FAQ page to find out more.

How to make beeswax candles

Learn how to make beeswax candles from raw beeswax, with a few extra hints and tips for how to make a candle moulds

Try our magazines – get 6 issues from just £9.99!

Published: August 5, 2021 at 3:17 pm

If you've ever thought about making your own candles but don't know where to start - give it a try, it's easier than you think! We're going to show you how to make beeswax candles from raw beeswax which have a lovely colour and delicious natural smell, and we'll be using pre-made wicks and containers - but keep reading below for tips on how to make your own wicks and containers! Alternatively, if you want to save yourself some effort gathering the individual materials, or were planning on making a candle for a friend, why not check out our pick of the best candlemaking kits!

Safety warning - before we start showing you how to make beeswax candles, it's important to note that there are several safety aspects to be aware of. Never leave a lit candle unattended or around pets or children, and do not position too close to walls or curtains. The following tutorial involves heating and pouring hot wax, as well as the use of some sharp tools - so please be careful and take your time. Please use your own judgement and common sense when creating home-made candles, it's a fun and creative project but is at your own risk!

How to make beeswax candles materials

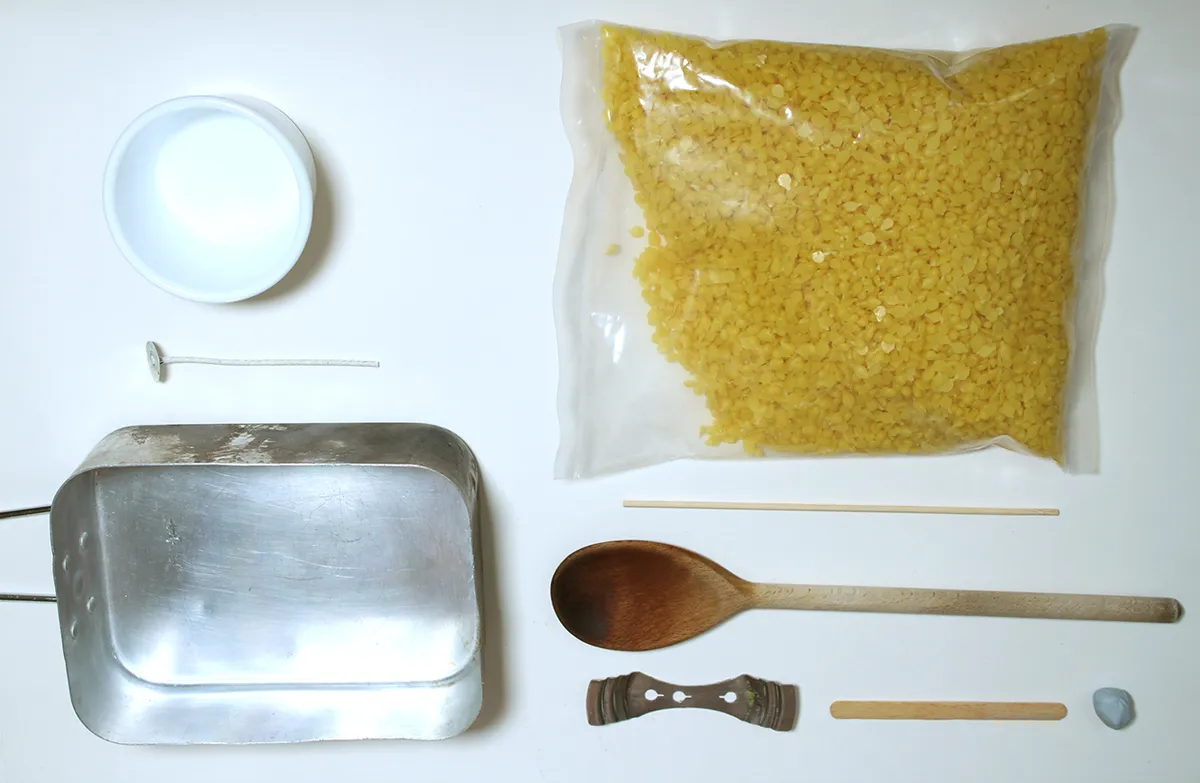
The first thing to do before we start learning how to make beeswax candles is to get all of your materials together. We've listed everything you'll need below, but here are a few extra notes and things to be aware of.

Beeswax - It's easiest if you can get hold of pellets rather than blocks of beeswax, as these will melt more evenly. If you are using blocks, try cutting them into smaller chunks with a knife. We used this 500g Beeswax Pellets from Amazon, and found that 500g was enough to make 3 medium sized candles.

Wicks - If you're trying to make candles for the first time we'd advise buying some pre-made wicks. Pre-made candle wicks are easy to use and it's a good idea to have some spares in case you need to start again for any reason. We used this pack of 100 candle wicks from Amazon that comes with 2 different sizes and a wick holder. Alternatively, you can make your own wicks using cotton yarn or string, find out more in our how to make a candle wick tutorial.

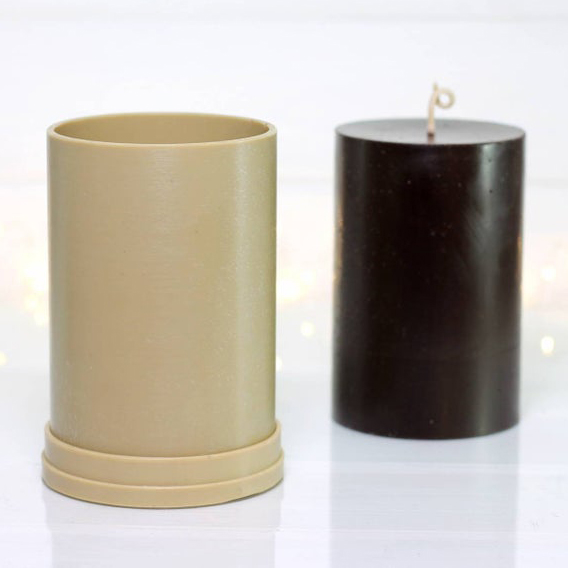
Containers - We're going to use a pre-used candle jar in this tutorial, but there are lots of options if you would like to use a different container. You can use glass jars, however - you need to be sure that they're heat proof - Kilner jars are a good choice for this! If you are unsure, using a wider jar is better than a slimmer jar, as the heat won't be as close to the glass. You can also use tin cans, although if they are ridged you won't be able to get the candle out of the can (more on this later), and you should be careful where you position it as the metal could get hot. Again, be cautious and use your best judgement.

Pans/heat source - Once you've used your pan for melting wax, you shouldn't use that pan again for food cooking (while beeswax is not-toxic and shouldn't do you any harm if you ingest a small amount, it's still advisable to avoid it). For this reason we've chosen to use an old camping mess tin as our pan. Your pan needs to be clean and dry - any water left in the pan could lead to it spitting. We've had no problems with melting the wax directly in the pan, however some people prefer to melt their wax in a bain marie (for example, put the wax in a glass bowl that sits in a saucepan of boiling water). The important thing is you want a very low and slow heat - you don't want your melted wax to boil and spit - so take your time and be careful - and be sure to use oven gloves!

Measurements - If you're unsure of how much wax you'll need for your container, it's easy to find out! Simply fill your container with water first and measure how much it weighs (subtracting the weight of the container of course) - once you know that simply weigh the same amount of wax. This will give you a ball-park amount, but you can always just add some extra wax f you're a little sure. Make sure that your container is clean and thoroughly dry before using.

Mess - You WILL made a mess and spill some wax, no matter how hard you try not to! It's a good idea to put some paper or an old sheet down where you will be transferring the hot wax. Equally, if you're worried about spilling wax on your kitchen stove or worktops, one option is to use a camping stove somewhere where you won't mind making a mess instead. TOP TIP - If you do spill any wax on your clothes, let it dry and scrape off the worst of it with a knife - then place some brown packing paper over the wax and iron on a low heat - the heat will melt the wax and soak into the brown paper - but be careful to do this gradually and keep checking it regularly so that you don't get wax on your iron.

how to make beeswax candles

You will need:

  • beeswax pellets
  • Pre-made candle wick
  • Wick holder (If you don't have one, you can use a lollipop stick and a bit of blue-tack)
  • A container (an old candle container is perfect)
  • Wooden spoon
  • a skewer or stick
  • A pan

Total time:

plus a minimum of 2 hours setting time

How to make beeswax candles

Step 1

Take your pre-made wick and wick holder (these are often included when you buy pre-made wicks). Place the wick in your container so you can gauge the height of your wick and where that relate to where you will attach it to the holder. (remember that you will need to leave approx 1cm at least of wick stitching out of the top of the wax). You want the metal clip at the bottom of your wick to be flat on the bottom of your container, with the wick going straight up and in the centre of the container. Once you’re happy, attach the wick into the groove on the wick holder.

How_to_make_candles_step_02

If you don’t have a wick holder, you can make a holder using an old lollipop stick (or any flat stick) and some blue tack or tape. again place the wick in the container and try to get it centred and going as straight up as possible. Place the stick on your container and use the blue tack to attach it to your wick – this should keep your wick standing up straight. You may need to adjust it a few times to get it perfect.

How_to_make_candles_step_03

Step 2

Next we’re going to melt our wax! Put your stove on a low heat and insert the beeswax pellets into your pan.

How_to_make_candles_step_04

Heat low and stir slowly until all of the pellets have melted and turned to liquid – if it starts spitting or boiling turn your heat down!

How_to_make_candles_step_05

Step 3

Now we’re going to pour the wax into our container. Be very careful doing this – go slowly, you don’t want to splash hot wax on yourself. It’s a good idea to wear oven gloves for this bit, as you can then hold the sides of your pan to give you more control with your pour. Pour your wax into the container, and fill it up to about 5mm below your desired height and leave some wax in the pan (we’ll explain why in the next step).

How_to_make_candles_step_06

Step 4

Leave your candle to set for approximately an hour. You will see the wax change back to that lovely yellow colour as it solidifies. Now in the last step we told you to keep a bit of melted wax to the side and not fill your container right up to the desired height – this is to account for your candle sinking. Sometimes (but not always), as the wax solidifies and cools, it can slightly contract when it sets, normally in the centre around your wick. If this happens you can still use the candle, it just won’t look as pretty and may burn down in the centre quicker. But here’s a quick way to fix it!

How_to_make_candles_sinking

Take a wooden skewer, and poke some holes in your wax around the wick. You don’t want to poke right to the bottom of the container, just most of the way in. And you want to get close to your wick, but you don’t want to touch it or knock it out of position. You might be tempted to just fill in the sink hole, however doing this method of poking will ensure there’s no hidden cavities further down your candle.

How_to_make_candles_step_07

Do this a few times. The wax may still be a bit liquidy when you poke in but that’s ok – ideally you want it to be soft enough to poke through but not completely liquid too.

How_to_make_candles_step_08

Then simply take that bit of wax we left in our pan before (you may need to quickly reheat it again), and simply pour on top to your desired fill level.

How_to_make_candles_step_09

Step 5

Then all your have to do is let it set fully. Leave in a cool place, ideally overnight… although if you want to speed up the process, you can pop it in the freezer once the candle is relatively solid. Remember to trim your wick to approx 0.5-1cm before lighting.

How_to_make_candles_step_10

A note about beeswax – Beeswax, while being a natural product, is still an animal product and therefore is not vegan friendly. There are vegan alternatives such as soy wax, but you should be wary that these are often blended with paraffin, and debates are had on the environmental impact of soy bean production.

How to make candle moulds

Step 1

If you want to make pillar style candles rather than in containers, there are plenty of moulds available online. But you can also get creative and make your own. We’ll show you how to make a candle mould from a can, but you could use a tin or other metal container instead (as long as it doesn’t have ridges that will prevent you from getting your candle out of the mould).

First, get an old can and give it a good rinse and time to air dry!

How_to_make_a_candle_mould_step_01

Step 2

Then take some masking tape, and wrap around the top of your can. This will give you a guide to help you evenly cut around the can.

How_to_make_a_candle_mould_step_02

Step 3

Now here’s the tricky bit! Take a sharp Stanley knife and carefully insert into the can above your masking tape line. Once you’ve made an insertion, you can either use your Stanley knife to continue cutting around, or you can switch it for a pair of sharp scissors.

BE VERY CAREFUL – it’s almost impossible to get a clean cut, and the can will flex as you cut further into it. This will create some sharp edges, we’ll show you a tip in the next step but still be careful not to cut yourself on these edges!

How_to_make_a_candle_mould_step_03

Step 4

Once you've taken the top of the can off, wrap some more masking tape around the can with half of the tape on the top of the can and half not sticking to anything. You can then carefully fold that unused half of tape over the sharp edge and stick it to the inside of the can. This will help to give you a little bit of protection from the sharp edges, but still be careful with them!

How_to_make_a_candle_mould_step_05

Step 5

Then you can just use it to continue making a candle like you would if it was in a container.

How_to_make_a_candle_mould_step_06

Step 6

Once you've given your candle time to set naturally, and you're ready to remove it from the can - pop it in the freeze for around 20min. The freezer will make the metal can contract, so in theory you should be able to just pop the candle out. However, if your candle doesn't just simply slide out, because the metal is quite thin you can just give it a few snips to open it out a bit and remove your candle with ease!

How_to_make_a_candle_mould_step_08

If you don't like the idea of sharp metal, you can make a mould out of the cardboard centre of a toilet roll, kitchen foil and tape. You cover the base of the cardboard tube with foil and the tape it in place. However, you will want to use a few layers of foil, and use a strong tape such as duct tape - as when we tried this we found the wax still leaked out of the bottom! We also found that the cardboard stuck to the wax, so we struggled to get a clean finished candle - you could cover the inside of the roll with foil too to combat this. We have heard of people using plastic containers such as beakers as moulds and coating the insides with oil or washing-up liquid to enable them to get the finished candle out - although we haven't tried this ourselves yet so can't recommend it.

If this all seems a bit tricky (or time-consuming), you can always just buy some candle moulds - here's just a few for you to try!

2 x Plastic Pillar candle moulds

Cylindrical candle molds

Striped pillar candle mould

Pyramid cone candle mold

That’s how to make beeswax candles from raw beeswax! Once you’ve made your first candle, why not try experimenting with different containers and waxes. You can easily melt down leftover wax from old candles to reuse – just make sure they’re clean and remove any existing parts of the old wick (or any other contaminants). You can also try making your own scented candles by adding essential oils – the trick with this seems to be letting the wax cool slightly before adding them so you don’t burn off the scent. And if you want to add some colour to your candles, then check out our how to make pink ombre candles tutorial!