Step 1

Cut 12 250cm (98 1/2") strands of yarn, taking care not to stretch the yarn as you measure it. Lay one strand horizontally, then lay two strands vertically on top, crossing their midpoints over the midpoint of the horizontal strand. Make a square knot with the two vertical strands, then fold down the strands at the top of the knot – one to the right and one to the left.
Step 2

Take two new strands from your pile and lay one vertically on the right-hand side of your work, with its midpoint at the same point as the knot. Lay the other strand horizontally, on top of the first five strands from left to right, then under the two strands on the furthest right. Using this horizontal strand, and working around the two vertical strands on the right, make a square knot, then push it up so it sits tightly against the original knot made in Step 1.
Step 3

Repeat Step 2 three times until you have five knots in total. Separate out the two loose strands at either end of the line of knots, then arrange the work with these two strands hanging down vertically. Lay the remaining strand horizontally underneath them, crossing their midpoints over the midpoint of the horizontal strand. Make a square knot to join the work into a circle, then push it up so it sits with the other knots.
Step 4

Spread out the work so you have a circle of knots in the middle, and the four strands from either end of each knot coming outwards from the centre. Take two strands from the side of one knot and two strands from the adjoining side of the next knot. Make a square knot, then repeat with the four strands to the right. Continue around the circle, creating six knots in total.
Step 5

Repeat Step 4, this time working the round of knots 1.5cm (5/8") down from the previous round.
Step 6

Place the work on top of the lampshade frame, positioning six square knots from the last round between the six sections created by the vertical bars. Attach each of the four strands from the knots to the frame within that section using a double half hitch knot, and the frame as Strand A.
Step 7

Cut 12 250cm (98 1/2") strands of yarn. Push the four knots in each section of the frame to the left, making a gap on the right-hand side. Tie one strand in each of these gaps using a cow hitch, ensuring the two strands that hang down are of equal length.
Step 8

There will now be six strands of yarn hanging down from each section of the frame. Take three strands from the left-hand side of one section and make a square knot. Push up the knot so it sits against the frame. Repeat with the next three strands, working around the lampshade frame until there are 12 knots in total.
Step 9

Cut three 150cm (59 1/8") strands of yarn. Take a strand of yarn from either side of a vertical bar, then place a 150cm (59 1/8") strand horizontally behind both the bar and strands, with its midpoint at the bar. Using the two ends of this new strand as Strand A and Strand B, make two square knots, 1.5cm (5/8") down from the previous round, and with the two vertical strands and the bar at the centre of the knot. Repeat with the other two vertical bars. Now, make square knots using the strands in between these, taking two strands of yarn from one knot and two from the next knot. When there is only one strand from each knot to work with, cut a 150cm (59 1/8") strand, place it horizontally behind the two strands, and make a square knot using the two ends as Strand A and Strand B.
Step 10

Working 1.5cm (5/8") down from the previous round, take two strands from the right-hand side of one knot and the two adjoining strands of the next. Make two square knots, then repeat with the next four strands. Continue around the frame – you should have 12 knots in total, with four knots in each section.
Step 11

Repeat Step 10 twice more, each time working 1.5cm (5/8") down from the previous round, incorporating the vertical bars of the shade into the knots as before when needed.
Step 12

Attach each strand of yarn to the bottom hoop with a double half hitch knot, keeping an even amount of strands in each section. Using six strands of yarn, make a square knot that sits 2.5cm (1") down from the bottom of the frame. Repeat with the next six strands, then continue working around the base of the frame to create eight knots in total.
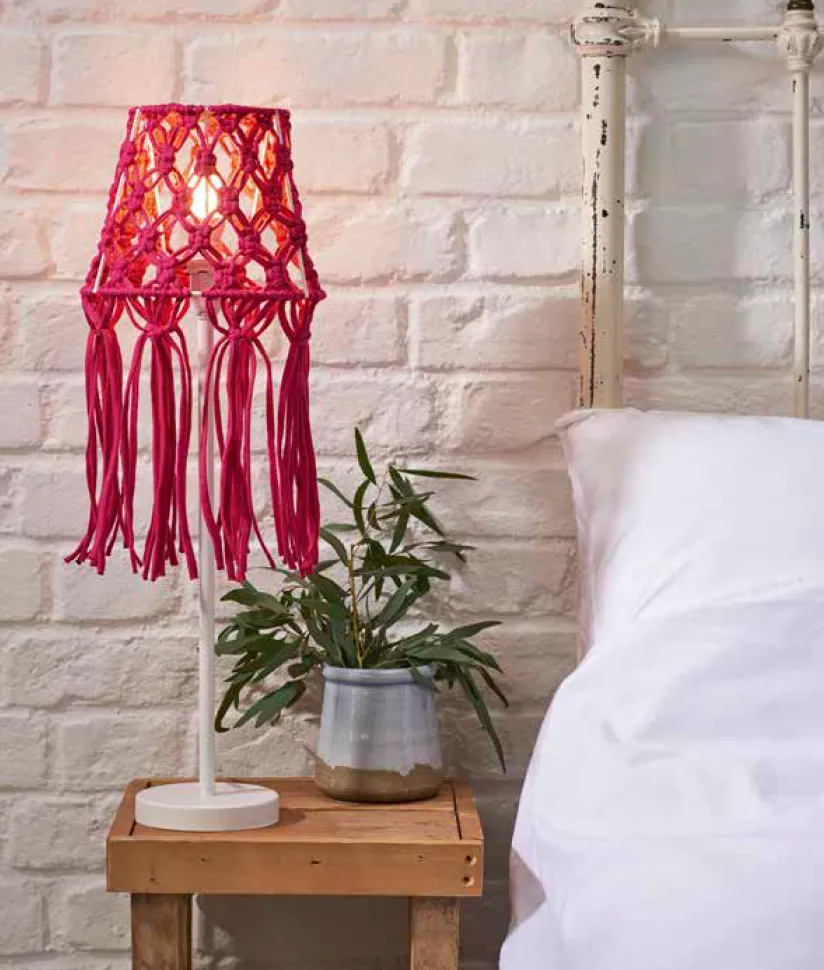
Step 13

Trim the ends to your desired length, then coat the finished lampshade with fire retardant spray before using, following the manufacturer’s instructions.