Step 1
To start, cut six 5m (195 7/8“) lengths of cotton rope.
Step 2

Fix one of the swivel clasps to the work surface with masking tape. Using lark’s head knot, attach the six lengths of rope to the swivel clasp.
Step 3

Since the rope lengths are very long, loosely knot them at about 30cm (11 7/8“) below the clasps.
Step 4

Starting from the left, using the image as a guide, make a row of three square knots.
Step 5

Leave out the first two rope lengths and make a row of two square knots, as shown.
Step 6

Repeat Steps 4 and 5 again, then Step 4 once more so you have five rows of square knots, finishing with a row of three square knots.
Step 7

Starting at the middle, use the first five lengths to make a diagonal line of two half hitch knots across the left.
Step 8

Starting from the middle, use the remaining five lengths to make a diagonal line of two half hitch knots towards the right. Make sure the two diagonals are symmetrical.
Step 9
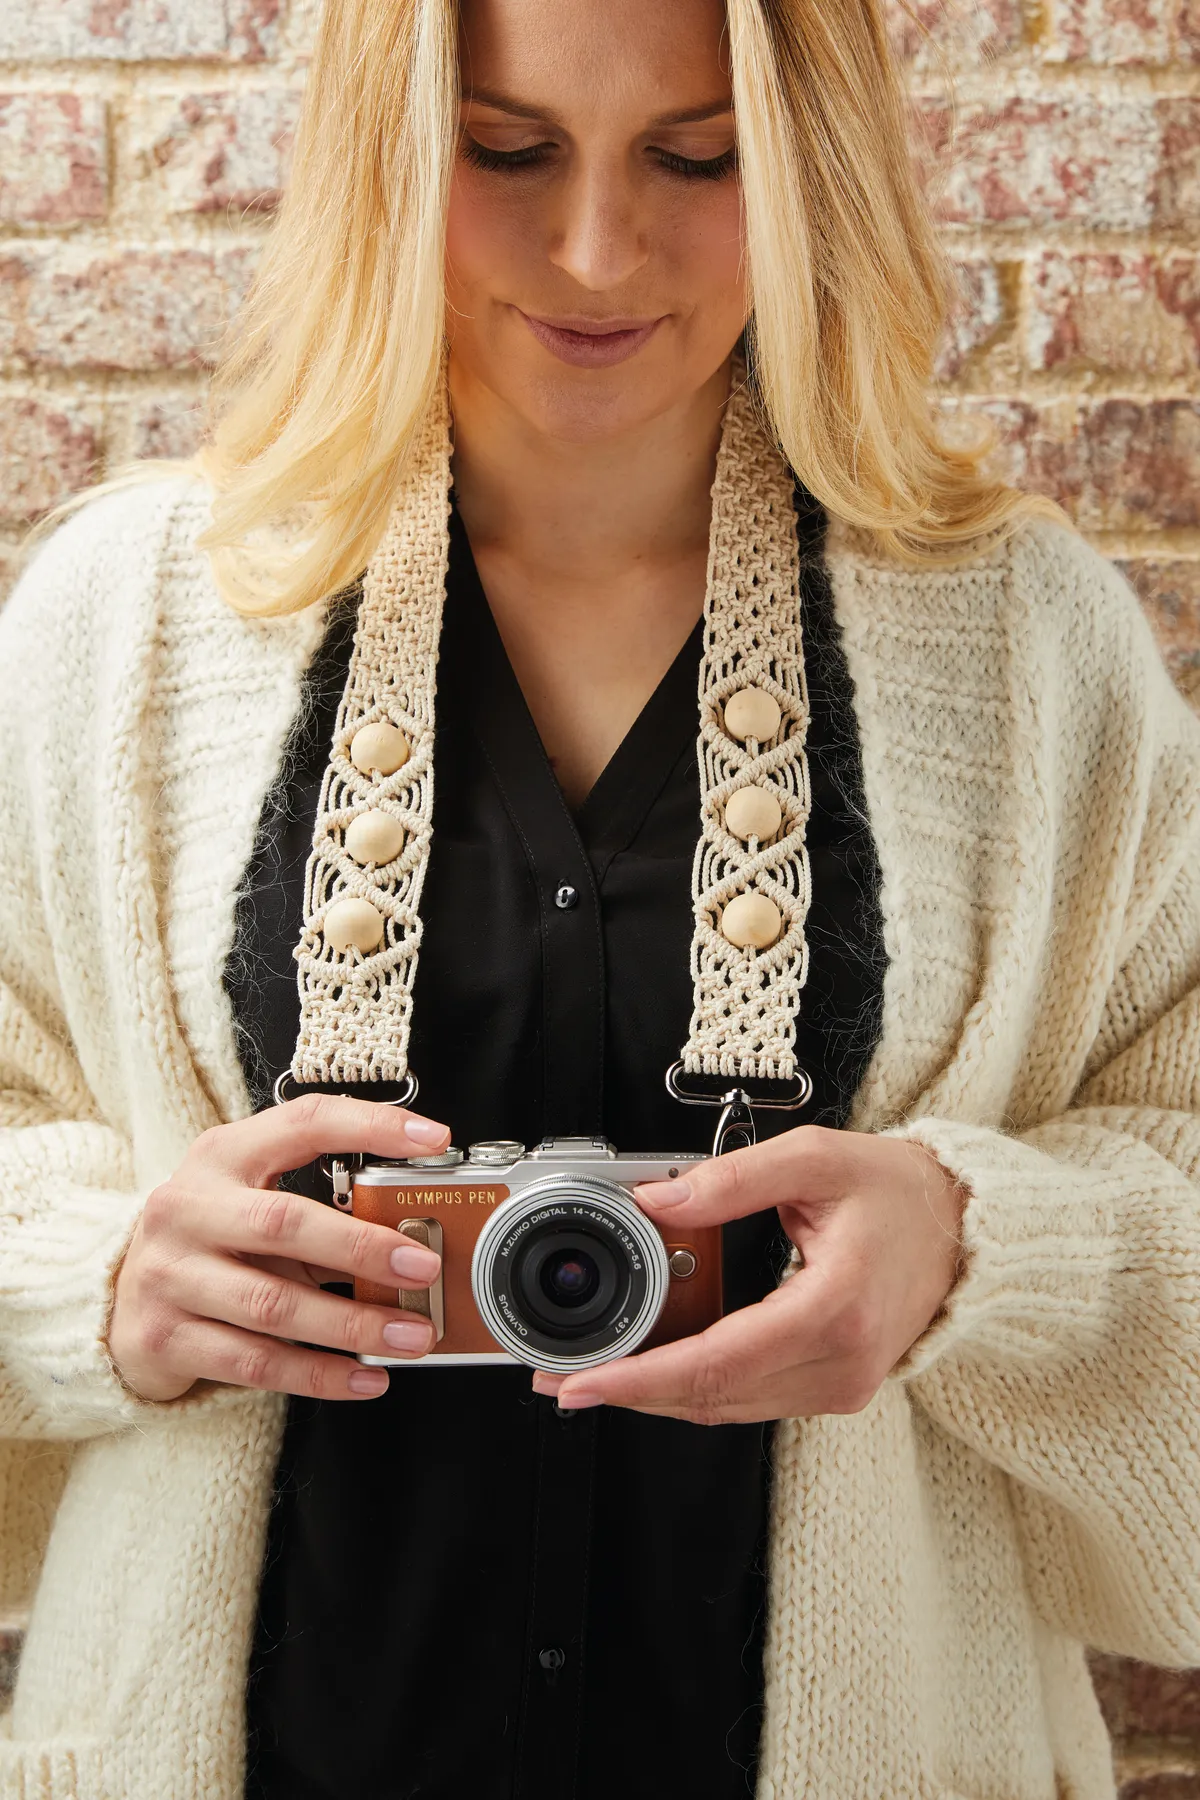
Using the tapestry needle, thread the two middle rope lengths through the first wooden bead.
Step 10

Starting at the left, make another diagonal of two half hitch knots using five lengths. Make sure to leave a small gap between the first series of diagonal knots and the new one to create the corner of the diamond shape, as shown.
Step 11
Repeat Step 10, starting at the middle and sloping up instead of down. Make one more two half hitch knot to close the diamond.
Step 12

Repeat Steps 7-11 to make two more diamond shapes.
Step 13
Use the four lengths in the middle to make a square knot, just under the last diamond, then add a square knot on each side to make a row, as per Step 4.
Step 14
Next, make a row of two square knots, as per Step 5.
Step 15
Repeat Steps 13 and 14 until there are 66 lines of square knots, or the strap measures approximately 45cm (17 3/4") long. Make sure to finish with a row of three square knots.
Step 16
Repeat Steps 7-12 to make three more diamond shapes.
Step 17

To attach the fastening, thread the ends of the rope lengths through the second swivel clasp as shown, then trim the 12 long rope ends to approximately 5cm (2").
Step 18

Add a few dots of glue on the back of the last row of square knots, fold the rope lengths over the clasp, then hold them in place with the help of clothes pegs, as shown, until the glue is dry.
Step 19
To make sure the strap is secure, add a few more dots of glue on the back of the other square knot rows, and the bottom of the strap, and peg the ends of the rope lengths in place again as in Step 18.
Step 20

Once the glue has dried, trim the remaining rope ends and clip the strap onto the camera.