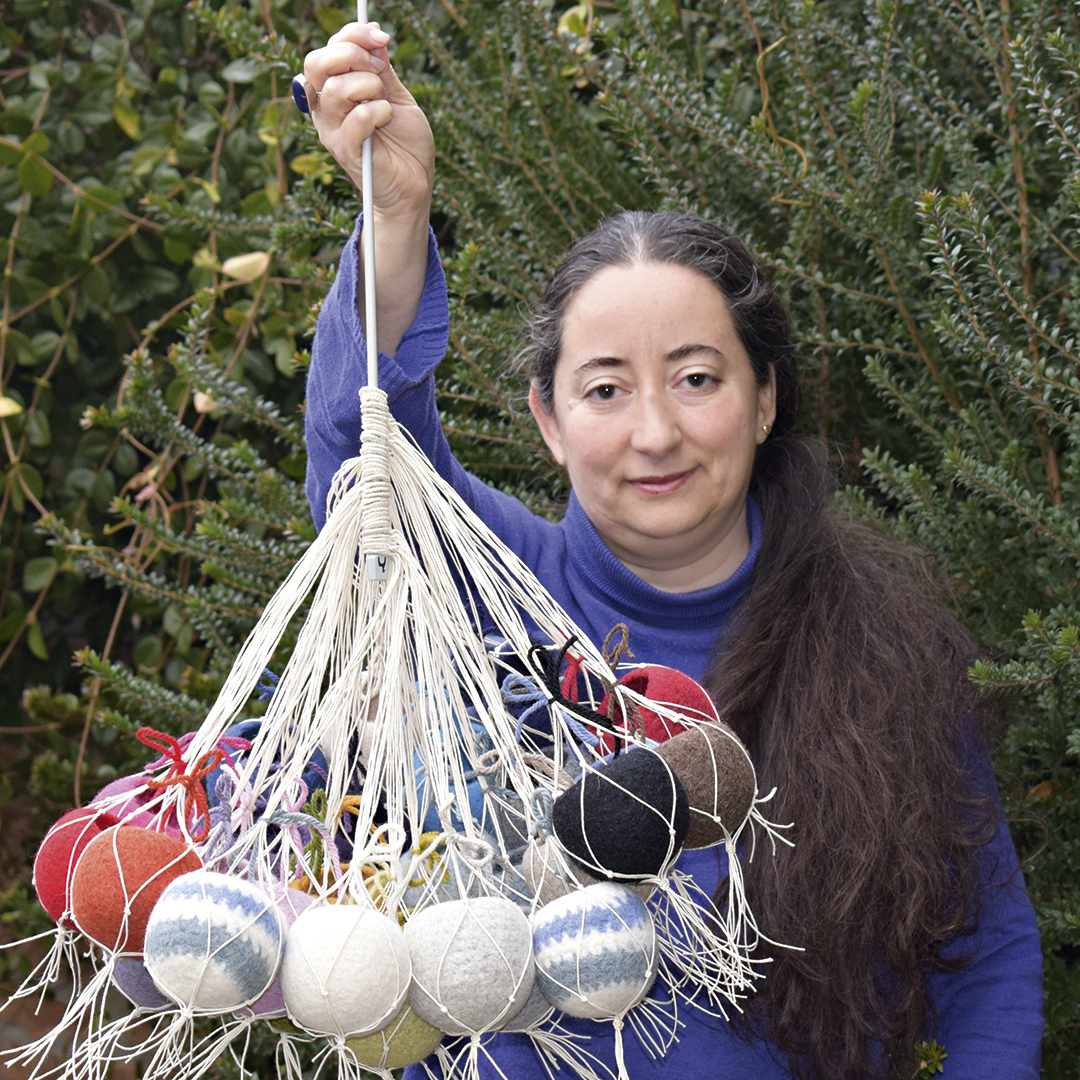
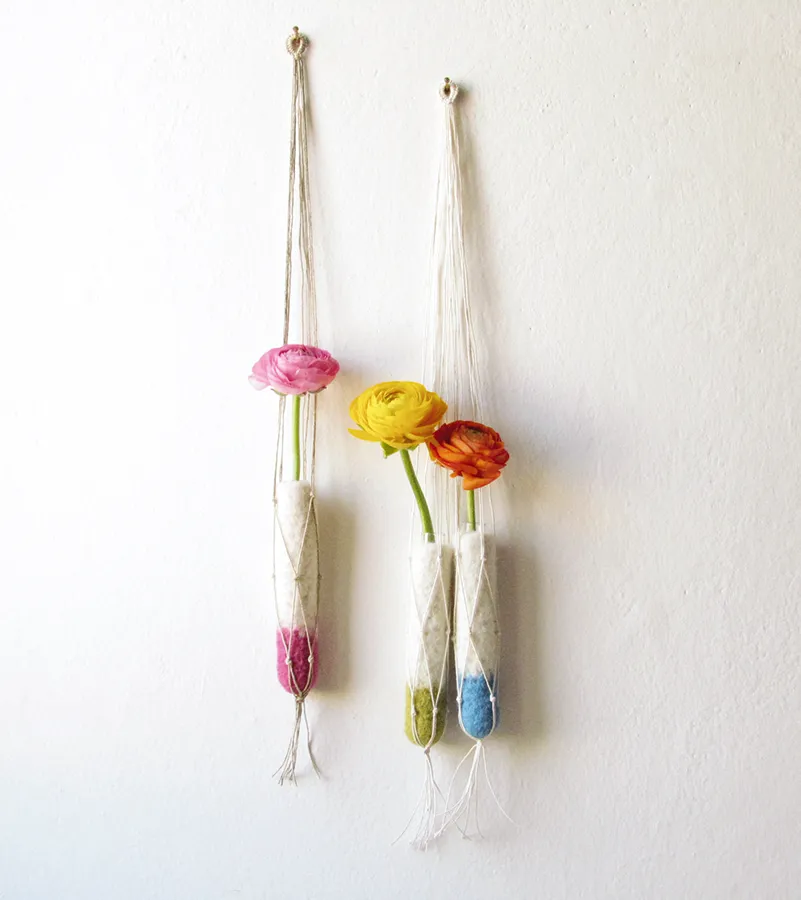
Create a real statement wall by mixing and matching colourful flowers inside these dip-dye effect macrame pot hangers. There’s a satisfying variety of techniques to get your teeth into here, such as crochet, felting and macramé.
When choosing yarn, you can go for any worsted weight wool not treated against shrinkage (if it’s labelled ‘superwash’ then it won't work).
Synthetic and vegetable fibres such as cotton won't felt at all either, but 100% wool or wool blend with natural animal fibres (such as mohair or alpaca) will give great results. Enjoy!
These macrame pot hangers were created by Stella for Mollie Makes magazine – for more easy-make craft projects and creative inspiration, subscribe to Mollie or click here to find out more. We have more funky macrame projects including our macrame bunting and DIY garden chair projects.
Looking for more macrame projects to make? Check out our favourite free macrame patterns for more inspiration.
Materials
- Worsted weight wool in two shades
- Piece of rubber hose, 22cm (8 3⁄4")
- Glass or plastic test tube, 15cm (6") high, 1.5cm (5/8") wide
- One ball of cotton or hemp twine
- 6mm (UK 4, US J/10) crochet hook
- Stitch marker (a paper clip also does the job)
Macrame pot hanger tutorial
If you're new to crochet and macrame then make sure you check out our basic macrame knots and crochet for beginners tutorials.
 Round 1 Using the first yarn colour, 5dc in magic ring, mark the last dc with a stitch marker, do not join but continue working in a spiral.
 Round 2 2dc in each dc around, move stitch marker to last st. Rounds 3 to 7 1dc in each st around, moving stitch marker up each time.

 Felt your macrame pot hanger using your washing machine. Put it on a 60° wash using a long programme plus spin dryer at the end, and add a little soap. You can always do some laundry at the same time if you want to save energy! Cut the cotton thread, remove the hose and insert the test tube. Shape the vase with your finger, stretching the felt if needed, and leave to dry.
 Create the hanging loop by using the longer thread to tie 20 knots around the folded twines. Pull the knots tight. Remove the twines from the clasp.
 Secure the loop in place under the clasp, this time with all the twines free. Use the two external ones to close the hanging loop. Take the twine on the far left-hand side and pass it under all the central pieces, then up through the loop and over the piece on the far right. Pull the knot tight. Repeat three times.
 Divide the threads into four groups of two, taking care not to cross them over each other. Tie a knot in each group 34cm down from the loop.
 Group the threads and block at the bottom by making a final three knots as described in Step 6.
 Cut the tassel at your desired length and remove from the clasp. You macrame pot hanger is finished.