How to make log candle holders

Sometimes the simplest of ideas deliver the most gorgeous of gifts! These log candle holders make great fireplace or table decorations.

Try our magazines – get 6 issues from just £9.99!

Published: November 3, 2021 at 6:38 am

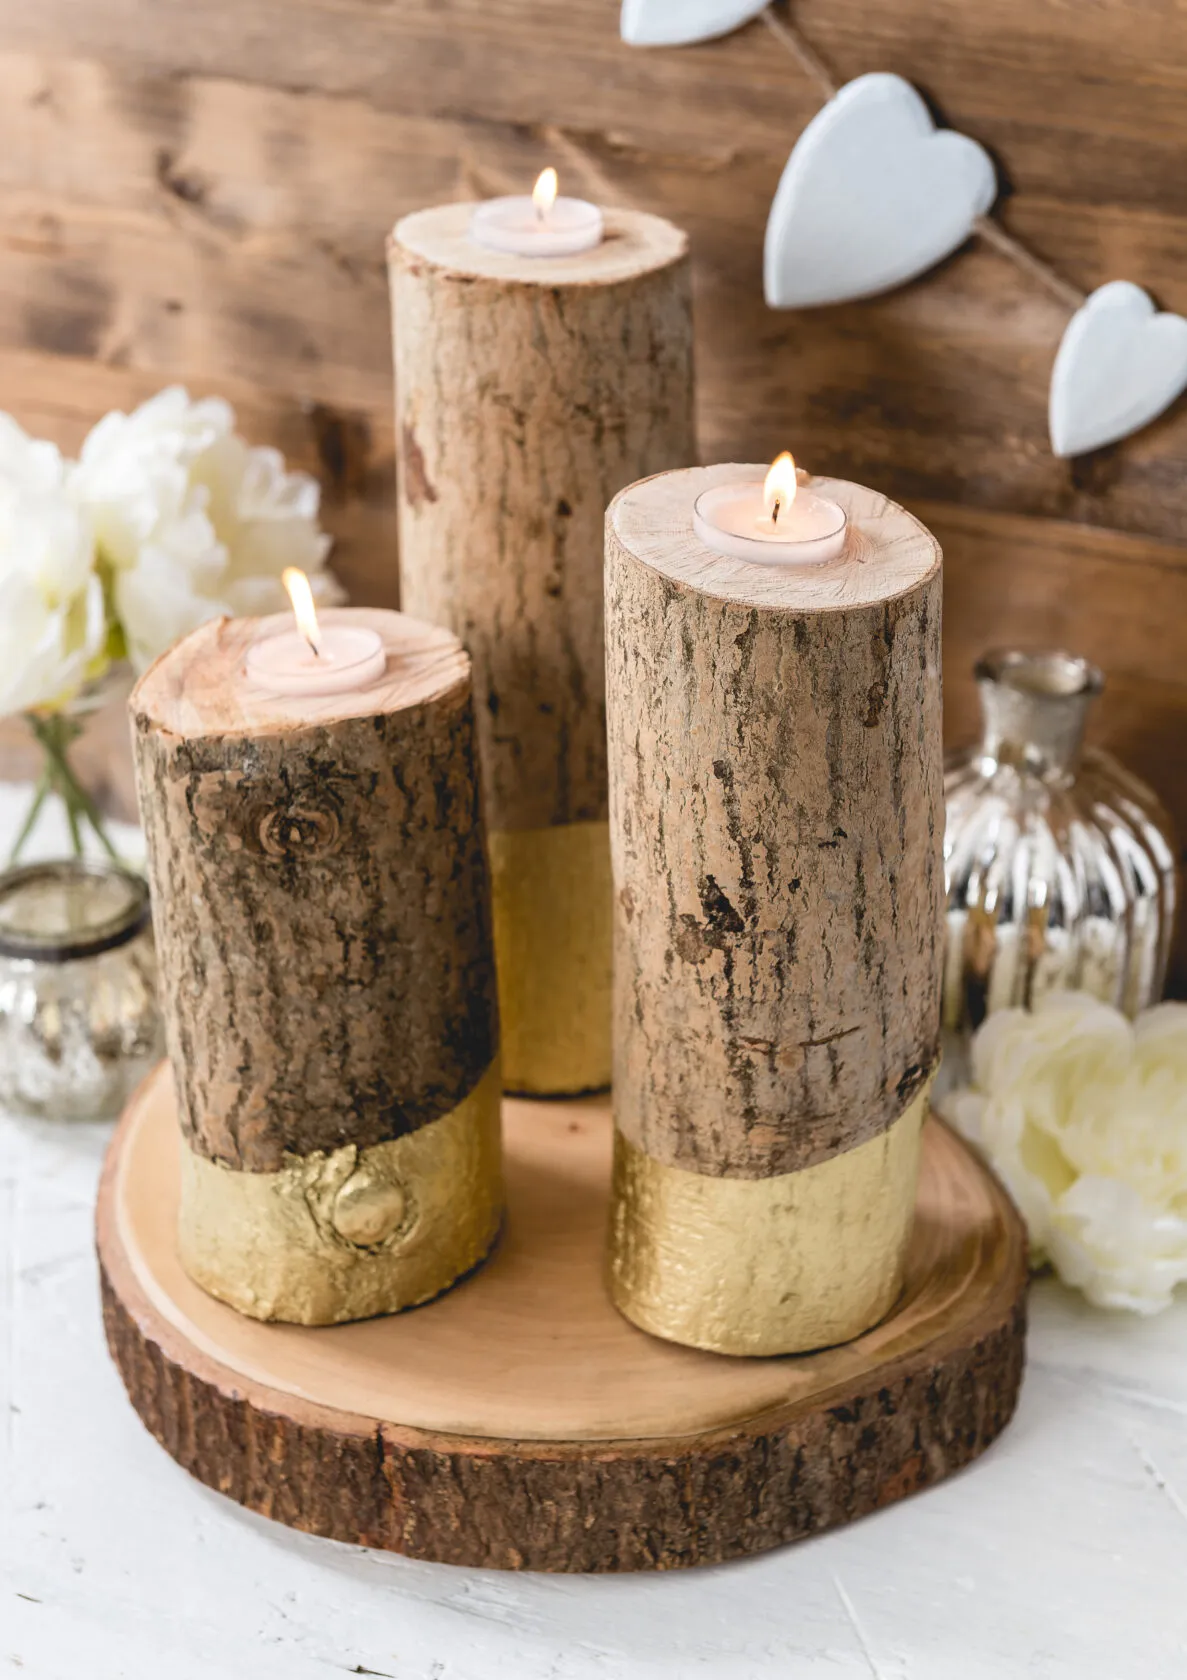
Who doesn’t like the relaxing glow of candlelight? And who would argue that bringing nature indoors has a wonderfully calming influence? Luckily it doesn’t always need to be old fashioned or expensive – these log candle holders are extremely cheap to make but will look like a million dollars! Using metallic spray paint to give your logs a ‘dipped’ appearance ensures this upcycling project updates your home in keeping with the very latest trends. Dipped effects like this are everywhere at the moment from fabrics and crochet to knitting and upcycling and can be altered to suit most objects you have in the house that need a new lease of life.

Check out our other upcycling projects for more inspiration, we love these upcycled jam jars, or if you love sewing and quilting, how about making these gorgeous DIY storage baskets from your favourite fabrics?

We love seeing what you make, so don’t forget to share your upcycling or craft projects with us on Instagram, Facebook or Twitter, too!

You will need

  • Selection of straight logs
  • Fine sandpaper
  • 38mm hole cutter
  • 35mm Forsner drill bit
  • Chisel
  • Hammer
  • Tealight
  • Saw
  • Masking tape
  • Metallic gold spray paint
  • Work bench with clamps
Log candle holders - on, portrait

How to make log candle holders

Step 1

When selecting your logs make sure they are the straightest ones you can find and at least 12cm (4¾in) in width. Give them a good scrubbing with warm soapy water to remove any debris and leave them to dry for a few days, depending on how wet they were when you found them.

Step 2

Start by clamping the first log onto your work bench and sawing the bottom off to create a smooth and even base for the log to stand up on. It is always worth testing that the log stands up straight before you go ahead and saw the top off. Decide on the height you would like your log to be – our designer has chosen three different heights. Using a tape measure and pencil mark a dot as a guide for your top cut line. Clamp and saw the top off your log.

Step 3

Arrange a tealight on the top of the log and, once happy with its position, lightly draw around it in pencil.

Step 4

Using your 38mm hole cutter (this size fits most tealights but it is always good to check), line the edges up with the circle you have drawn and cut down into your log for 20mm.

Step 5

Using a 35mm Forsner drill bit, you can now steadily start to make a hole in the centre of the circle you have just marked by using the Forsner drill bit. Burrowing down for 20mm.

Step 6

Use a chisel and hammer to knock out any extra bits of wood that might be blocking the hole in the log.

Step 7

Using fine sandpaper, give the whole log a good rub down to remove any debris. Then wipe away any dust with a damp cloth.

Step 8

Wrap the masking tape around the areas of your log that you don’t wish to paint. We decided to paint only the bottom to give a contemporary, dipped look. 

Step 9

In a well-ventilated area lightly spray paint the exposed areas off your log and leave to dry for half an hour. Unpeel the making tape and pop your tealight in the top hole and light it up!

Log candle holders – off, portrait


We hope you’ve enjoyed this upcycling tutorial on how to make log candle holders. If you have a few empty wine bottles lying around, why not make these quick and easy wine bottle lights – they take less than an hour!