All products were chosen independently by our editorial team. This review contains affiliate links and we may receive a commission for purchases made. Please read our affiliates FAQ page to find out more.

How to crochet hairpin lace

We'll show you how to crochet hairpin lace and how to use a hairpin lace loom so you can perfect your lacy crochet skills!

6 issues of Simply Crochet magazine for £14.99|Save 72%

Published: March 31, 2021 at 8:00 am

The hairpin crochet, or hairpin lace technique, looks complicated but is actually pretty simple to master. Before you know it, you’ll be creating lovely lacy strips or braids you can join together in different ways to form all sorts of effects. You can use any yarn you like to make hairpin lace. Use a fine cotton yarn to make a summer top or a chunky yarn to make a cosy winter scarf – the creative possibilities are almost endless.

What_is_crochet_hairpin_lace

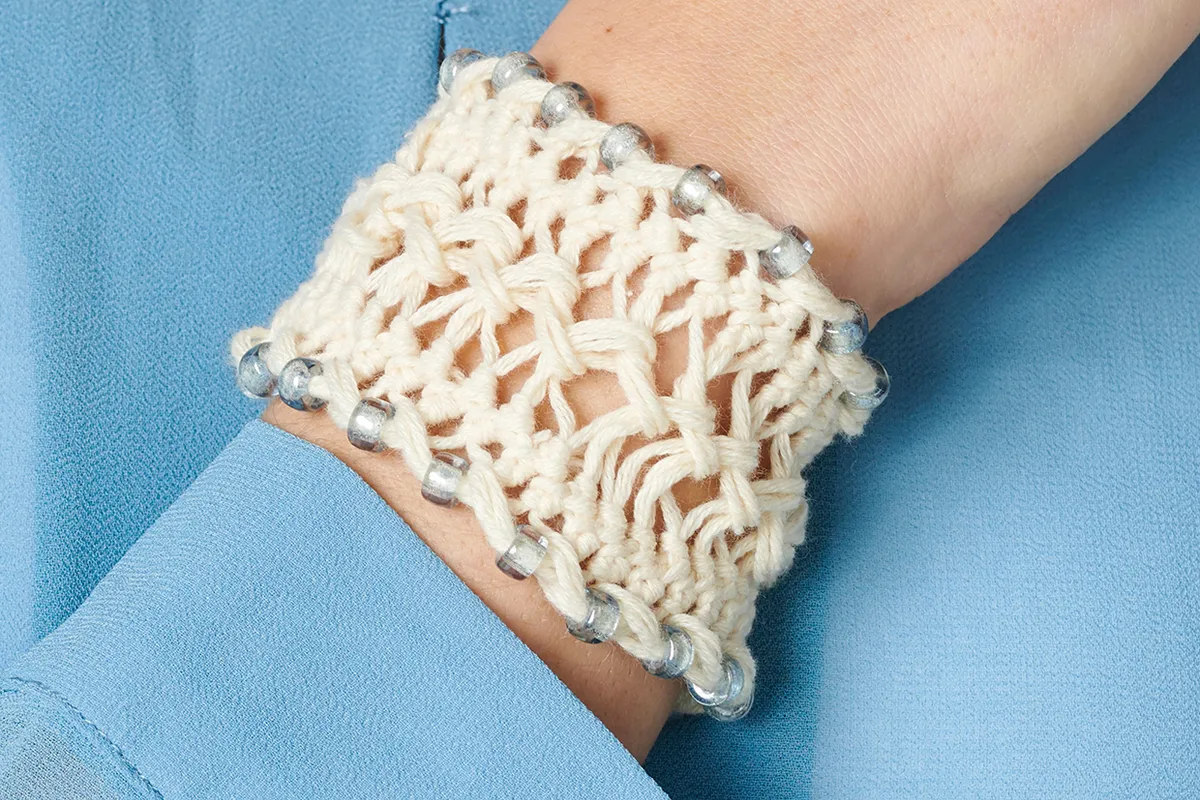
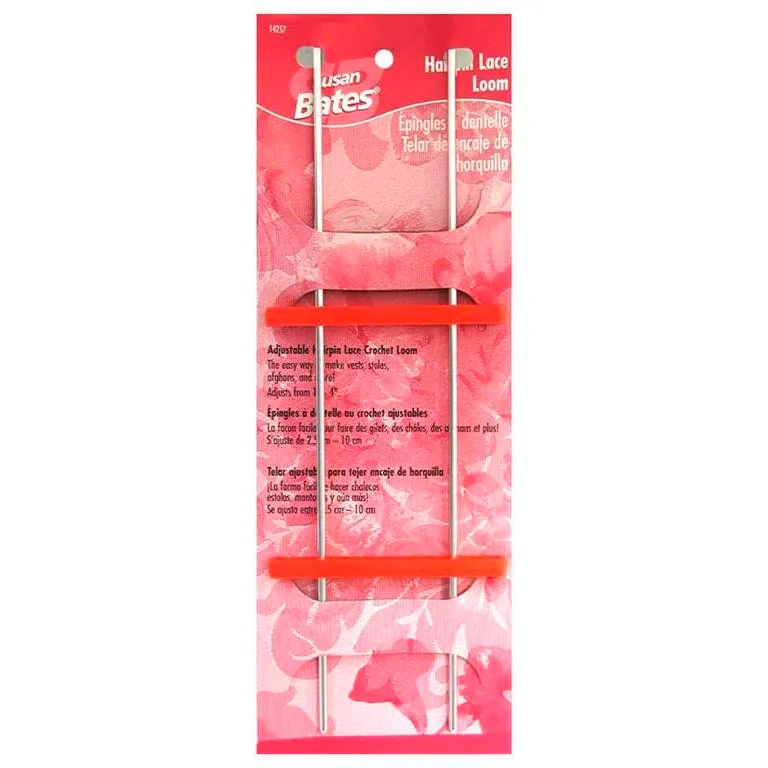
The only special equipment you need for hairpin crochet is a hairpin loom (also known as a hairpin lace fork or hairpin lace tool). If you’ve never used any sort of loom before, and you’re wondering just how difficult it might be to crochet on one, there’s no need to worry. Using a hairpin loom is simpler than you might imagine, so grab loom and let’s get started with this fun and creative craft. You might discover a new passion!

The Hairpin Lace loom used in this tutorial was included with issue 85 of Simply Crochet magazine, however if you missed out there's plenty available online. Here's just a few to choose from!

Susan Bates Adjustable Hairpin Lace Loom

Clover Hairpin Lace loom

Simplicity Boye Hairpin Lace Loom

In the steps below, we'll show you how to use a crochet hairpin lace loom and the basics of how to crochet hairpin lace, as well as some extra steps on how to add edging and how to join strips of crochet hairpin lace. If you're struggling with this tutorial at all, we've also got a handy video below which shows how to use the hairpin lace loom that was included with issue 85 of Simply Crochet magazine.

You will need:

  • Yarn
  • Crochet hook
  • Hairpin Lace Loom
  • Yarn needle

How to use a hairpin lace loom

Step 1

You’ll see that the loom comes with two long, thin prongs – when you’re using the loom, these prongs need to run vertically (up and down) and then you crochet the hairpin loops around these prongs. The loom also comes with two bar pieces – when you’re using the loom, these bars need to sit at the top and bottom of the prongs and secure the prongs in place at a set width. Each bar piece has at least four holes, which will set your prongs in place at two width settings, giving you loads of options.

How_to_use_a_hairpin_lace_crochet_loom_Step_01

Step 2

Insert the prongs into the inner holes in the bar pieces to set the loom to 4cm wide. Our bar pieces have a curved edge and a straight edge – you can insert the prongs into either, as you prefer.

How_to_use_a_hairpin_lace_crochet_loom_Step_02

Step 3

Insert the prongs into the outer holes in the bar pieces to set the loom to 6cm wide, again making your own choice about inserting the prongs into the curved or straight edge.

Top Tip – The width of the hairpin strip you make will depend on the space between the two prongs, so check the instructions in your pattern before you position them. You can use any yarn you like with your hairpin loom – just pair up the yarn with the hook size recommended on the yarn’s ball band. When you’re first learning, it’s best to use a DK or 4ply yarn and a suitable hook (such as 3-4mm). For this guide we used a light DK with a 3.5mm hook. We’ve worked our tutorial for right-handed crocheters – if you’re left-handed, simply reverse the instructions, swapping any lefts for rights and vice versa.

How_to_use_a_hairpin_lace_crochet_loom_Step_03

How to crochet hairpin lace

Step 1

For this tutorial, set your loom prongs to 4cm apart and use your yarn to make a slipknot on your hook, leaving a long tail.

With the hook in front of the loom, take the yarn around the right prong and to the back-left of the loom.

How_to_crochet_hairpin_lace_step_01

Step 2

Yrh and pull through the slipknot. Tighten the slipknot. You will have made your first hairpin loop around the right prong. Keep the hook as central as you can, between the two prongs, as you work.

How_to_crochet_hairpin_lace_step_02

Step 3

Keeping the working loop on the hook, lift hook up and over the right prong, so it’s at the back of the loom. You can let go of the hook, but keep tension on the yarn.

How_to_crochet_hairpin_lace_step_03

Step 4

Turn the loom over anti-clockwise (lifting the RH side of the loom towards you) so the yarn wraps around what was the left prong (this becomes the right prong) and runs across the back of the loom.

How_to_crochet_hairpin_lace_step_04

Step 5

Your first hairpin loop will now be around the left prong. Insert the hook into this loop.

How_to_crochet_hairpin_lace_step_05

Step 6

Yrh and pull up a loop (2 loops on now on the hook).

How_to_crochet_hairpin_lace_step_06

Step 7

Yrh and pull through the 2 loops on the hook – this will form a dc stitch and secure your second hairpin loop around the right prong. Try to keep the dc stitches in the centre between the two prongs – use the mark on the bar piece to help you.

How_to_crochet_hairpin_lace_step_07

Step 8

Repeat Steps 3-7 to make more loops. As you work, a delicate zigzagging ladder of dc stitches appears. Once the loom is full of hairpin loops, you’ll need to take some off to make room for more. Before you do this, secure the loops by inserting a length of spare yarn on the inside of each prong, using a tapestry needle or hook.

How_to_crochet_hairpin_lace_step_08

Step 9

Carefully remove the bottom bar and slide off the loops. If you’re continuing the strip, leave 3 loops in place on each prong to aid continuity, then replace the bottom bar and continue to make more loops.

How_to_crochet_hairpin_lace_step_09

Step 10

Once your strip is finished, fasten off as usual to secure the final loop. Secure the loops with spare yarn and slide all the loops off. Now you’ll be ready for edging or joining.

How_to_crochet_hairpin_lace_step_10

Top Tip - Be mindful to keep your tension consistent while working each hairpin loop. An inconsistent tension will lead to loops of differing lengths after the strip is removed from the loom.

How to work edging on crochet hairpin lace

Step 1

The joining and edging of your hairpin strips will create different effects and enable you to create various lacy projects, from garments to accessories. To make joining and edging easier, it’s important to make sure you have the same number of hairpin loops down the sides of each strip, so when you’re hooking the strips, use stitch markers or spare yarn to help you keep count.

The hairpin loops can look a bit messy, so adding an edging to your strip will give it a neater finished look. There are lots of edging options, but the simplest methods just work a slip stitch or double crochet into one or two of the hairpin loops. The way you work into the loops creates either a straight or twisted look, so try them both out and see which one you prefer:

To work a dc edging that twists the hairpin loops, insert the hook into two loops from the back of the strip towards the front – this should be in the same direction as the spare yarn you’ve used to secure the loops. Then work a dc in the usual way.

How_to_crochet_hairpin_lace_edging_step_01

Step 2

To work a dc edging that keeps the loop straight, insert the hook into two loops from the front of the strip towards the back. Then work a dc in the usual way.

Top Tip - You can work into as many or as few loops as you want, or even vary the number of loops you work into to create a wavy edging or even a wavy join between two hairpin strips. Once you have a base edging of dc, you can also add rows of standard crochet to create a fancy edging, such as scallops, picots or a lacy pattern, just as you would with any row of dc.

How_to_crochet_hairpin_lace_edging_step_02

How to join strips of crochet hairpin lace

Step 1

Joining hairpin strips means you can create larger pieces of fabric. To join two strips, place them side by side on a flat surface so you can easily work into the loop(s) of one strip and then the loop(s) of the second strip. You could work almost any crochet pattern between the two strips, but start with a simple slip stitch join for a look that’s similar to the central spine of the strip. Once you’ve got the hang of it you can experiment with working other stitches. The slip stitches in this join are worked in a similar way to surface crochet, as follows:

Keeping the yarn at the back of the strips, *insert hook into a loop of the RH strip. Then insert hook into a loop of the LH strip.

How_to_join_crochet_hairpin_lace_step_01

Step 2

Yrh and pull through all loops on hook. Repeat Steps 1-2 to the end of the strips. Alternatively, try the cable join, which is quite a bit chunkier but looks lovely.

How_to_join_crochet_hairpin_lace_step_02

Step 3

To start, insert the hook into 2 loops of the LH strip, *insert the hook into 2 loops of the RH strip.

How_to_join_crochet_hairpin_lace_step_03

Step 4

Pull the RH loops through the LH loops. Insert hook into next 2 loops of the LH strip and pull through the RH loops on the hook. Repeat from * to ‘zip’ together the strips. You can vary the look by working in more or fewer than 2 loops, or inserting the hook from front to back or back to front.

How_to_join_crochet_hairpin_lace_step_04

Top Tip – There are plenty of ways to incorporate hairpin strips into your crochet projects. Try making a circular crochet motif, then join a hairpin strip around the outside. With a bit of imagination, you’ll see that there’s the potential to achieve all sorts of effects in hairpin crochet. For example, you could change the dc stitches to something else (such as dc, ch4) to create a different effect down the spine of the hairpin strip. Have fun and see what you can create.

We hope you’ve enjoyed this tutorial on how to crochet Hairpin Lace, if you fancy some more fun tutorials why not check out how to make i-cords or how to crochet crocodile stitch! And don’t forget, you can find all of our tutorials in our how to crochet section!