All products were chosen independently by our editorial team. This review contains affiliate links and we may receive a commission for purchases made. Please read our affiliates FAQ page to find out more.

How to use planned pooling for crochet colourwork

What is the planned pooling crochet technique and how does it work? We have all you need to know about this crochet colourwork method!

6 issues of Simply Crochet magazine for £14.99|Save 72%

Published: August 10, 2021 at 8:00 am

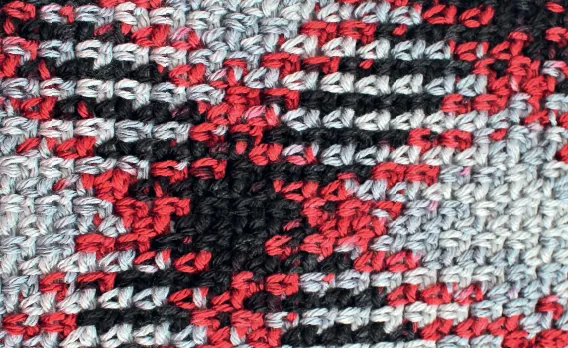
We all love the vibrancy that variegated yarns can bring to a crochet project, but you can also use them to create effects such as argyle-style patterns that have a fascinating woven look. The technique is known as yarn pooling, planned pooling or colour pooling. We’ve seen some fantastic examples of it cropping up online lately, so we dug a little deeper to find out exactly how it works.

The technique involves intentionally working the colours of a multi-coloured ball of yarn in a specific way, to create a design or colour effect when you crochet. The colour pooling technique is done with an easy formula and works with almost any variegated yarn, which means you can get an argyle look without having to cut the yarn for each colour.

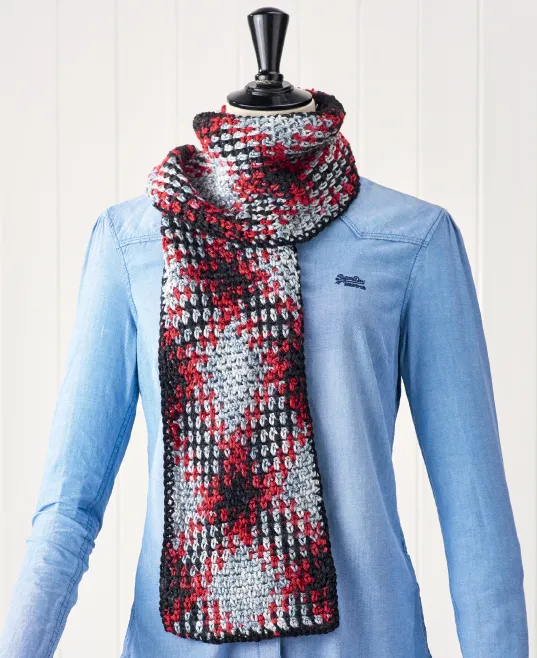
Crochet designer Ann Mancini-Williams explains just what you need to know, and guides you step-by-step through the process of making her impressive planned pooling argyle scarf. The hook size required may depend on the yarn you choose. With this planned pooling argyle example, the tension was 15sts and 13 rows to 10x10cm. Once you’ve figured out tension and the colour sequence aspect, it’s chains and double crochet stitches all the way. This yarn pooling project is fantastic for developing your skills.

Planned pooling suggested yarns

Planned pooling requires very particular kinds of variegated yarn, so here's a few popular choices for planned pooling crochet.

Bernat Softee Chunky Ombre in shades Dad’s Scarf and Shadow.

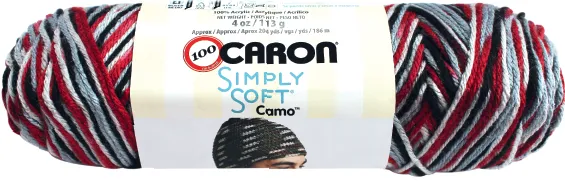
Caron Simply Soft Camo in shades Red Camo and Woodland Camo.

Lion Brand Vanna’s Choice Multi in Charcoal Print.

Red Heart Super Saving Pooling in Carnival Pooling.

Many variegated yarns will work, but self-striping yarn will not work. When looking for a yarn, the yarn must have an even number of colour sequences. For example, if the yarn has 15cm of blue, 10cm of white and 5cm of purple then every repeat of those colours must be 15cm of blue, 10cm of white and 5cm of purple – these are referred to as the colour sequences. The individual colours within a sequence do not have to be the same lengths, but the whole colour sequences do.

You also want the colours in each sequence to be no less than 7.5cm long and no more than 30cm long. For our scarf, we used 2 skeins of Caron Simply Soft Camo (100% acrylic, 113g/186m) in Red Camo.

To start

Use any hook size you want for planned pooling – start by using the size recommended on the ball band and see how you get on. The key aspect to this technique is tension – there are tips and tricks on this later to help you succeed.

You will need:

  • Yarn (Variegated)
  • Crochet hook

Step 1

Start by pulling a good length of the yarn out of the ball to determine what the colour sequence of the yarn is. It doesn’t matter if the yarn is pulled from the centre or the outside of the ball – the technique will still work, but the colours will be in a different order. The colour sequence in this yarn is Grey, Red, Black, Red.

How to do planned pooling crochet Step1

Step 2

Now it’s time to crochet! Start at the beginning of your yarn – it doesn’t have to be a specific place, you’ll see why later. Start chaining evenly until you have chained through one entire colour sequence. For our example, we decided to end at Red, so our colour sequence for the foundation chain is Black, Red, Grey, Red.

How to do planned pooling crochet Step2

Step 3

The LAST loop on your hook MUST be the first colour in your NEXT colour sequence. In this example, Black is the beginning of my NEXT colour sequence.

How to do planned pooling crochet Step3

Step 4

Start crocheting your first row of pattern stitches as follows: dc in fourth ch from hook, *ch1, skip next ch, dc in next ch; repeat from * across, until you have worked through one entire colour sequence.

How to do planned pooling crochet Step4

Step 5

At the end of your last dc, the loop on your hook MUST be the first colour in your NEXT colour sequence. You will have chains left over from your starting foundation chain but don’t worry, you won’t need to use these leftover chains so you can just undo them at the end.

How to do planned pooling crochet Step5

Step 6

Now for the important step. Before you turn to work the second row, you need to REMOVE one set of stitches: you will need to pull out the last dc and ch1 you made at the end of Row 1. This is where the magic happens, as you will now have shifted the colours by one set of stitches. You will only need to do this once, at the end of Row 1.

How to do planned pooling crochet Step6

Step 7

Now you can continue working the moss stitch pattern for Row 2 and each row as follows: ch2, dc in first ch-1 sp, *ch1, skip next dc, dc in next ch-1 sp; repeat from * across, placing last dc in last turning ch-sp. The colours should shift by one stitch to the right on the row you are working on.

How to do planned pooling crochet Step7

Step 8

As you crochet each row, pay very close attention to your colours. When you turn, the colours will still shift to the right and since it is the opposite side, that is what will make the colours criss-cross. To keep track of this, have a look at the dc below and to the left of the dc you’ve just worked.

How to do planned pooling crochet Step8

Tips and tricks for crochet planned pooling

Tension is absolutely vital to this technique. You need to keep that one set of stitches in the ‘shift’ or the effect will go askew. If your colours are not shifting to the right (lining up in a straight line) then you need to loosen your tension to use up more yarn. If your colours are shifting too much to the right then you need to tighten your tension to use up less yarn. If you need to, try changing your crochet hook size.

Keep your colour sequence in your head while you’re working. If the colour sequence changes (due to manufacturer issues, such as a knot when they change yarns) then you will need to cut and rejoin your yarn to match your colour sequence. The same applies if you need to join a second ball of yarn.

To make a larger item like a blanket, make sure your balls have the same dye lot – this will ensure the colour sequences are in the same order and are the same length so it won’t change the pooling effect.

The width of your piece is determined by how long your colour sequence is. The more colours in your colour sequence or the longer the length of your colour sequence, the wider your piece will be. You cannot make the piece smaller and still achieve the argyle effect, but you can achieve a zigzag effect if you start with half of your colour sequence. You can make the piece larger though – just chain through multiple colour sequences first, then follow the same instructions.

planned_pooling_tutorial_main_02

Planned Pooling Crochet Patterns

If you can’t wait to get your hooks stuck into your first planned pooling crochet project, here’s a few patterns you might enjoy!

Free planned pooling scarf crochet pattern

This free scarf crochet pattern from Red Heart is a brilliant choice for your first planned pooling crochet pattern – plus there’s a handy video tutorial to help you perfect the technique too!

Find the Free planned pooling scarf crochet pattern on Yarnspirations

red heart scarf planned pooling crochet pattern

Amateur Argyle Free colour pooling crochet cushion pattern

If you want to add some clever colourwork to your home decor, then you can always try hooking up this Amateur Argyle Free colour pooling crochet cushion pattern from Lovecrafts.

Find the Free colour pooling crochet cushion pattern on Lovecrafts

amateur argyle planned pooling crochet pattern

ZigZag Free planned pooling crochet cowl pattern

If you want to try planned pooling but want something a little different to the usual argyle-style patterns, then check out this clever zigzag cowl pattern!

Find the Free planned pooling crochet cowl pattern on the FiveMonkeysMenagerie blog

zigzag cowl planned pooling crochet pattern

Free Granny Stitch planned pooling blanket crochet pattern

Colourwork and granny stitch – two of our favourite techniques combined! We love this granny stitch blanket by RepeatCrafterMe, especially as she’s included some really clear tutorial photo’s and handy videos!

Find the Free Granny Stitch planned pooling blanket crochet pattern on the RepeatCrafterMe blog

planned pooling crochet blanket pattern

We hope you’ve enjoyed this planned pooling crochet tutorial, don’t forget if you need any help with your crochet stitches you can always check out our crochet for beginners guide. And if you’re looking to treat yourself, check out our list of the best crochet hooksand the best crochet kits for beginners.