Knitting the head of the bunny
Step 1
Casting on starting at the muzzle
Cast on 3 stitches using 3mm needles and Yarn A.
Row 1 (RS) Kfb to end. [6 sts]
Step 2
Lengthening the head of the bunny
Row 2 Purl.
Row 3 Kfb to end. [12 sts]
Row 4 Purl.
Row 5 K2, kfb 8 times, K2. [20 sts]
Row 6 Purl.
Row 7 K3, kfb 5 times, K4, kfb 5 times, K3.
[30 sts]
Work 3 rows in st st, beg with a P row.
Step 3
Shaping the head of the bunny
Row 11 K3, (k2tog, K1) 3 times, (K1, kfb) 3 times, (K1, k2tog) 3 times, K3. [27 sts]
Work 3 rows in st st, beg with a P row.
Row 15 K11, kfb, K1, kfb, K1, kfb, K11. [30 sts]
Work 3 rows in st st, beg with a P row.Row 19 (K2tog, K3) to end. [24 sts]
Row 20 Purl.
Row 21 (K2tog, K2) to end. [18 sts] Row 22 Purl.
Row 23 (K2tog, K1) to end. [12 sts] Row 24 Purl.
Row 25 K2tog to end. [6 sts]
Cast off.
Step 4
Stuffing the head and embroidering the face of the bunny
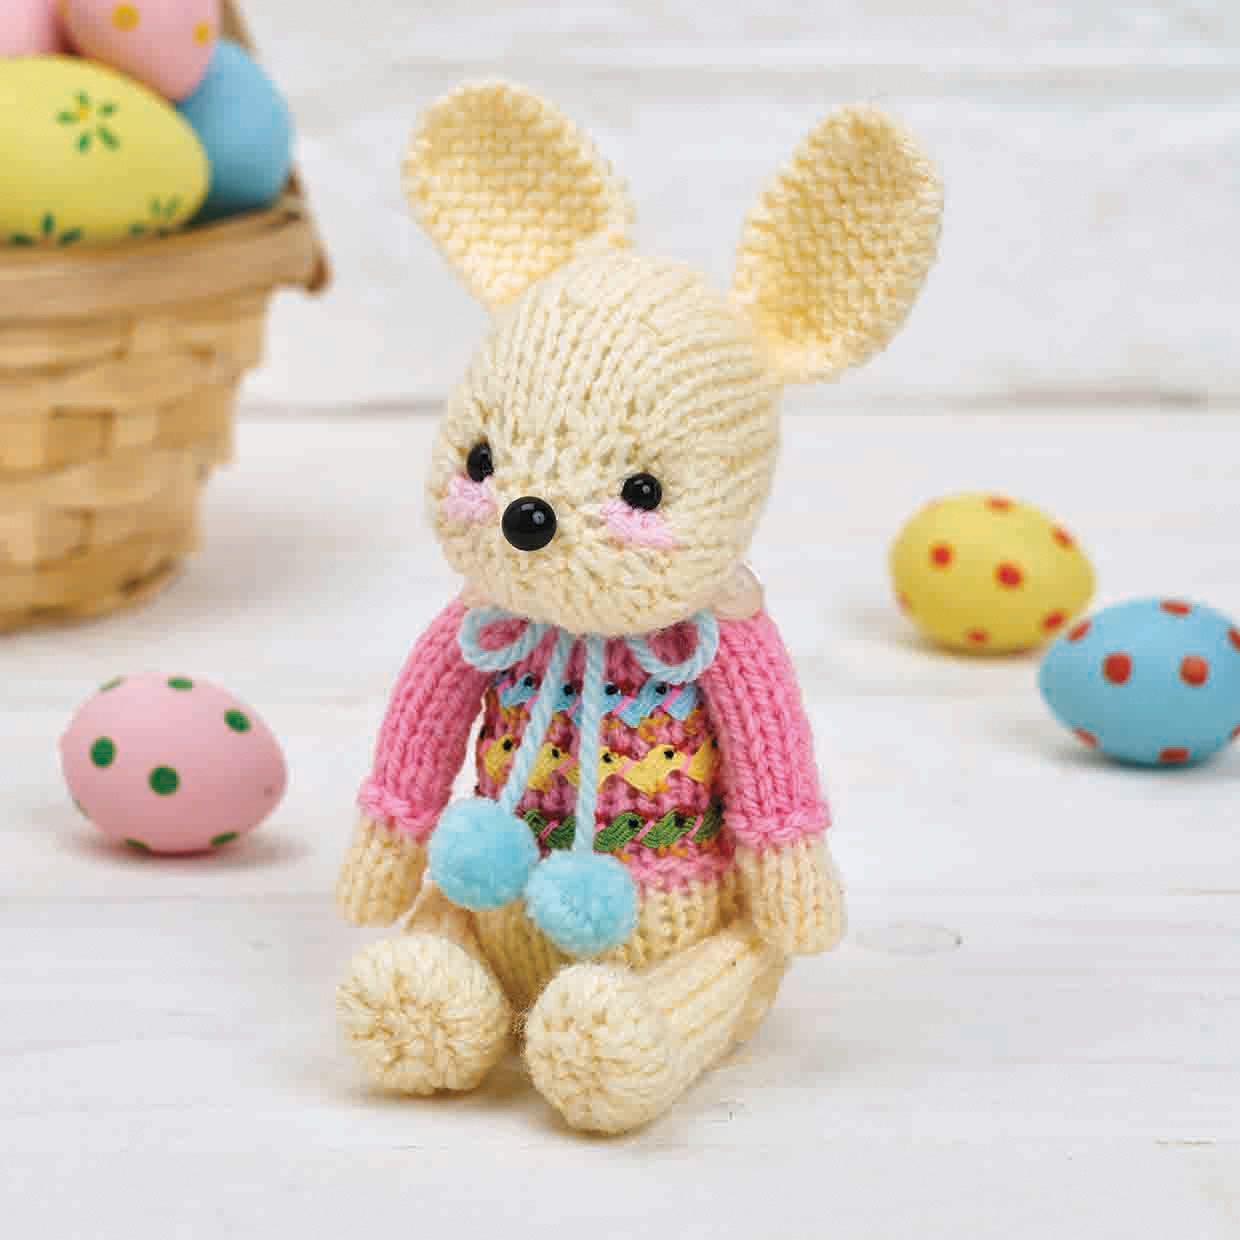
Sew the head and stuff it, making the right shape. Sew the eyes and the nose in place, firmly. Embroider the cheeks with Yarn C under the eyes.
Knitting the body of the bunny
Step 1
Casting on starting at the bottom of the bunny
Begin at the bottom.
Cast on 5 sts using 3mm needles and Yarn A.
Row 1 (WS) Purl.
Step 2
Lengthening the body of the bunny
Row 2 Kfb to end. [10 sts]
Row 3 Purl.
Row 4 Kfb to end. [20 sts]
Row 5 Purl.
Row 6 (Kfb, K1) to end. [30 sts]
Work 7 rows in st st, beg with a P row.
Step 3
Knitting the jumper of the bunny
Change to Yarn B.
Knit 3 rows.
Work 8 rows in st st, beg with a P row. Row 25 (P2tog, P4) to end. [25 sts] Row 26 Knit.
Row 27 (P2tog, P3) to end. [20 sts] Row 28 Knit.
Row 29 (P2tog, P2) to end. [15 sts] Row 30 Knit.
Row 31 (P2tog, P1) to end. [10 sts] Row 32 Knit.
Row 33 P2tog to end. [5 sts]
Cast off.

Step 4
Stuffing the bunny’s body and adding detail
Sew the Body and stuff it. Sew Head to the Body.
Using the image as a guide, sew the green, yellow and blue ric rac around the jumper.
Embroider the tiny chicks with black thread for the eyes, yellow thread for the legs, and red thread forthe beaks.
Sew one stitch between the chicks to separate them using one strand of Yarn B.
Knitting the arms of the bunny (make 2)
Step 1
Casting on the arms
Cast on 3 sts using 3mm needles and Yarn A.
Row 1 (RS) Kfb to end. [6 sts]
Step 2
Lengthening the arms
Row 2 Kfb, P5. [7 sts]
Work 4 rows in st st, beg with a K row. Change to Yarn B.
Row 7 Kfb, K6. [8 sts]
Row 8 Knit.
Work 14 rows in st st, beg with a K row. Row 23 K2tog, K4, k2tog. [6 sts]
Cast off.
Step 3
Stuffing and attaching the bunny’s arms
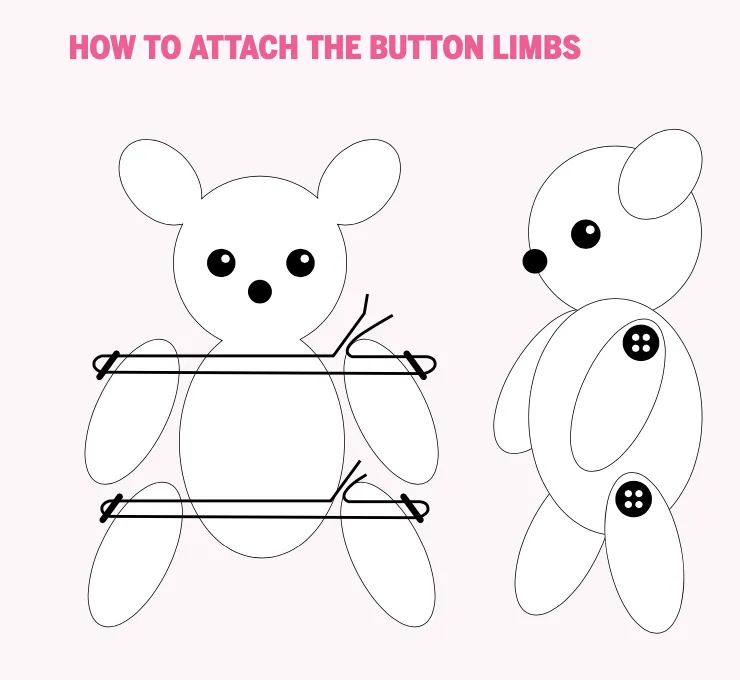
Sew the Arms and stuff them just a little bit. Attach the Arms to both sides of the Body with a mother-of-pearl button.

Knitting the ears of the bunny (make 2)
Step 1
Cast on 5 sts using 3mm needles and Yarn A.
Row 1 (RS) Knit.
Row 2 Kfb, K3, kfb. [7 sts]
Work 19 rows in garter st.
Cast off.
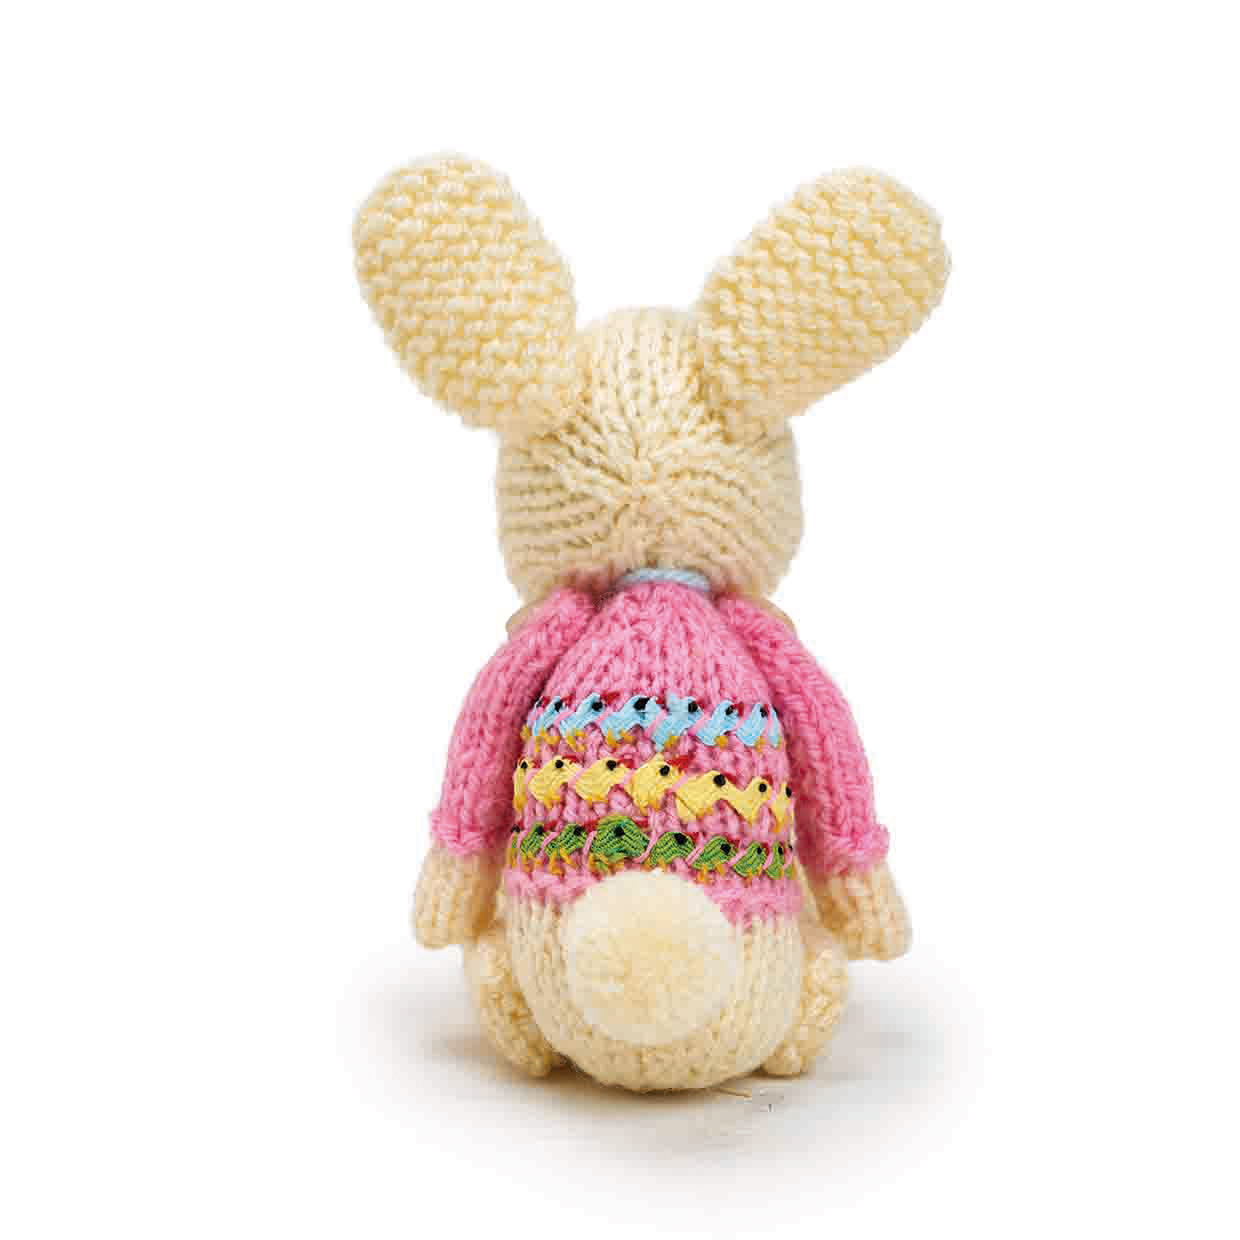
Sew the ears to the head using the photograph as a guide for where to attach them
Knitting the feet and legs of the bunny (make 2)
Step 1
Cast on 8 sts using 3mm needles and Yarn A.
Row 1 Kfb to end. [16 sts]
Work 4 rows in st st, beg with a P row.
Row 6 P5, (p2tog) 3 times, P5. [13 sts]
Row 7 K5, sk2po, K5. [11 sts]
Work 10 rows in st st, beg with a P row.
Row 18 P2tog, P7, p2tog. [9 sts]
Cast off.
Sew the Feet and the Legs and stuff them just a little bit. Attach them to both sides of the Body with a mother-of-pearl button.
Making the pompom finishing touches
Step 1
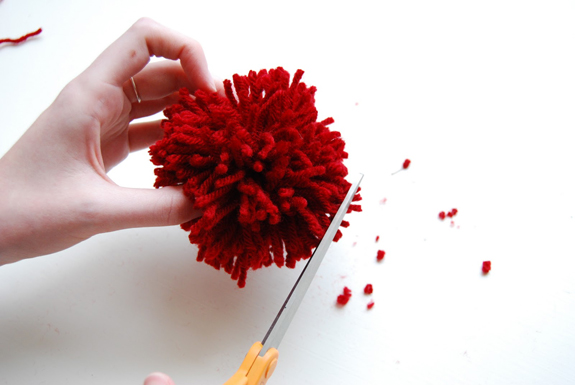
Using Yarn A, make the tail by creating a a pompom measuring 2.5cm in diameter. Sew it to the back.
Step 2
Using Yarn D, make two pompoms measuring 1.5cm in diameter. Sew the pompoms to the ends of a strand of Yarn D and tie it around the neck to make a bow.
How to make a pompom
Make sure your bunny has the fluffiest tail with Gathered’s guide showing how to make a pom pom