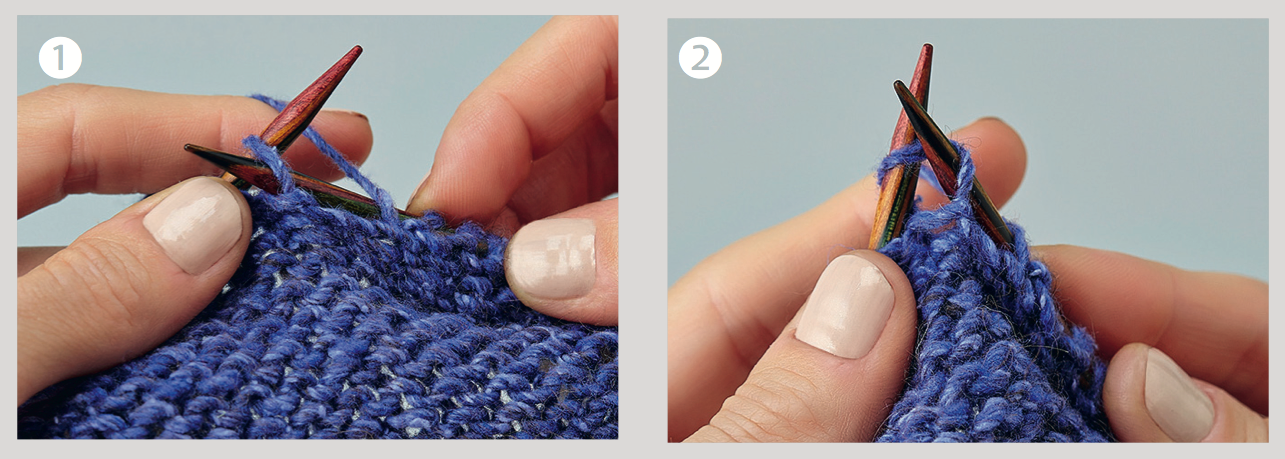
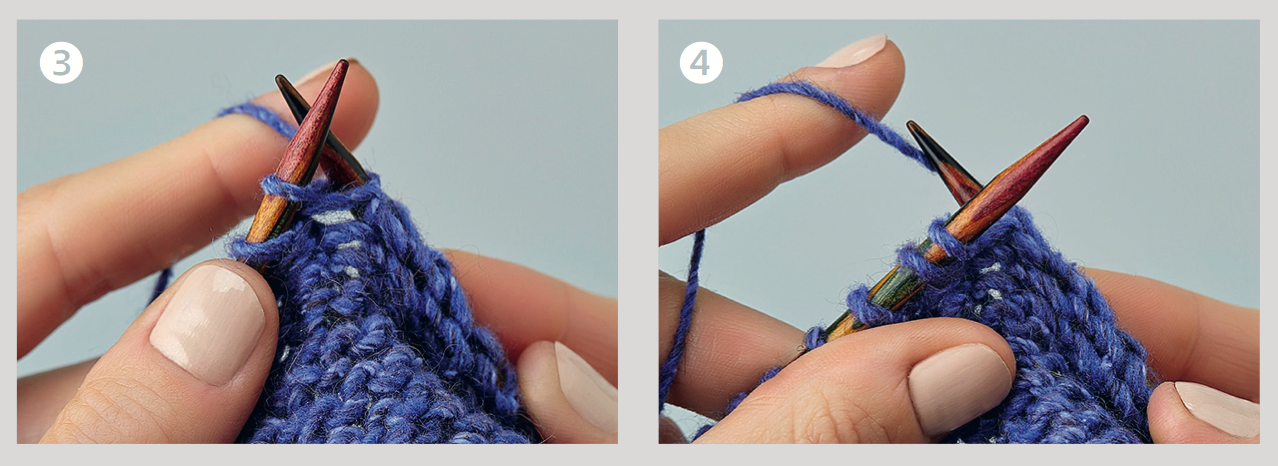
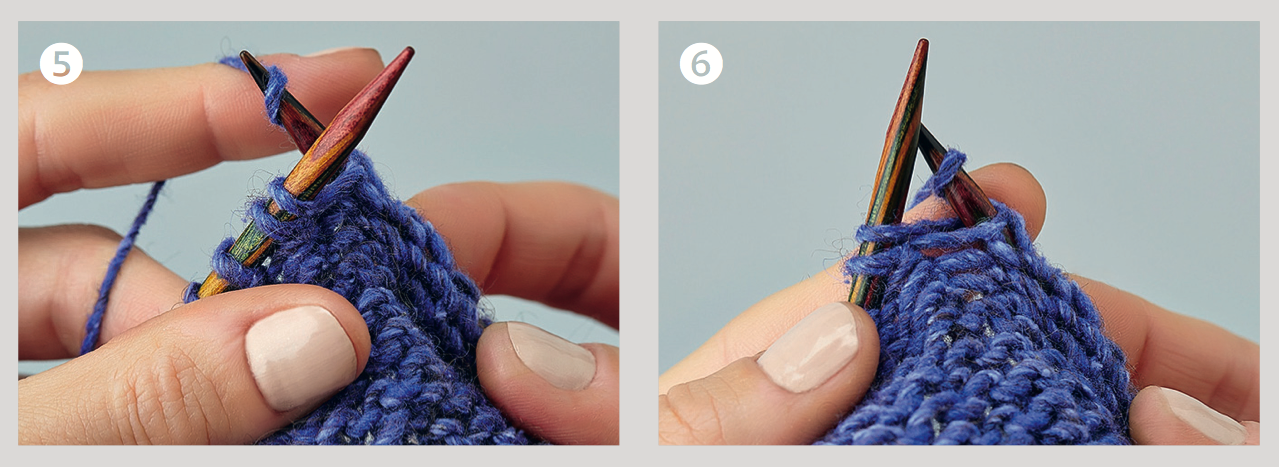
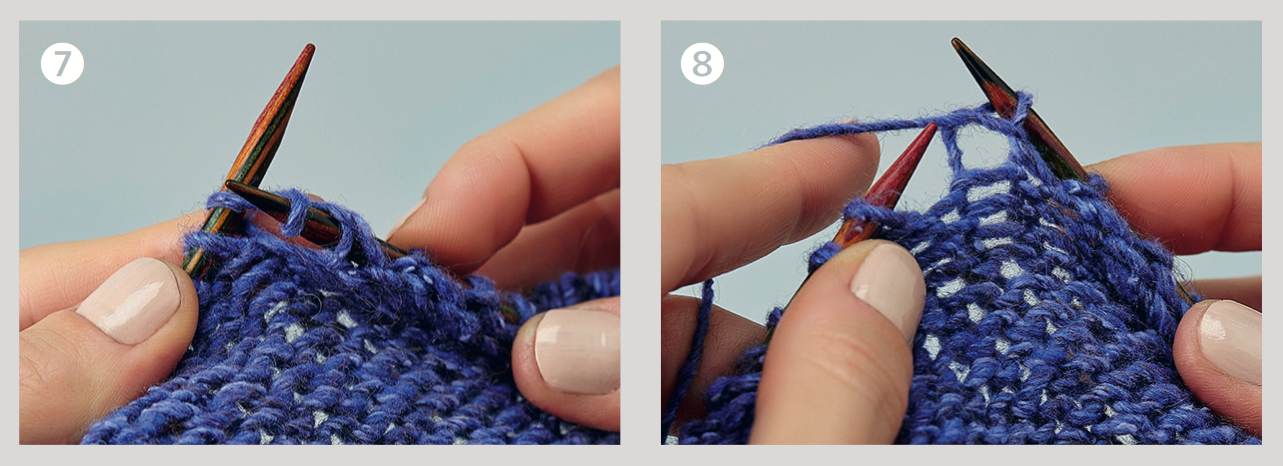
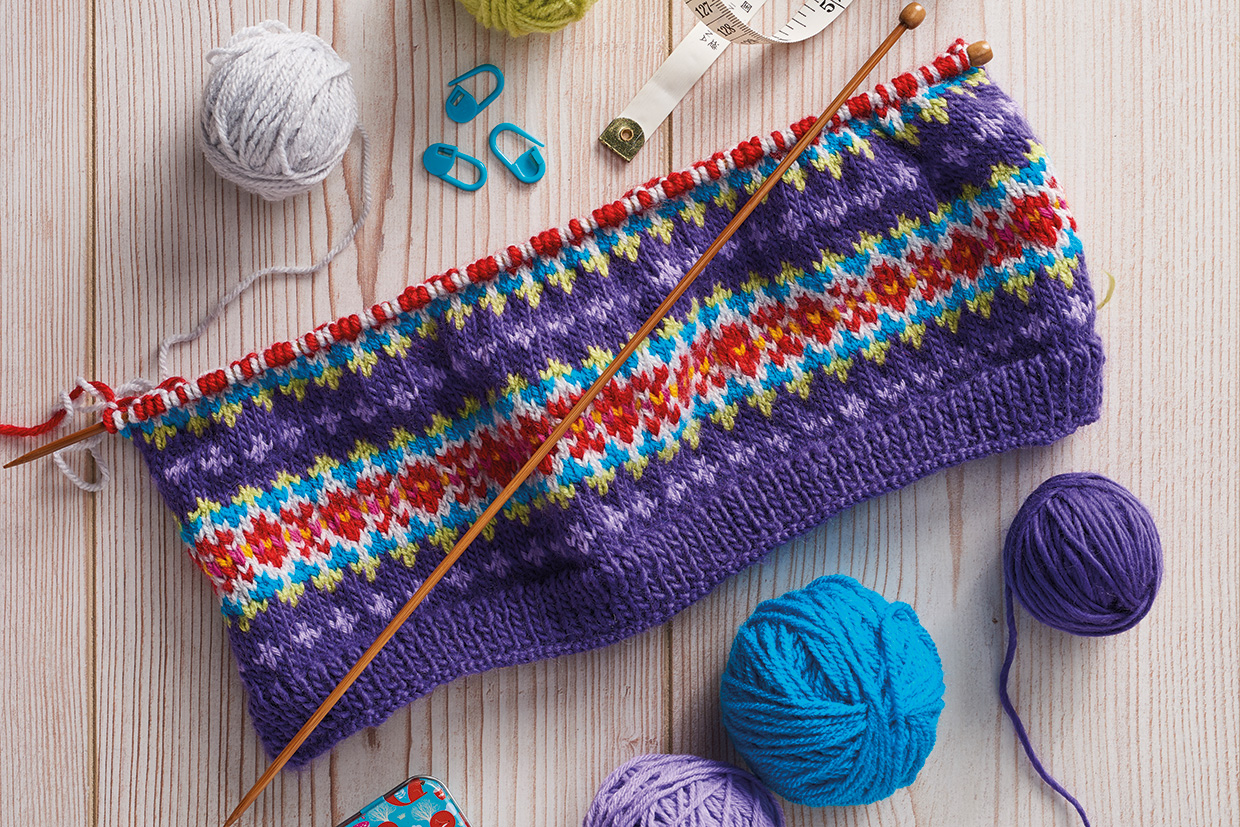
If you've been trying out Continental knitting you may also like to have a go at Norwegian purl. This is worked with the yarn tensioned in the left hand and held at the back of the work at all times. Some Continental knitters find this technique easier than the usual method of purling with the yarn in front.
Norwegian purling is also useful when working ribbing and knit and purl stitch patterns, as the yarn isn’t constantly being moved backwards and forwards over the work.
How to work a Norwegian purl
If you're new to Continental knitting then before you begin, you want to find a nice yarn tension in your left hand. Play with different ways of holding the yarn – first try it the same way as you do in your right hand, and see how that feels. I tend to wrap the yarn once around my ring finger and then over my index finger, which is the same way I tension the yarn when I crochet.
Many English-style knitters who have later learned Continental have problems with purling in the new style. You just need to train the fingers in the left hand to have a bit more control – it will come, eventually!
