Step 1
Transferring your design
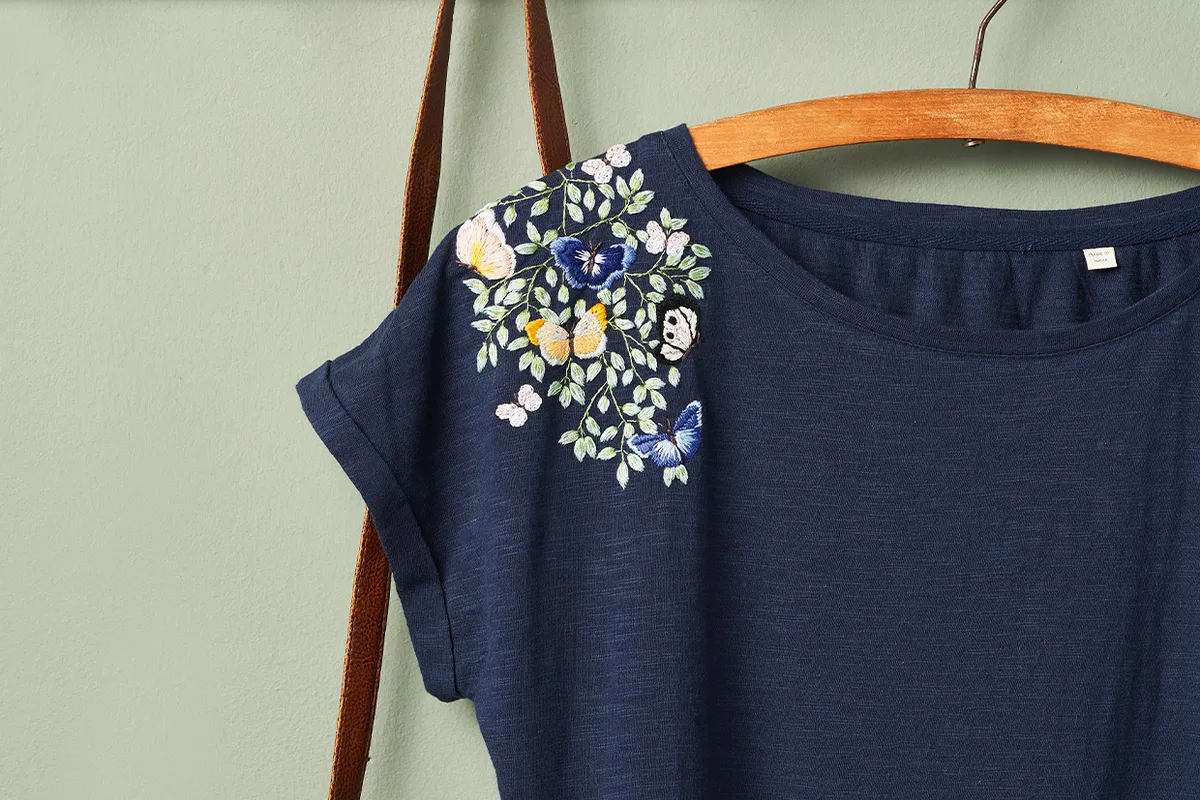
Transfer the design from the template onto the right-hand shoulder of the t-shirt using your preferred method.
We first mounted the t-shirt into a hoop, to support the fabric, and then used a white heat-erasable pen over a lightbox to trace the pattern.
Keep your hoop fairly loose if you are using a stretchy t-shirt, otherwise, your stitching may pucker the fabric.

Step 2
Stitch the leaves
Sew all the leaves in Satin Stitch using two strands of light green. Then, add three or four Straight Stitches over the top of each leaf using one strand of green. Start your stitches at the base of each leaf and work towards the middle each time.

Step 3
Stitch the stems
Work the stems using Stem Stitch in one strand of green.

Step 4
Work the small butterflies using Brick Stitch
The three small butterflies are made using Brick Stitch.
Begin by working a row of Backstitch around the outline of the wing and then fill in row by row, stitching inwards. The bottom wings are stitched using two strands of white and the top wings are stitched using two strands of pink.

Step 5
Stitch the blue butterfly at the bottom of the design
For the blue butterfly at the bottom of the design, start by stitching the lower wings in Long and Short Stitch using two strands.
Start with very dark blue on the edge of the wings and then change to light blue near the body – angle these stitches towards the body.
Then, in vertical Satin Stitch, fill in the middle sections of the upper wings using two strands of blue. Next, with two strands of light blue, stitch the tips of the wings in Satin Stitch.

Step 6
Stitch the central yellow butterfly
Now, for the central yellow butterfly, begin by stitching the tips of the upper wings using two strands of orange-yellow in Satin Stitch.
Then, with two strands of grey, work Satin Stitch along the edge of the lower wings and in the middle sections of the top ones.
Next, fill in the rest of the wings using two strands of light orange on the upper wings and apricot on the lower ones in rows of Split Stitch. Angle all the stitches towards the body so they radiate out from the centre.

Step 7
Stitch the black butterfly
Next, work the black and cream butterfly along the right-hand edge of the design.
Fill in the outer edges of the wings and the circular shapes in Satin Stitch using two strands of black.
Then, with beige and black and using only one strand, work Backstitch over the veins of the wings.
Step 8
Finish the wings with Satin Stitch
Work Satin Stitch in two strands of cream to fill in each of the segments within the wings.

Step 9
Stitch the blue butterfly at the top of the design
Using two strands of dark blue, work Satin Stitch in the centre sections of the upper and lower wings, leaving a space just in front of the template marks clear of stitching.
Then, fill the outer sections with Satin Stitch using two strands of blue. If you have used a non-erasable marker to draw your template lines then take care to cover the marks with your stitching.
Next, using two strands of pale pink, add some Straight Stitches radiating from the centre of the butterfly out to the middle of both the upper and lower wings, varying the length of each stitch.

Step 10
Stitch the peach butterfly
Moving onto the top-left peach butterfly, start by working Satin Stitch along the outer sections of the wings using two strands of pale pink.
Then, with Satin Stitch, fill in the wings using two strands of peach, leaving the middle shape on the upper wing clear.
Next, use two strands of yellow to work Straight Stitches radiating from the centre of the wing towards the middle, varying the length of your stitches.

Step 11
Stitch the bodies and antennae
Once you have stitched the butterfly wings, add the bodies and antennae in two strands of brown. Fill in the bodies and heads with vertical Satin Stitch, then work a single Straight Stitch for the antennae.

Step 12
Iron your stitching on the reverse
Make sure all your thread ends are firmly secured at the back of your work and then remove the stitching from your hoop.
Iron the reverse of your fabric to get rid of any creases left from your hoop. While doing this, the heat from the iron should also erase any of the remaining pen marks (if you used a heat-erasable pen).
You may wish to cut a piece of lightweight fusible interfacing that is slightly larger than the design area and gently fuse it over the back of the work, following the manufacturer’s instructions. This will not only neaten the inside but will protect the back of the stitches, too.