How to do Split Stitch

Add versatile Split Stitch to your embroidery skillset in just four easy steps – a great tool for outlining designs and filling areas with texture.

Try 6 issues of Love Embroidery magazine for just £9.99| SAVE 77%

Published: December 6, 2022 at 10:00 am

Split Stitch, as the name suggests, involves splitting the thread of the previous stitch and creates a similar appearance to that of Chain Stitch.

It’s brilliant for beginners to learn as it’s so simple and versatile – you can use it to outline a design or to fill an area with texture when you work it in dense rows.

Similar to Backstitch, you work back on yourself to split the thread of the previous stitch with your needle. As this motion anchors the thread in place, the stitch is ideal for designs with tighter curves – much like our ocean banner.

This lovely Split Stitch tutorial was created by Heather Nugent and first appeared in Love Embroidery issue 15. Looking for similar projects? Sign up for our newsletter to get weekly inspiration and free patterns!

How to work Split Stitch

Step 1

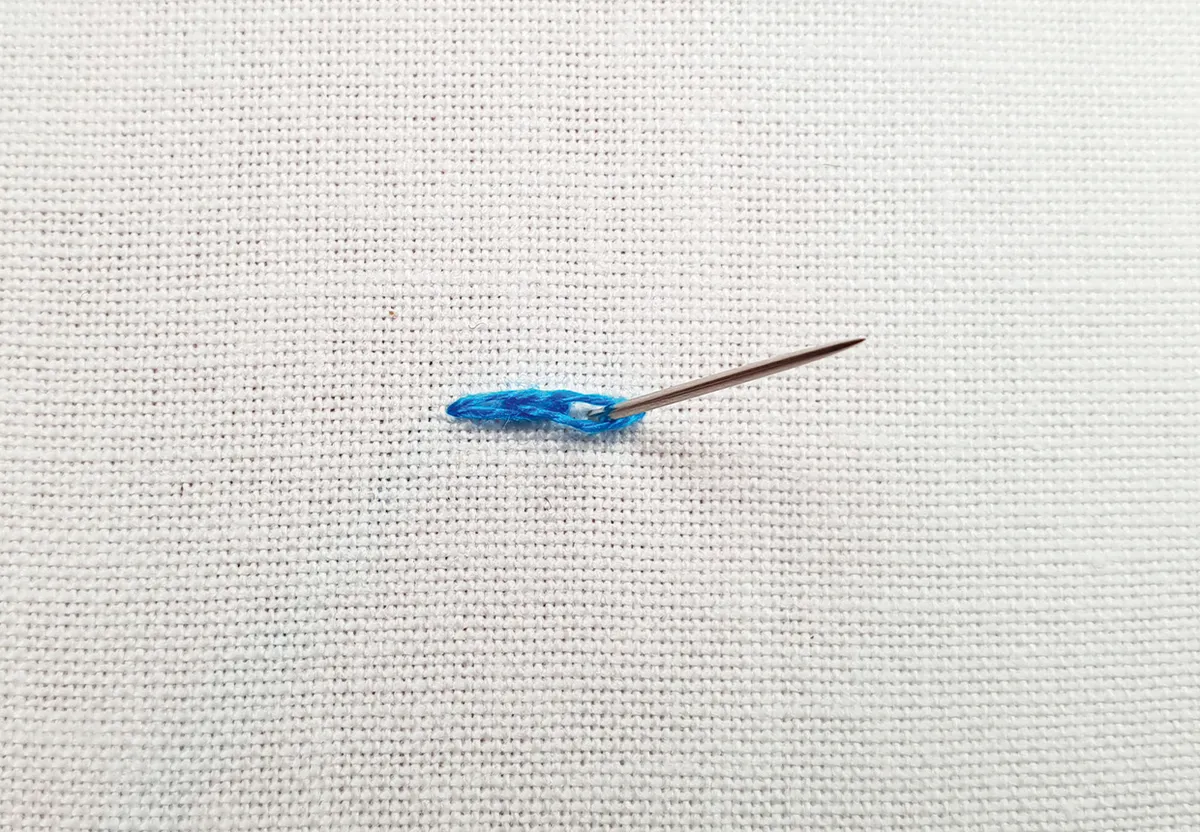
For Split Stitch in one strand, begin by working a single straight stitch. Bring the needle up through the centre of your first stitch, about halfway along, splitting the fibres evenly on either side of the needle. Take the needle down again, completing the next stitch. Continue stitching in the same manner, spacing the stitches at regular intervals to create a neat line of stitches.


Step 2

If working in multiple strands, use the same method as in step 1, but bring your needle up between the strands instead of through the fibres. For a neater finish, it’s best to use an even amount of strands, as you will want an equal amount on each side. However, you can use an odd amount – split the central strand instead or have an uneven amount on one side.


Step 3

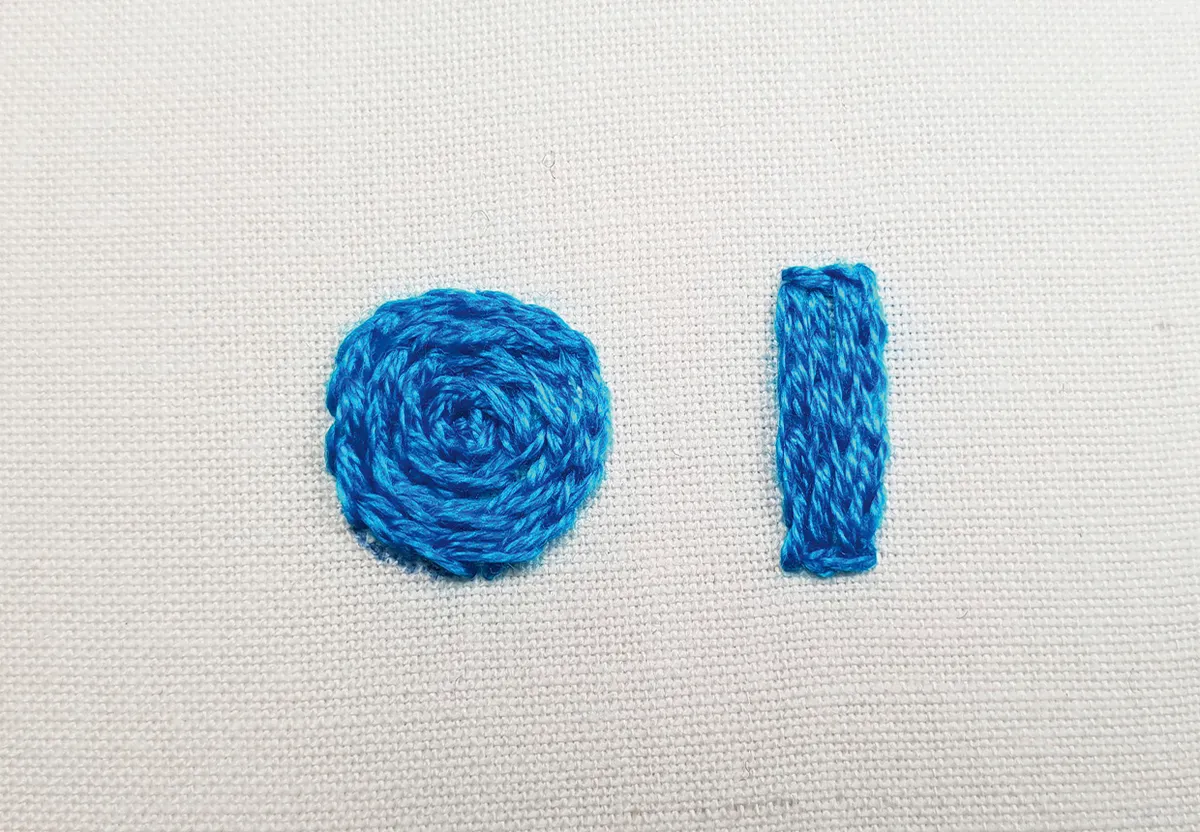
Split Stitch can also be used as a filling stitch. For rounded shapes, first outline an area with a Split Stitch border. Then work in a spiral, starting from the outline and moving in towards the centre. For a more angular shape, work the outline and then fill with parallel rows of Split Stitch to create a solid block. You want the lines of stitches to be touching but not overlapping each other.


Step 4

Split Backstitch is an alternative way to work Split Stitch that uses a similar method to Backstitch. Instead of bringing the needle up through the centre of the previous stitch, bring it up through the fabric where the end of the next stitch will sit. Then, take the needle back down through the centre of the previous stitch, splitting the fibres or strands as you do so.

Create the ocean banner using Split Stitch

Stitches needed:

  • Split Stitch

Download the free ocean embroidery template

You will need:

  • Cotton fabric (35x55cm, 16x25cm, light blue)
  • Stranded cotton (1 skein each of bright blue, light blue, navy blue, teal and white)
  • Embroidery hoop (25cm diameter)
  • Dowel rod (15cm)
  • 3mm wide ribbon (50cm, navy blue)
  • Sewing machine and light blue machine thread
  • Basic embroidery kit

Step 1

Transfer your design to fabric

Transfer the design from the template onto the larger piece of fabric, including the template outline, using your preferred method. We used a heat-erasable pen and
a lightbox to transfer the design. Mount the fabric into your hoop with the stitched area of the design positioned centrally.

split stitch banner step 1

Step 2

Start stitching the first section of the waves

Starting at the bottom of the design, fill the first section of waves using Split Stitch in two strands of navy blue. Keep your stitching fairly short and even to help create
a really smooth curve in your lines of stitching.

split stitch banner step 2

Step 3

Continue to stitch the waves

Continue stitching each section of the waves in two strands of bright blue, light blue, navy blue and teal using Split Stitch.

Top tip: If you find your thread getting twisted as you stitch, try dropping the needle and letting it gently hang to allow the thread to unwind itself before continuing.

split stitch banner step 3

Step 4

Stitching the clouds

Next, work the clouds in Split Stitch using white. First, outline the clouds in two strands to create a crisp shape. Then, switch to four strands to fill the shapes in. Work from the outline towards the centre in a spiral of solid Split Stitch.

split stitch banner step 4

Step 5

Stitching your banner

Once all your stitching is complete, cut out your embroidery with a 1cm seam allowance. Cut out a matching panel of fabric for the backing. Pin the stitched panel to your backing fabric with the right sides together.

Stitch along your seam allowance to secure, leaving a 5cm gap along the top edge. Snip your corners, turn through the gap and press. Fold over your top edge by 4cm and stitch a line 2.5cm down from the fold to create a channel for your dowel rod.

split stitch banner step 5

Step 6

Making your tassels and finishing your hanging

Create five tassels using a blend of light blue, navy blue and teal. Check out our helpful video tutorial on how to make a tassel.

Sew the tassels along the bottom of the hanging at regular intervals, sewing through the back panel only.

To finish, insert a dowel rod into the channel along the top and tie the ribbon to both ends to hang. 

split stitch banner step 6

How to do Split Backstitch

Split Backstitch is a handy embroidery stitch for creating outlines and lettering on your hoop. Read our beginner’s guide to working this stitch below. To give your stitches added interest, try using different tones of the same thread colour in your needle to add depth and definition to your stitching.

Download, print out and trace the free embroidery template below onto your fabric lightly with pencil and stitch over the lines. In this Split backstitch tutorial we’ve used four strands of stranded cotton for the words and two strands for the leaves and stems to make the lettering stand out more.

Template design by Lisa Jones, stitching & instructions: Rebecca Reid

Free leaves embroidery pattern (PDF)

How to do Split Stitch

Step 1

Work one straight stitch at the beginning of your line. It needs to be about 5mm (¼in) long so the rest of the stitches curve nicely.

How to do split stitch step 1


Step 2

Now bring your needle up to the right of the first stitch, making sure it is in the centre of your traced pencil line. The needle should be the same distance away from the stitch as the length of the stitch. This will ensure your stitches are all the same length and will give a neater finish.

How to do split stitch step 2


Step 3

Push the point of the needle into the first stitch you made about one quarter of the way from the end. If your thread has just one strand then pierce the centre, but if you have two strands or more then you can push the needle between the strands themselves.

How to do split stitch step 3


Step 4

Continue working the split backstitches in the same way, making sure you always make your stitches of equal length and that you split them in the same place. This will give a neat outline and a finished stitched line similar to chain stitch but smaller and closer together.

How to do split stitch step 4


Upcycle a plain tee with Split Backstitch

Neutral knits are a wardrobe staple, but sometimes we just can’t resist getting the sewing kit out and adding our own design details! This simple project is the perfect way to practise your new split backstitch skills fit you’re new to the technique.

Start by reading our split backstitch tutorial above, then download our leaf embroidery pattern (at the top of this post) to start stitching. This design would look great sewn onto the neckline of a plain tee, or you could scale it down and stitch it onto the collar of a crisp white shirt. Match the thread colour to your accessories for a pulled-together look!

Don’t throw out that old tee, add a flourish of embroidery to it!

Looking to try more embroidery stitches? Click to discover our How to do Stem stitch guide.