All products were chosen independently by our editorial team. This review contains affiliate links and we may receive a commission for purchases made. Please read our affiliates FAQ page to find out more.

How to embroider a hat with a fun digger design for kids!

Have fun with your bucket hats and embroider a cute digger design, ideal for children in time for summer.

Try 6 issues of Love Embroidery magazine for just £9.99| SAVE 77%

Published: May 12, 2023 at 8:00 am

Summer is coming! That means it’s time to refresh your wardrobe for the warmer months ahead. By adding embroidery to your plain garments you can give them a new lease of life. This is true for kid’s clothing and accessories too!

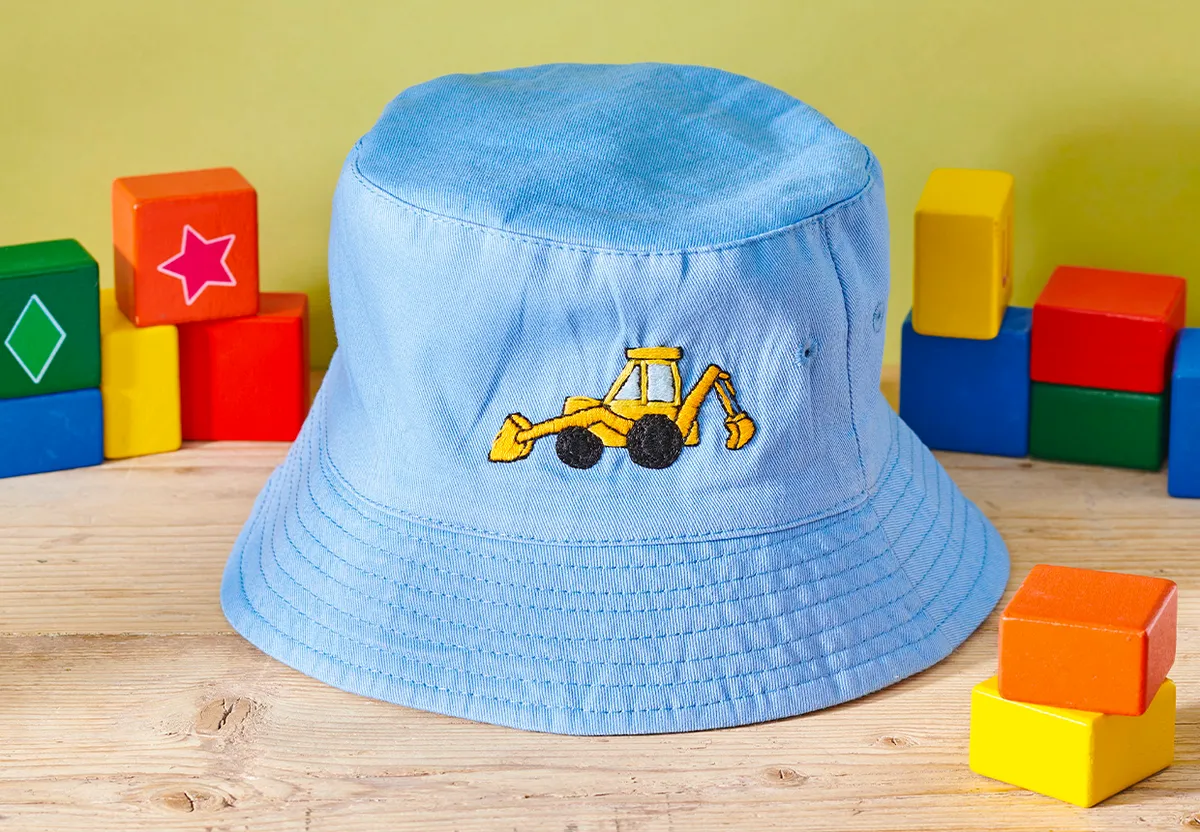
In this guide, we’ll show you how to update a bucket hat with a fun yellow digger design, ideal for transport-fanatic kids! It’s a great way to not only spruce up a plain hat but to encourage kids to wear a hat for sun protection.

This embroidered hat project was designed by Clare Albans and was originally published in Love Embroidery issue 15. Get your digital edition and discover the rest of the issue.

What you need to know about hat embroidery

We’ve kept it simple with this pattern. Using only Backstitch and Satin Stitch you’ll have this design whipped up in one afternoon. If you need help with those stitches, check out our guides below. Otherwise, you can skip straight to our detailed step-by-step tutorial.

What type of hat should I use for hat embroidery?

The beauty of embroidery on clothes is that most designs can be applied to any garment or fabric. To keep things beginner-friendly, opt for an easy design and apply it to a hat with an area of fabric without any seams and where the fabric is smooth.

A bucket hat is perfect for this design, but you could also embroider baseball caps or beanies.

Transferring an embroidery design onto a hat

We transferred the design onto an adhesive-soluble stabiliser and attached it to the hat ready for stitching. You don’t need to use an embroidery hoop for this project as the fabric of your bucket hat will be sturdy enough to hold in your hands.

Once you have stitched the design, the stabiliser can simply be washed away.

Top tip: Add their initials for an extra special touch.


How to embroider a hat by hand

What stitches will I need?

Looking for more tips and tricks to upgrade your stitching? Check out our embroidery stitch library.

What materials do I need?

Blue embroidered bucket hat with a digger design

You will need:

  • Bucket hat
  • Stranded cotton
  • Adhesive soluble stabiliser
  • Basic embroidery kit

Step 1

Transfer the design to your hat

Transfer the design from the template onto the stabiliser using a fine pen. Enlarge or shrink the design to fit your chosen hat.

transfer your design onto stabiliser – how to embroider a hat

Step 2

Apply the stabiliser to the hat

Trim the excess around the edges, leaving a 2cm border to help it stick to the hat. Peel off the backing paper and attach it to the hat.

Top tip: Avoid placing it over any seams as the extra layers will be harder to stitch through.


Step 3

Stitch the arms of the digger

Start by stitching the digger’s arms using a small, vertical Satin Stitch in three strands of orange.

Follow the direction of both the front and back arms.

Leave gaps between each stitch and then fill in the missing sections.

Top tip: Keeping the stitches parallel will help to achieve a smooth, even finish.

how to embroider a hat – satin stitch the diggers arms

Step 4

Stitch the body of the digger

Next, stitch the main body of the digger with three strands of gold, using a horizontal Satin Stitch.

Pay attention to the direction of your stitches on each section of the digger, as they add an extra dimension to the design.


Step 5

Stitch the digger’s windows

Add the window details in Satin Stitch using three strands of light blue.

Once complete, use three strands of yellow to work long Satin Stitch around the windows.

how to embroider a hat – satin stitch the diggers body

Step 6

Stitch the digger’s roof

Continue with Satin Stitch to add the roof in three strands of gold and the front scoop in three strands of orange. Leaving the smaller details on the back scoop unstitched for now.

Step 7

Backstitch the outline of the digger

Using two strands of black, stitch the outline of the whole digger in Backstitch.

stitch the outline – hat embroidery

Step 8

Add finer details on the scoop

Fill in the finer details on the scoop at the back of the digger with Satin Stitch in three strands of orange.

Step 9

Stitch the wheels

Next, stitch the centre of the wheels in Satin Stitch using three strands of black.

Then, fill in the outer section of each wheel with rows of Backstitch in three strands of black. Start around the outside edge and then work in a spiral towards the centre.

Stitching the wheels – how to embroider a hat

Step 10

Wash your design

Fill a bowl with lukewarm water and carefully wash off the stabiliser. Allow the hat to dry completely before ironing around (but not over) the design.

That’s it! Your hat is ready to be worn.

wash the design – how to embroider a hat

Stitching for a new baby?

Personalising an item for a new baby is a beautiful way to congratulate the new parents. Embroider sweet florals and ladybirds onto a soft linen bonnet to create your own treasured heirloom.

Embroidery can take kid’s clothing to the next level!

Adding embroidery gives a plain piece of attire a whole new character! It’s also a wonderful way to personalise a garment to give as a gift.

Embroidered dungarees for little cubs!

How adorable is this embroidered lion pattern by Julia Staite? Stitch this roarsome character onto dungarees, t-shirts, hats and jackets.

embroidery animals loop stitch