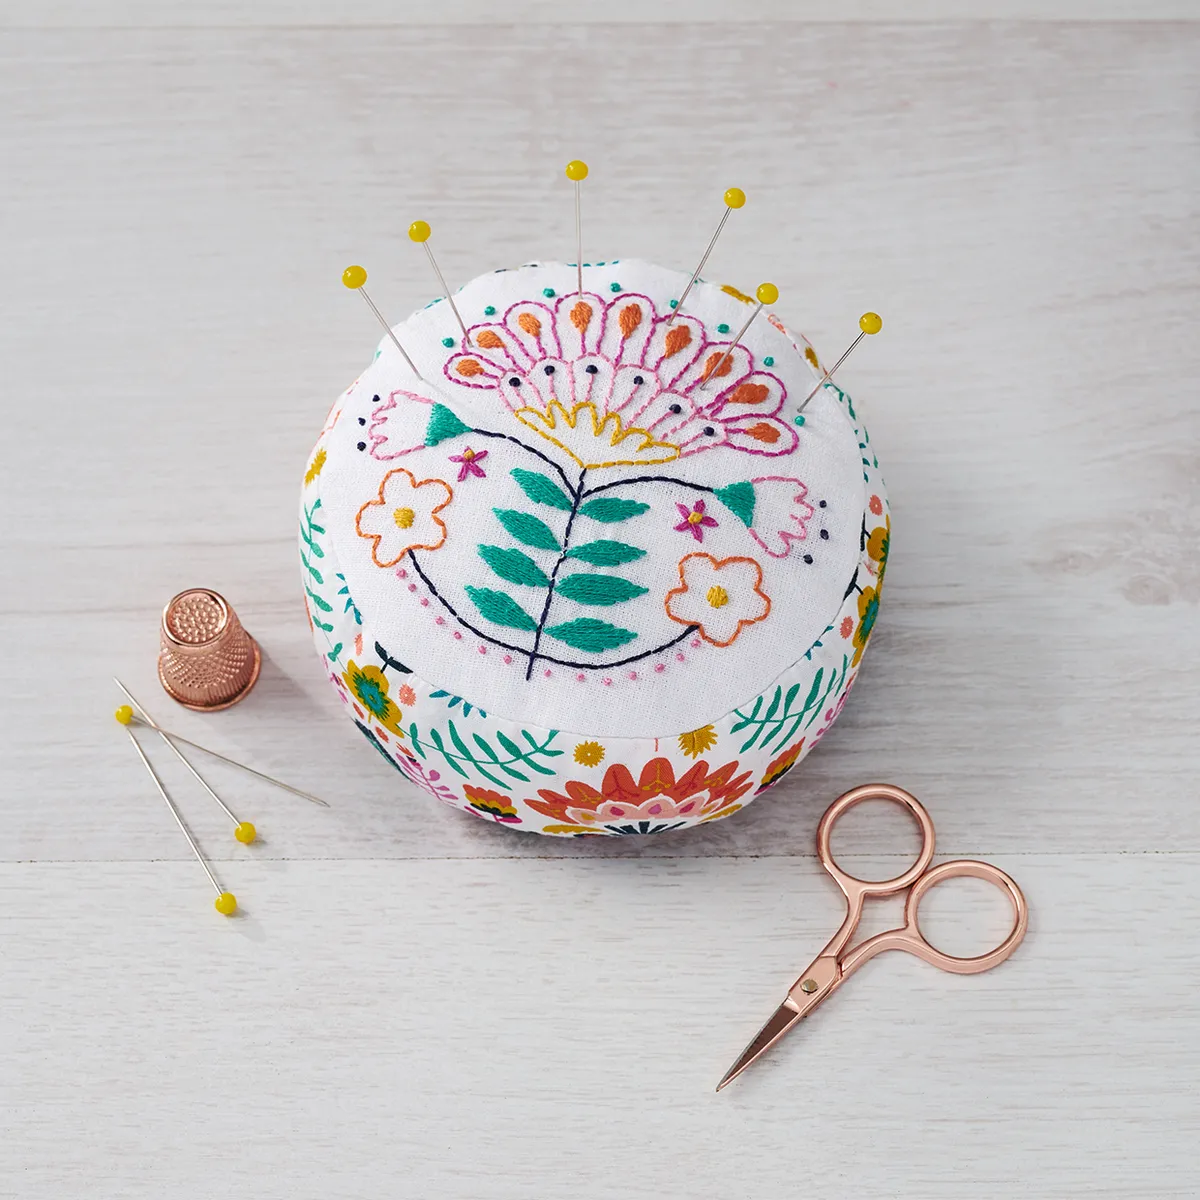
Stitch this beautiful folk art-inspired embroidered pincushion for your craft room with our beginner-friendly guide where you can learn embroidery stitches as we walk you through the stages you need to stitch this embroidered pincushion. You'll need a basic beginners embroidery kit, some plain fabric and some patterned fabric and stranded cotton – we've used green, red, yellow and orange in our design. to find out more about the very basics of getting started, read our How to Embroider article.
Download this free embroidery design
To get started, download our learn embroidery stitches template (PDF) and transfer the design onto plain fabric using your preferred method.
We placed the fabric centrally on top of the template and traced over all the lines lightly in pencil. You can use an erasable pen for this, if you prefer. Refer to the learn embroidery stitches guide to see which colour to place in which position. There are four basic embroidery stitches used in this project:Backstitch, French Knot, Lazy Daisy Stitch and Satin Stitch
If there are any stitches you haven’t tried before it’s a good idea to practise them first on a spare piece of fabric. Click to see our how to Backstitch guide, or click to find our how to do Lazy Daisy stitch article. You can find advice os Satin stitch in our how to do Satin Stitch article, or brush up your French knots with our how to do French knots article.
Step 1
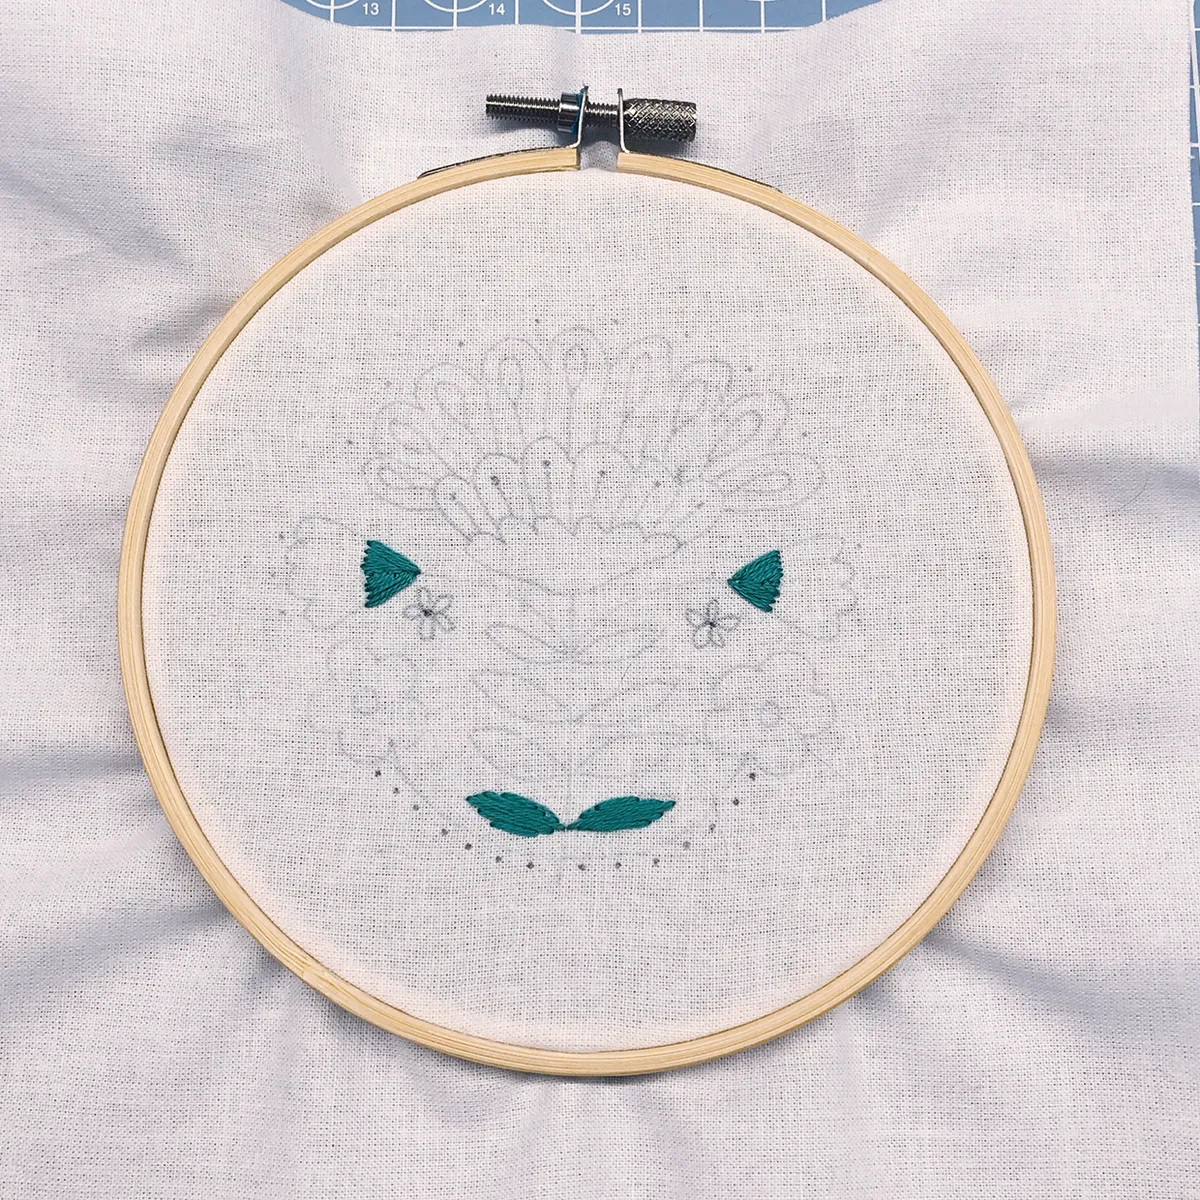
Work the leaves and side flower sepals in Satin Stitch using four strands of green.
Step 2

Work the top inner petals in Satin Stitch using four strands of orange. Work the centre of the orange flowers in Satin Stitch using four strands of yellow.
Step 3
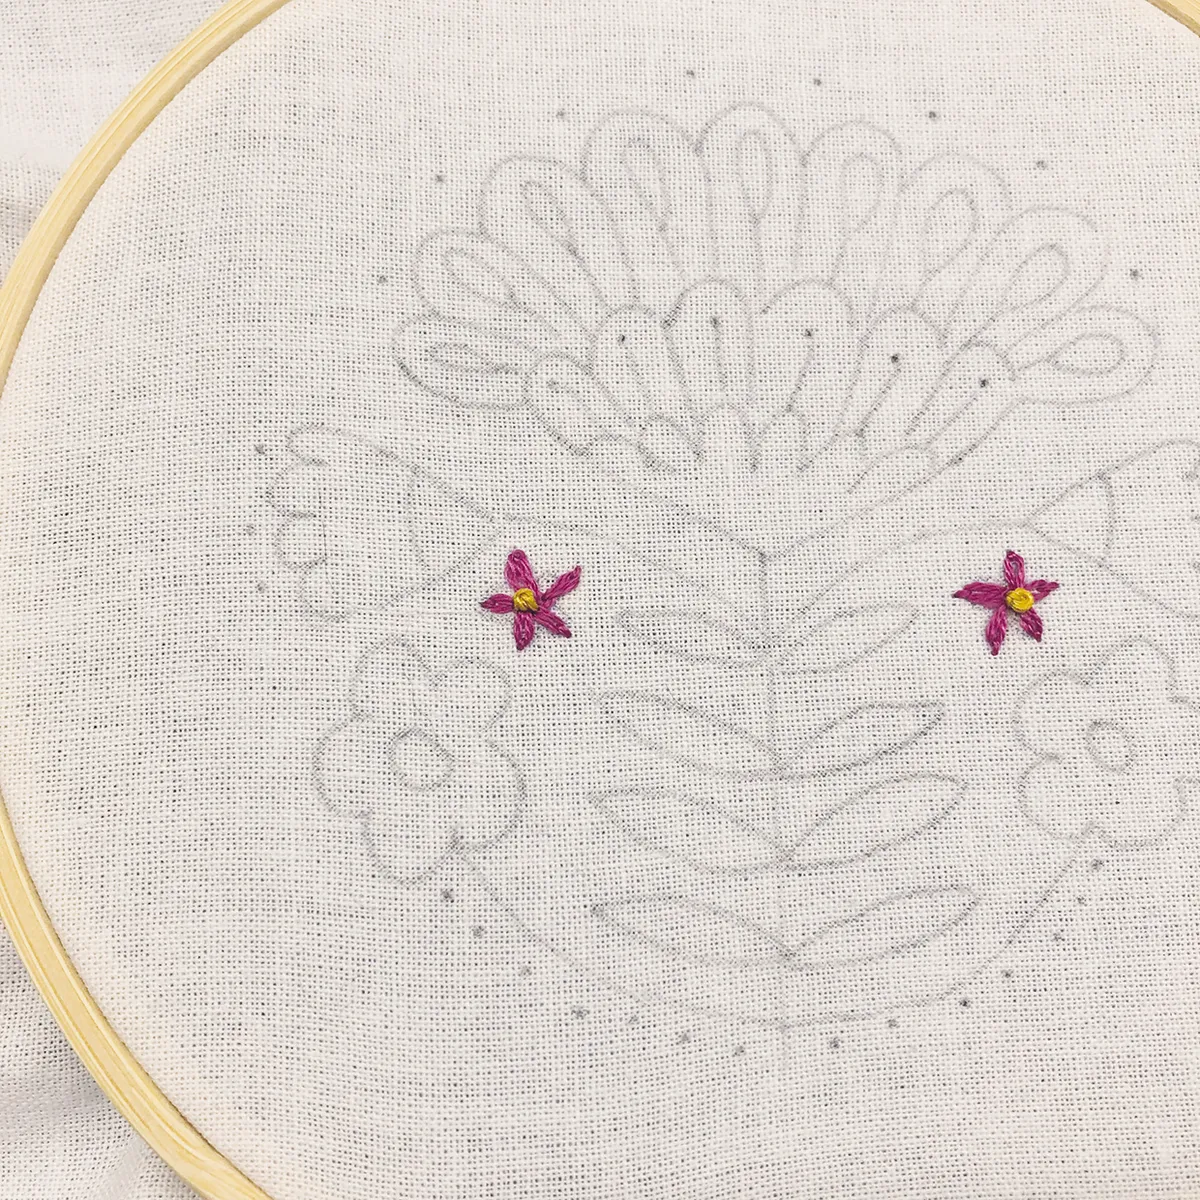
Work the small flowers in Lazy Daisy Stitch using two strands of dark pink. Add a yellow French Knot in the centres.
Step 4

Work the remainder of the flower and stem outlines in Backstitch using two strands in the colours shown in the Embroidery Guide. Work the dots as French Knots in two strands.
Step 5
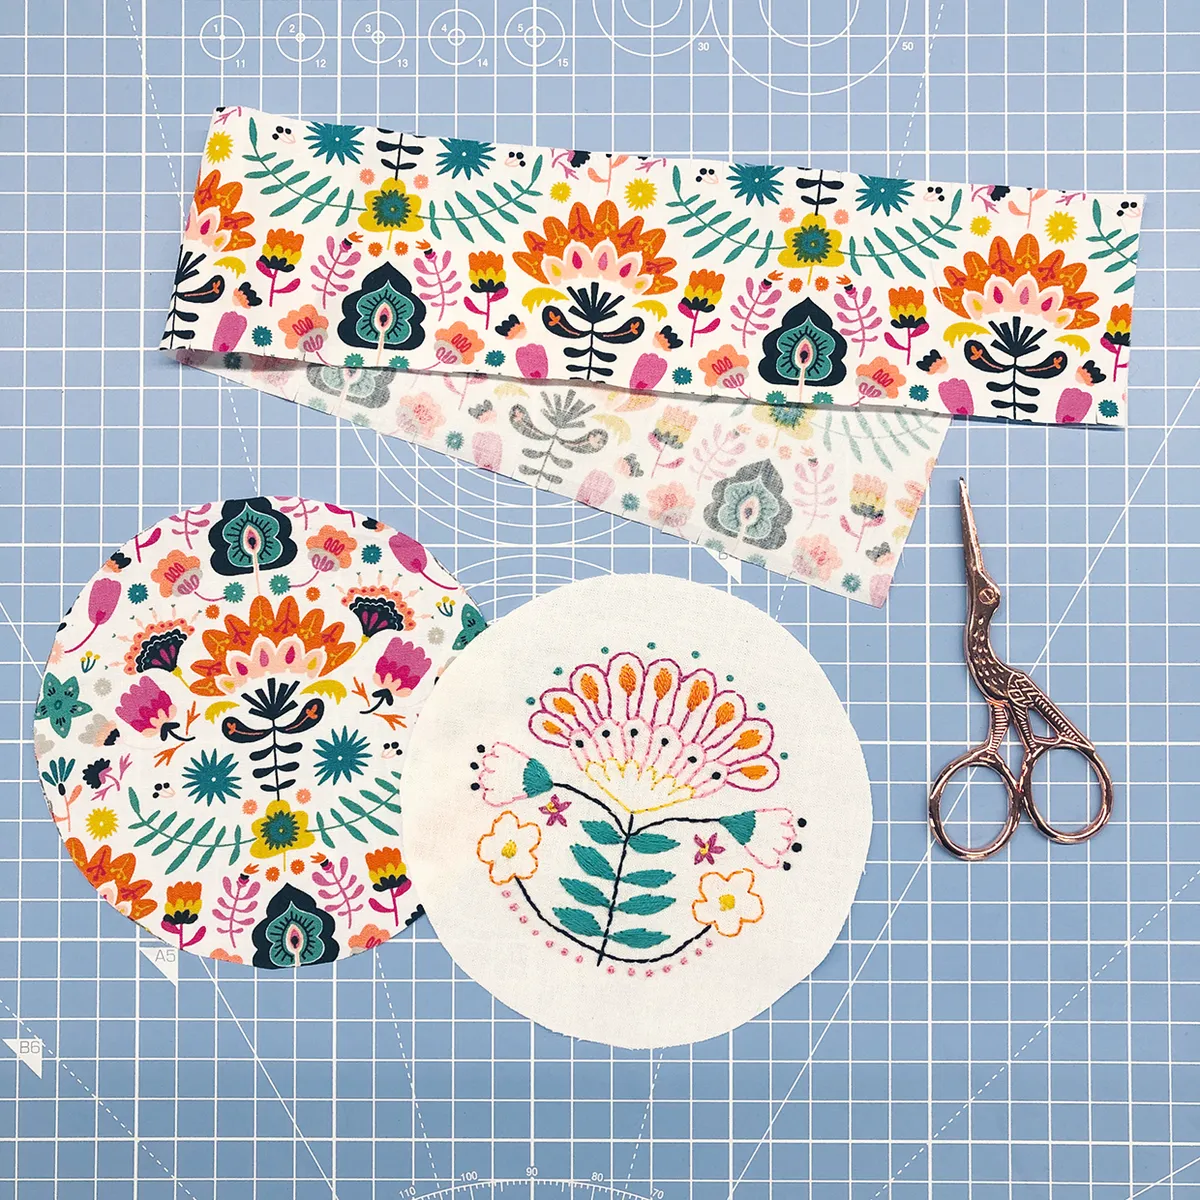
Cut around the outer traced circle to make the pincushion top. Then from print fabric cut: Base: one circle using the pincushion top circle as a template.Side: 6x45cm. Make small 5mm snips along both long edges of the side strip to help it to curve around the circular top and base.
Step 6
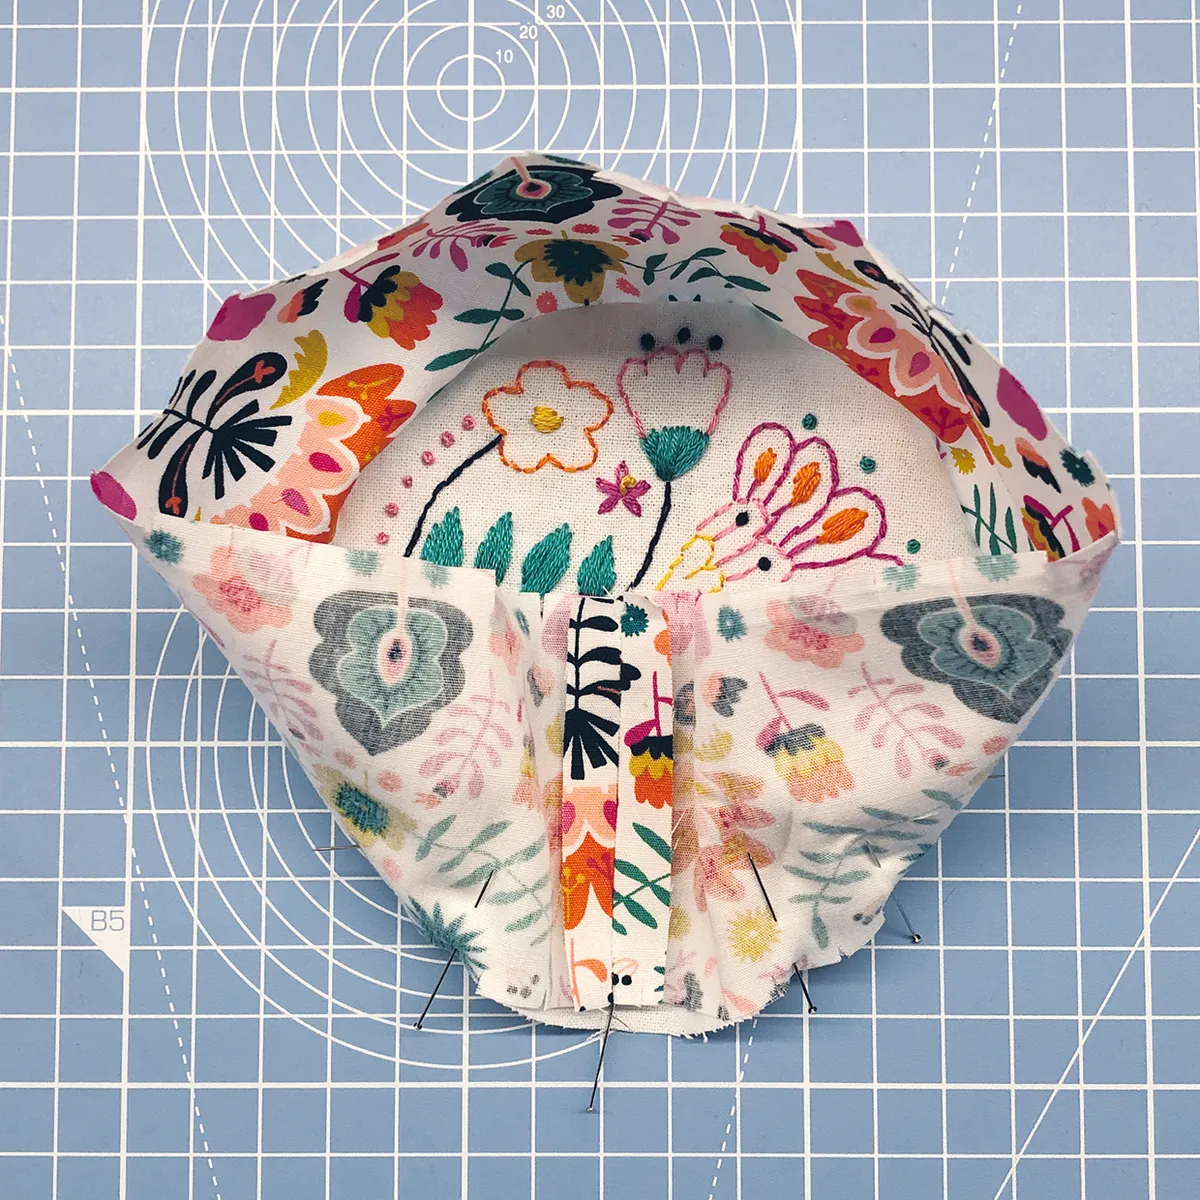
Pin the side strip around the edge of the top, right sides together, matching raw edges. Remove a few pins so you can stitch the two short ends together, but leave a 3cm gap in the centre of the seam for filling.
Step 7
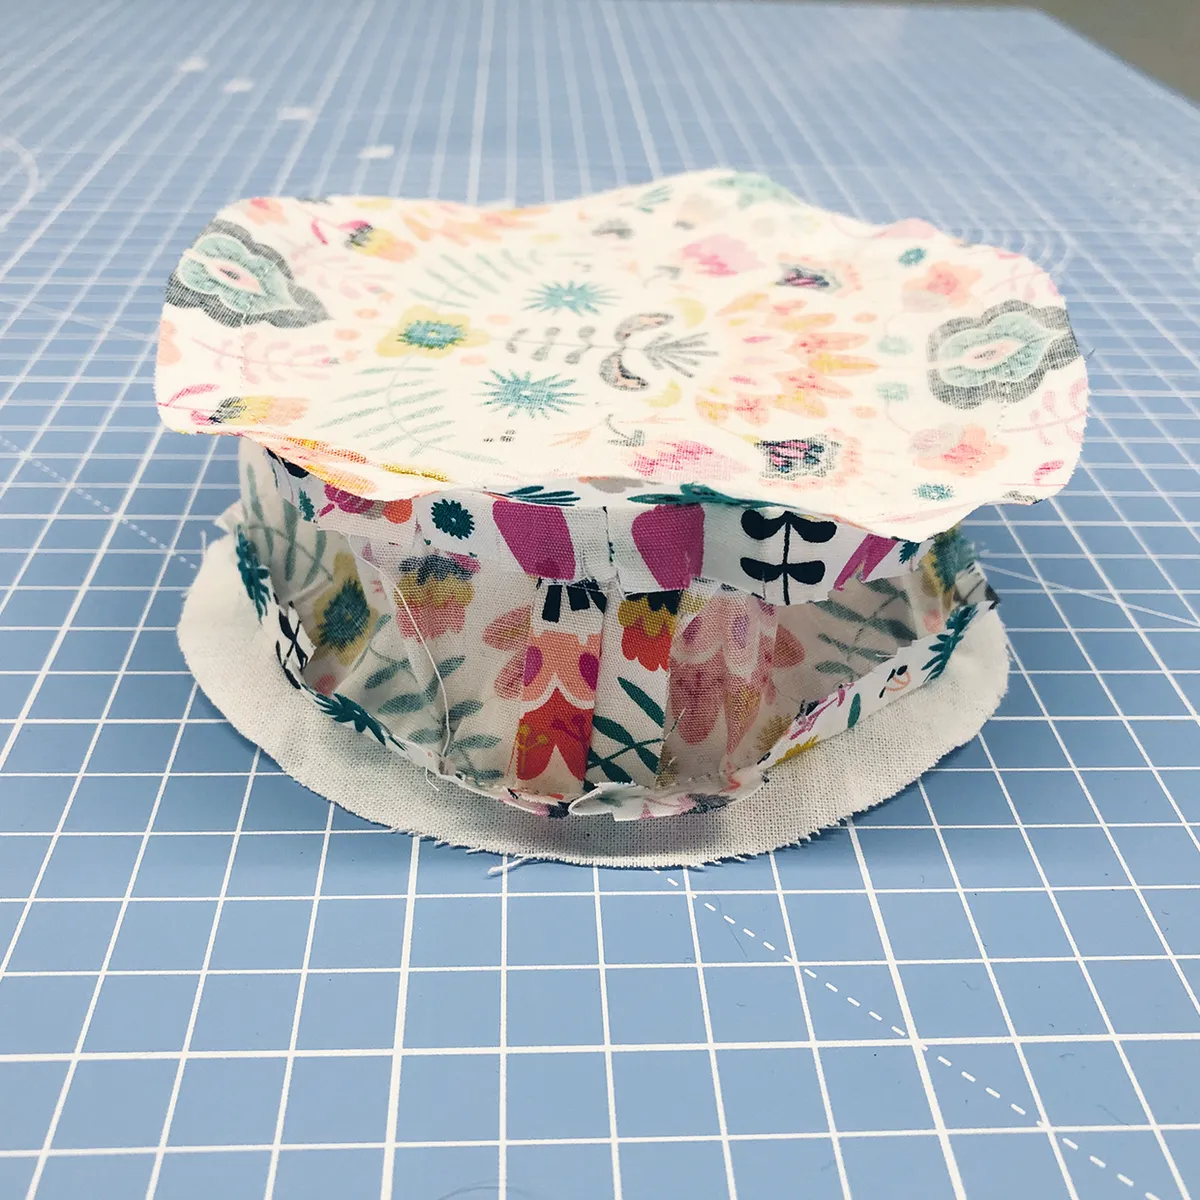
Repin the joined fabric strip round the pincushion top and stitch together all the way around. Repeat this to join the other side of the fabric strip to the pincushion base in the same way.
Step 8
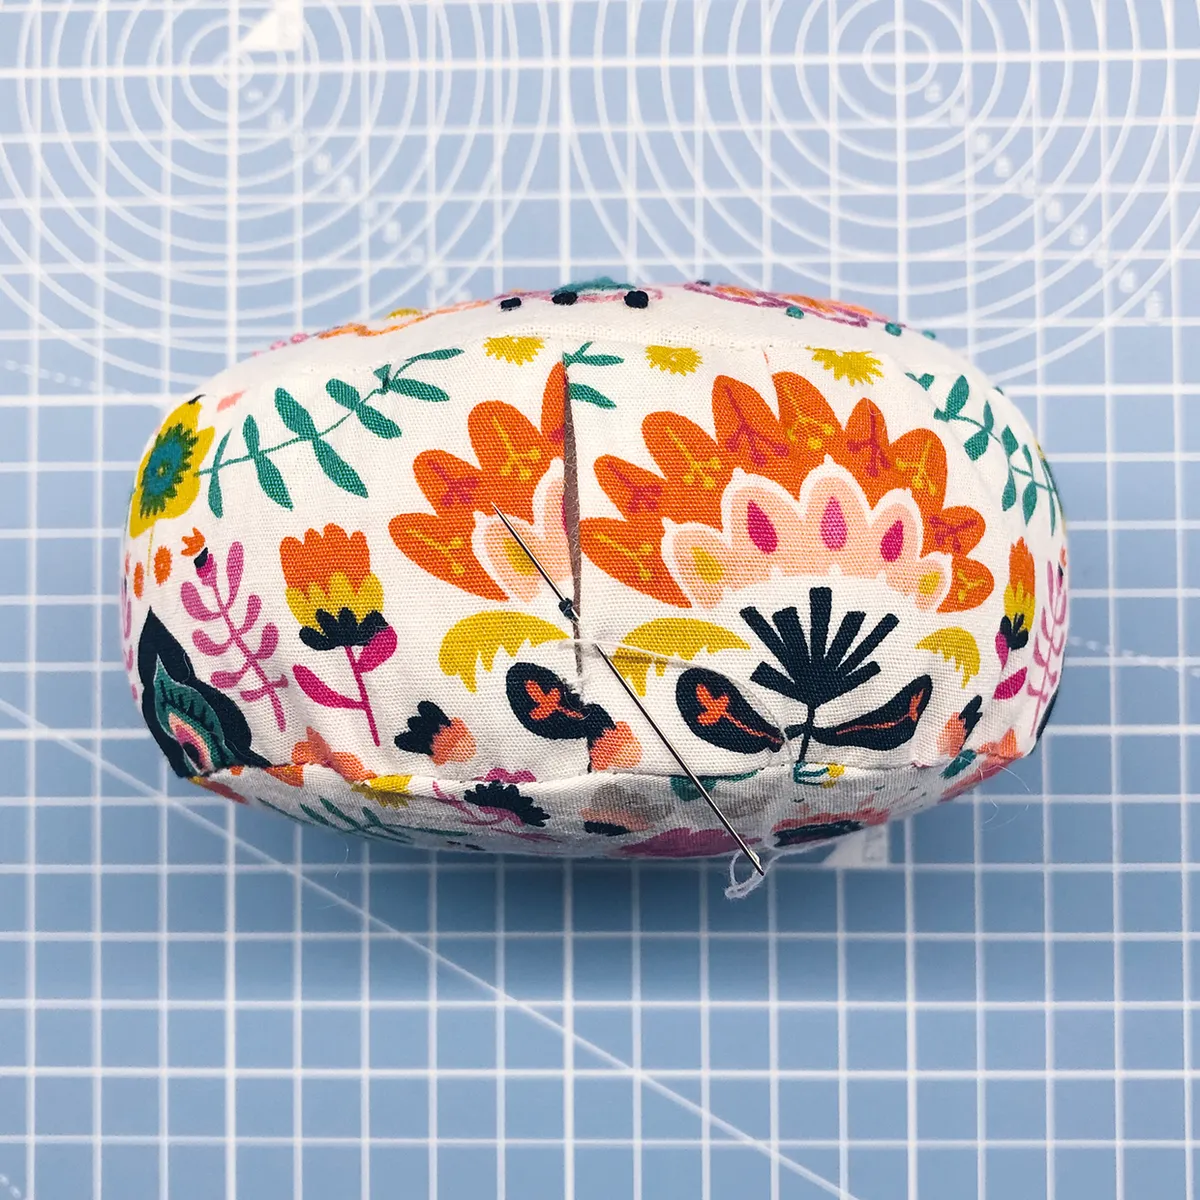
Fill your pincushion with fibrefill or ground walnut shells. The shells are ideal for stuffing pincushions as they help to keep the pins sharp and clean with their mildly abrasive quality. Once it’s full, slipstitch the gap securely closed. If you have filled it with walnut shells then just put a little fibrefill on top of the shells beneath the opening to keep them in place while you stitch.
More project to learn embroidery stitches with
We have many more free tutorials on Gathered to help you learn embroidery stitches. Take look at our library of free embroidery patterns to choose a project, or swot up on the techniques with our different types of embroidery stitches article. Try our cat embroidery pocket too make a start on personalising clothes with embroidery, or read our embroidery on clothes article to find out more about this cool technique.
