Mini embroidery designs to add a festive shine to your wardrobe

This trio of mini embroidery designs includes a fluffy bobble hat, a Christmas pudding and a Christmas tree ready to embellish a Christmas t-shirt.

Try 6 issues of Love Embroidery magazine for just £9.99| SAVE 77%

Published: November 20, 2023 at 8:00 am

Stock up on stripy tees and treat the whole family to some festive cheer with these quick-stitch Christmas mini embroidery designs.

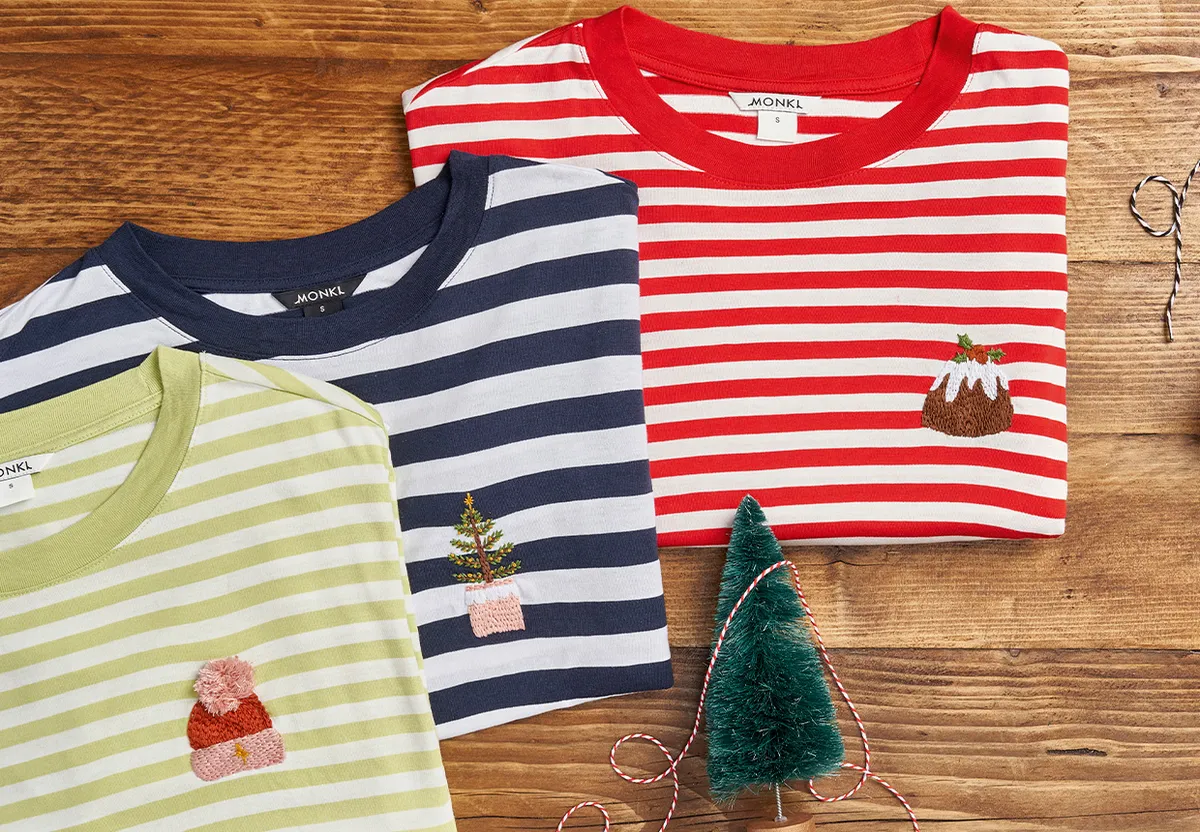
Choose from a trio of delightful designs created by Jessie Newton. There’s a plump Christmas pudding, a sparkling Christmas tree and a fluffy bobble hat to choose from.

Jesse has worked each of the designs onto a stripy t-shirt, but these mini motifs can be stitched wherever you like, onto a hat, a tote bag or maybe you just want to display them in a hoop.

Whatever you decide, these versatile mini embroidery designs will transform any fabric into a festive treat!

In this guide, you’ll find everything you need to stitch the three motifs, including a materials list, a step-by-step guide and stitch guides.

Time to transform your wardrobe this Christmas!

This project was designed by Jessie Newton and first published in Love Embroidery issue 32. Sign up for our embroidery newsletter to receive more beautiful embroidery patterns every week.

Looking for more stitching inspiration? Check out our free embroidery patterns for lots more ideas.

What stitches will I need for these mini embroidery designs?

Are you looking for more tips and tricks to improve your stitching? Check out our embroidery stitch library.

What materials do I need to create the mini embroidery designs?

How to embroider a t-shirt with the mini embroidery designs: Step-by-step tutorial

mini embroidery - main

You will need:

  • Cotton top: striped x3
  • Stranded cotton: 1 skein each of brown, green, pink, red, white, yellow
  • Embroidery hoop: 13cm diameter
  • Water-soluble stabiliser
  • Basic embroidery kit

Step 1

Transfer your design and mount your fabric

Transfer the designs from the templates onto the tops using your preferred method. We used water-soluble stabiliser so that the designs were clear on both the dark and light areas of the tops and to add some additional support to the fabric. Make sure you use a fabric-friendly pen if using this method.

Mount your chosen area in your hoop, with the design central and the fabric taut like a drum – being careful not to overstretch the fabric, as this can cause puckering.

Step 2

Start the bobble hat design

Starting with the bobble hat design, create the mid-section of the hat with tight Chain Stitch in vertical rows of red.

Then, work the brim using Brick Stitch in pink.

mini embroidery – step 1

Step 3

Continue stitching the bobble hat

Next, using Turkey Stitch in pink, create the bobble. Add the star to the brim using Straight Stitch in yellow.

mini embroidery – step 2

Step 4

For the Christmas pudding design

For the Christmas pudding design, stitch the main body of the pudding by working Brick Stitch in vertical rows of brown.

Then, using the same stitch, work the icing in white.

mini embroidery – step 3

Step 5

Stitch the berry and holly leaves of the Christmas pudding

Using three strands of red, work the holly berries in Satin Stitch. Then, switch to Leaf Stitch in three strands of green to work the holly leaves.

mini embroidery – step 4

Step 6

Start the Christmas tree design

Moving onto the Christmas tree design.

Use Brick Stitch in pink to work the base of the pot in vertical rows and the top rim in horizontal rows.

Using white, work the scallop design on the pot’s midsection in a vertical Satin Stitch.

Then, create the trunk of the tree using a vertical Brick Stitch in brown.

mini embroidery – step 5

Step 7

Create the branches of the Christmas tree

Work the branches of the tree using Stem Stitch in three strands of brown.

Then, work Straight Stitch for the pine needles in green.

To finish, use three strands of yellow to add in some French Knots for fairy lights and to add a Straight Stitch star to the top of the tree.

mini embroidery – step 6

Step 8

Finish your mini embroidery designs

Make sure all the thread ends are firmly secured inside the tops, then carefully wash away the stabiliser and leave to dry.

mini embroidery – main

Mini embroidery that adds a festive touch to your wardrobe

These motifs are so cute! They would look fabulous stitched onto any t-shirt and will transform a plain tee into a stylish Christmas outfit.

More ways to make your Christmas wardrobe shine

If you love updating your clothes with embroidery, add some sparkle to your Christmas jumper with our sequin embroidery.

sequin embroidery-main