Lunar New Year marks the start of the traditional Lunar calendar. Get children creating to celebrate with three easy papercraft projects to try at home. This year, the event will fall on the 1st February 2022, heralding the new year of the tiger.
Festivities continue for 16 days until the Lantern Festival on February 15th, 2021. In this post, we'll show you 3 crafty Chinese New year crafts for kids to try. We think grown-ups will enjoy crafting them too!
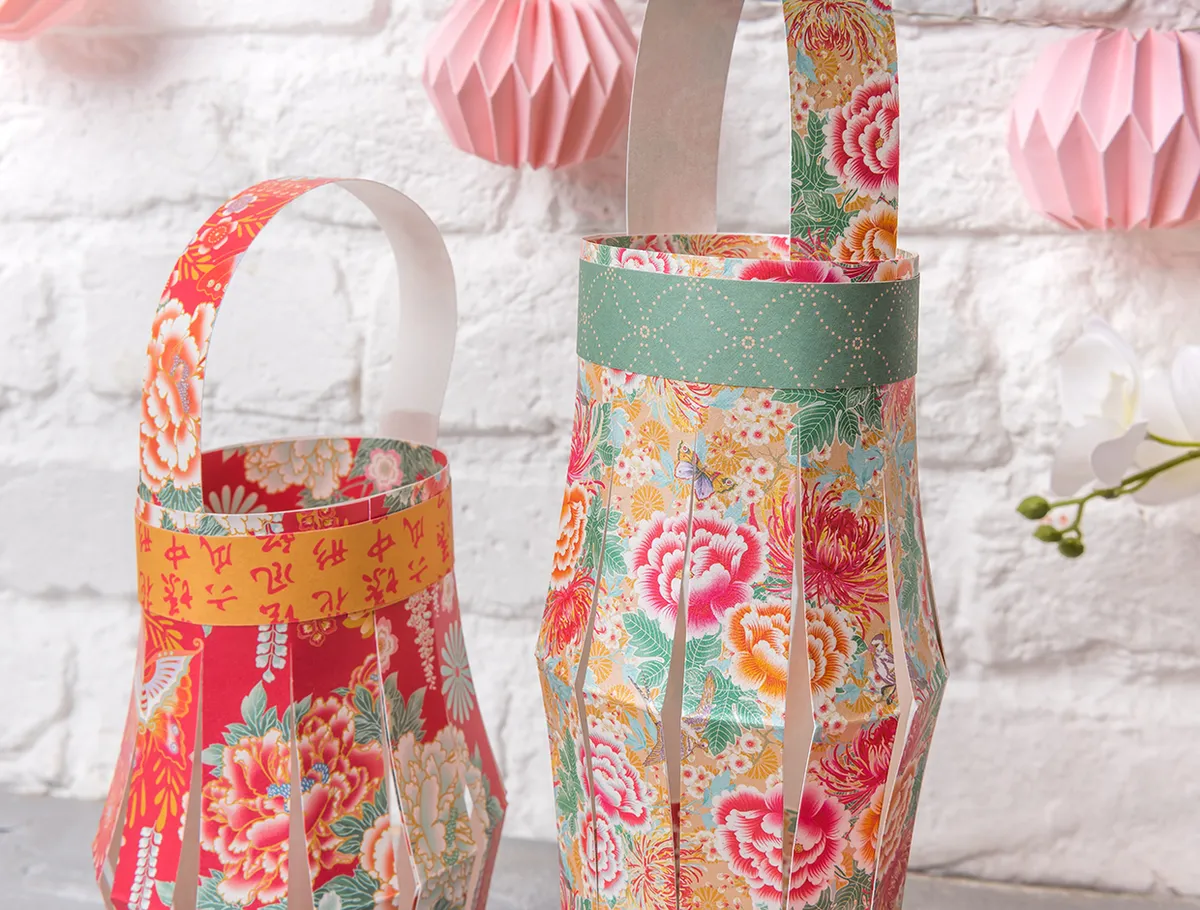
First up, we'll show you how to make your own Lunar New Year Decorations with simple DIY lanterns. Once you've mastered those, why not have a go at making easy paper envelopes? Finally we'll show you how to make papercraft fortune cookies, step by step.
You don't need any expensive supplies to make any of these projects; just some papers and a few craft basics.
We've used a Trimcraft Paper pad but you could use any floral or plain papers from your craft stash. We've got lots of free patterned papers for you to download here on Gathered, ready to turn into Chinese New Year crafts!
These easy crafts will work for a wide range of ages – whether you're looking for Chinese New Year EYFS activities for homeschool or teenage craft ideas.
If you like this, you might also enjoy our 50 craft ideas for kids to make at home, or our Paper crafts for kids round-up. We've also got craft ideas for toddlers and craft ideas for teenagers. But now it's time for our trio of Chinese New Year crafts for kids, enjoy!
Lunar New Year crafts for kids
How to make simple Chinese New Year Decorations – DIY Lanterns
Our first Chinese New Year craft for kids is these gorgeous paper lanterns. Decorate your home with colourful lanterns to celebrate the New Year. Plus they're so simple to make!