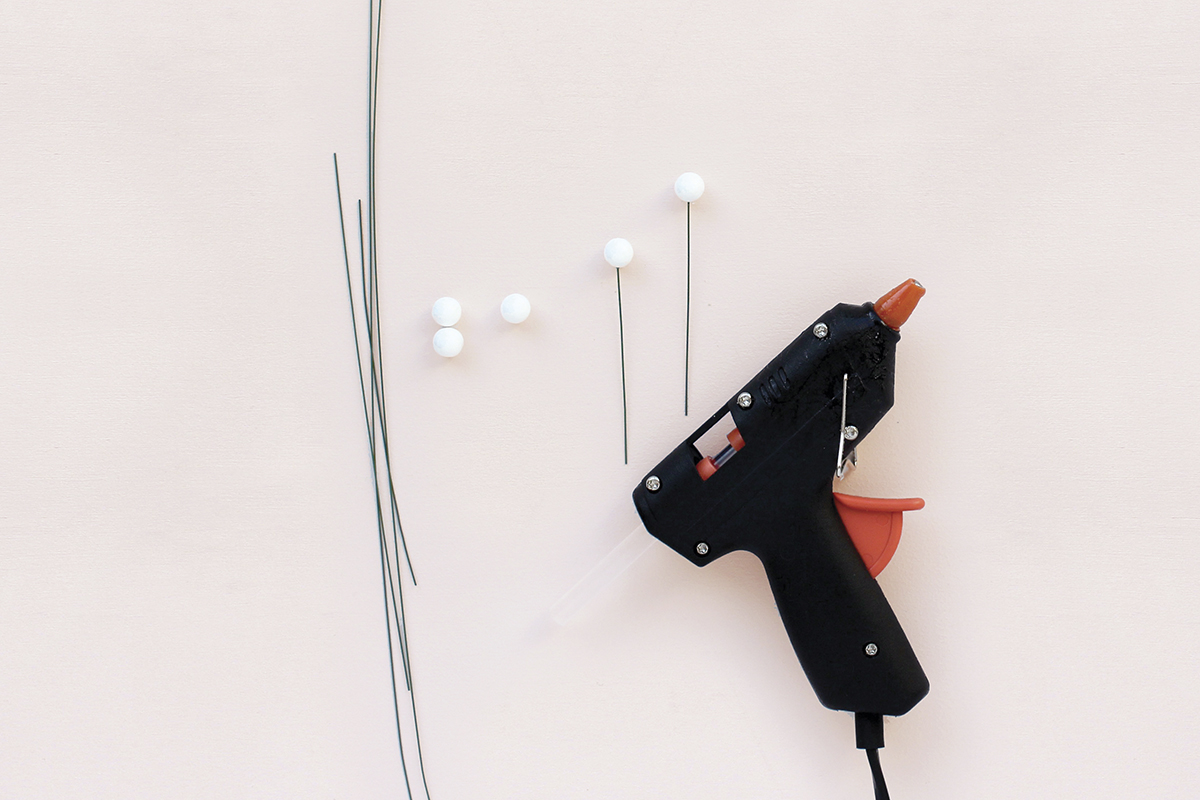
Step 1
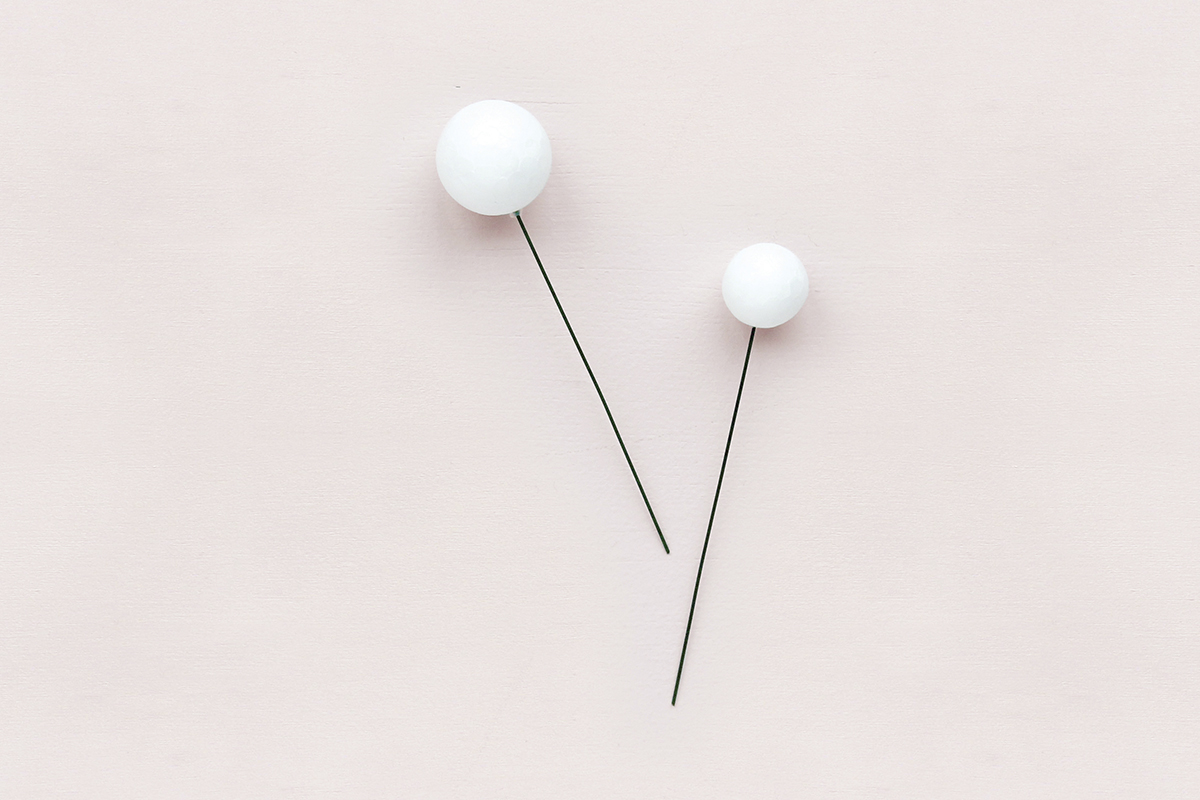
Use wire cutters to cut 22 x 6cm (23⁄8") lengths of floral wire.
Take one length and apply a small amount of hot glue to one end, then quickly push it into the centre of a 1cm (3⁄8") polystyrene ball.
Repeat with the remaining wires.
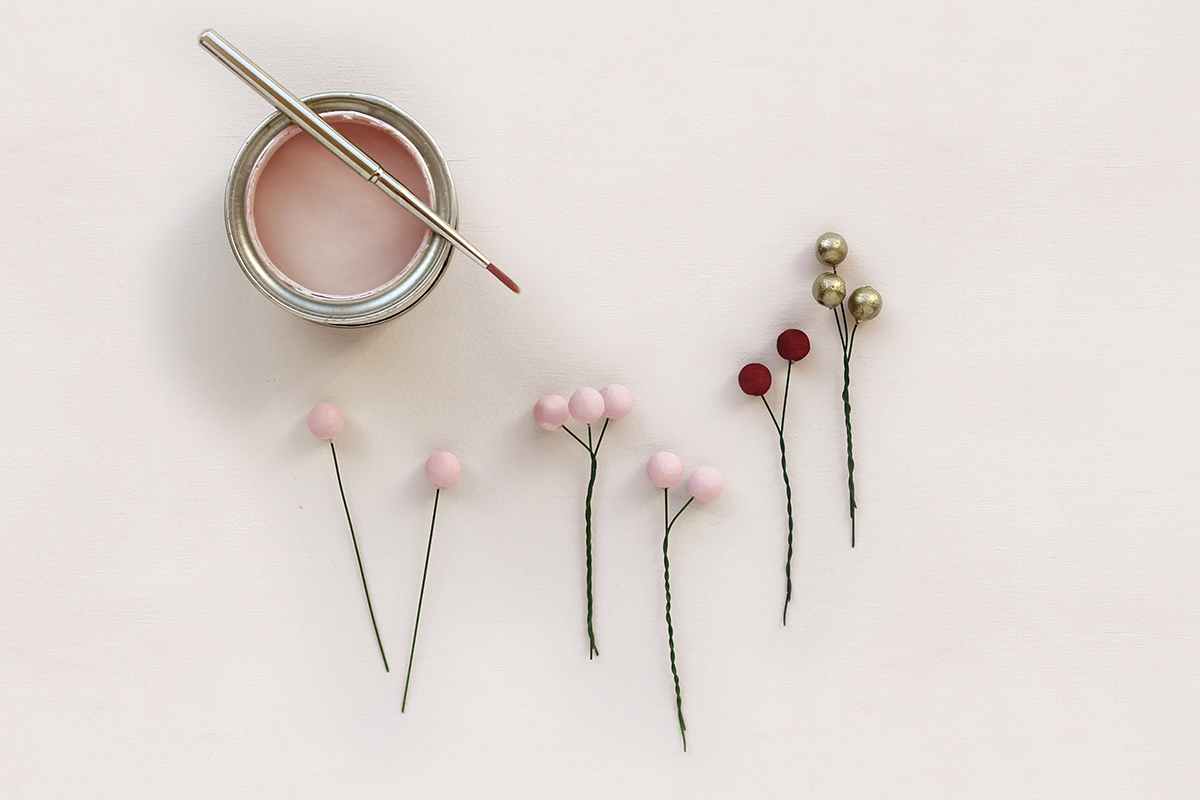
Step 2
Paint seven polystyrene balls using pink paint, five using red paint, and five using gold paint. Leave five balls white.
Once dry, group the berries in twos and threes, as shown, twisting the wires together to secure them.
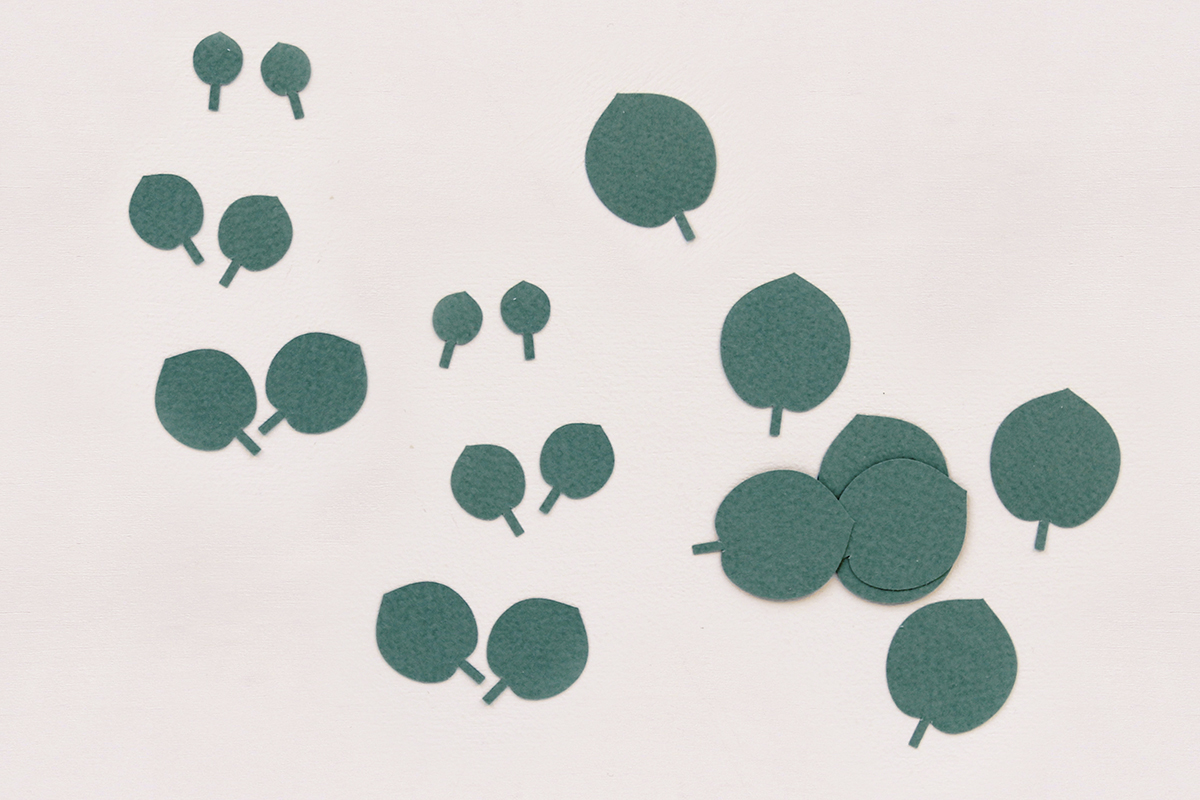
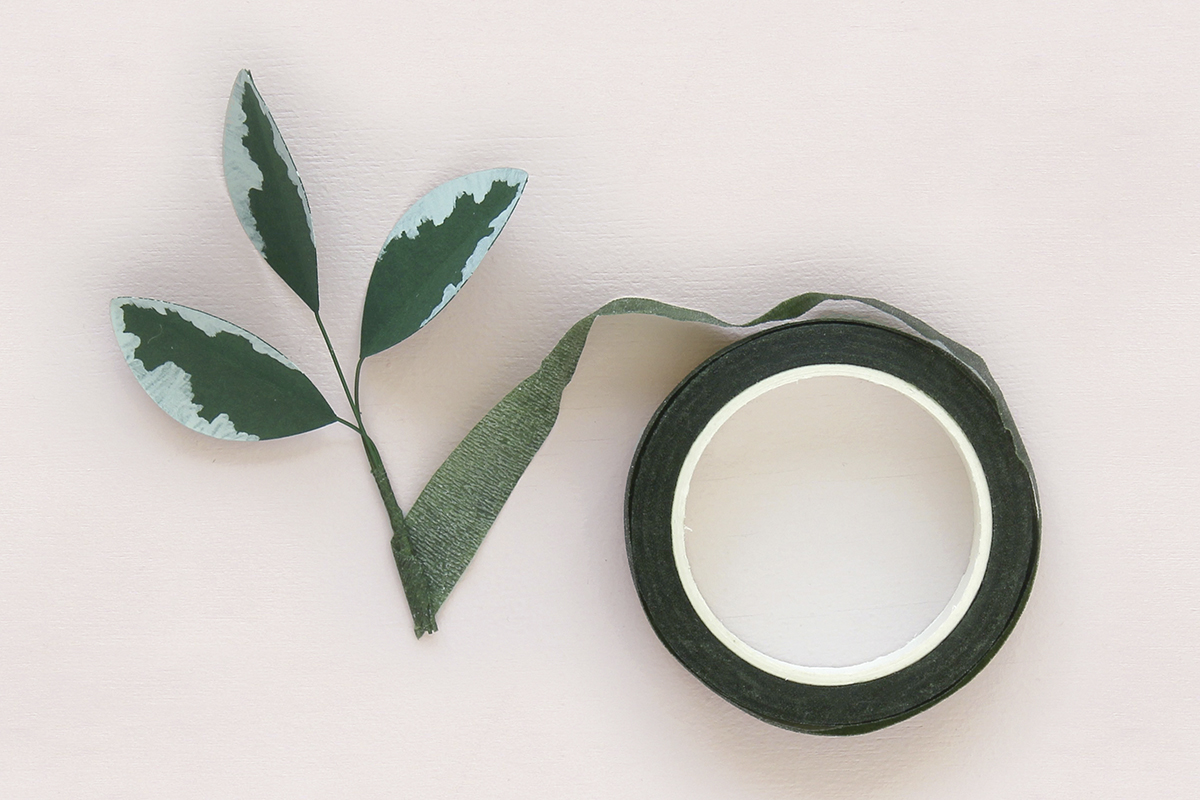
Step 3
Using the templates, cut 20 round eucalyptus leaves from the sage green paper: four small, four medium, four large and four extra large. To prepare the eucalyptus sprigs, cut two 12cm (4¾") lengths of floral wire.
Separate the eucalyptus leaves into two groups, with two small, two medium and two large leaves in each group. Put two extra large leaves into one group, and six extra large leaves into the other.
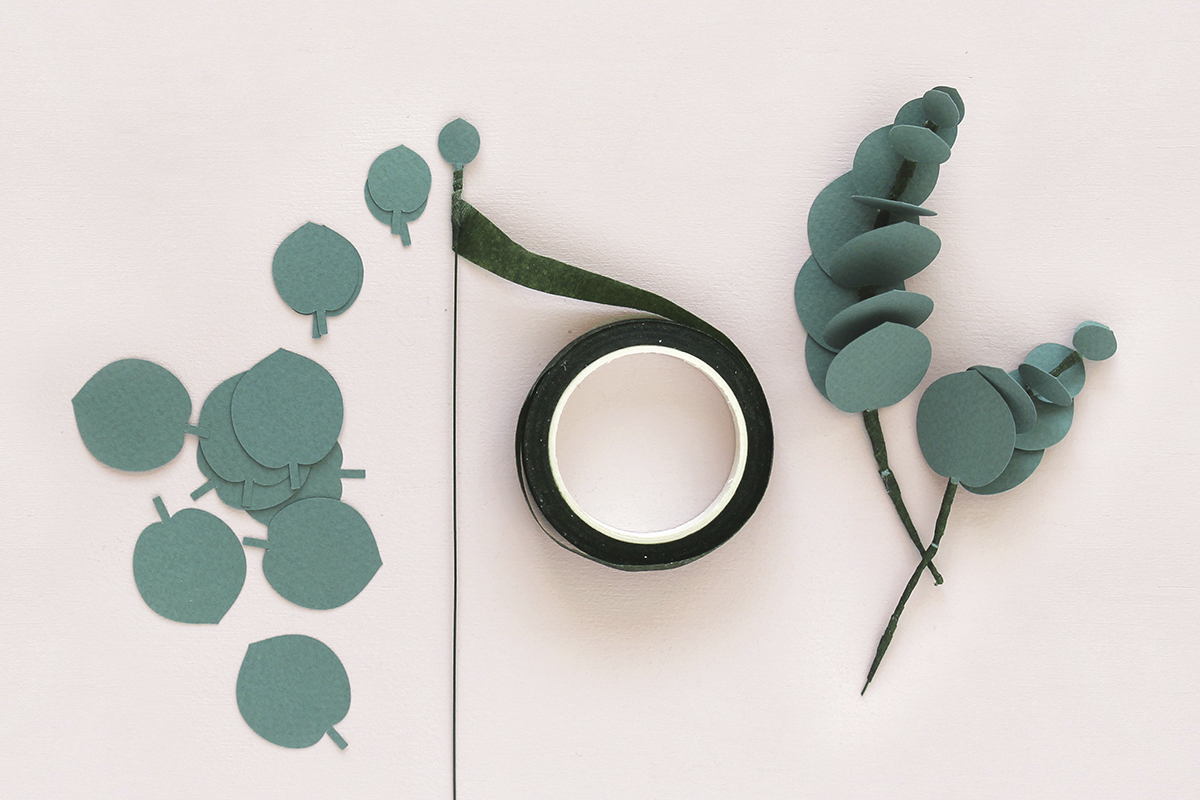
Step 4
To make the eucalyptus sprigs, use quick-drying glue to attach the leaves to each wire in pairs, one on either side of the wire, starting at the top of with the smallest pair, as shown.
After sticking on each pair of leaves, wrap floral tape around the paper stems and the wire, roughly 1-1.5cm (3⁄8 - 5⁄8") down, then add the next pair of leaves. Continue until both groups of leaves are attached to both wires.
Step 5
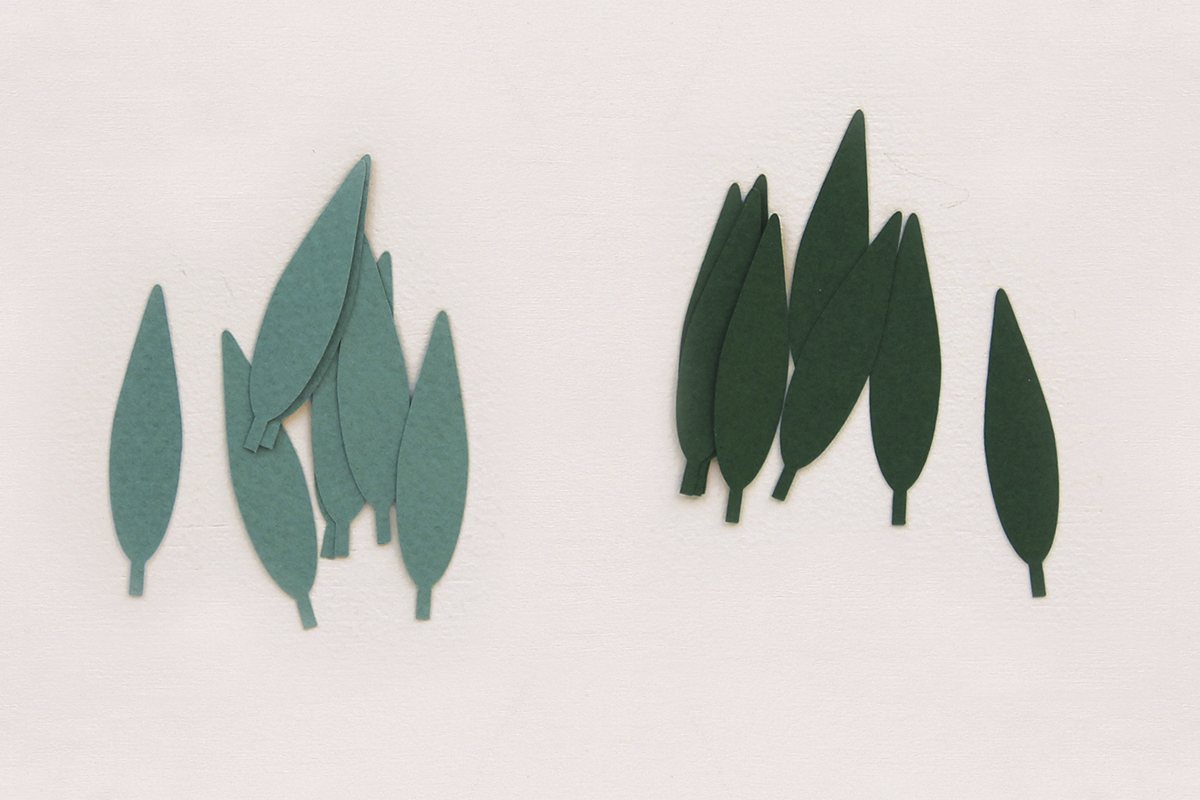
Using the templates, cut out 60 long eucalyptus leaves – 30 from dark green paper and 30 from sage green paper.
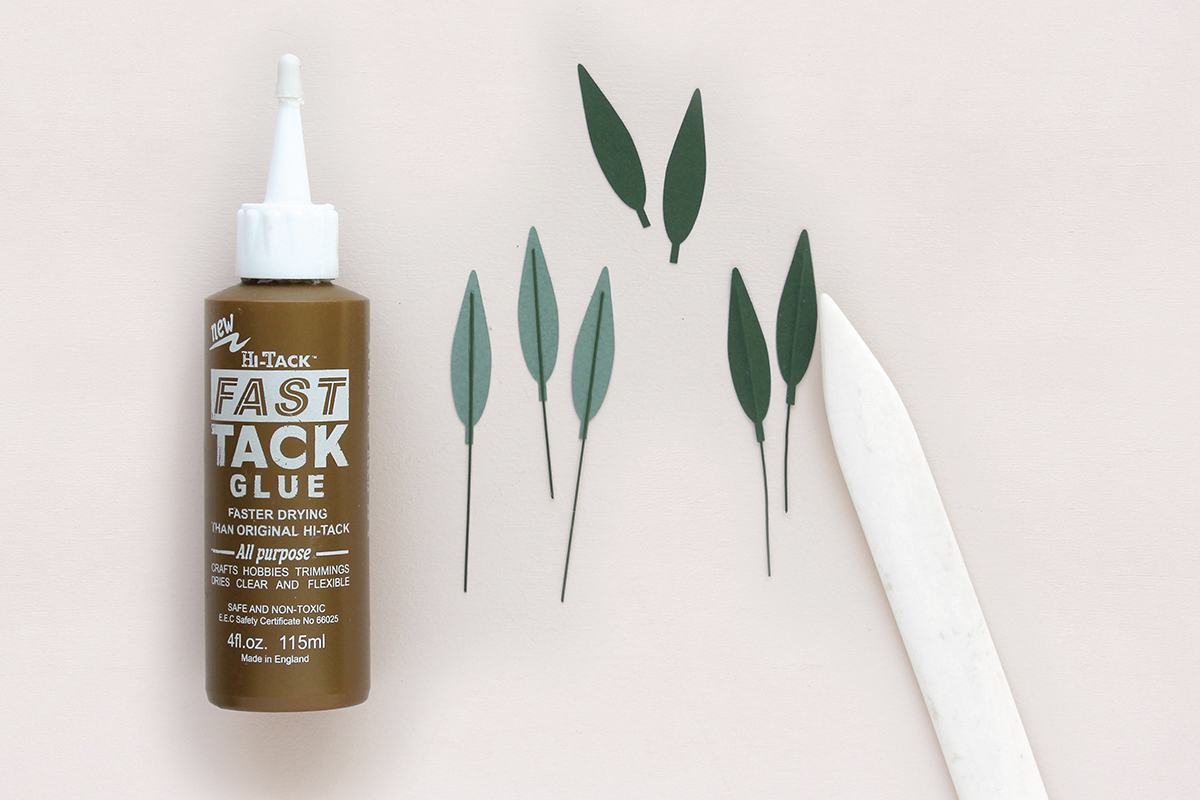
Cut 30 x 8cm (31⁄8") lengths of floral wire, then glue a piece of wire down the centre of each sage green leaf.
Apply a thin layer of quick-drying glue to one side of each dark green leaf, then press onto the sage green leaves, sandwiching the wire between the two. Press together with the bone folder, then repeat with the remaining leaves and wire.
Step 6
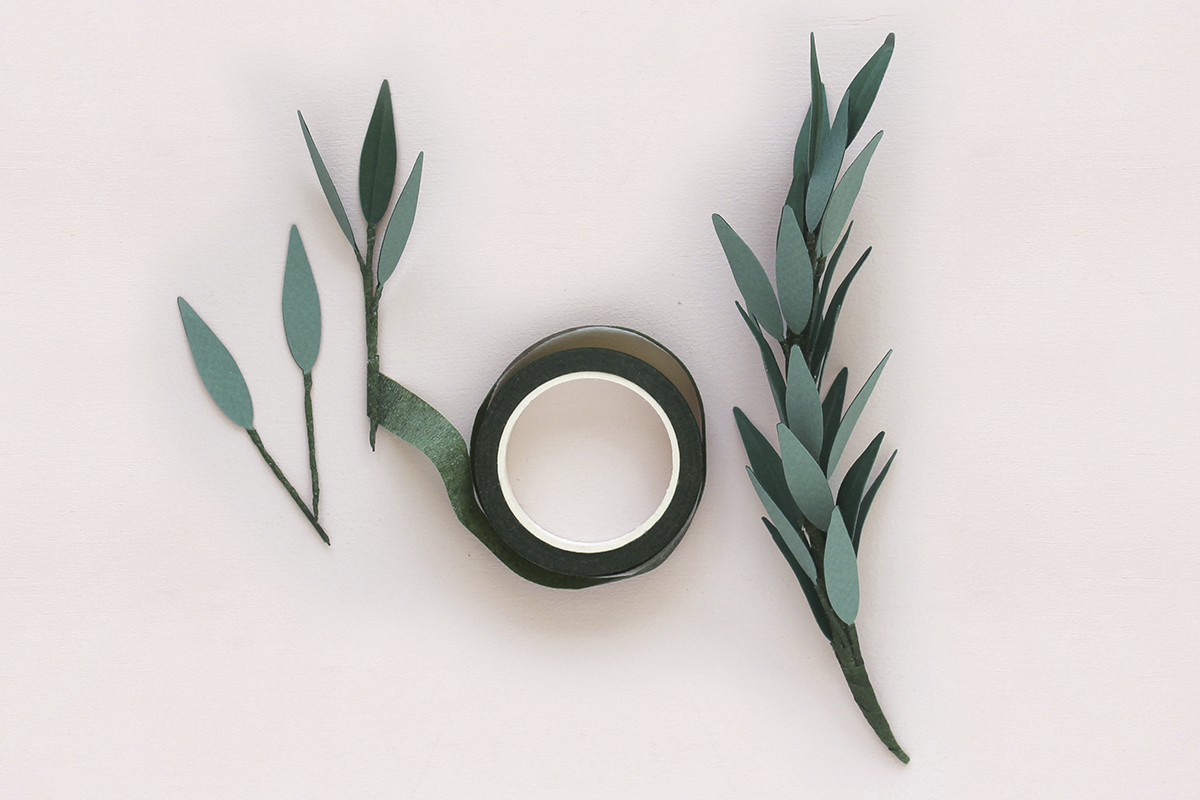
Wrap each long eucalyptus leaf’s wire with floral tape. Take two of the leaves and hold their stems together with one leaf positioned higher than the other. Wrap the two stems together from the base of the leaves down, adding in new leaves as you go.
Make one eucalyptus sprig with 25 leaves and one with five leaves.
Step 7
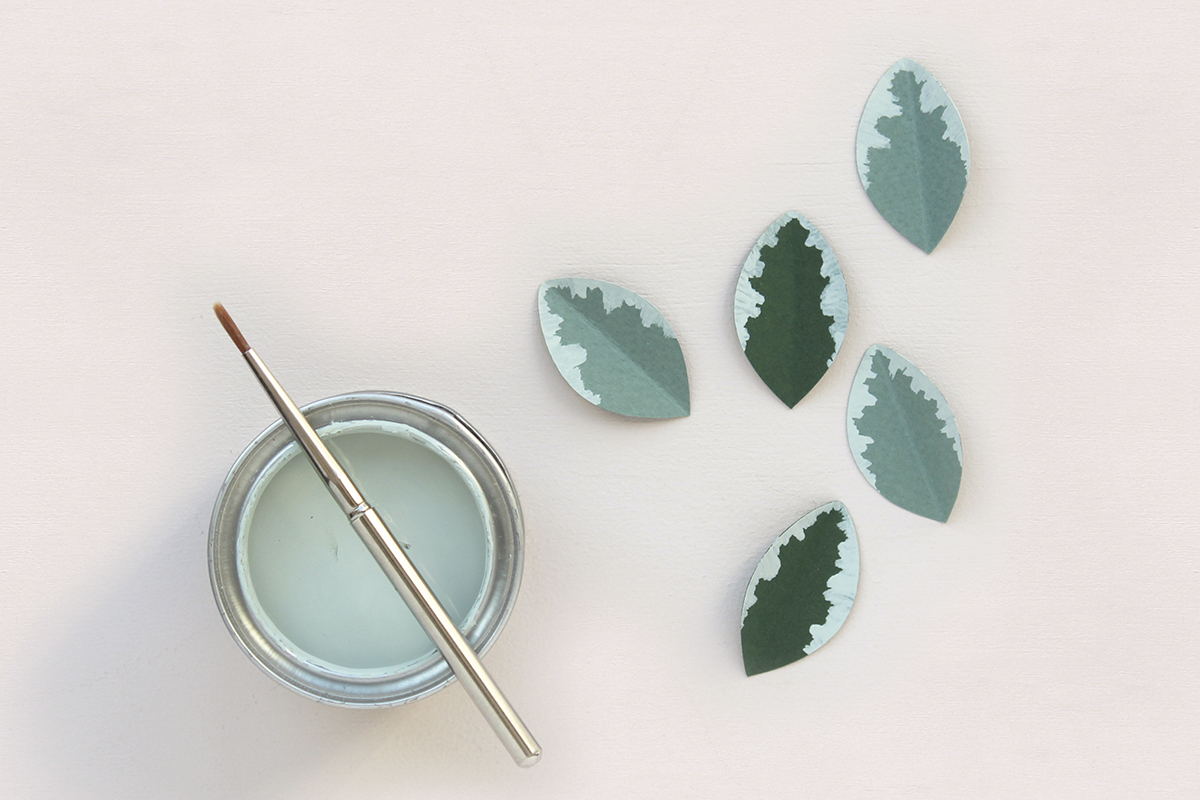
Using the templates, cut four variegated leaves from the dark green paper and five from the sage green paper.
Fold each one in half down the centre, then use short brush strokes in light green paint to colour the edges of each of the leaves, as shown.
Step 8
Cut nine 8cm (31⁄8") lengths of floral wire. Use quick-drying glue to attach a wire to the back of each variegated leaf, along the fold.
Separate the leaves into two groups of three leaves, leaving three single leaves. Use floral tape to bind the wire ends of the grouped leaves together.
Step 9
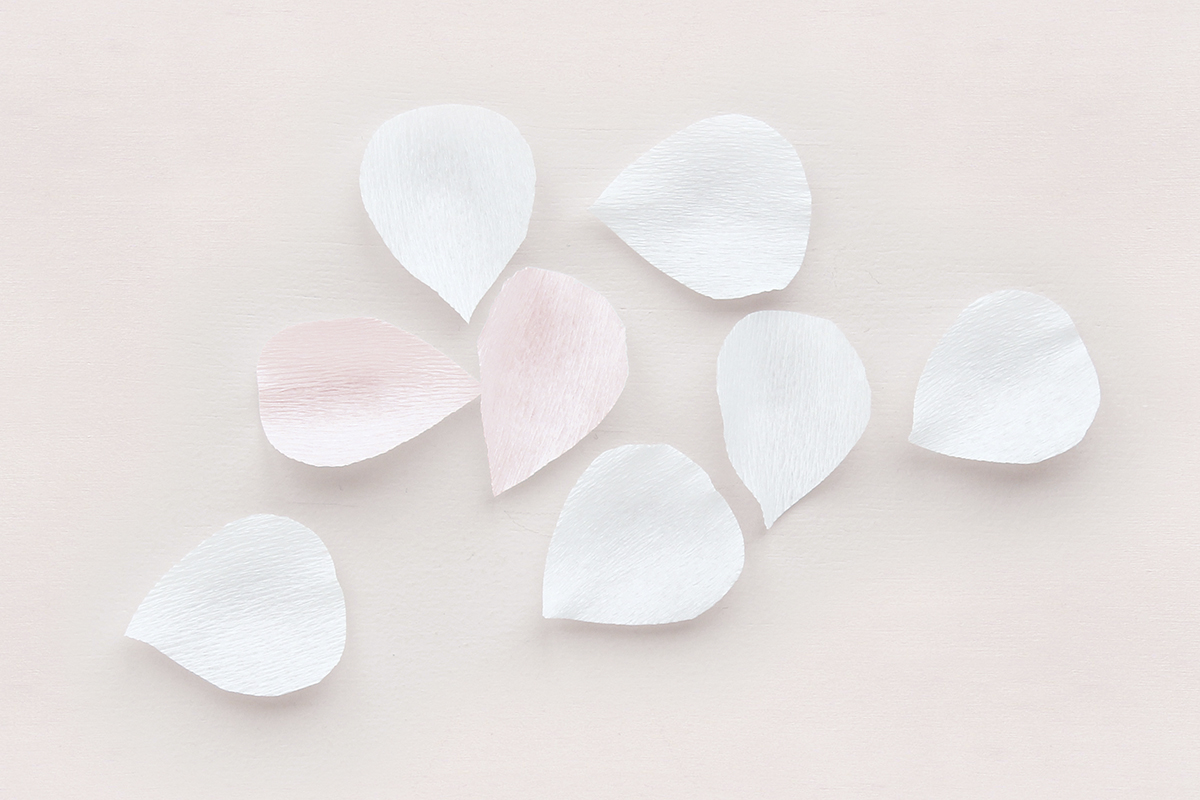
Using the templates, cut 38 large petals from white crepe paper, eight small petals from white crepe paper and 32 small petals from pink crepe paper. Cut with the grain of the crepe running vertically through each petal.
Round out each petal by holding it with your thumbs in the centre, then pulling them gently apart to stretch it out.
Step 10
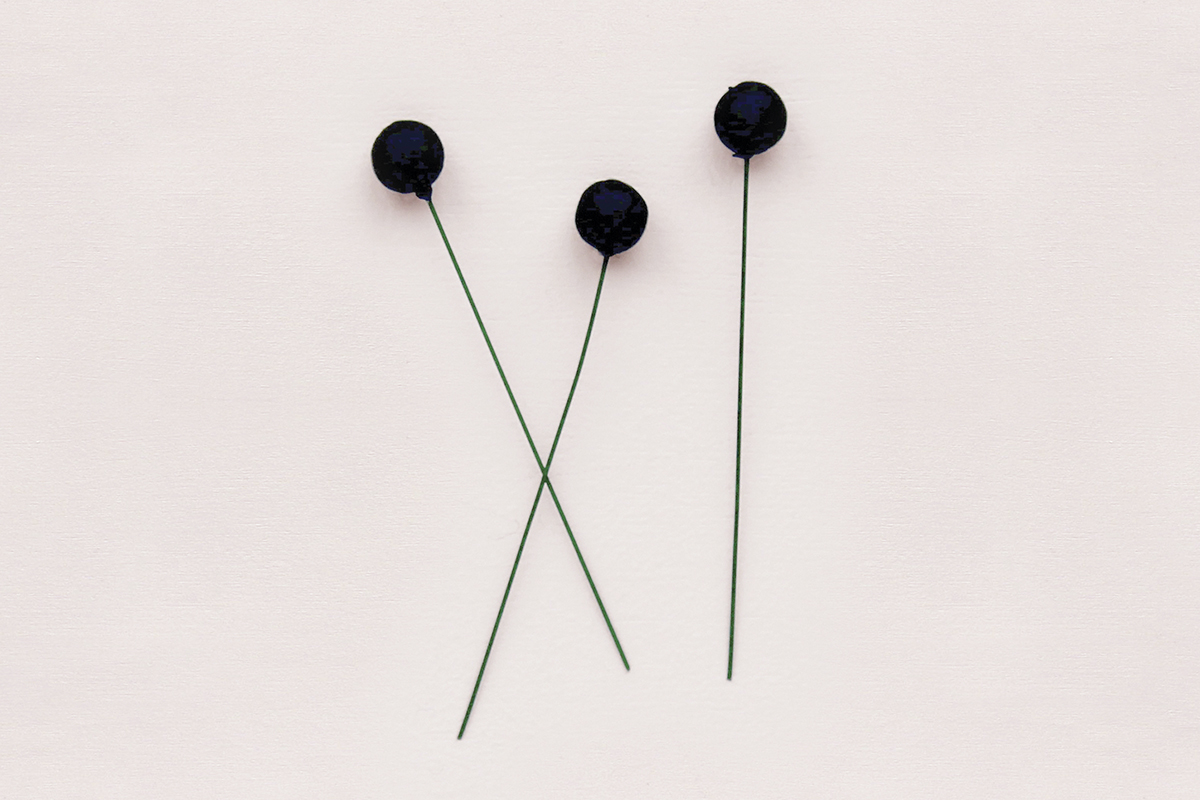
Use the wire cutters to cut three 6cm (23⁄8") lengths of floral wire. Use hot glue to attach a 1cm (3⁄8") polystyrene ball onto the end of each wire, using the same technique as Step 1. Paint the polystyrene balls black.
Using the templates, cut 38 large petals from white crepe paper, eight small petals from white crepe paper and 32 small petals from pink crepe paper. Cut with the grain of the crepe running vertically through each petal.
Round out each petal by holding it with your thumbs in the centre, then pulling them gently apart to stretch it out.
Step 11
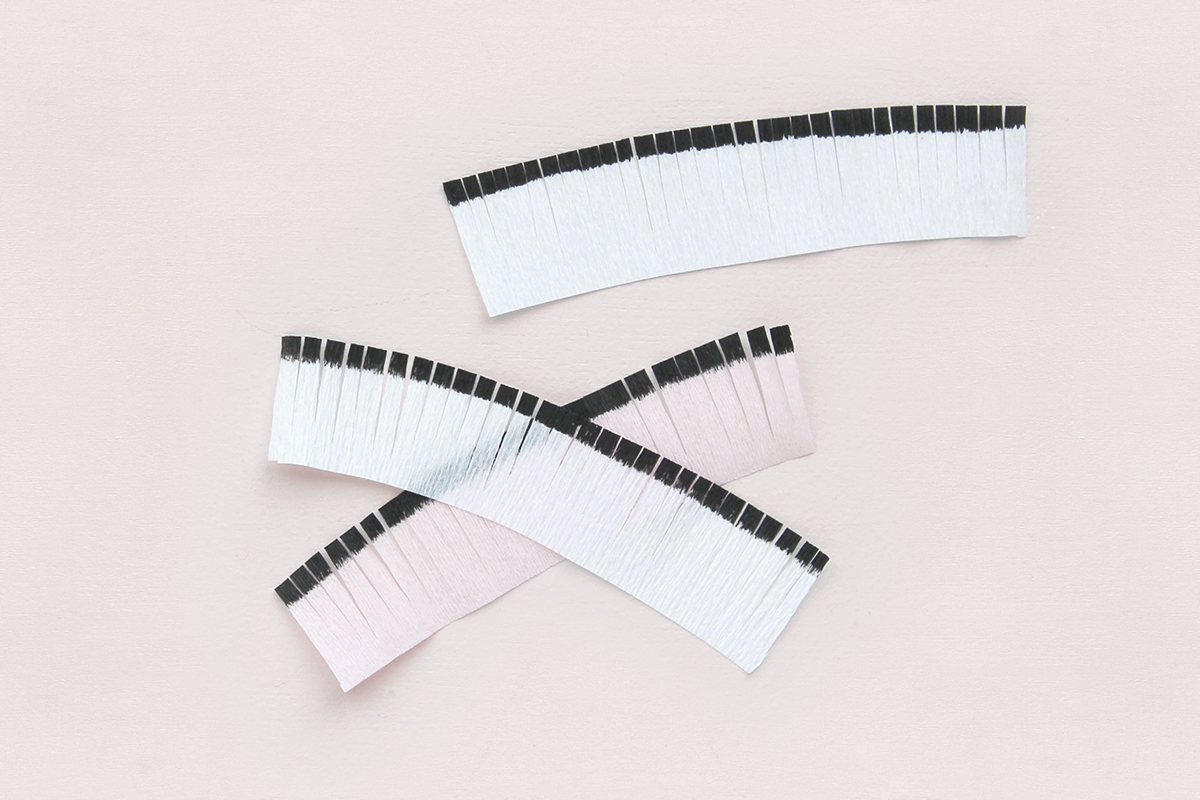
Cut two strips of white crepe paper and one strip of pink crepe paper measuring 2 x 7cm (¾ x 2¾"). Brush a strip of black paint along one long edge of each of the three strips, around 0.5cm (¼") thick.
Use scissors to fringe the painted edges, making the cuts a couple of millimetres apart, and finishing 0.5cm (¼") from the bottom edge.
Step 12
Apply lines of quick-drying glue to the bottom edge of each strip, then wrap one strip around each wire, just below the black polystyrene ball, to create the centre of an anemone.
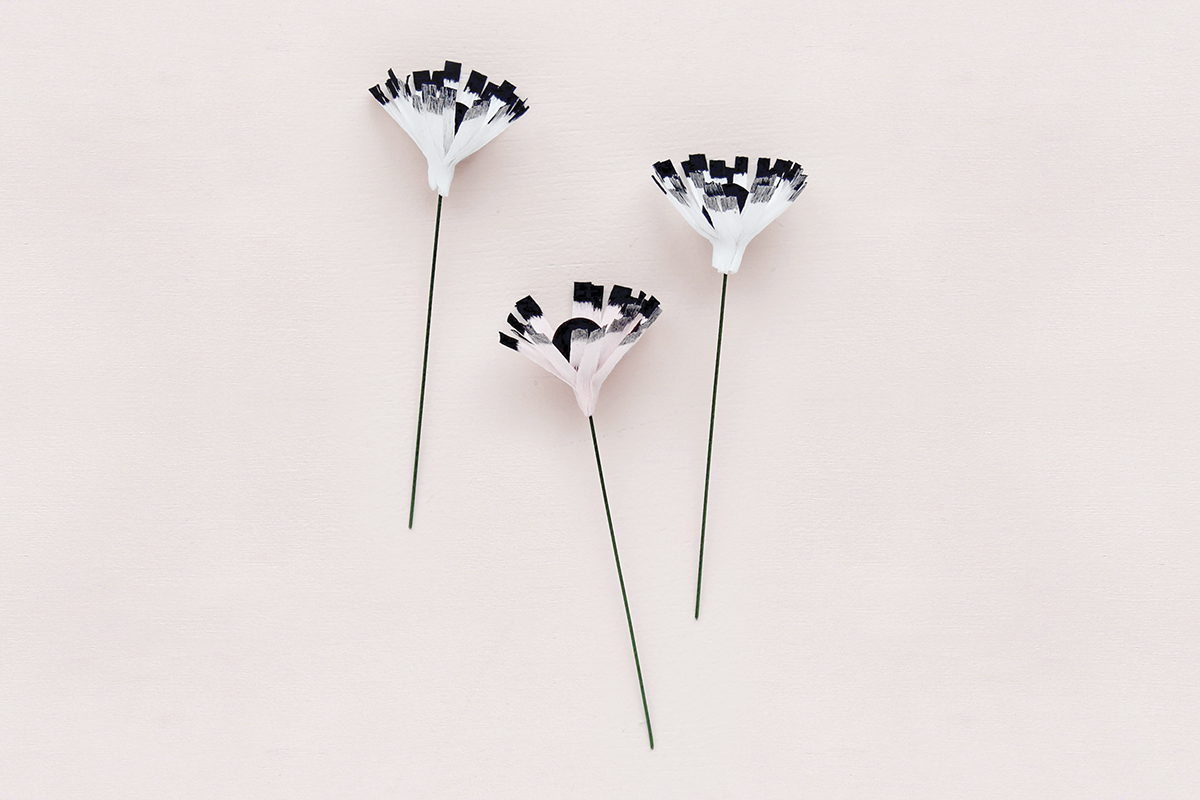
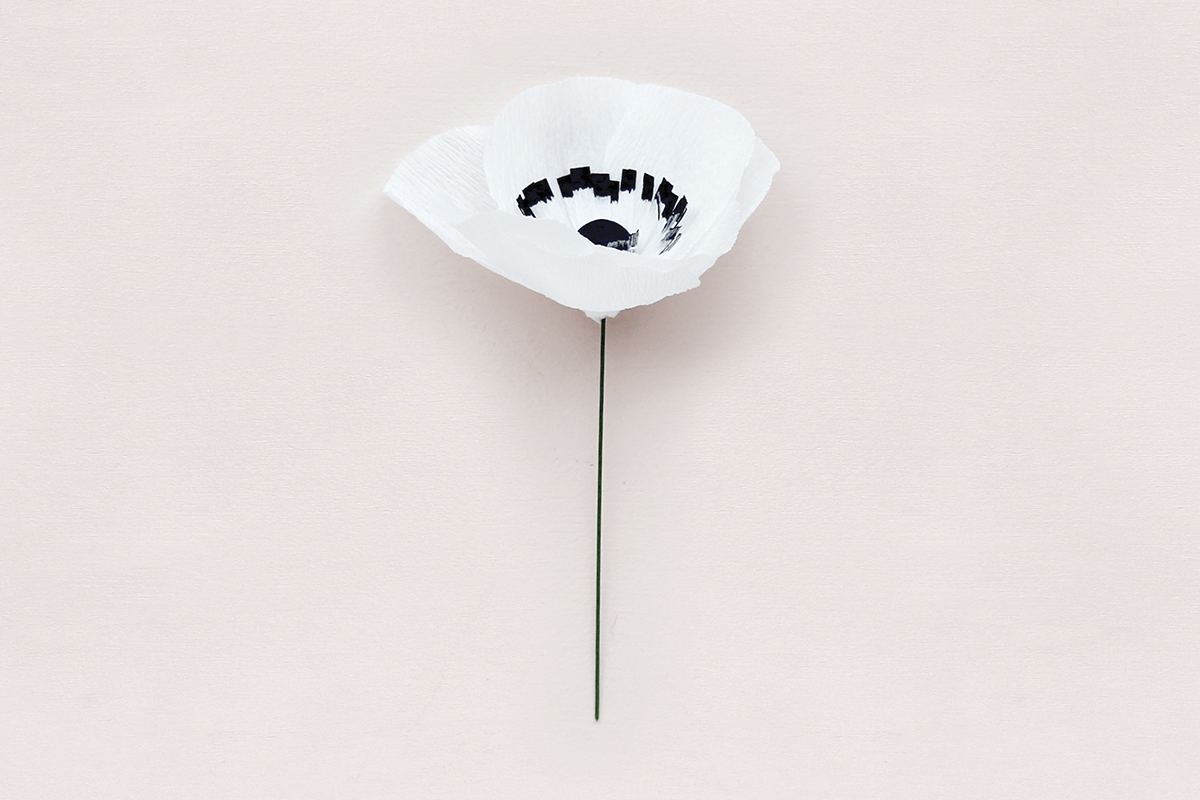
Step 13
To make one large anemone, take eight large white petals. Use quick-drying glue to attach two layers of four petals around the fringed centre, off-setting the second layer.
Repeat this process with eight small white petals to make a small white anemone, and with eight small pink petals to make a small pink anemone.
Step 14
Use the wire cutters to cut two 6cm (23⁄8") lengths of floral wire. Use hot glue to attach a 1.5cm (5⁄8") polystyrene ball onto the end of one wire and a 2cm (¾") polystyrene ball onto the other.
Step 15
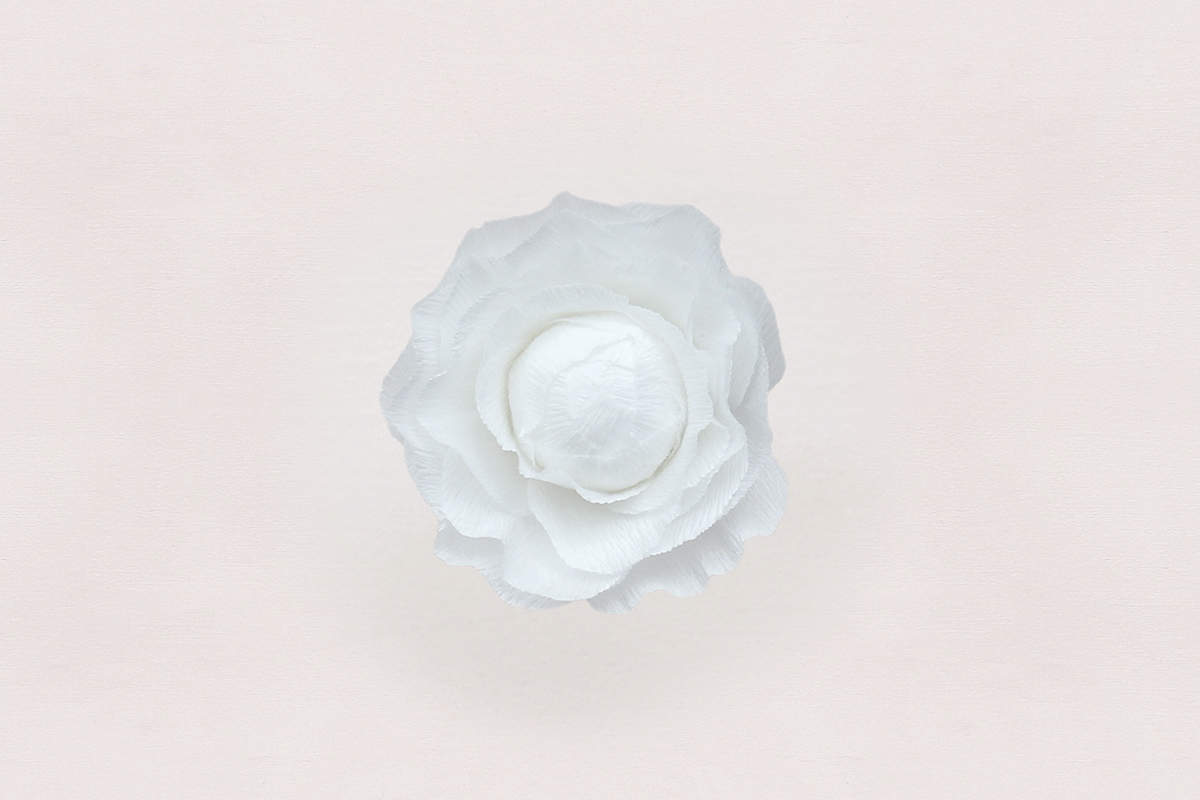
Take 10 large white petals and 10 small pink petals. Use quick-drying glue to stick the large white petals onto the large polystyrene ball, positioning them so the first three petals meet at the centre top of the ball, then the remaining petals graduate outwards around the ball, all cupping the ball tightly.
Repeat with the small pink petals on the small polystyrene ball.
Step 16
Take the remaining 20 large white petals and use quick-drying glue to stick them around the white centre from Step 15 in layers.
Repeat with the remaining 14 small pink petals and pink centre.
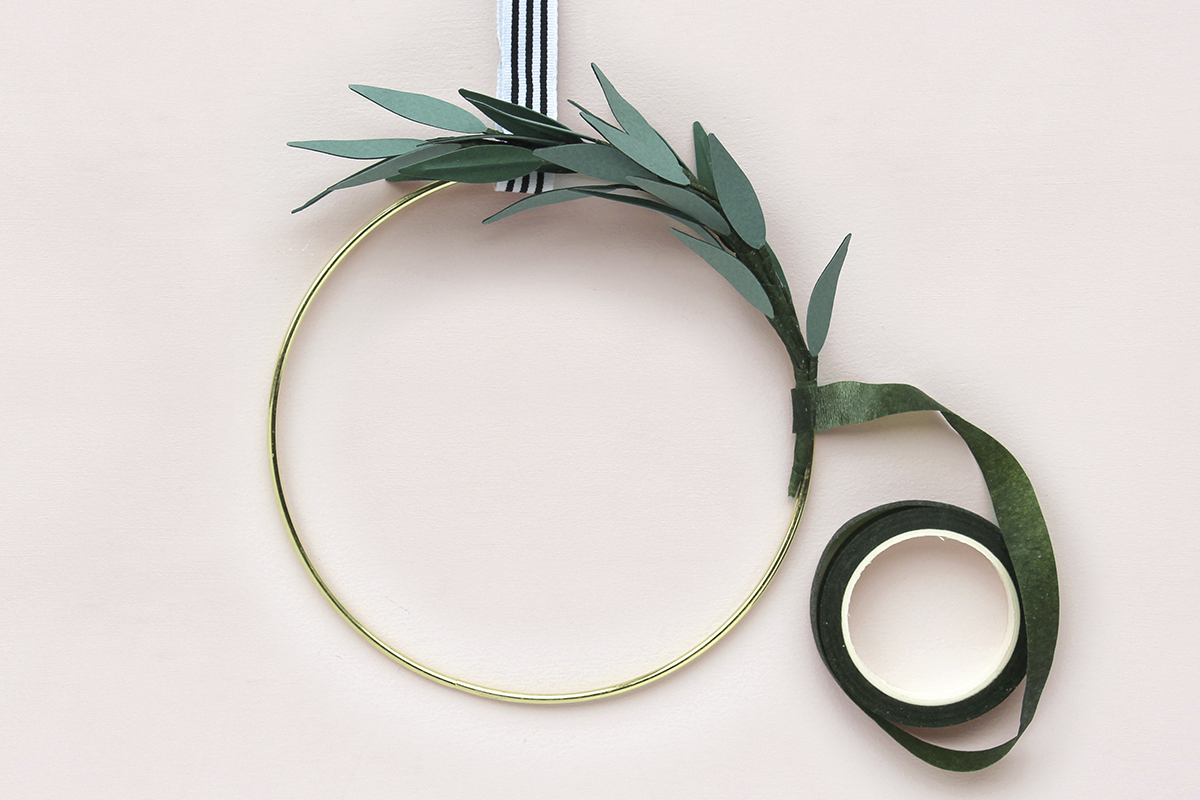
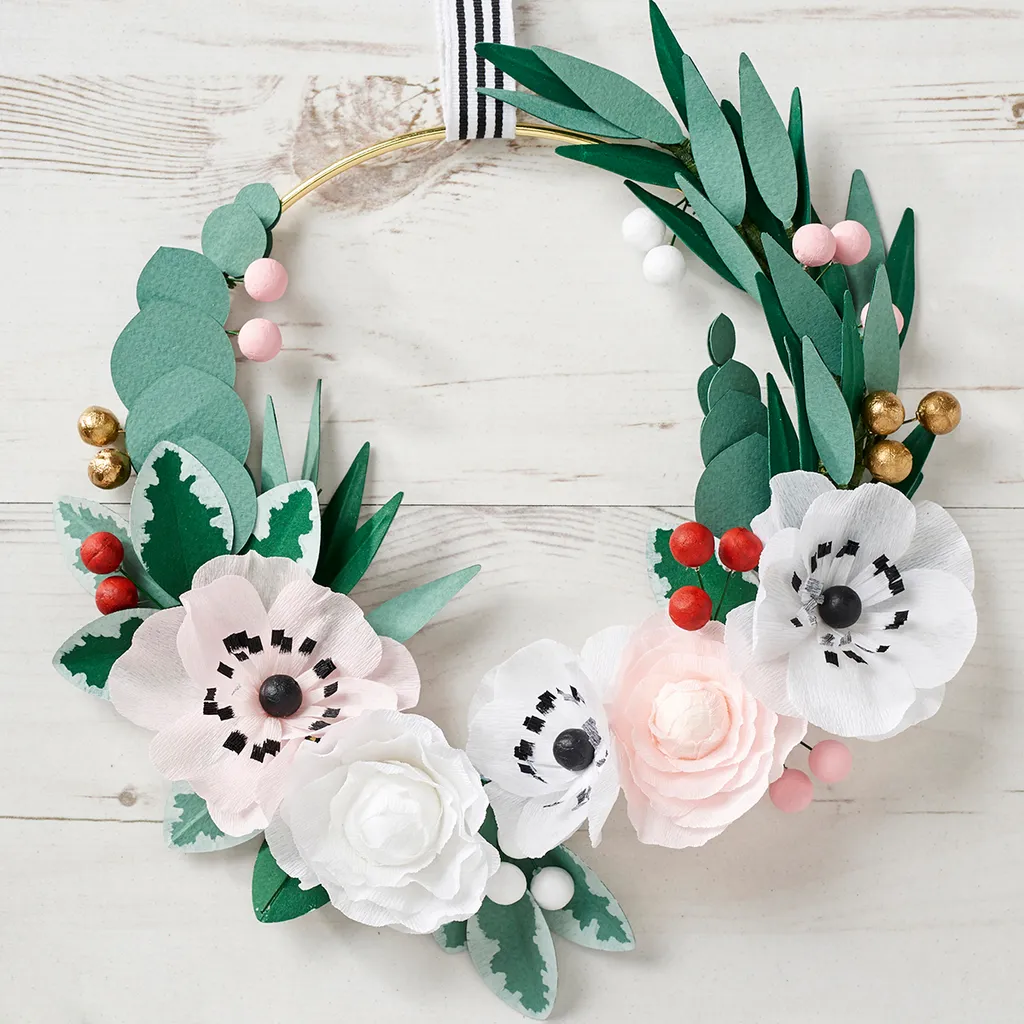
Step 17
Fold the ribbon in half around the top of the gold ring to make a loop for hanging.
To assemble, arrange the foliage and flowers asymmetrically onto the ring, using the main image as a guide. Wind the wire stems of some elements around the ring, and bind the others to the ring with floral tape.