There always seems to be a celebration just around the corner, whether that’s a milestone birthday, Christmas or Valentine’s Day. Whatever the occasion it’s likely you’ll be giving that special someone a gift, so you’ll need something to wrap it in!
Yes, you could go out and buy some generic wrapping paper – but where’s the fun in that? With our unique gift wrapping ideas, you can easily take your gifts to the next level and make them look extra special.
We’ve packed our round-up with inventive ways to add dimension to your gifts, whether that’s replacing your paper with sheet music or finishing your gifts with fresh flowers. There’s plenty of gift wrapping ideas to get stuck into, so put down the boring roll of wrapping paper and elevate your occasions!
21 unique gift wrapping ideas to make your presents memorable
1. Pleated gift wrapping idea
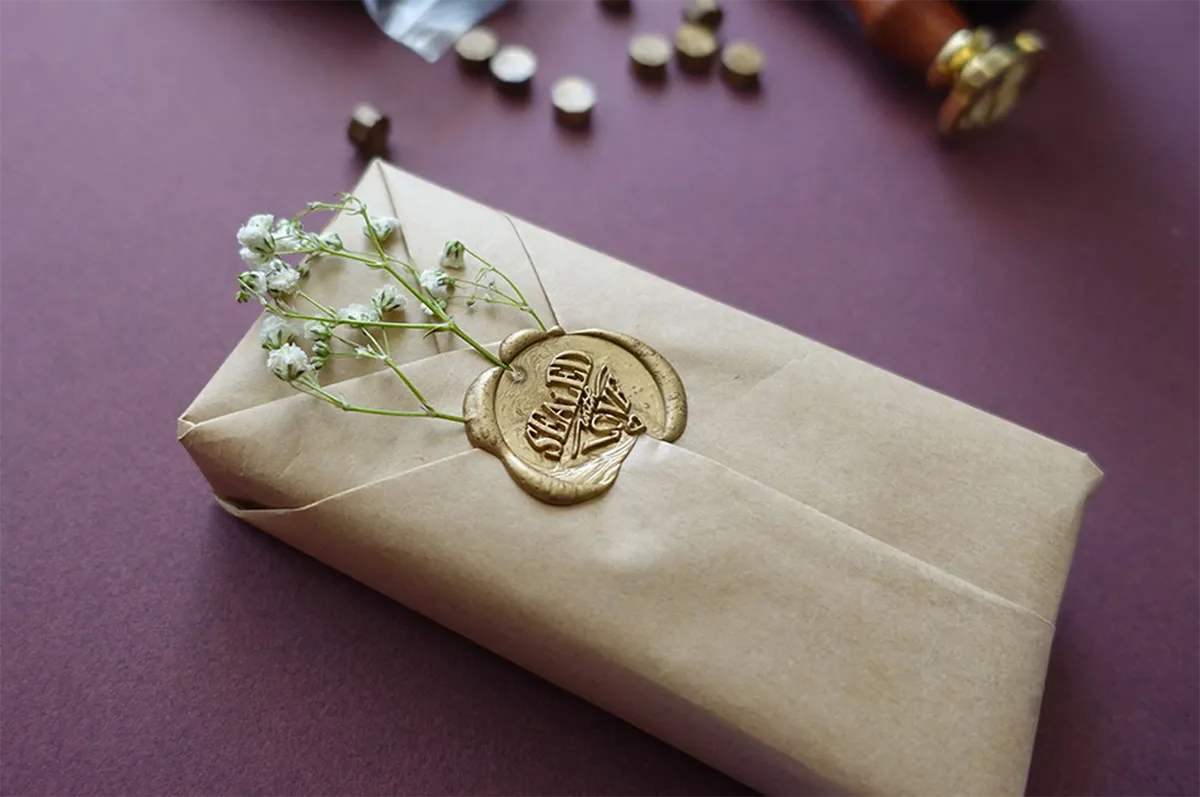
Pleating your wrapping paper is a great way to add a touch of class to your presents. It makes any present look expensive and professional. This technique is particularly good for wedding gifts, to ensure they look elegant. Fiona Ariva has a full tutorial on this technique where you’ll find out the easiest method for pleating wrapping paper. If you want to add an extra special touch you can include dried flowers and a wax seal.
2. Newspaper-wrapped gifts
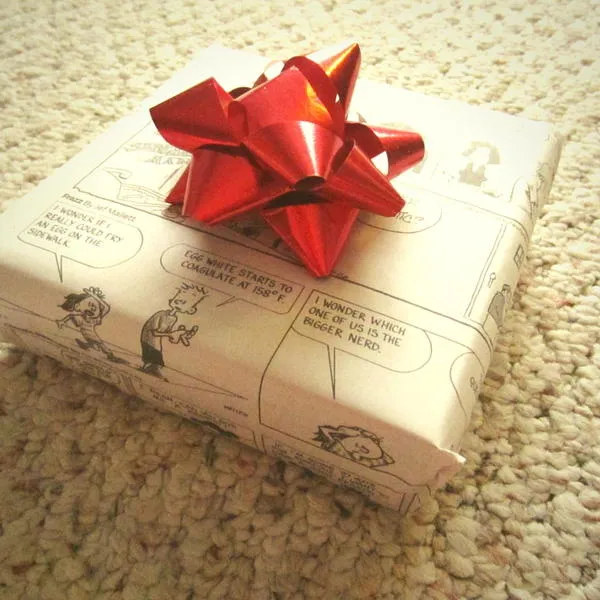
Newspapers are a low-cost and effective way to create attractive gifts. Use comic strips like Fave Crafts has, to give your presents a unique twist. When selecting the newspaper to use as wrapping paper just ensure you avoid negative stories! Pages with fun pictures, comic strips or horoscopes work particularly well.
3. DIY wrapping paper gift bag
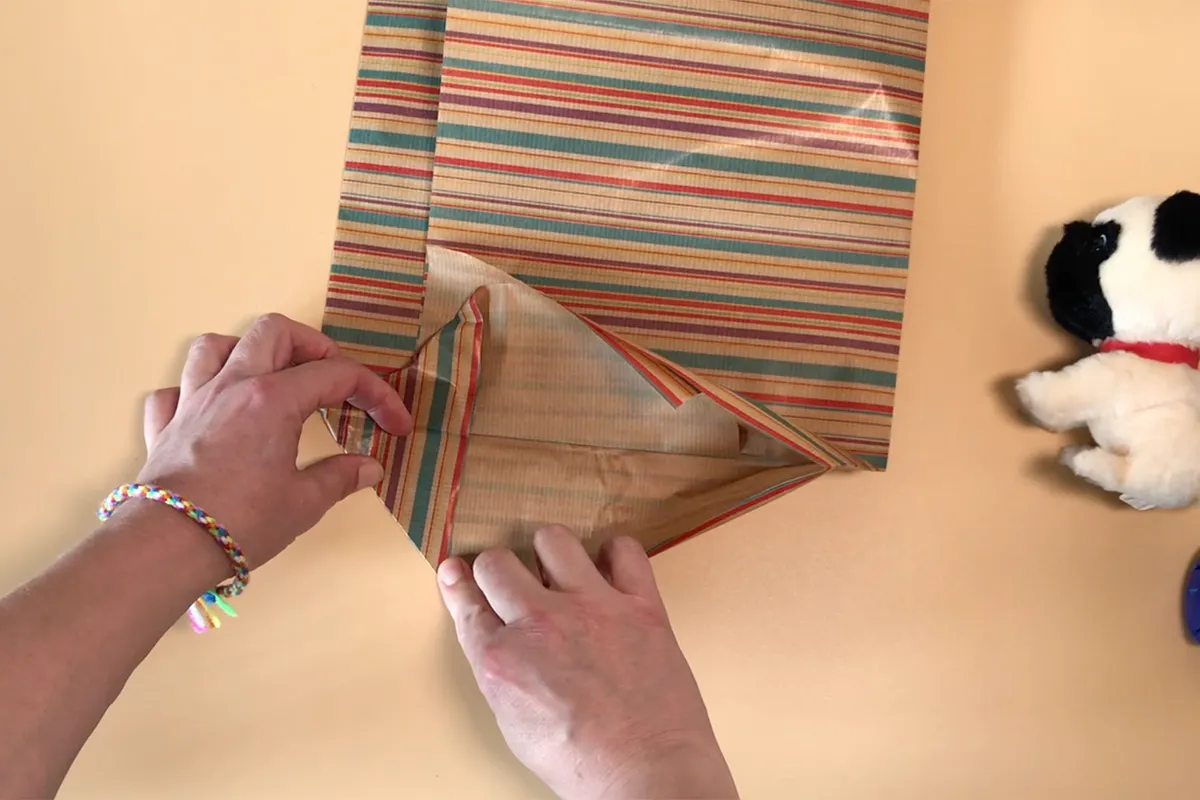
Are your gifts awkward to wrap? Sometimes it’s easier to use a gift bag. With our DIY gift bag tutorial, you won’t need to shell out for pricey shop-bought bags. In just a few simple steps you’ll have a pro-looking creation for gifts of all shapes and sizes.
4. Suminagashi gift wrap tutorial
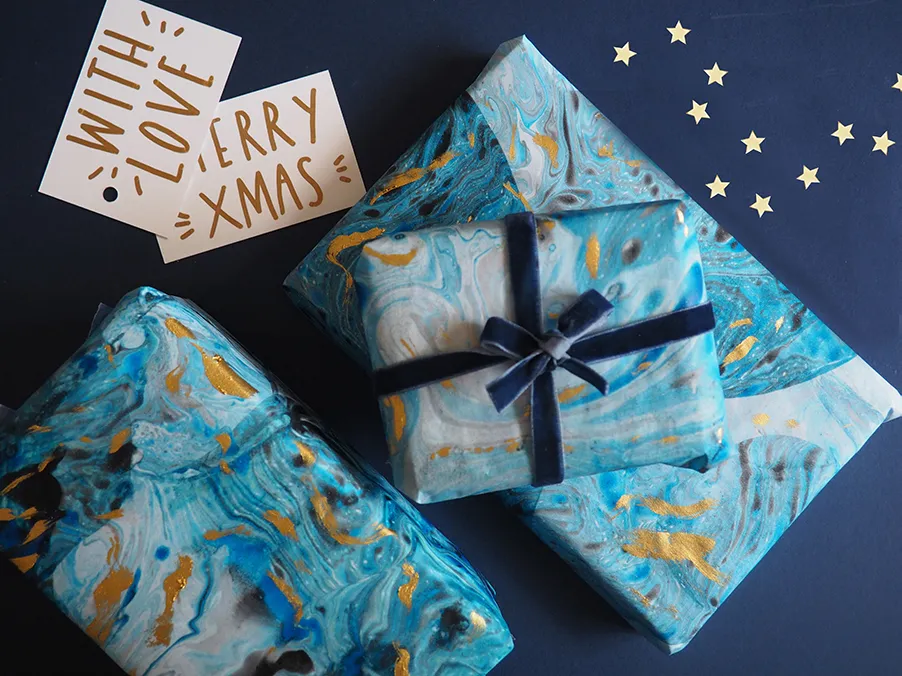
Have you ever heard of Suminagashi? Suminagashi is the Japanese art of marbling plain paper with water and ink. It dates back to the 12th century and produces beautiful results. With our Suminagashi gift wrap tutorial, you’ll discover everything you need to know to make this vibrant wrapping paper.
5. Furoshiki gift wrapping
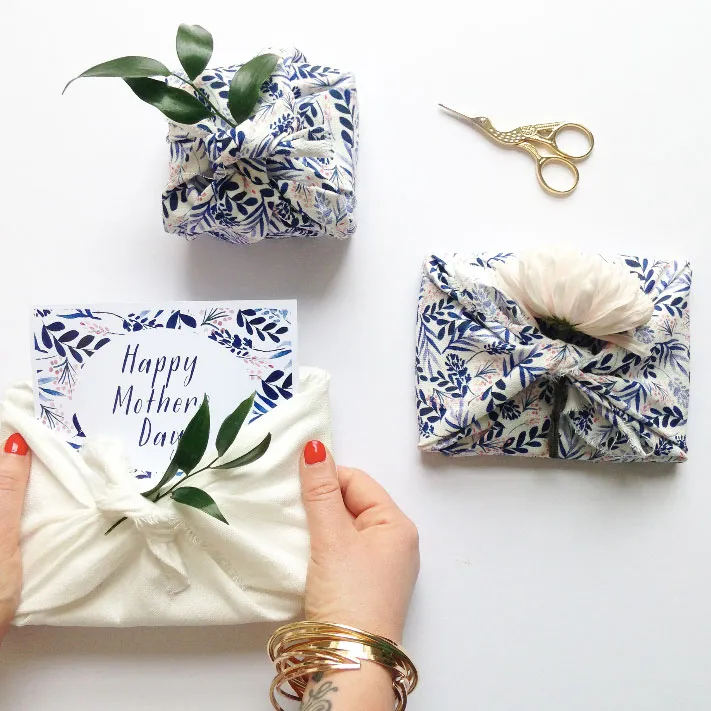
Looking for an eco-friendly way to give gifts? Try Furoshiki gift wrapping with our simple tutorial. In this guide, you’ll find out how to use fabric rather than paper to wrap your gifts. This is a brilliant sustainable option as it can be used over and over.
6. Hand-stamped wrapping paper idea
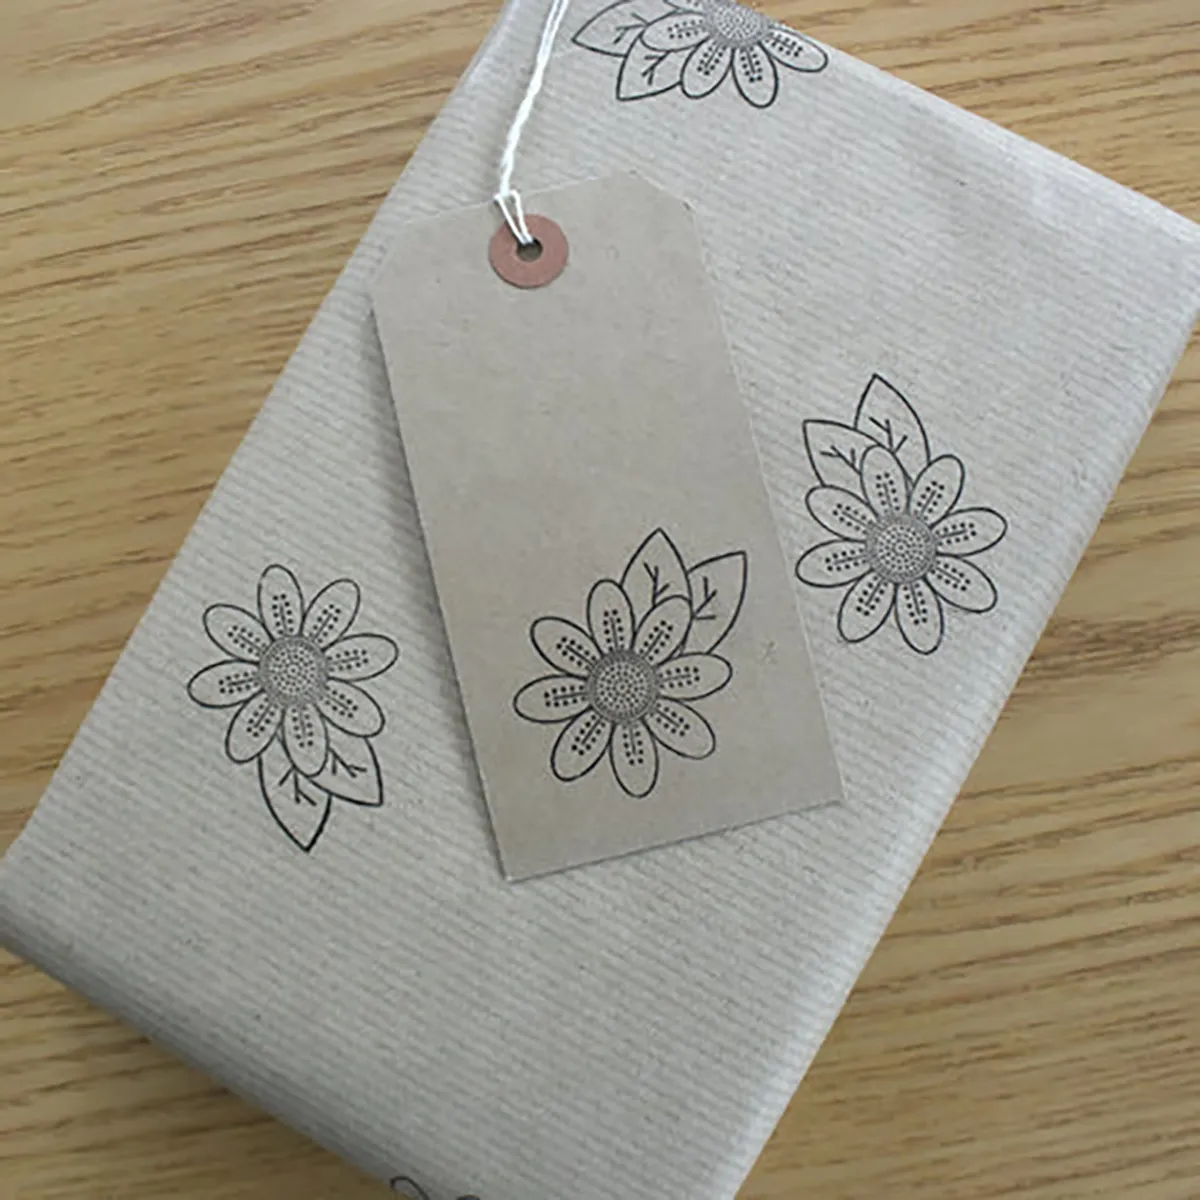
Upgrade your plain wrapping paper with stamps! It’s so simple yet genius. For this method, you can simply use brown parcel paper which is a more cost-effective option if you’re wrapping lots of gifts. Find out how to make your plain paper stand out with Mint Maker Studios tutorial.
7. Pom pom finishing touch
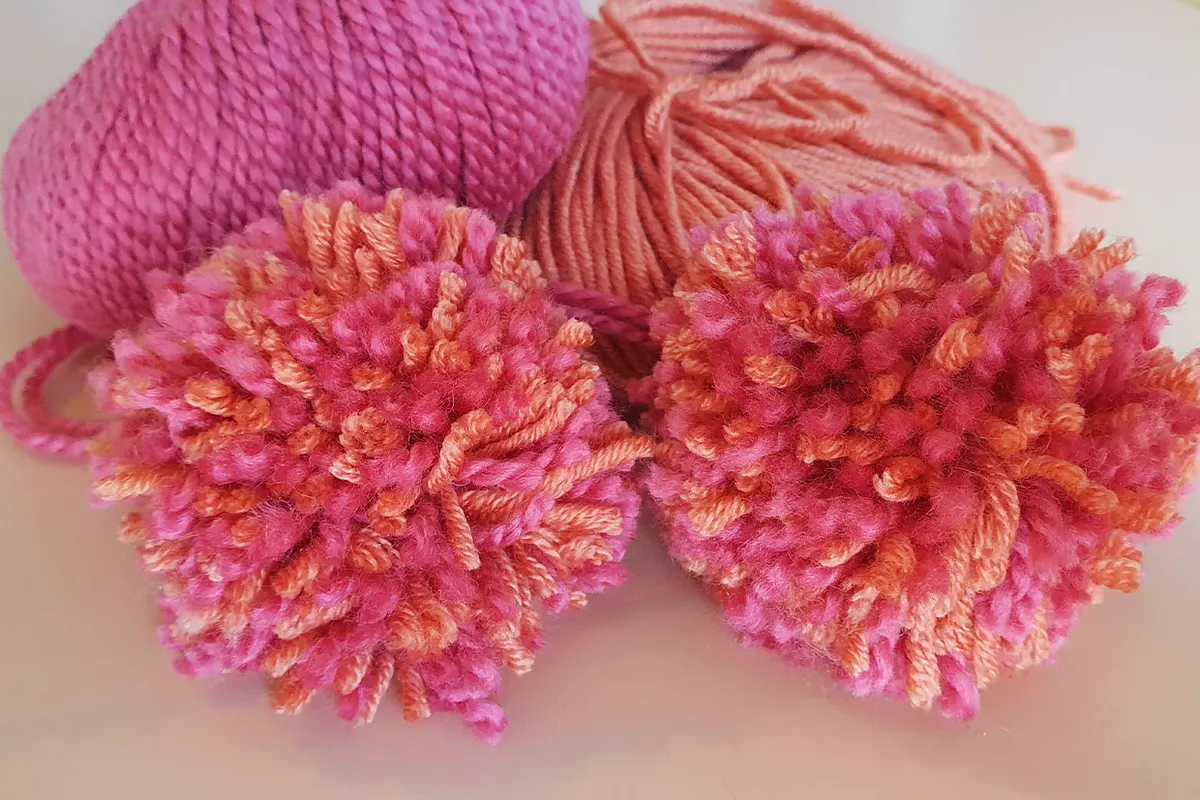
Forget the ribbon and make your own pom pom as a creative way to finish your presents. Check out our easy pom pom tutorial, and whip up as many as you need!
8. Gift boxes
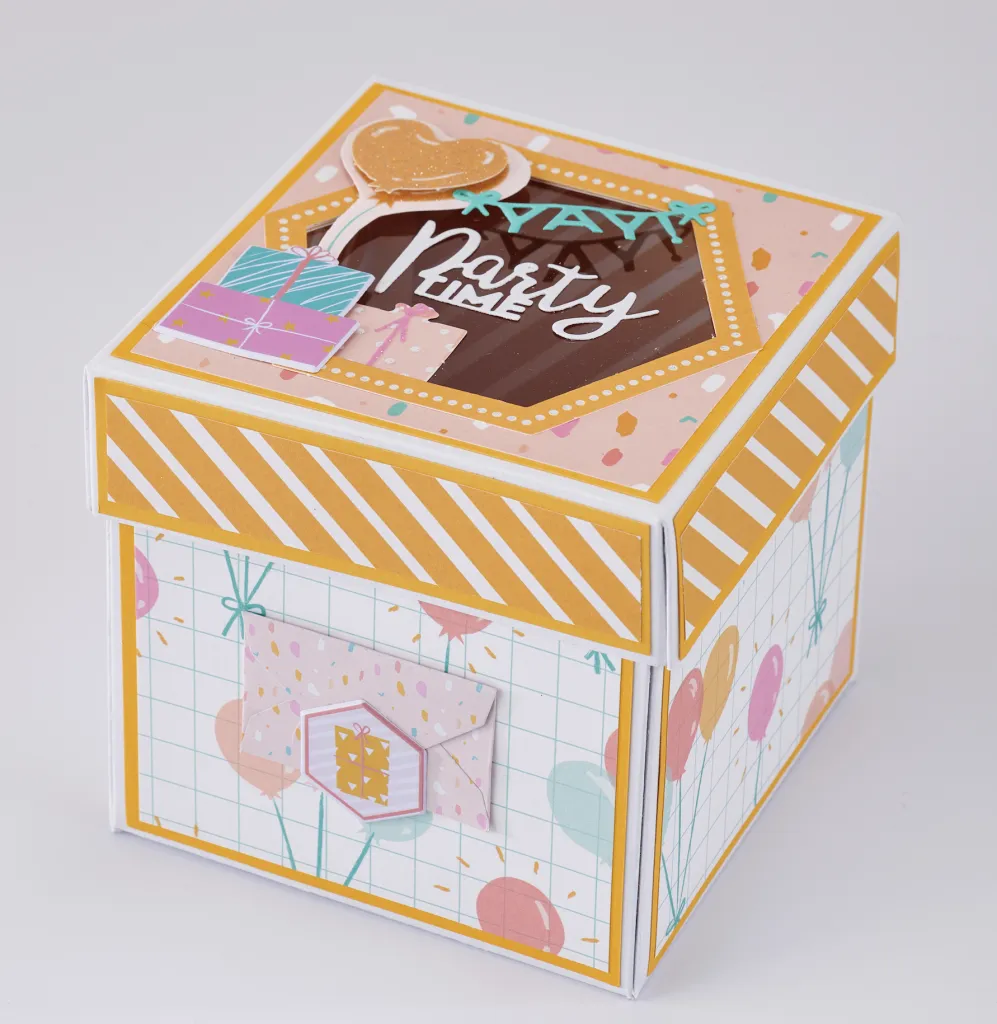
A gift box might work better than paper if the item is small or delicate and requires protection. Head over to our DIY gift boxes round-up to find plenty of gorgeous gift boxes in a variety of shapes and sizes.
9. Dried orange slices to decorate your gifts
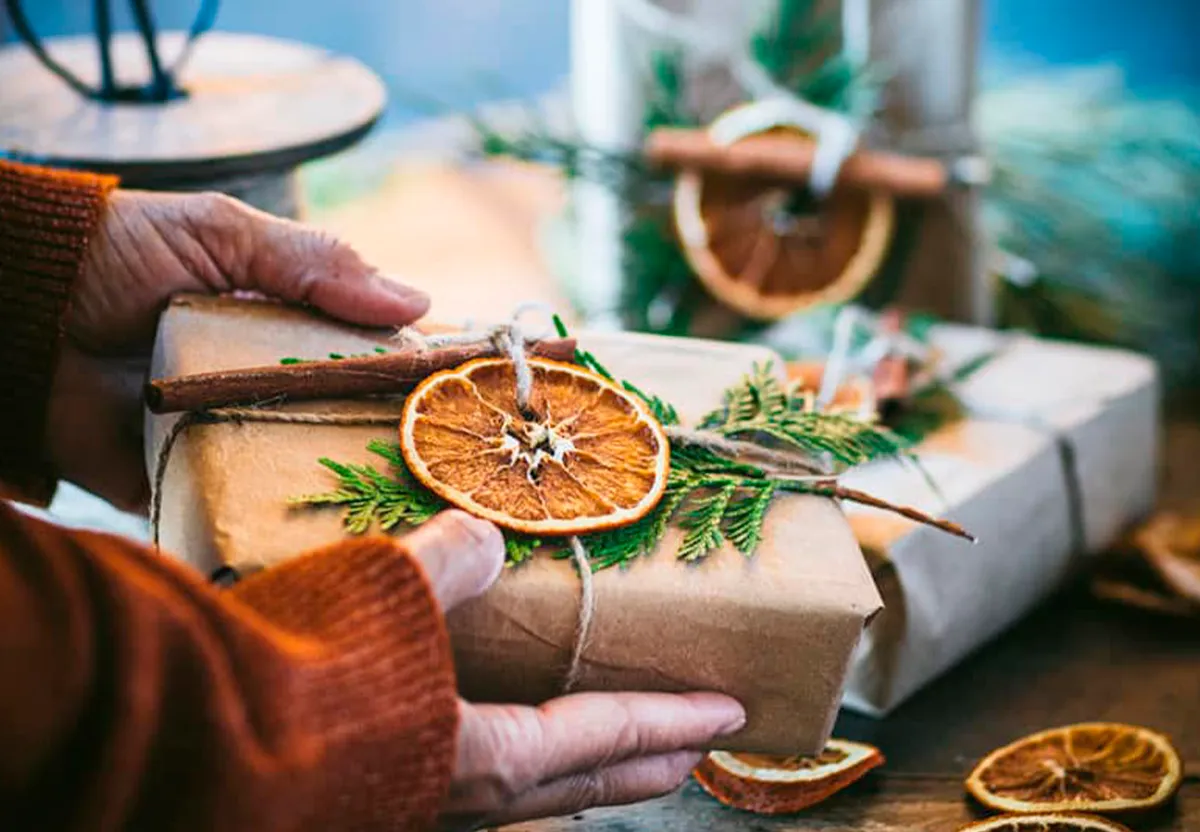
Sometimes keeping it simple is best. Use brown parcel paper to wrap your gifts and top with homemade dried oranges for a beautiful citrus scent and festive look. Find out how to make your own dried orange slices with Celebrate Creativity.
10. Polaroid photo present topper
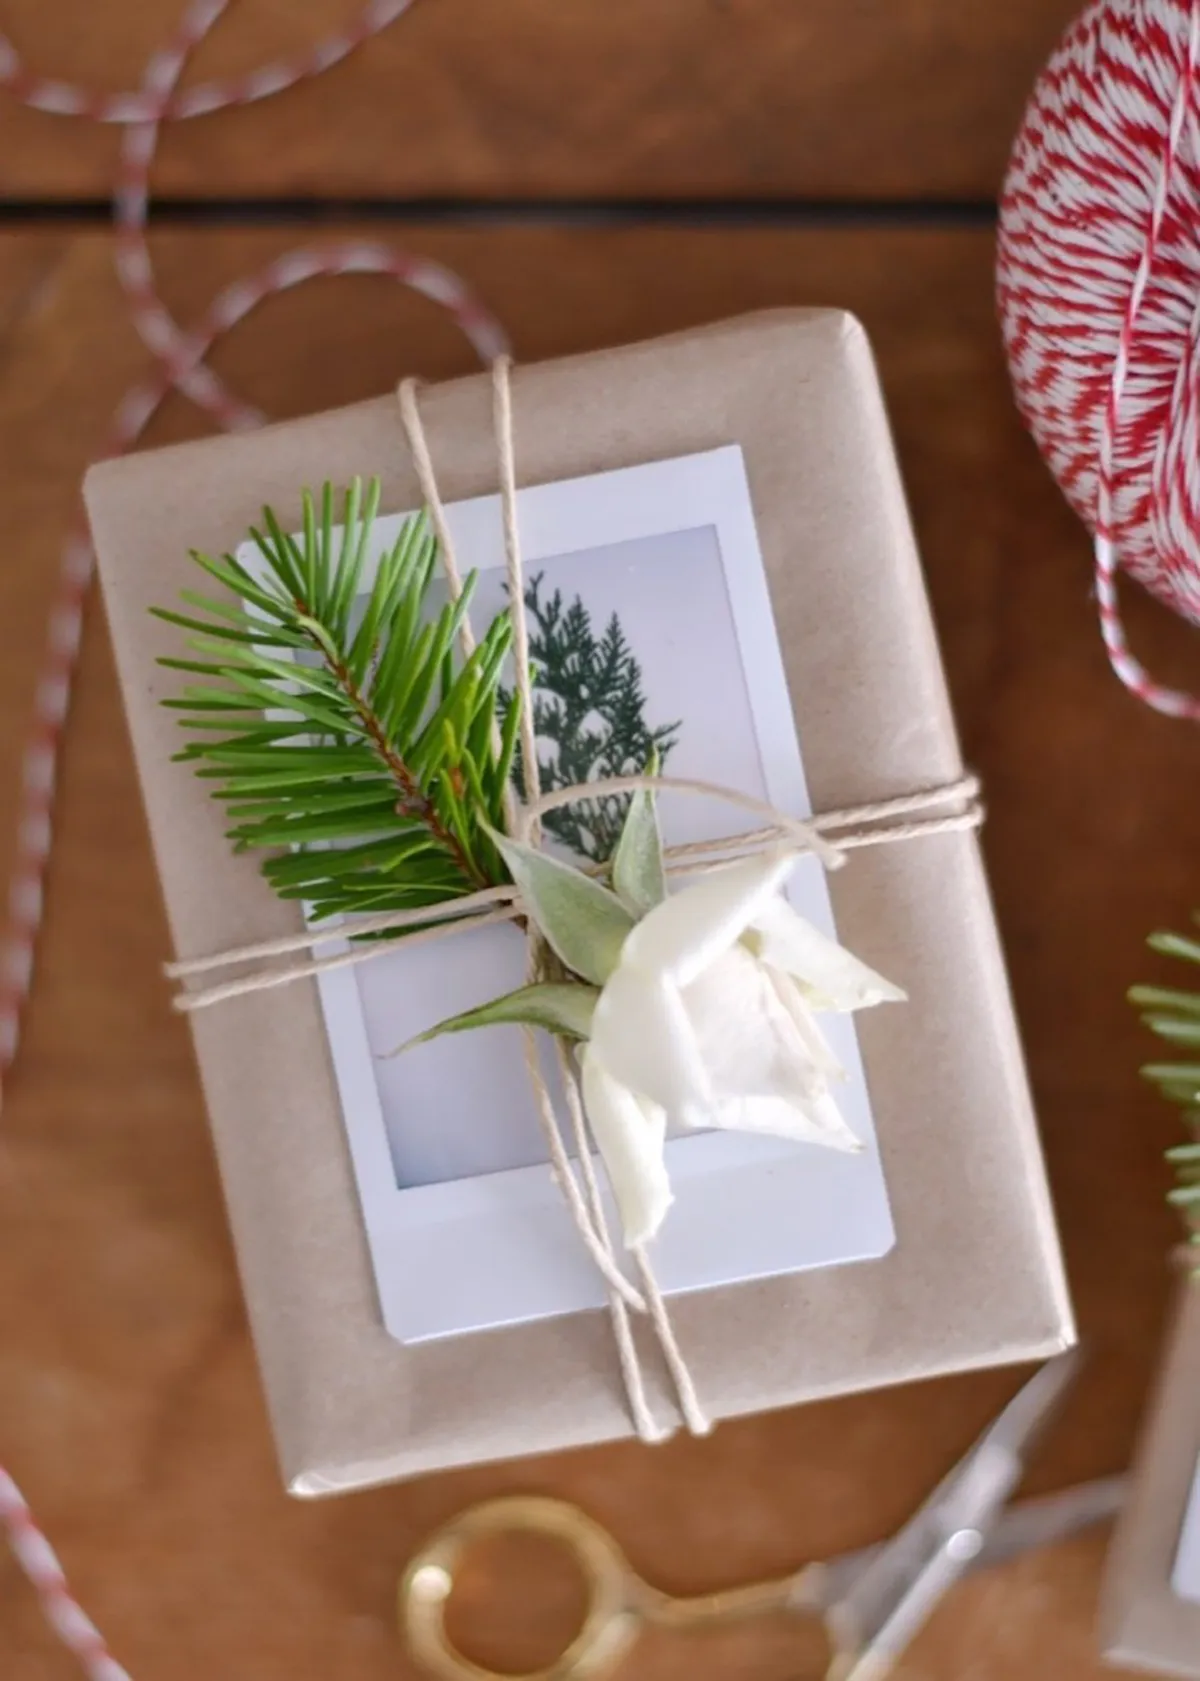
Make your gift personal by attaching a Polaroid picture to the top. It’s a great alternative to a gift tag, and looks so cool! If you want tips and advice on putting together your gift check out Darling Magazine.
11. Wrap your gifts with yarn
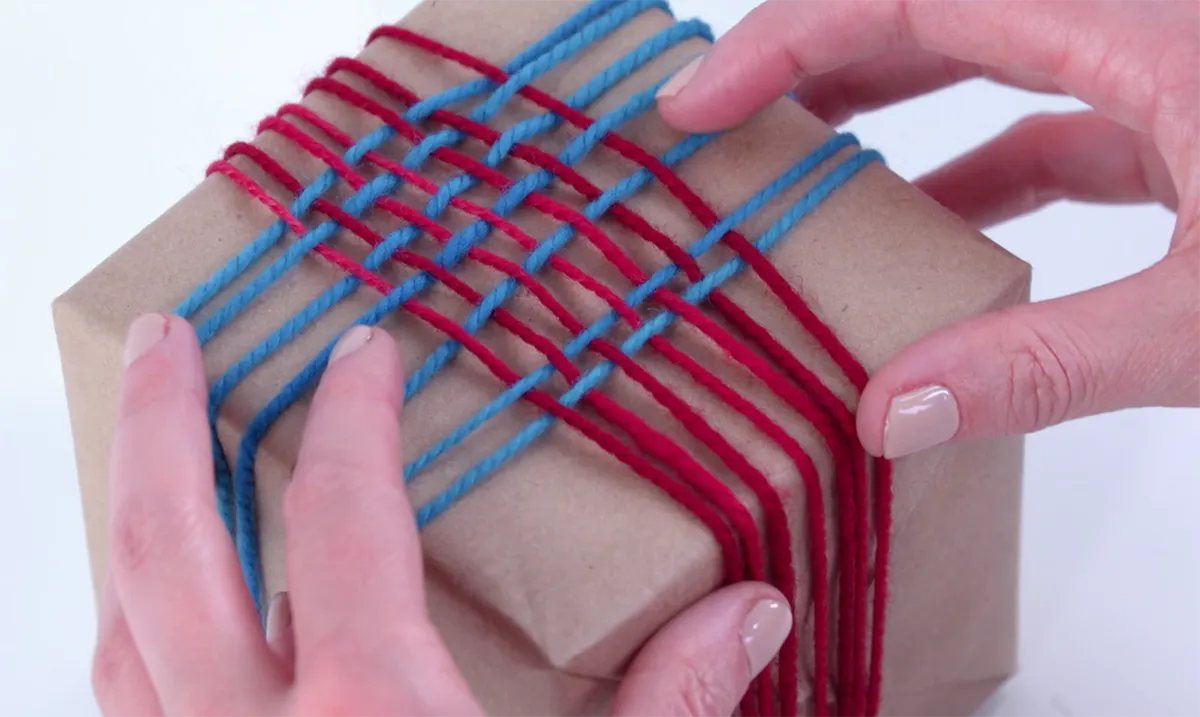
If you’re a knitter or crocheter it’s likely you’ll have some spare yarn in your stash. This tutorial from Craftsy will show you how to weave your yarn to your presents to create a fun decoration.
12. Candy cane topped gift wrapping idea
Make use of candy canes with this iconic Christmas gift wrapping idea from Nourish and Nestle. Use plain wrapping paper in brown or white to ensure your candy canes stand out.
13. Washi tape birthday candles
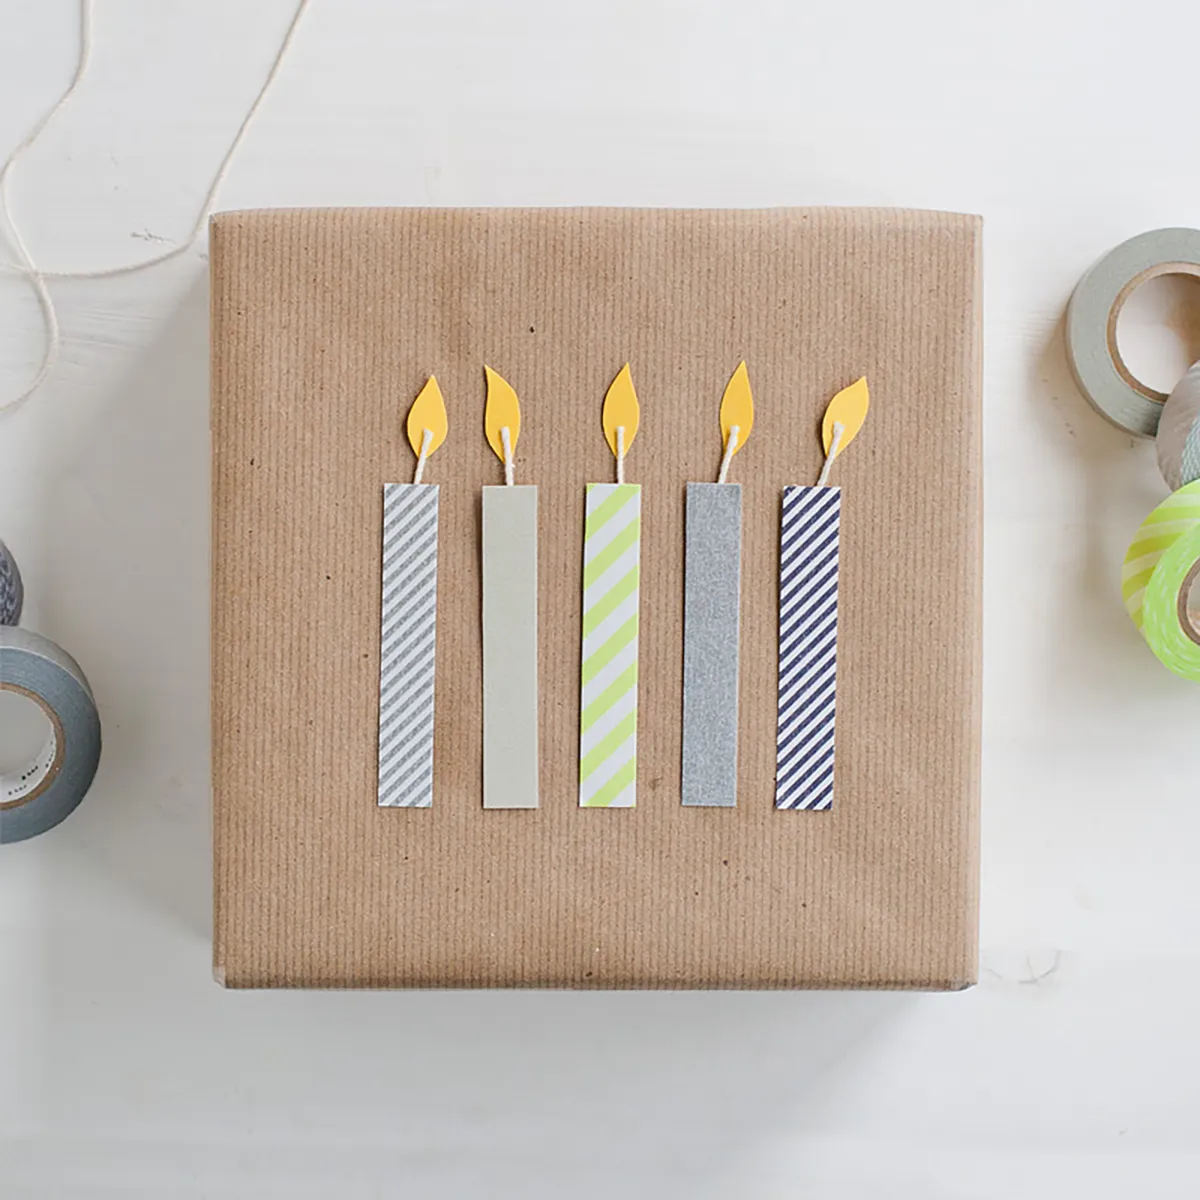
We love washi tape! It’s so versatile and is available in lots of different designs. Not only does it work in place of sticky tape but you can also use it to decorate your wrapped presents. In this guide, Anatasia Marie shows you how to use washi tape to create these cute birthday candles.
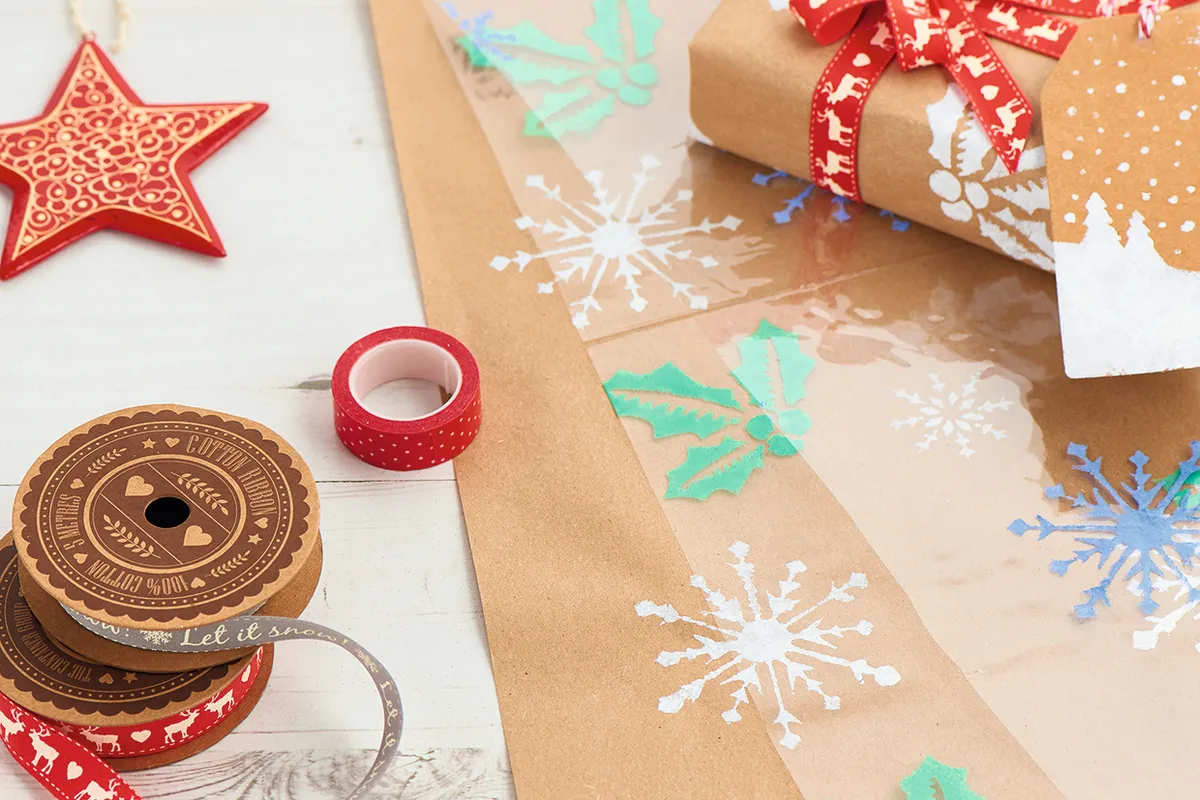
14. Sheet music gift wrapping idea
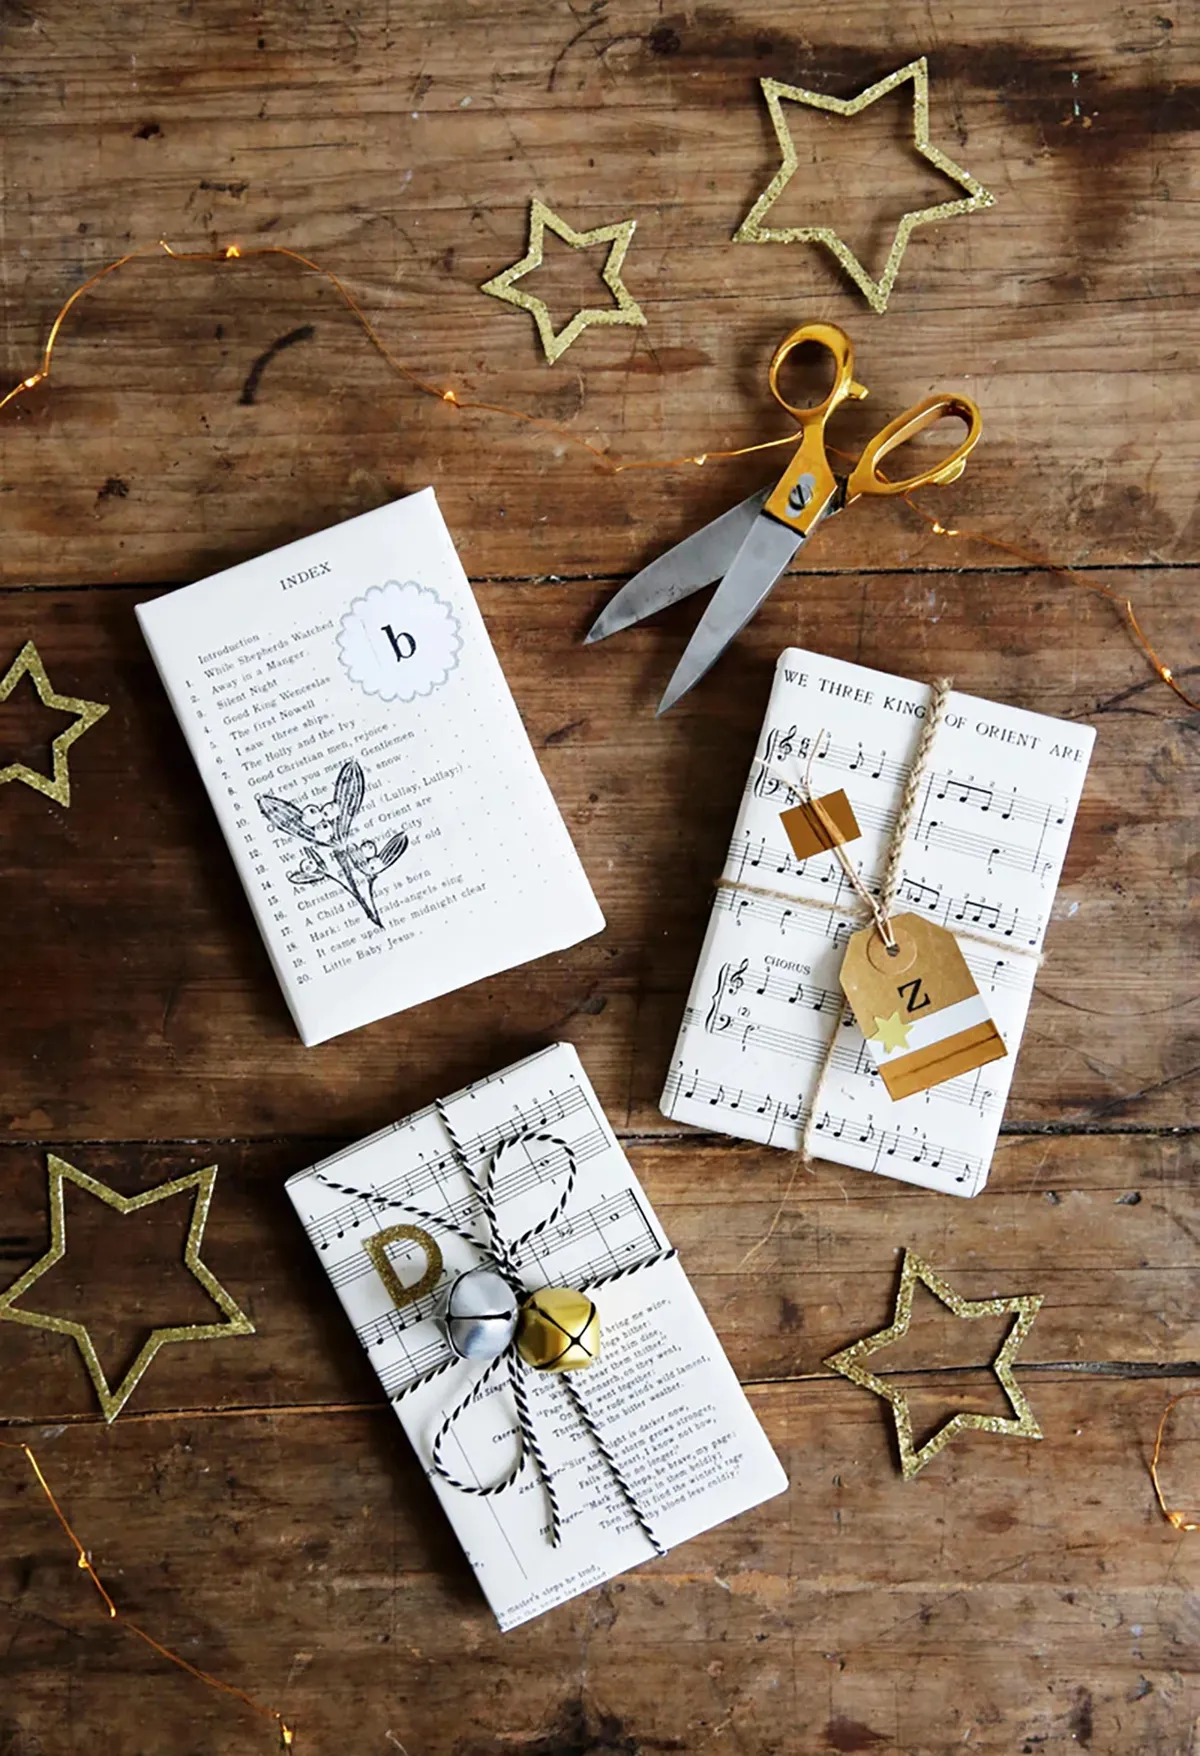
When we think of Christmas we think of carols so what better material to use for your gift wrapping than Christmas carol sheet music? It’s a fab way to add an extra layer of festive charm to your gifts. This tutorial from Paper Mash results in a vintage-style gift.
15. Natural gift wrap idea
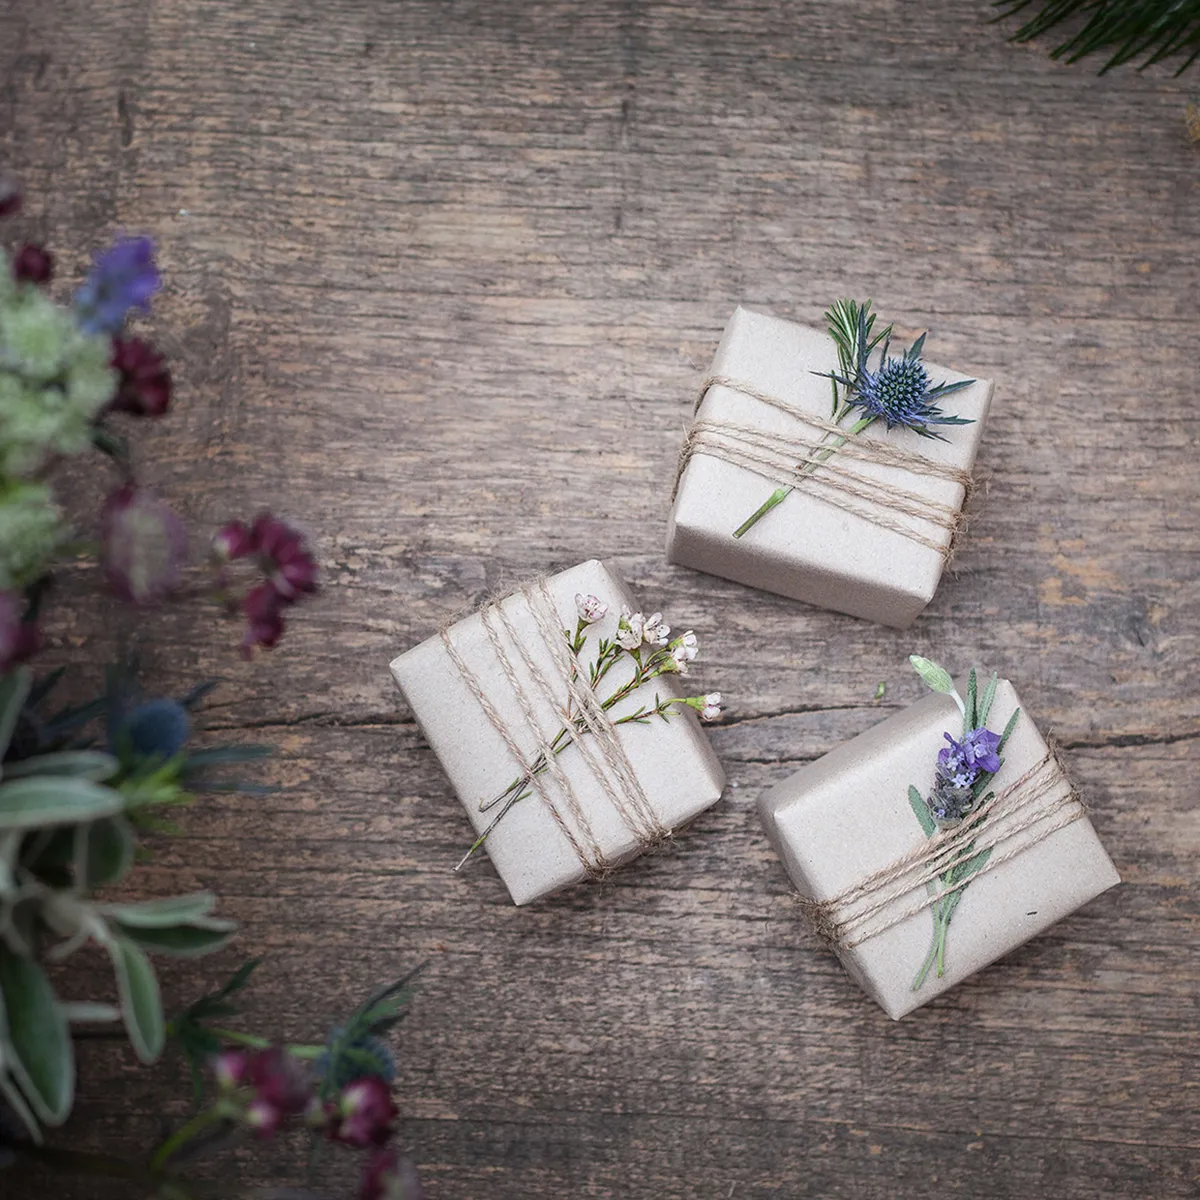
Keep it simple and natural with this gorgeous idea from Real Flowers. It involves wrapping your gift in brown paper and adding twine around it. Once your twine is in place you can add dried flowers. How pretty!
16. Photo wrapping paper idea
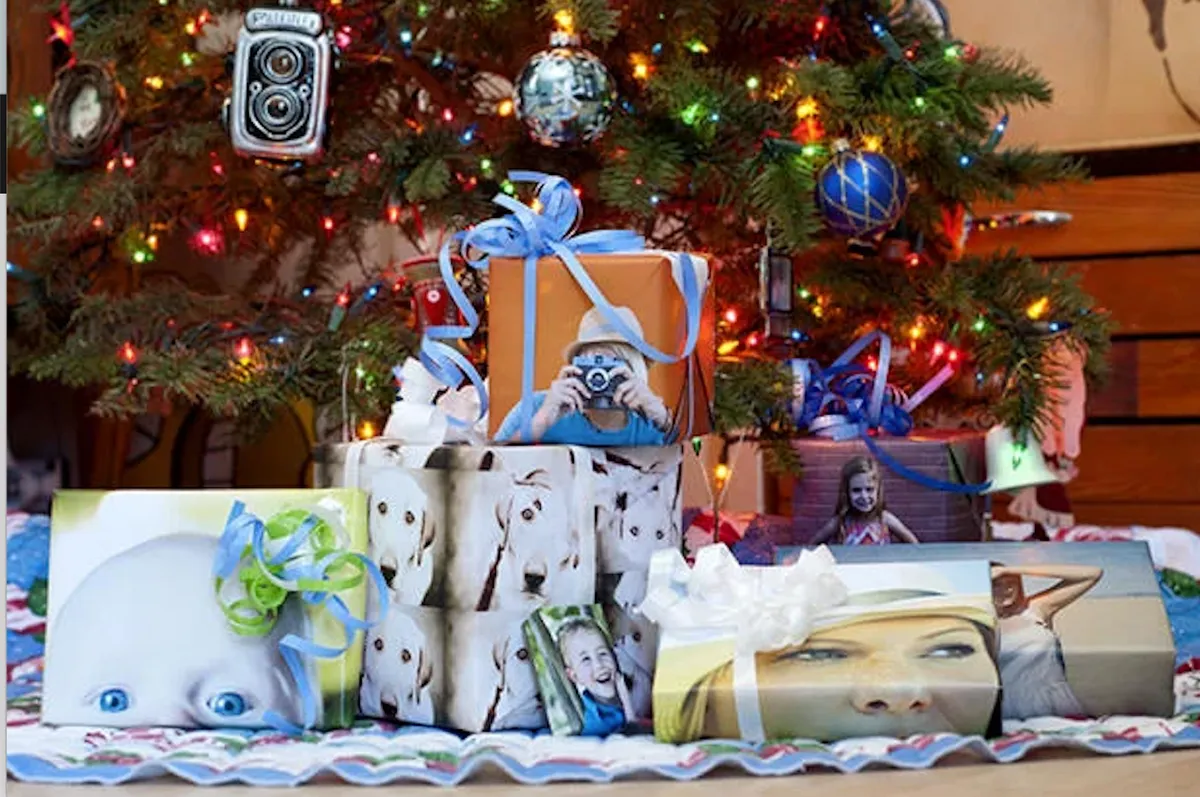
You can’t get much more personal than plastering your face all over your gifts! Make your friends and family laugh with you-wrapping paper. If you prefer a more wholesome style, then you can use group photos, special memories or even photos of your dog. Find the best technique to do this with Peta Pixel.
17. Real flowers wrapping paper idea
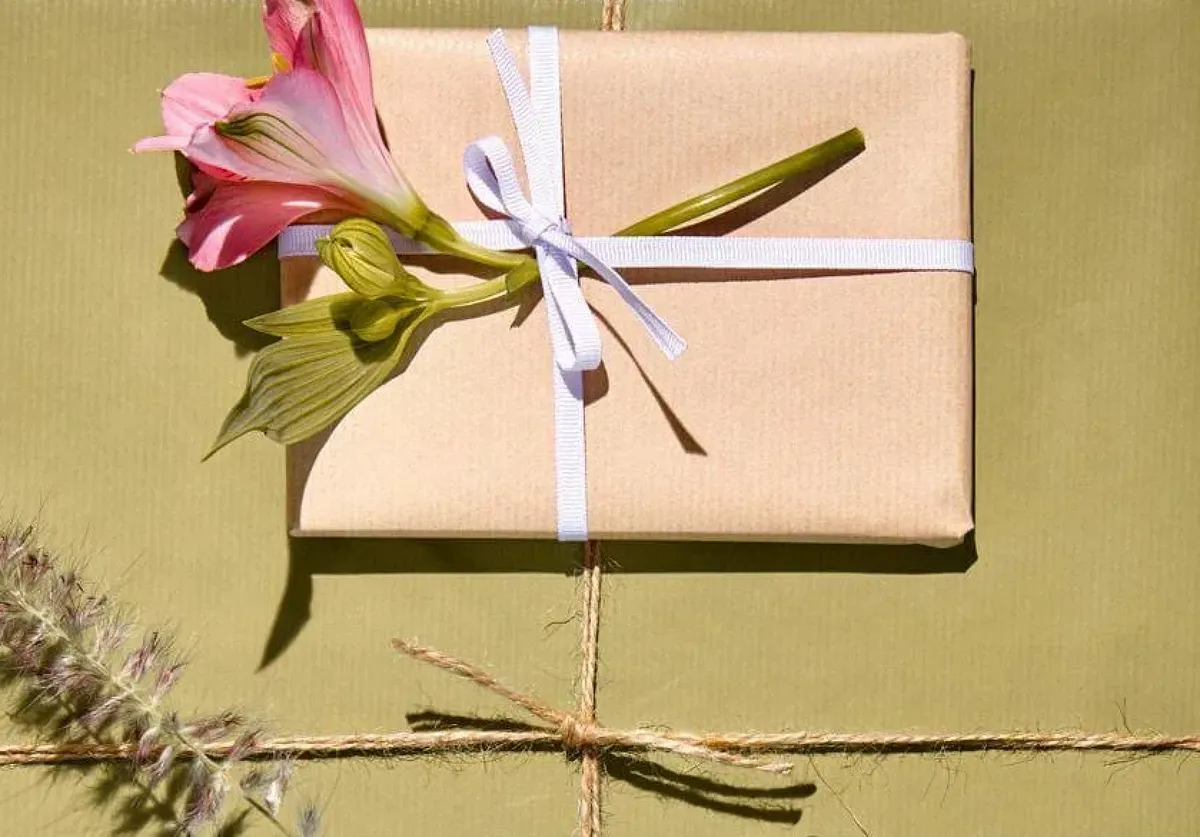
Who doesn't love the sweet smell of fresh flowers? With this lovely idea from Bloomon you can not only give someone a floral gift but also treat them to their favourite flower. This one would work especially well for anniversaries or Valentine’s Day. We guarantee it will get you in the good books!
18. Stencils wrapping paper ideas
Whip up your handmade wrapping paper with our easy guide. In this tutorial, you’ll use acrylic paints and stencils to decorate plain paper. This is a low-cost and effective way to take your plain papers to the next level!
Easy gift wrapping projects to have a go at right now
19. Confetti gift wrapping idea

Make this surprise confetti gift wrap in just a few simple steps:
- To make the confetti, use a circular hole punch to cut shapes from red, gold, pink and white paper, or your choice of colours. Wrap the gift with plain wrapping paper and sticky tape first, then wrap it with a layer of cellophane, this time securing it with contrasting washi tape, and leaving one side open.
- Insert the handmade confetti between the plain gift wrap and the cellophane layer. Shake the gift slightly to move the confetti around so it’s evenly distributed.
- Once you’ve added the desired amount of confetti, finish wrapping the cellophane layer and close the final side with washi tape.
- Tie with coordinating velvet ribbon to finish.
20. Mini pom pom gift wrapping
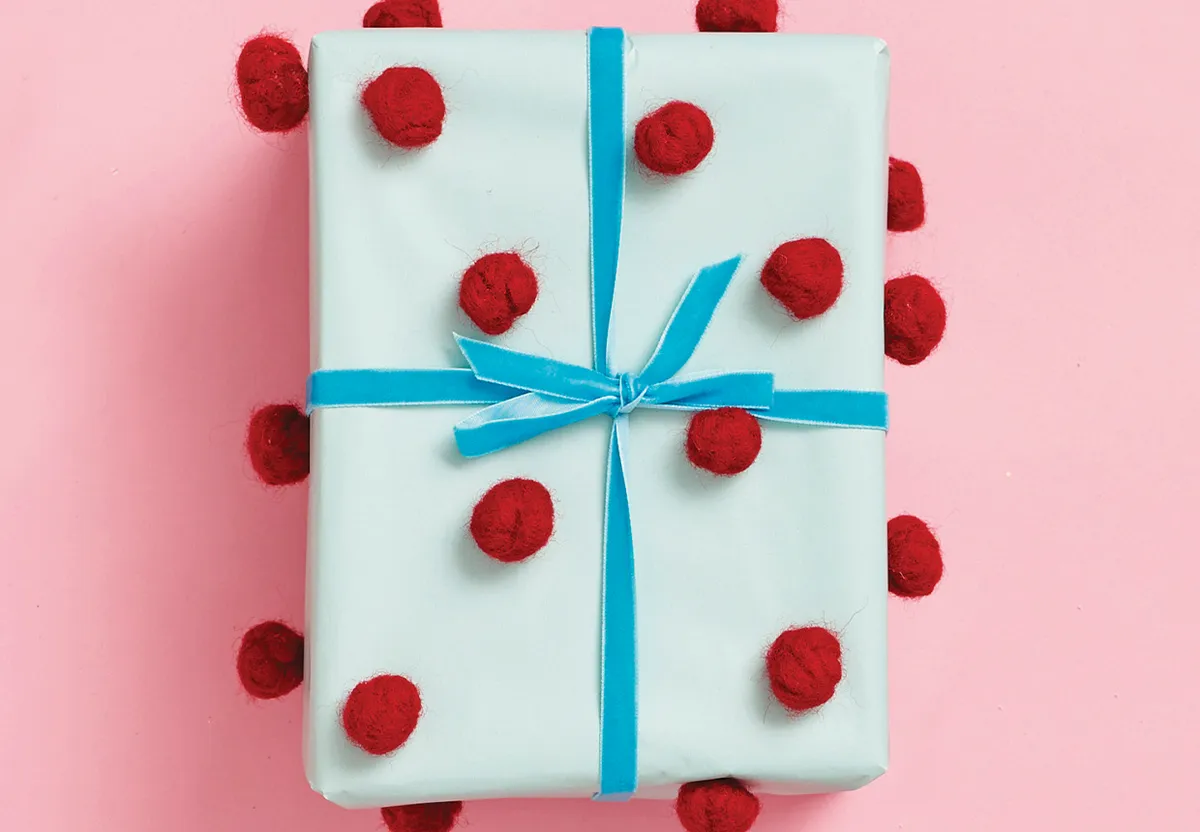
Attach pom poms to your presents for a fun look perfect for birthdays! Follow along with our quick guide:
- Wrap the gift with a layer of plain wrapping paper.
- Apply a small drop of glue to one of the felted pom poms (you can get these at most craft stores) and attach it to the top of the wrapped gift.
- Repeat, attaching pom poms to cover the top, then let the glue dry.
- Once the glue has dried, turn the gift to another side and attach a few pom poms to that side. Repeat until you’ve attached all the pom poms, leaving the underside of the gift free so it sits flat, and leaving enough space between the pom poms to tie with ribbon.
- Tie coordinating velvet ribbon around the gift to finish.
21. Papercut gift wrapping idea
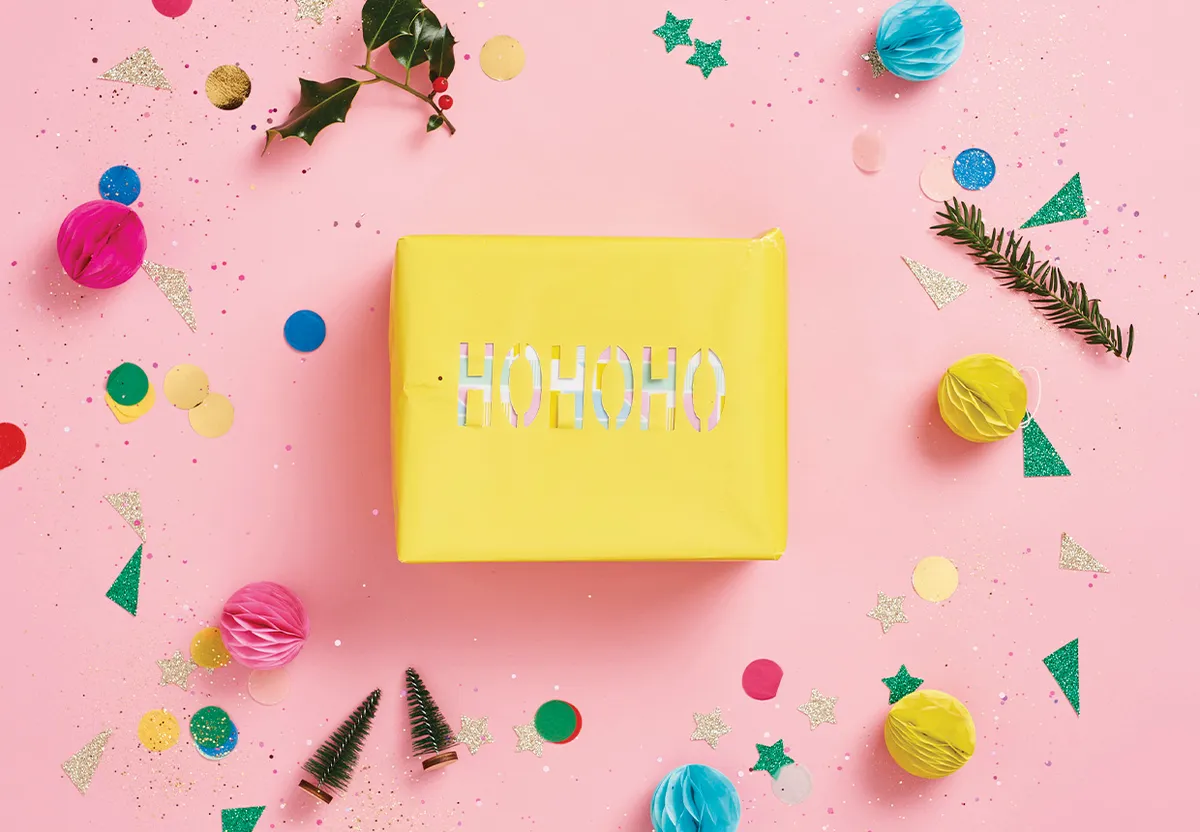
Use negative space to display a fun message or picture on your wrapping paper with our easy tutorial:
- Cut a piece of wrapping paper large enough to wrap your item. Place the piece of wrapping paper right side (RS) down on a flat surface. Place the gift on top and centre it. Trace the outline of the gift onto the paper. Now you can have fun making a stencil design (you can use a piece of card for this)! Or use a stencil you already have that fits your outline.
- Place the stencil RS down– the text or image should be mirrored – in the centre of the pencil outline on the wrapping paper.
- Cut all of the design out with a craft knife. Wrap the gift with a layer of contrasting or coordinating patterned wrapping paper first.
- Place the wrapping paper with the cut-out design on top of the wrapped gift, RS up.
- Centre the design and keep it in place while you flip the gift over. Wrap the gift neatly and secure the paper with washi tape to finish.
Wrapping gifts doesn’t have to be a chore
Even adding a small touch to your gift wrapping like a wax seal or dried flowers will elevate the aesthetic of your gifts. It makes them even more personal and memorable!
DIY gift box to make
Awkward item to wrap? Make your own gift box to ensure your item stays safe and looks fabulous!