All products were chosen independently by our editorial team. This review contains affiliate links and we may receive a commission for purchases made. Please read our affiliates FAQ page to find out more.

Easy baby quilt pattern – DIY half square rectangles quilt

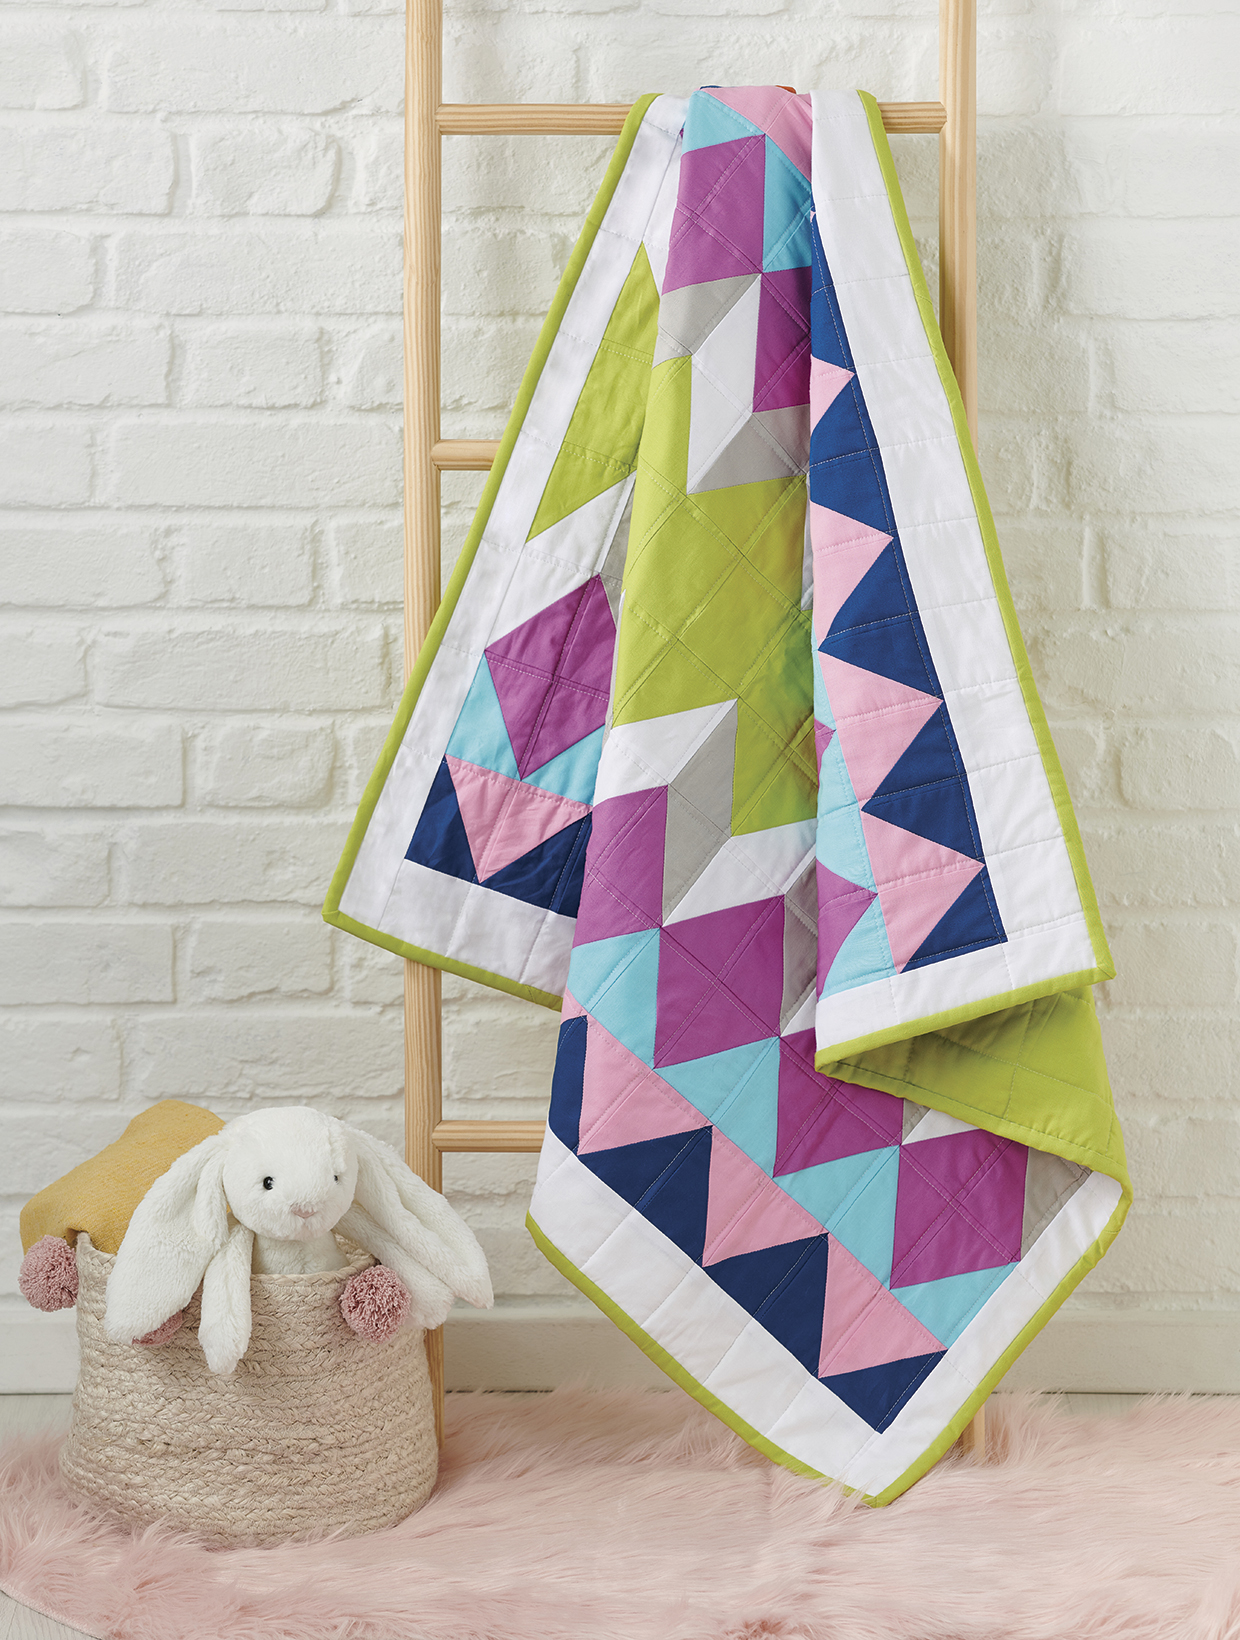
Mix and match Half-rectangle Triangles to make a graphic baby quilt with a geometric colour pop finish

Try 6 issues of Love Patchwork & Quilting magazine for £9.99| SAVE 76%

Published: April 2, 2021 at 6:20 pm

We've got the perfect quilt for you to make in a weekend. This modern geometric pattern is a great beginner quilt project as you won't need to master any advanced patchwork techniques to make it take shape. We've created it as a baby quilt but you could easily adapt it with your favourite colours to add a splash of colour to your sofa by turning it into a lap quilt.

The patchwork on the front of the quilt is made from simple solid fabrics, cut into half square rectangles, then sewn together to whip up a quick quilt top. Complement the sharp piecing by quilting the sandwich together with straight lines. If you're new to making quilts, or this is your first one, head over to our guides to quilting for beginners and how to bind a quilt.

This quilt was designed by Lou Orth for Love Patchwork & Quilting magazine.

How to make an easy half square triangles quilt

You will need

  • Fabric A (white) 58 yard
  • Fabric B (grey) ½yd
  • Fabric C (light pink) one (1) fat quarter
  • Fabric D (navy) one (1) fat quarter
  • Fabric E (turquoise) one (1) fat quarter
  • Fabric F (purple) ½yd
  • Fabric G (green) (includes binding) ¾yd
  • Wadding: 44in square
  • Backing fabric: 1¼yds
  • Sewing machine
  • Iron
  • Basic quilting supplies

Fabrics used

  • All fabrics are Kona Cotton Solids by Robert Kaufman in White, Ash, Carnation, Prussian, Bahama Blue, Gumdrop and Limelight.
  • Fabrics provided by Wool Warehouse

Finished size

38in x 36in

Notes

  • Seam allowances are ¼in, unless otherwise noted.
  • RST = right sides together.
  • WOF = width of fabric.
  • HRT = Half-rectangle Triangle.
  • Press all fabrics well before cutting.
  • Vlieseline 80/20 Cotton mix batting available from Lady Sew and Sew (ladysewandsew.co.uk)
Easy half square triangles quilt pattern

You will need:

  • Fabric (For the quilt top, backing and binding)
  • Wadding
  • Sewing machine
  • Iron
  • Basic quilting supplies

Cutting out

Step 1

From Fabric A cut:

  • Sixteen (16) 4¾in x 3¾in pieces.
  • Two (2) 35½in x 3in strips for the top and bottom borders.
  • Two (2) 37in x 2in strips for the side borders.

Step 2

From Fabric B cut:

  • Sixteen (16) 4¾in x 3¾in pieces.

Step 3

From each of Fabrics C, D and E cut:

  • Fourteen (14) 4¾in x 3¾in pieces.

Step 4

From Fabric F cut:

  • Thirty (30) 4¾in x 3¾in pieces.

Step 5

From Fabric G cut:

  • Sixteen (16) 4¾in x 3¾in pieces.
  • Fourteen (14) 4in x 3in pieces.
  • Five (5) 2½in x WOF strips for the binding.

Piece the Half Rectangle Triangle units

Step 1

To make the Half-rectangle Triangles (HRTs), pair up your 4¾in x 3¾in rectangles into the following combinations:

  • Fabric C/D: fourteen (14) pairs.
  • Fabric E/F: fourteen (14) pairs.
  • Fabric B/F: eight (8) pairs.
  • Fabric A/F: eight (8) pairs.
  • Fabric A/G: eight (8) pairs.
  • Fabric B/G: eight (8) pairs.

Step 2

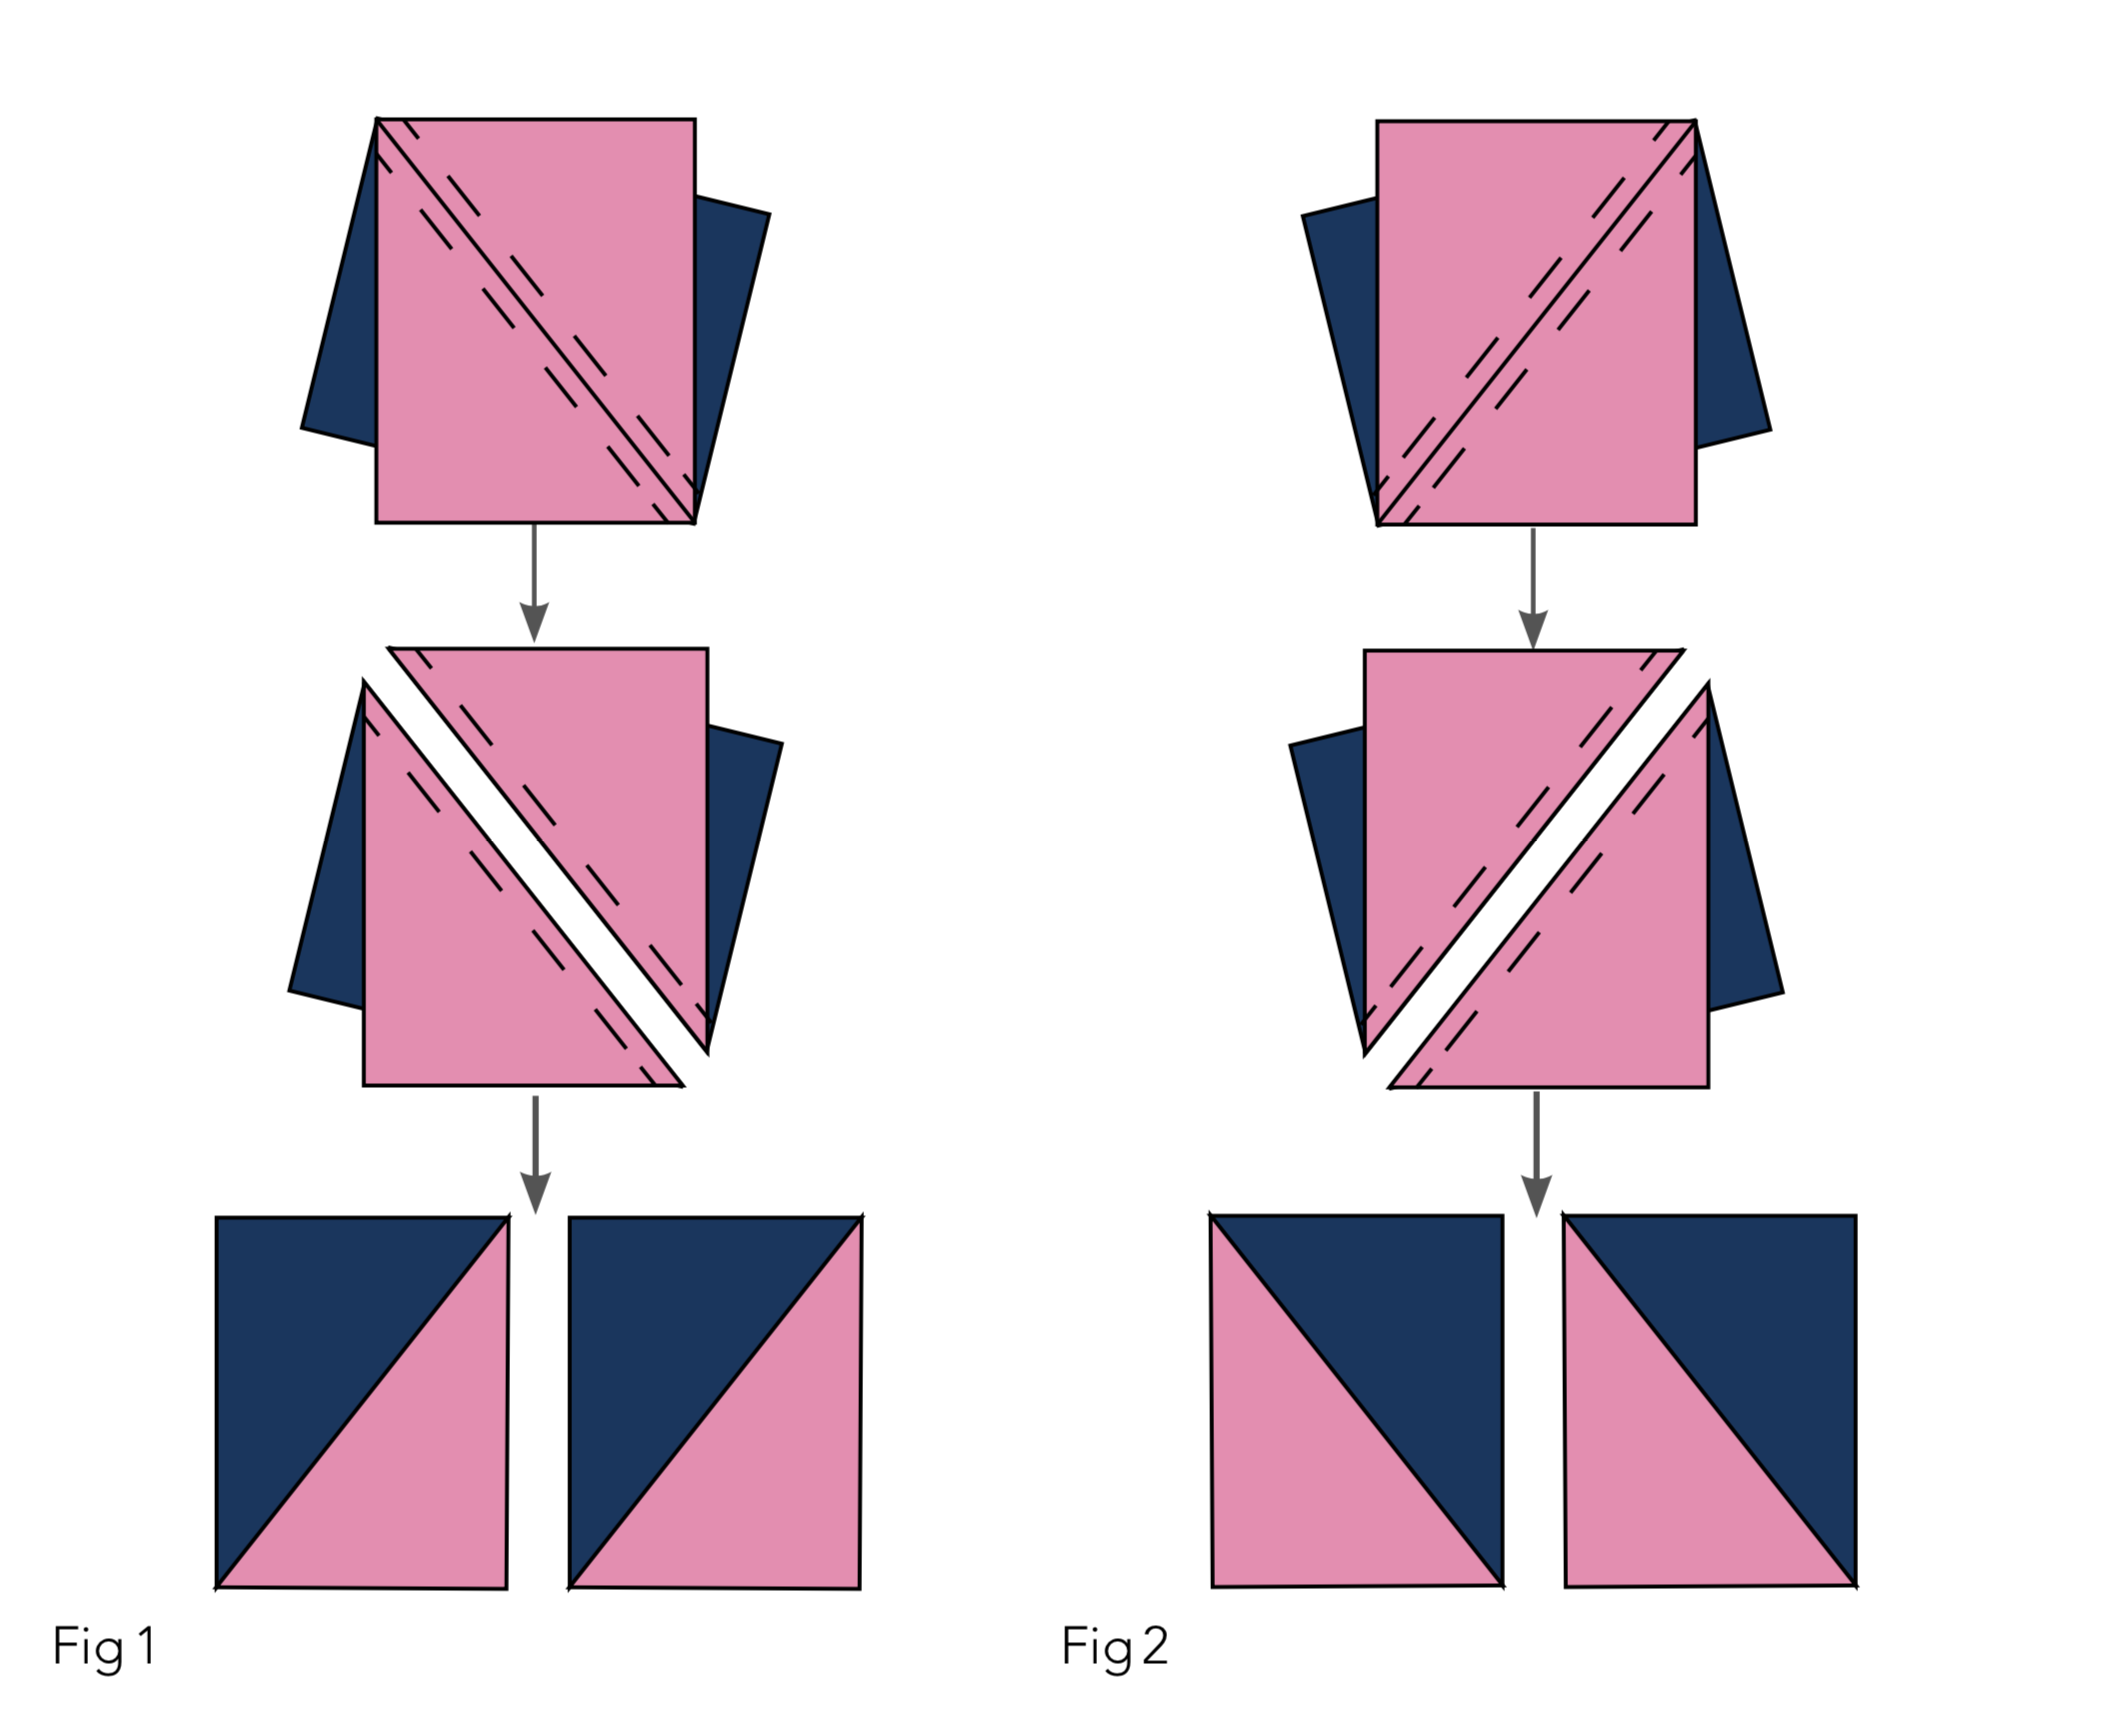
Take one pair of Fabric C/D rectangles. Draw a diagonal line from the top left to bottom right on the wrong side of one rectangle. Place the two rectangles RST, then rotate one rectangle to match opposite corners. Sew a scant ¼in either side of the drawn line. Cut along the marked line and press open to make two HRT units (Fig 1). Repeat with six more pairs to make a total of fourteen HRT units.

Easy quilt pattern Figures 1-2

Step 3

Repeat step 7 with the remaining Fabric C/D pairs, drawing the diagonal line in the opposite directions to make fourteen mirror image HRT units (Fig 2).

Step 4

Repeat steps 7–8 with the Fabric E and F pairs. Repeat steps 7–8 again with the remaining fabric pairs to make eight regular and eight mirror image HRT units for each of the Fabric B/F, Fabric A/F, Fabric A/G and Fabric B/G pairs.

Step 5

Trim all the HRT units to 3in x 4in, making sure the seams are aligned at the corners.


Step 6

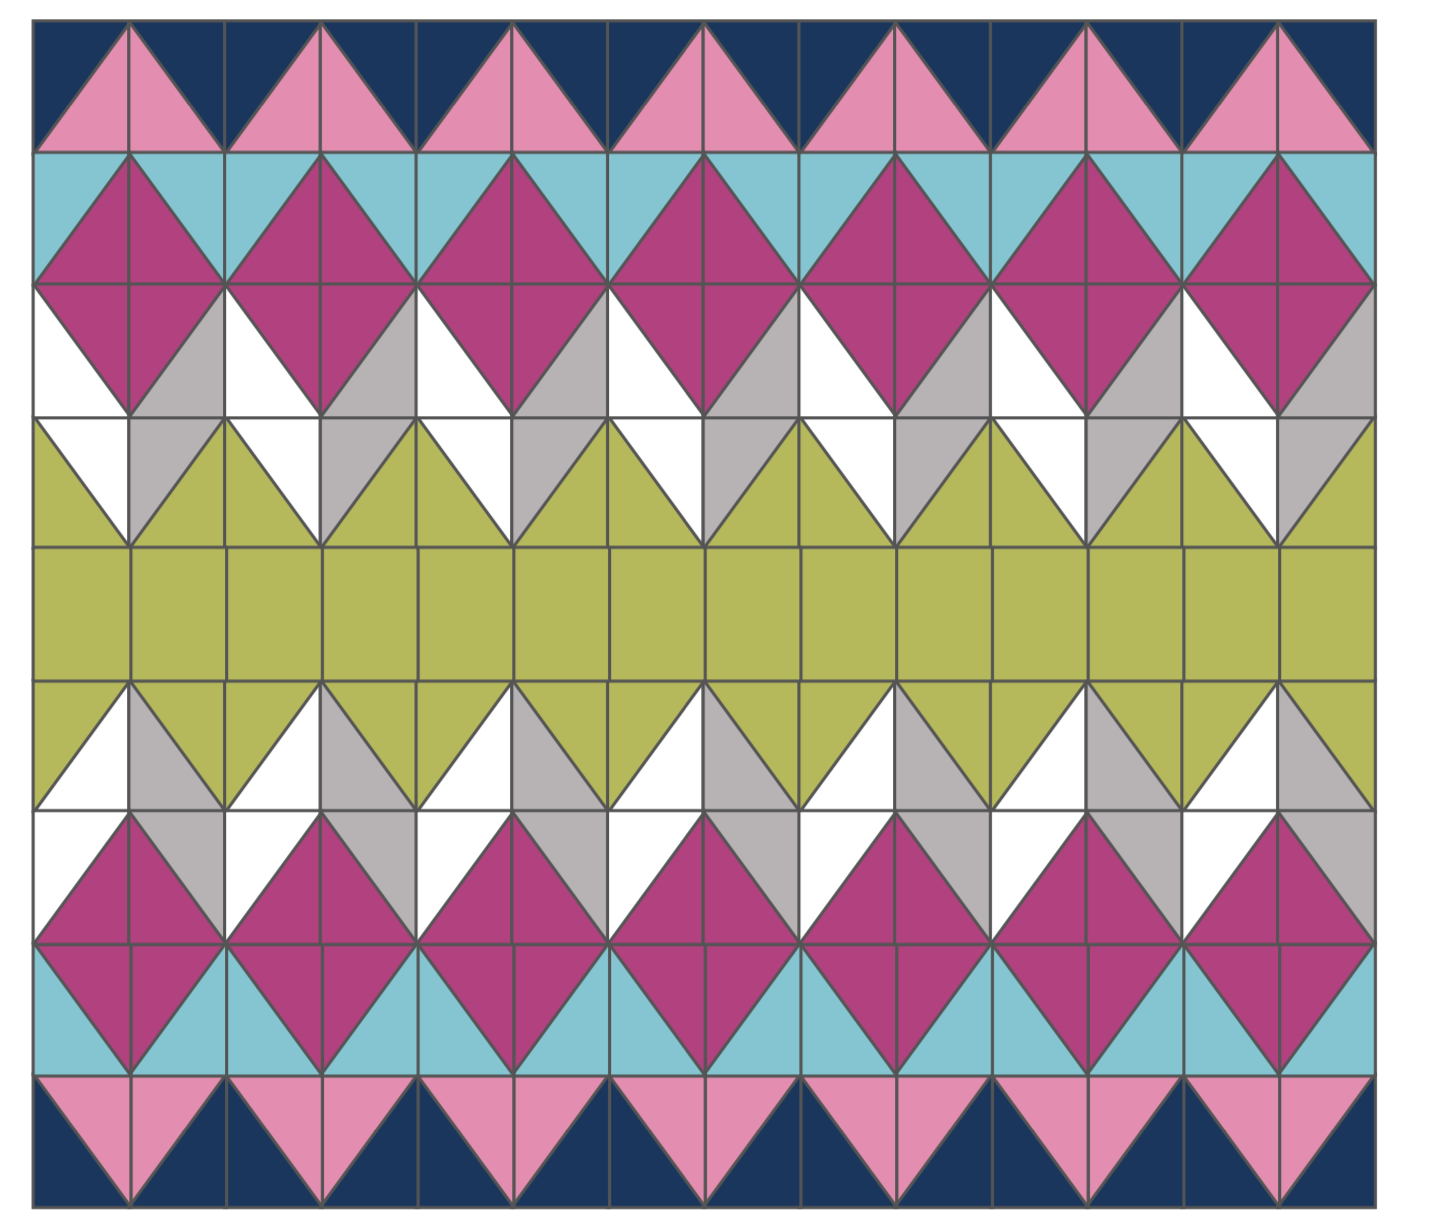
Arrange the HRT units and remaining Fabric G rectangles in nine rows of fourteen, referring to the Layout Diagram for placement. Note, you will have one regular and one mirror image unused HRT unit from each of the sets of eight. Discard or save for another project. Sew the units in rows, then sew the rows together, carefully matching seams.

Half square triangles quilt pattern Layout Diagram
Layout diagram
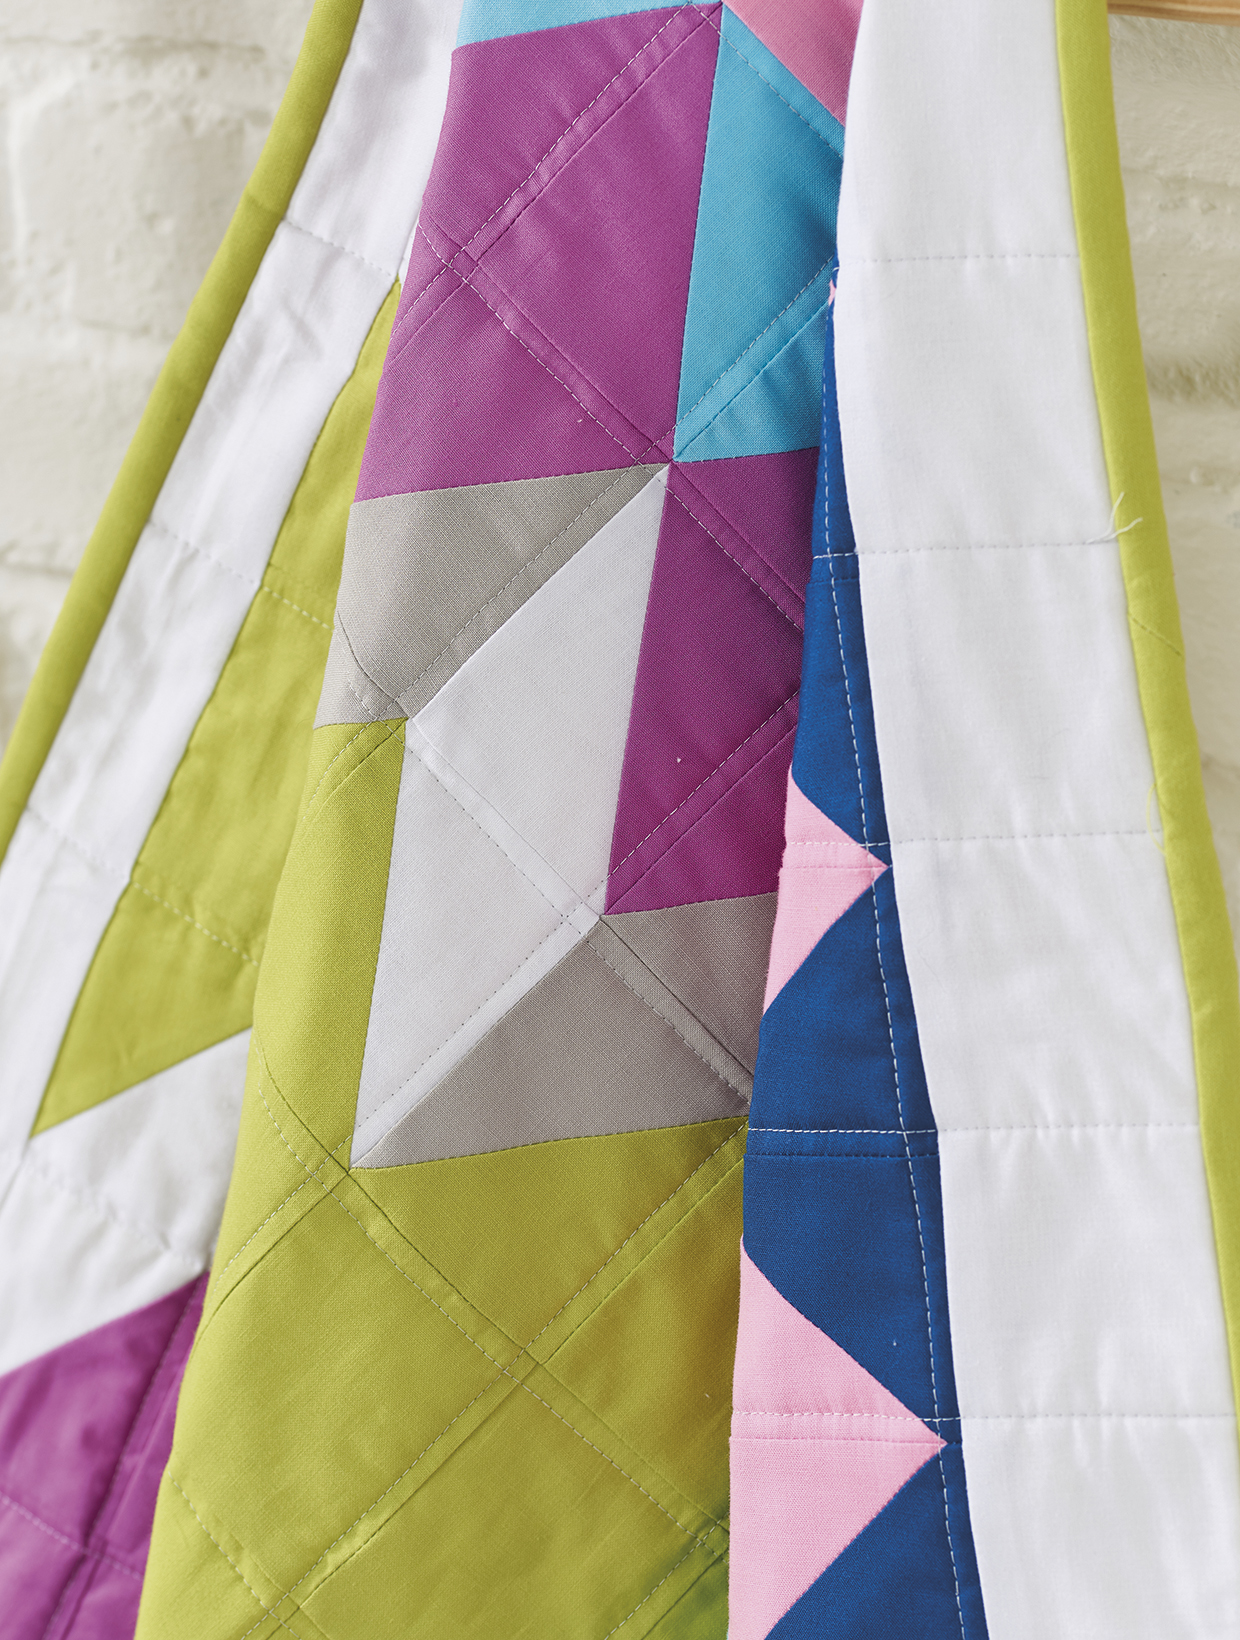
Easy quilt pattern half square rectangles

Step 7

Sew the white 3in x 35½in strips to the top and bottom of the quilt top, pressing seams toward the strips. Sew the 2in x 37in strips to either side, again pressing seams toward the strips, to complete the quilt top.


Quilting and finishing

Step 1

Press the quilt top and backing well. Make a quilt sandwich by placing the backing fabric right side down, the batting on top, then place the quilt top centrally and right side up. Baste the three quilt layers together using your preferred basting method.

Step 2

Quilt as desired. Lou quilted a grid of horizontal and vertical straight lines, roughly ¼in from the seams, using a light coloured thread. Trim off the excess batting and backing fabric and square up the quilt to measure 38in x 36in.

Step 3

Sew the binding strips together end-to-end using diagonal seams. Press the seams open. Fold the joined strip in half lengthways, wrong sides together, and press.

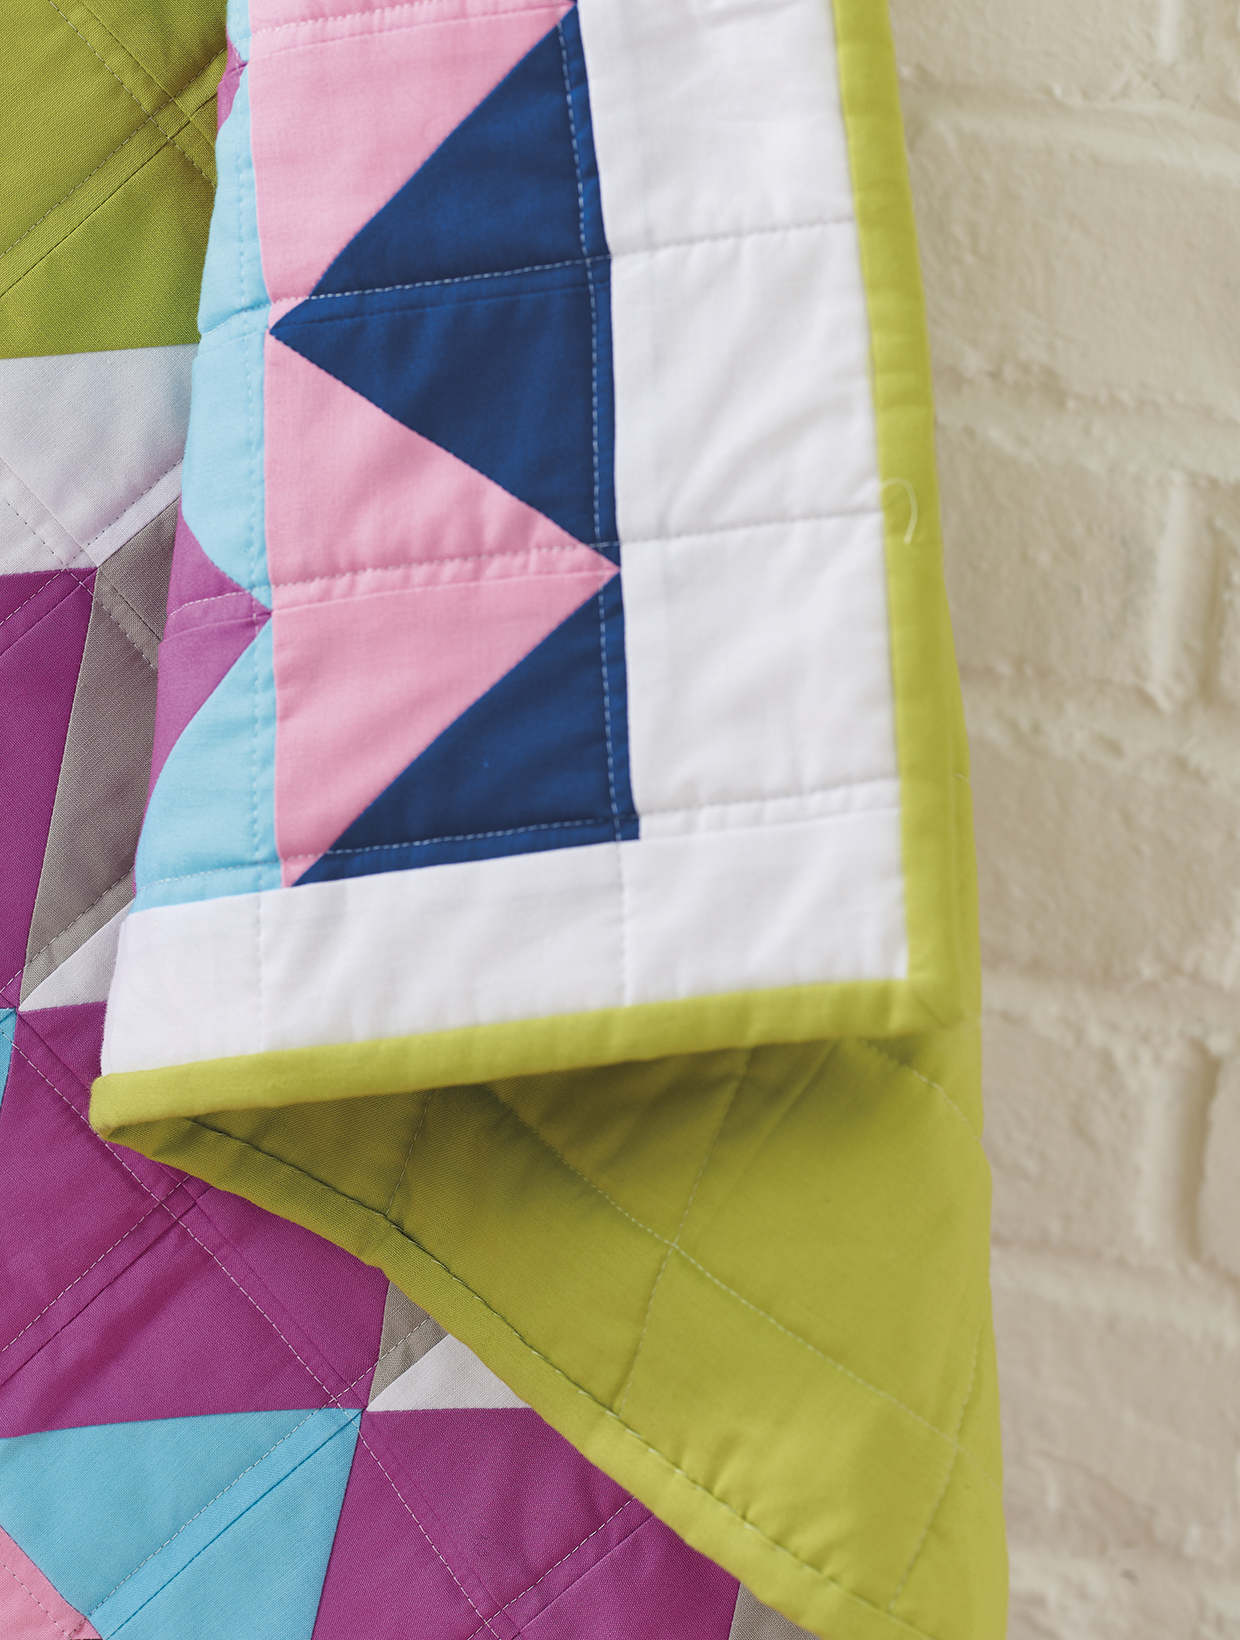
Easy quilt pattern detail

Step 4

Sew the binding to the right side of the quilt, creating a neat mitre at each corner. Fold the binding over to the back of the quilt and hand stitch in place to finish.


Easy quilt pattern