Transform solid fabric scraps into crisp and colourful patchwork apples with Kate Basti's apple quilt pattern – perfect for teacher gift or modern quilt makers on the hunt for fun quilt ideas
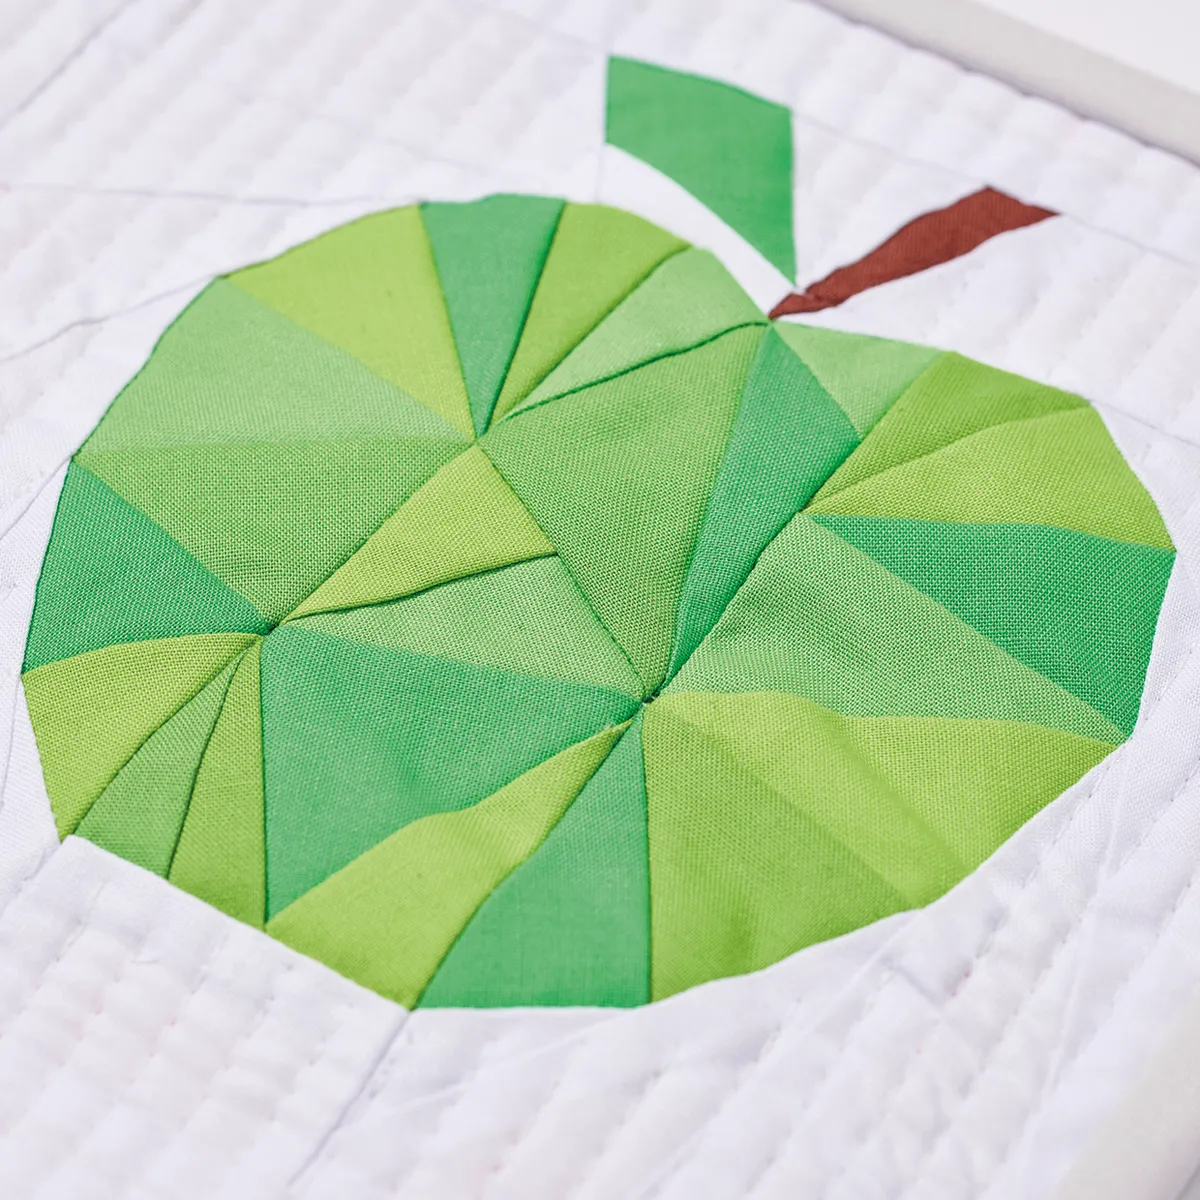
OK people, are you ready for our most fun quilting project yet? Reach for your favourite fabric scraps and play with the clever technique of foundation paper piecing to make your very own patchwork apples! If you’ve never tried paper piecing before, it’s a clever way of sewing several small pieces of fabric to a paper template (in reverse order!) to create really quite magically intricate quilt patterns.
Not sure where to begin? Head over to our beginner’s guide to foundation paper piecing. Why not use a sweet apple printed fabric for your backing fabric to complete the fruity look? A good tip is to mix and match the shades of solid scrap fabric you use to sew each apple – to create a subtly varied look which still stands out as one block of colour when you step back and look at the finished quilt from afar. If you like modern quilt projects, check out our round-up of our favourite quilting trends for a good dose of modern quilt inspiration.
Fabric (For the quilt top, backing and binding (see fabric requirements))
Wadding
Sewing machine
Paper
Basic quilting kit
Total time:
Cutting out
Step 1
Download the apple FPP templates (above). From each of the red, green, yellow and background fabrics, prepare pieces for the FPP templates by cutting them roughly to the shape of sections, referring to the photo for colour placement. The pieces need to be at least ¼in bigger all round than the section on the template.
Step 2
From the binding fabric, cut three (3) 2½in x WOF strips.
Piecing the apple quilt blocks
Step 1
Take one FPP Template A and one Section A1 red fabric piece. Place the fabric right side up on the unprinted side of the template against Section A1. Ensure that the fabric covers the whole section, plus at least ¼in all round (Fig 1). Pin in place, making sure not to pin along the seam line between Sections A1 and A2.
Step 2
Take a Section A2 red fabric piece and place it right side own on top of the Section A1 fabric piece, matching up the raw edges on the side where Sections A1 and A2 will be joined and making sure that when folded back along the seam line, Section 2 will be covered by the fabric, plus at least ¼in all round. Pin in place.
Step 3
Turn the template over to the printed side and stitch along the marked line between Sections A1 and A2, backstitching at the beginning and end of the seam (Fig 2). Fold the template away from the seam and trim to ¼in. Fold the template back, turn the work to the fabric side, flip section A2 open and then press (Fig 3).
Step 4
Repeat steps 3–5 to piece FPP Sections A1–A10 on the template in numerical order. Repeat to piece FPP Templates B–E.
Step 5
Trim each pieced section along the dotted seam allowance line on the template. Arrange the sections as shown (Fig A).
Step 6
Take Sections A and B. Align the edges of both sections and stitch along the solid border line on the template, making sure to backstitch at the beginning and end of each seam (Fig B). Press seams open.
Step 7
Repeat step 8 to join the remaining sections in alphabetical order to complete one apple block (Figs C–D). Remove the templates, press and square up.
Step 8
Repeat steps 3–9 to FPP the yellow, green and red/yellow apples, making sure to position the coloured fabrics correctly in the red/yellow one.
Assembling the quilt top
Step 1
Arrange the apples into a four-patch layout as desired. Align the side edges of the top two apple blocks and join. Press seams open. Repeat to join the bottom two apple blocks.
Step 2
Join the top and bottom rows to complete the mini quilt top.
Quilting and finishing
Step 1
Make a quilt sandwich by placing the backing fabric right side down, the batting on top, then the quilt top centrally and right side up. Baste the layers together using your preferred method. If you’re new to making quilts, head to our guide to quilting for beginners to find out more about this step.
Step 2
Quilt as desired. Kate quilted vertical straight lines on the background fabric. This is a nice and simple quilting pattern to try if you’re new to quilting, and also looks clean and stylish if you’re more experienced but want to quilt in a way which doesn’t detract from the main patchwork design.
Step 3
Trim off the excess batting and backing fabric from all around the edges to “square up” the quilt.
Step 4
Join the binding strips together end-to-end using diagonal seams. Press the seams open and trim away the dog ears, then fold in half lengthwise, WST, and press. For more on this, and the steps below, see our guide to how to bind a quilt.
Step 5
Sew the binding to the front of the quilt, folding a mitre at each corner, then fold it over to the back of the quilt and hand stitch it in place to finish.
Advertisement
Your quilt is finished! If you’re fond of modern quilt patterns like this one, and foundation paper piecing, you might also like our guide to how to make fun dog quilts using foundation paper piecing, or our free weather foundation paper piecing patterns.
Quilt designer Kate made her first quilt in 2013 and has gone on to work with some of the quilt industry’s best-loved manufacturers and designers. She is a colour lover, English Paper Piecing addict and fussy cutting fan who talks about all things patchwork in regular column for Love Patchwork & Quilting magazine. She runs her own Etsy store, specialising in beautiful, eye-catching paper-pieced quilt patterns. See more of her work at www.quiltwithkate.com or find her on Instagram @katebasti
Advertisement MPU how_to
BONUS £10 Amazon.co.uk Gift Card when you subscribe! Choose your favourite magazine today.