Cutting Out
Step 1
From the Wiltshire Shadow Oyster White fabric (BKG), cut as follows:
- Four (4) 4½in x LOF strips for the outer borders
- Six (6) 2in x LOF strips for the sashing.
- One (1) 7¼in x LOF strip Subcut into six (6) 7¼in squares, cut these squares in half diagonally to yield twelve (12) half-square ending triangles.
Step 2
From thirty (30) of the Winterbourne fat eighths, cut one (1) 3½in x WOFQ strip. Subcut each of these into two (2) 9½in braid segments.
Step 3
Choose two (2) light prints for the nine-patches (Winterbourne Lois Daisy A and Lois Daisy B). From each of these fat eighths, cut one (1) 3½in x WOFQ strip. Subcut each of these into six (6) 3½in squares.
Step 4
From the accent print for the nine-patches, cornerstones and accent border, cut as follows:
- Seven (7) 2½in x WOF strips for the binding*
- Six (6) 1in x WOF strips for the accent border
- Four (4) 3½in x WOF strips. Subcut these into forty-five (45) 3½in accent squares.
Step 5
Cut the backing fabric into two (2) equal lengths.
Making the nine-patch centre blocks
Step 1

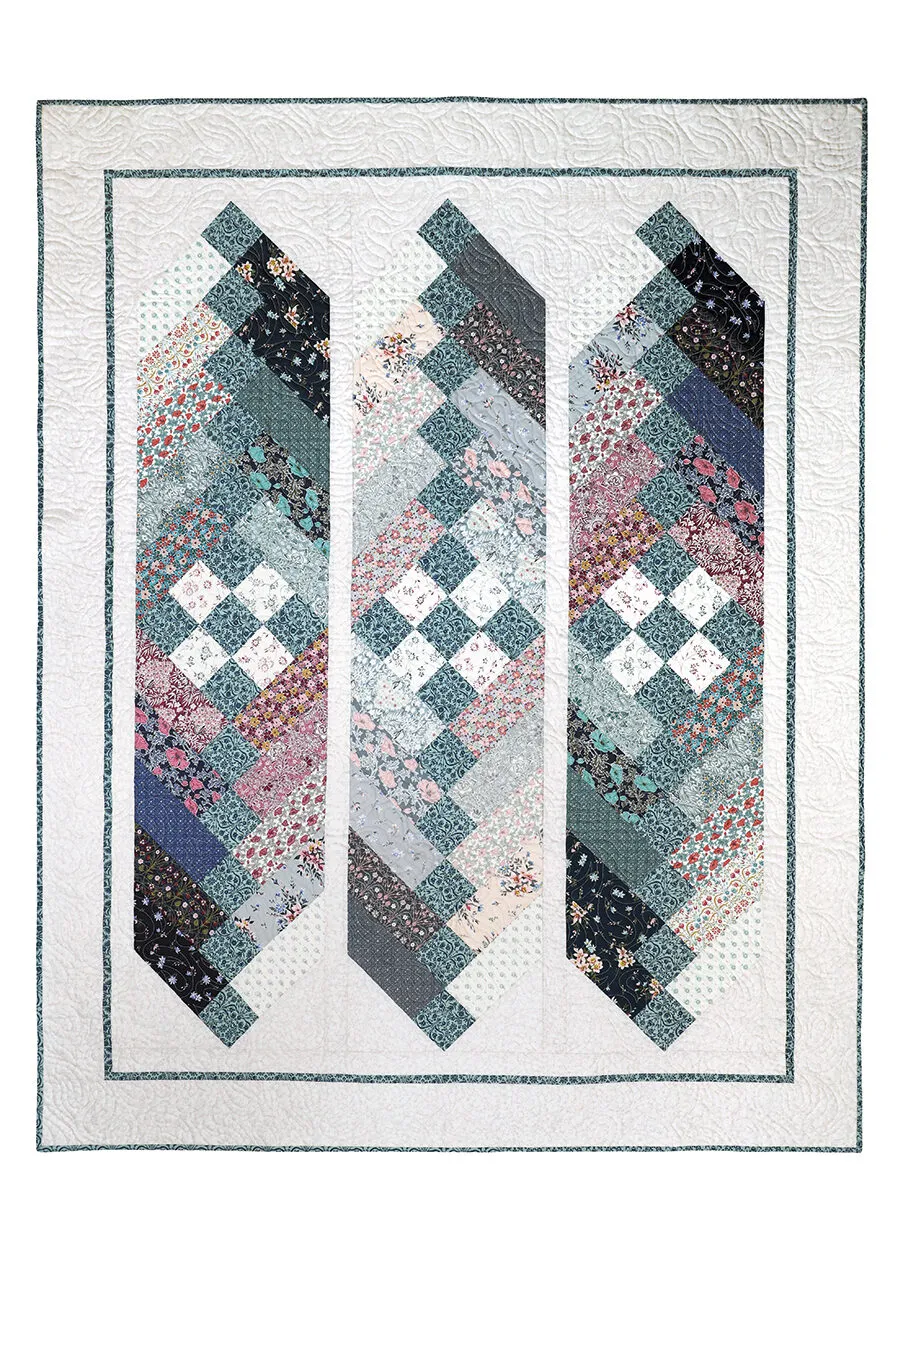
Arrange five (5) accent print 3½in squares, and two (2) of each of the light print 3½in squares into a nine-patch, as shown in Fig 1.
Step 2

Sew together in three (3) rows of three (3) squares, pressing the seam allowances in the direction of the arrows, then sew the rows together to complete the block, as shown in Fig 2.
Step 3
Repeat the above steps to assemble three (3) identical ninepatch blocks. The unfinished blocks should measure 9½in square.
Sewing the French Braid strips
Step 1

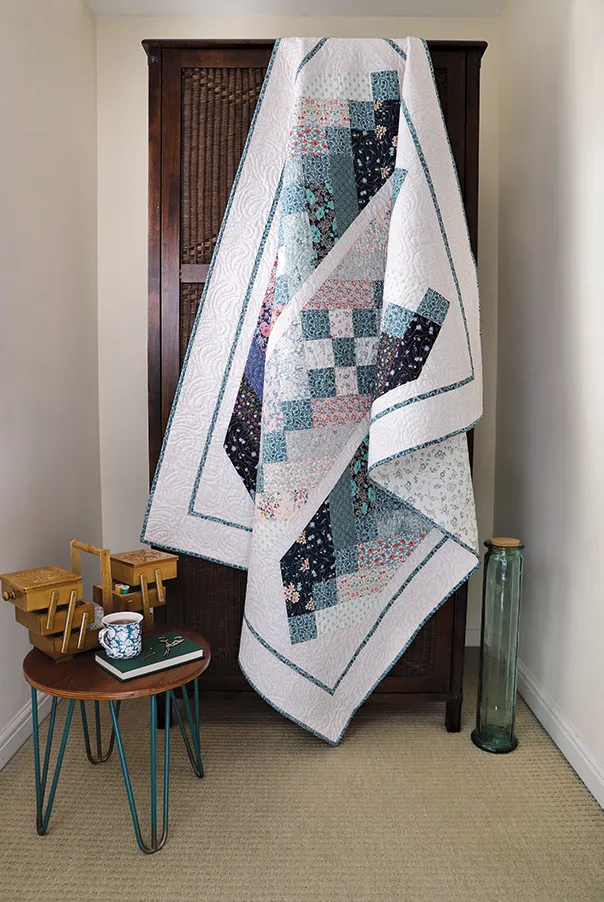
Arrange the braid segment fabrics until you are satisfied with their placement. For the sample quilt, Amanda achieved a mirrored ‘ombré’ effect, as shown in Fig 13
Step 2


Sew a 3½in accent cornerstone square to one short end of thirty (30) 3½in x 9½in braid segments. Press the seams towards the braid segments (Figs 3-4).
Step 3

With a starting nine-patch block right side up, place two (2) unaccented 3½in x 9½in braid segments right sides down on opposite sides of the block, matching the raw edges and 90-degree angles. Pin and sew to the top and bottom of the block. Press the seams towards the braid segments (Fig 5).
Step 4

Place two (2) accented (with cornerstones) 3½in x 12½in braid segments right sides down on the remaining sides of the block. Nest your seams for a perfect intersection, pin and sew. Press the seams towards the braid strips (Fig 6).
Step 5

Add the remaining braid segments in the same manner, alternating the unpieced and accented braid segments on the same sides each time (see Fig 7 for the sequence).
Attaching the half-square ending triangles
Step 1

Take one (1) BKG 7¼in half-square ending triangle and, placing with right sides together, line up its long side with the left side of one completed braid strip. The long side edges of the triangle should extend past the centre point of the braid strip by ¼in, but should finish approximately 2½in short of the end of the braid strip (Fig 8).
Corner extends ¼in beyond point of square
Step 2
Pin the edges together to avoid stretching the bias; flip the entire unit over so that the triangle is on the bottom and sew. Press the seam allowance towards the triangle.
Step 3
Join another half-square ending triangle to the right side of the completed braid strip in the same manner. Again, press the seam allowance towards the triangle. Trim across the top of the ending triangles to remove the dog ears.
Step 4
Repeat the process to join the remaining ten (10) half-square ending triangles to both ends of all three (3) completed braid strips.
Adding the sashing strips
Step 1

(Mark line 6⅝in from centre. Line should be ¼in beyond points of rectangles)
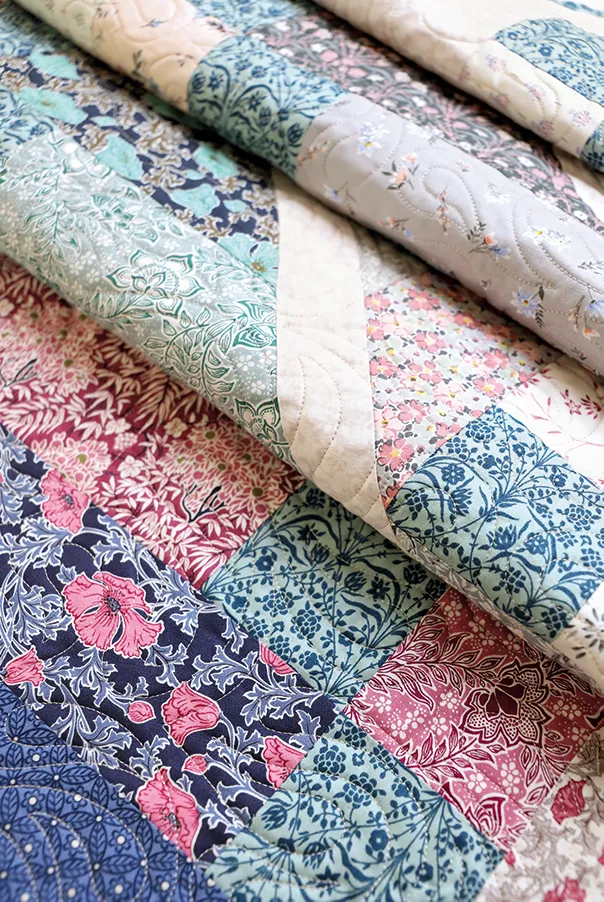
Press the braid strips well, taking care not to stretch them. Align the long side of your acrylic ruler so that the 6⅝in mark passes vertically through the centre of the accent squares and the ninepatch block and draw a pencil line at the zigzag edge as shown in Fig 9 (do not trim yet). Since the fabric shifts easily, make short overlapping pencil strokes. Measure the length of each braid strip through their centres from top to bottom. If you have cut and sewn your braid strips accurately, they should measure 55¾in.
Step 2
Cut two (2) BKG 2in x LOF sashing strips to the length you have measured. Find and mark the centres and quarters of the sashing strips and the braid strips by folding them in half and then folding the ends in to meet the centres.
Step 3
With right sides together and keeping the sashing strips on top, match the long raw edge of the sashing strip to the pencil line on the braid strip. Pin the marked centre and quarters of the band to the corresponding marks on the braid strip, easing where necessary and pinning at every braid seam.
Step 4

Using the raw edge of the sashing strip as a guide, sew the sashing to the braid strip using a ¼in seam allowance (Fig 10). Sew slowly and carefully. Match raw edge with line.
Step 5
After sewing the seam, place the unit on your cutting mat. Using the raw edge of the sashing as a guide, trim the zigzag edge off the side of the braid strip with your ruler and rotary cutter. Press the seam towards the sashing.
Step 6
Repeat this process once more, so that you have two (2) braid strips, each with a sashing strip attached to the same side.
Step 7

Sew these units to each other and to the unattached braid strip using the same methods for marking, matching and pinning. Press the seams towards the sashing (Fig 11).
Adding the sashing
Step 1
Repeat steps 19 – 22 to attach two (2) BKG 2in x 55¾in vertical sashing strips to both sides of your quilt top. Press the seams towards the sashing strips.
Step 2

Measure your quilt top through its centre from side to side. Cut two (2) BKG 2in x LOF horizontal sashing strips. If you have cut and sewn accurately, you should expect them to measure 2in x 44¾in. Sew to the top and bottom of your quilt top. Press the seams towards the sashing strips (Fig 12).
Attaching the inner accent borders
Step 1
Sew the 1in x WOF accent border strips together to make one continuous 1in wide strip.
Step 2
Measure your quilt top through its centre from top to bottom. Trim two (2) matching 1in x WOF side accent border strips to this measurement. If you have cut and sewn accurately, you should expect them to measure 1in x 58¾in. Sew to sides. Press the seams towards the accent border strips.
Step 3
Measure your quilt top through its centre from side to side, including the previously attached side accent borders. Trim the remaining two (2) 1in x WOF top and bottom accent border strips to this measurement. If you have cut and sewn accurately, you should expect them to measure 1in x 45¾in. Sew to top and bottom. Press the seams towards accent border strips.
Assembling the outer borders
Step 1
Repeat steps 28 – 29 to fit, trim and sew four (4) BKG 4½in x LOF outer border strips to the sides, top and bottom of your quilt top. If you have cut and sewn accurately, you should expect them to measure 4½in x 59¾in and 4½in x 53¾in respectively. Press the seams towards the accent border strips (Fig 13).
Quilting and finishing
Step 1
Join the two (2) pieces of backing fabric together along the long sides using a ½in seam. Press the seam open.
Step 2
Make a quilt sandwich basting together the backing, batting and quilt top.
Step 3
Quilt as desired. Amanda long arm quilted a ‘Lazy Paisley E2E’ design using a ‘Warm Grey 4’ Glide No.40 thread. Trim the backing and batting even with the edges of the quilt top.
Step 4
Sew the binding strips together at right angles, pressing the seams open to reduce bulk. Trim away the ‘dog ears’ and fold the strip in half lengthwise, wrong sides together, and press.
Step 5
Working from the right side and starting part-way down one edge, match the raw edges of the binding to the raw edges of the quilt and sew in place, folding a mitre at each corner.
Step 6
Continue stitching until you are back near the beginning of the binding strip. Fold under the short raw end of the starting piece 1/4in and insert the ending piece into it. Fold the binding over the raw edges to the back of the quilt and neatly slipstitch in place by hand.