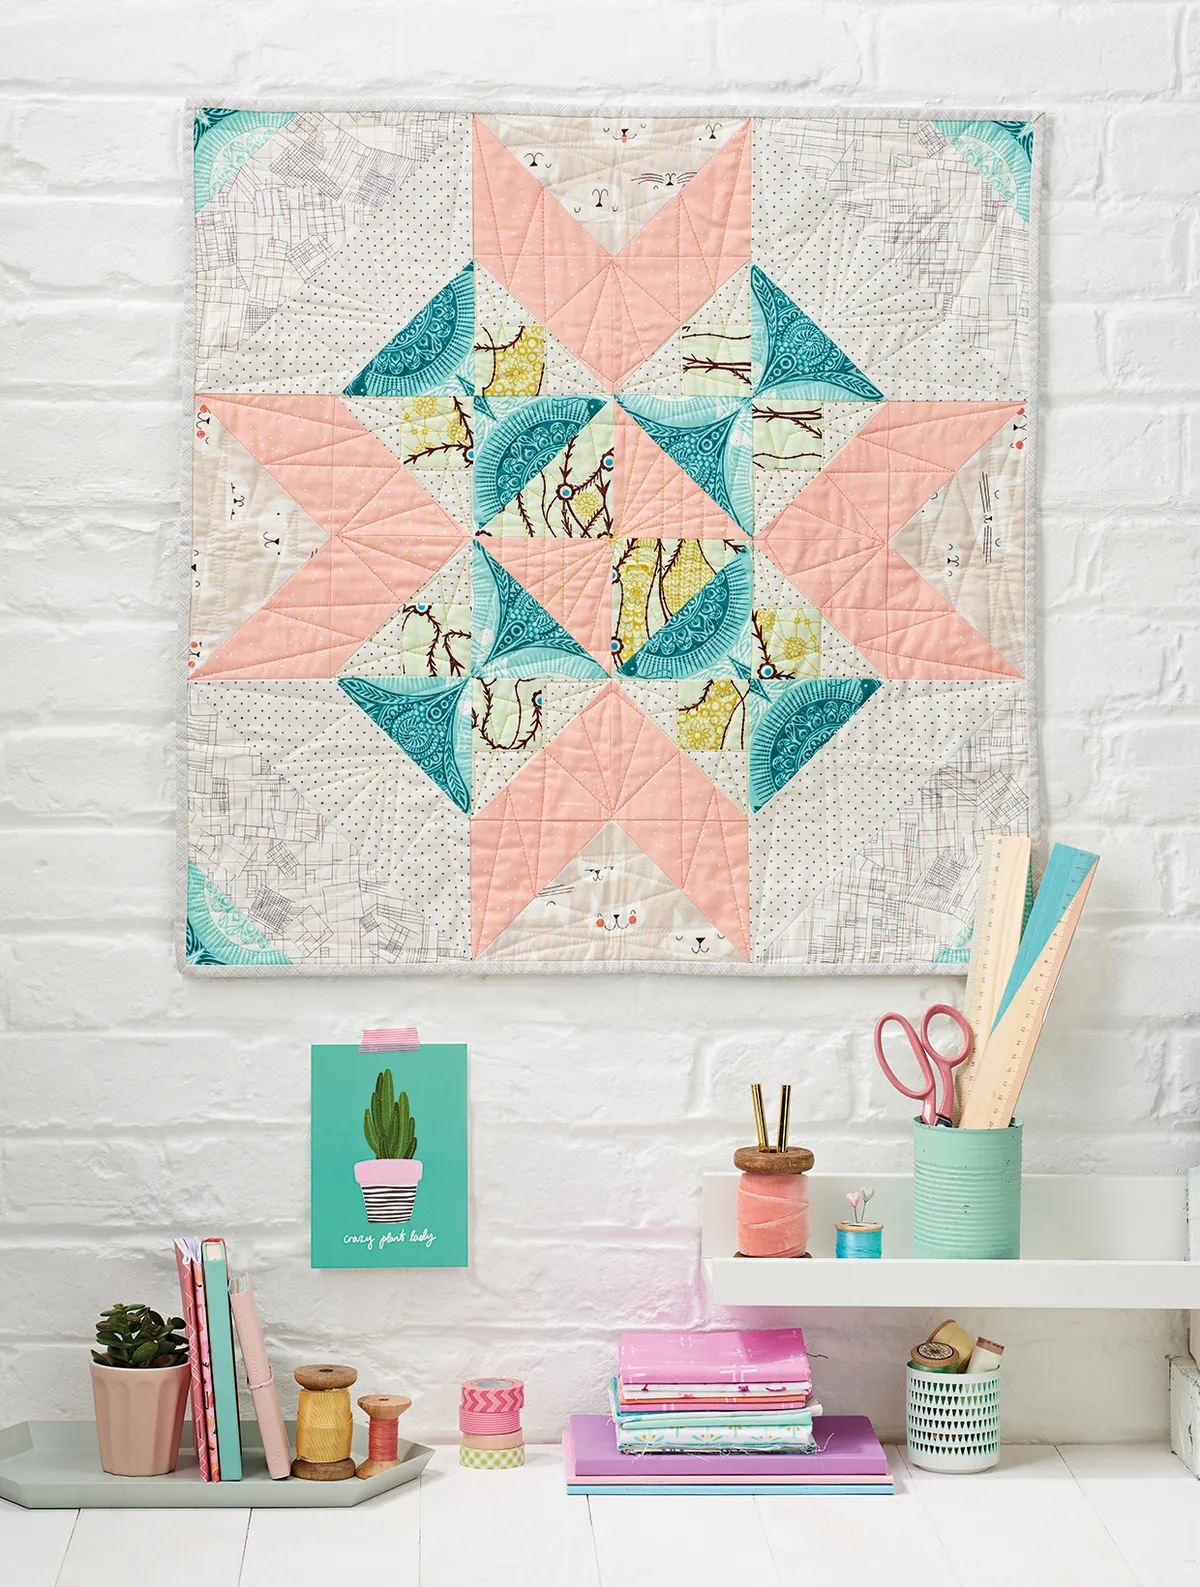
Free Dresden quilt pattern and templates
Sarah Griffiths is back with another gorgeous quilt just for you! Her modern Dresden quilt pattern will make the perfect addition to your home. Its colourful geometric shapes give the quilt a unique design.
We also show you how to sew Dresden Plates, too, if you need a little more help with this project.
You will need
- Fabric A (pink straws) one (1) fat quarter
- Fabric B (pink map) one (1) fat quarter
- Fabric C (pink solid) one (1) fat quarter
- Fabric D (peach bubbles) one (1) fat quarter
- Fabric E (yellow straws) one (1) fat quarter
- Fabric F (yellow doughnuts) one (1) fat quarter
- Fabric G (yellow sprinkles) one (1) fat quarter
- Fabric H (teal doughnuts) one (1) fat quarter
- Fabric I (teal bubbles) one (1) fat quarter
- Fabric J (teal map) one (1) fat quarter
- Background fabric (white): 1½ yds
- Backing fabric: 1½ yds
- Batting: 44in x 50in
- Binding fabric:⅜ yd
- Lightweight fusible interfacing (20in wide): 1yd
Templates
Finished Size
36in x 43in
Notes
- Seam allowances are 1⁄4 in unless otherwise noted.
- Press seams open, unless otherwise instructed.
- RST = right sides together.
- RS = right side.
- WST = wrong sides together.
- Fabrics supplied by FIGO Fabrics (figofabrics.com)
Fabrics Used
Fabrics from the American Road Trip collection by Jacqueline Colley for FIGO Fabrics, plus Northcott ColorWorks Solids.
If you’re new to the world of quilting, don’t worry. We have a beginners guide to quilting as well as a how to use a sewing machine tutorial.

Dresden quilt pattern: step by step tutorial
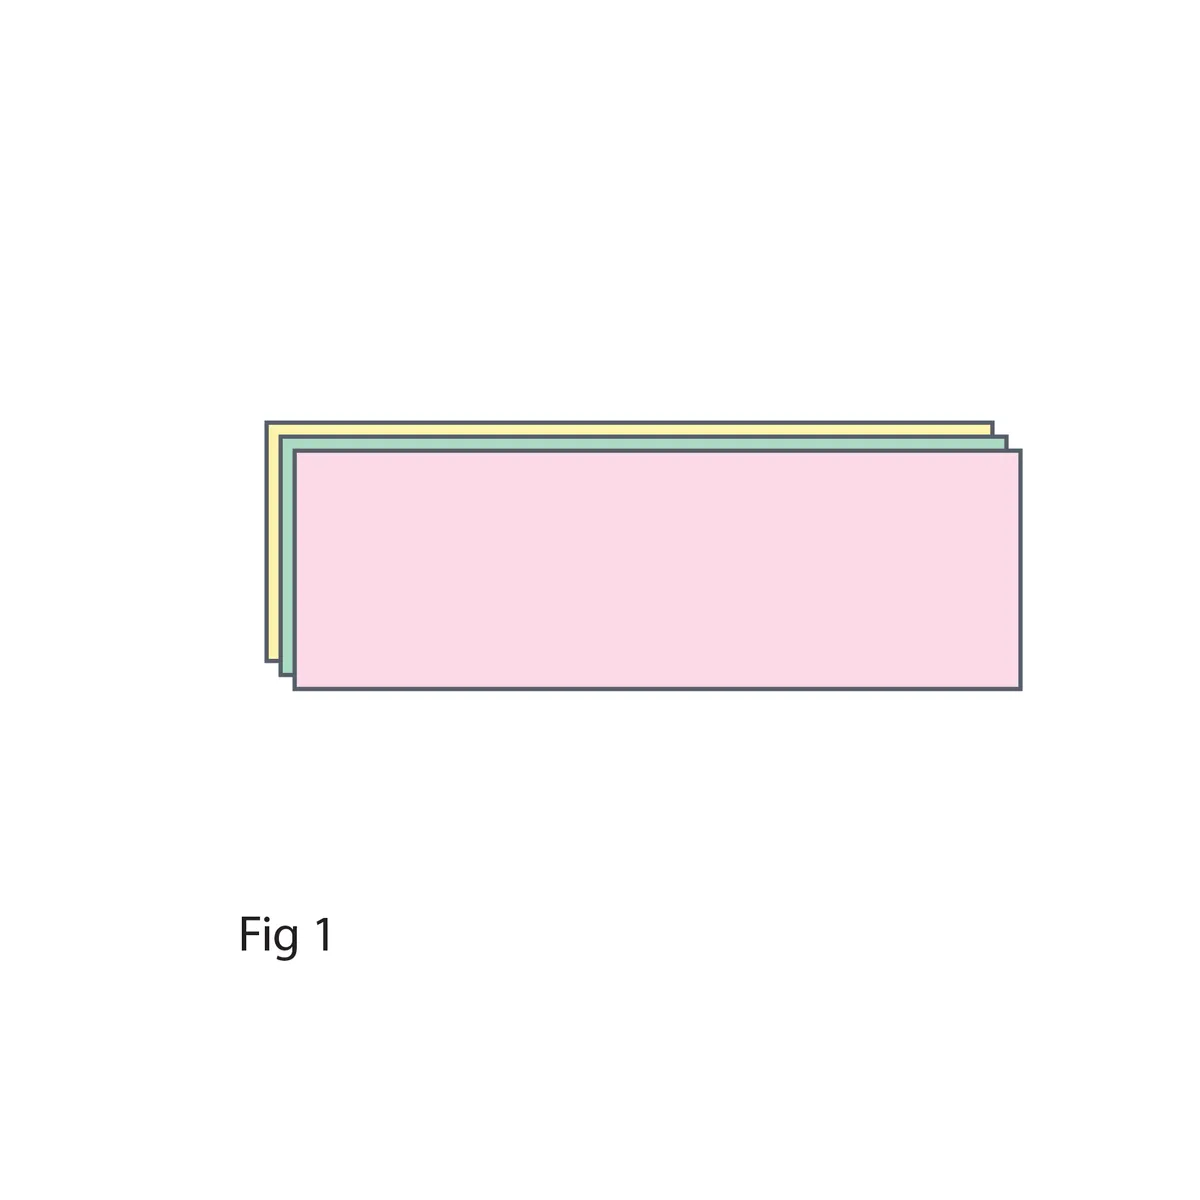
- Cut strips of fabric to the desired height of your Dresden blades, and neatly stack.
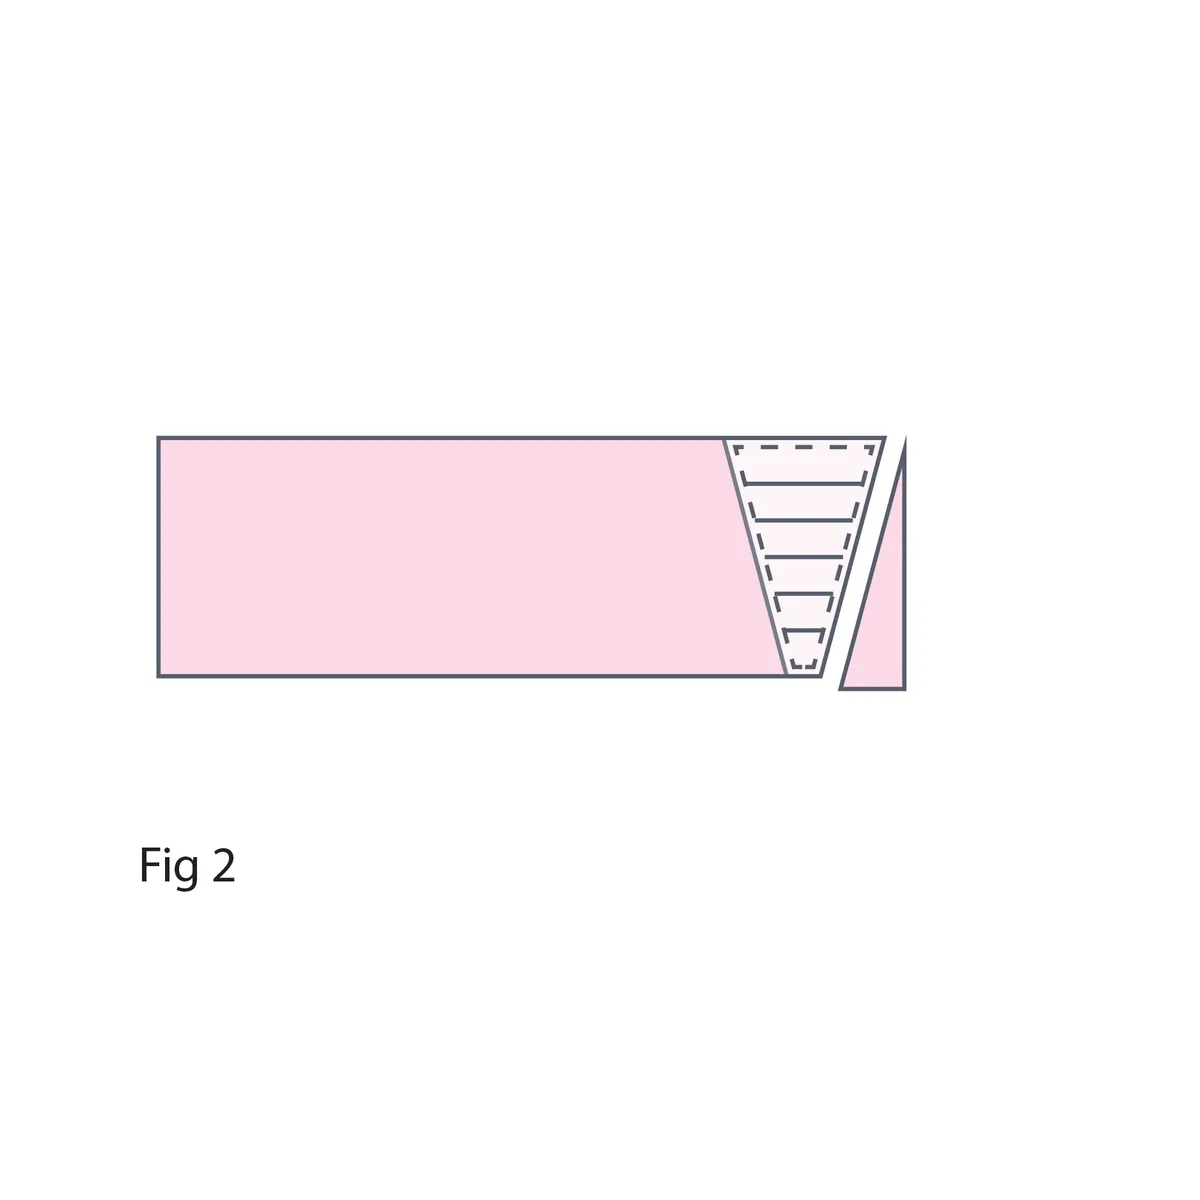
2. You can use any size up to 6½ in, but the intermediate marks can help you line up the ruler along the top edge. Place the ruler on the right end of the strips and cut along the right side.
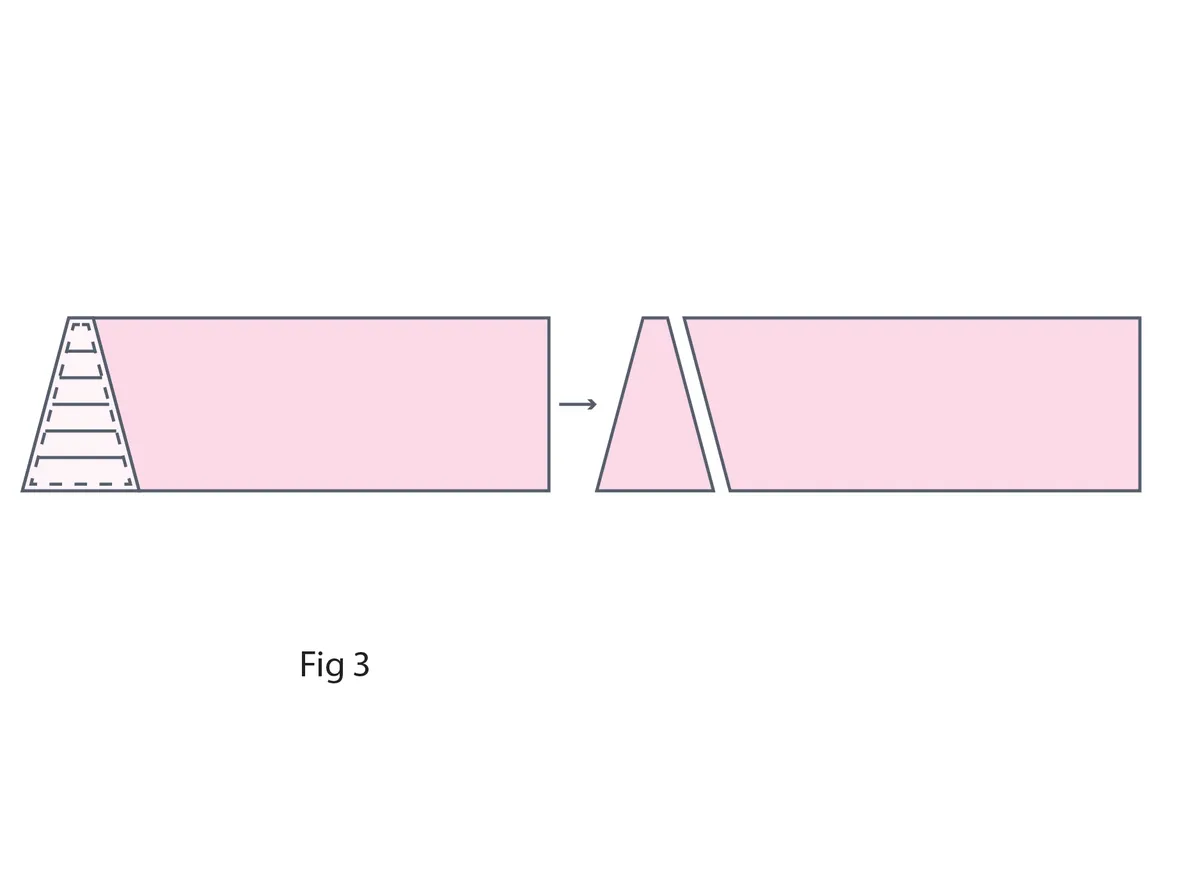
3. Rotate the strips so the cut edge is at the left. Place the ruler at this edge and cut along the right side.

4. Turn the ruler, align and cut again.
5. Keep repeating until you have cut the desired pieces.
Fussy cutting
- To fussy cut, place the ruler on your fabric and align as desired. Trace around the sides and bottom of the template. If using the intermediate marks, add a line at each edge where you would like the top of your blade.
2. Move the Dresden ruler and connect the two lines at the top.
3. Once you have traced all the desired pieces, cut out using a pair of scissors or a rotary cutter.
Cutting Out
Step 1
This pattern uses the Dresden ruler free gift. Use to cut the following Dresden blades using 5½ in strips for the large blades, and 3 ½ in strips for the small blades. For more details on cutting, see the instructions above.
Step 2
From Fabric A cut:
Three (3) large Dresden blades.
Six (6) small Dresden blades.
Step 3
From Fabric B cut:
Three (3) large Dresden blades.
Three (3) small Dresden blades.
Step 4
From Fabric C cut:
Three (3) large Dresden blades.
Six (6) small Dresden blades.
Step 5
From Fabric D cut:
Five (5) small Dresden blades.
Step 6
From Fabric E cut:
Three (3) large Dresden blades.
Eight (8) small Dresden blades.
Step 7
From Fabric F cut:
Three (3) large Dresden blades.
Three (3) small Dresden blades.
Step 8
From Fabric G cut:
Three (3) large Dresden blades.
Two (2) small Dresden blades.
Step 9
From Fabric H cut:
Nine (9) small Dresden blades.
Step 10
From Fabric I cut:
Four (4) large Dresden blades.
Three (3) small Dresden blades.
Step 11
From Fabric J cut:
Five (5) large Dresden blades.
Six (6) small Dresden blades.
Step 12
From the background fabric cut:
One (1) 6½ in x WOF strip. Subcut into two (2) 6½ in x 7½ in, one (1) 6½ in x 10½ in and one (1) 5½ in x 6½in.
One (1) 7½in x WOF strip. Subcut into four (4) 7½ in squares, one (1) 2½in x 7½in, one (1) 4in x 7½ in, and one (1) 4½in x 7½in.
One (1) 7½in x WOF strip. Subcut into one (1) 11/2in x 7½ in, two (2) 8½ x 7½, one (1) 11½ x 7½ in, and one (1) 12in x 7½ in.
One (1) 9½ in x WOF strip. Subcut into one (1) 9½ in x 8½ in, one (1) 91/2in x 5½ in, one (1) 8½ in square, two (2) 6½ in x 8½ in, and one (1) 4in x 8½in.
One (1) 17½ in x WOF strip. Subcut into two (2) 17½ in x 7½ in, one (1) 8½ in x 16½ in, one (1) 8½ in x 12in, and one (1) 6½ in x 12½ in.
Step 13
From the binding fabric cut:
Five (5) 21⁄4 in x WOF strips.
Step 14
From the interfacing cut:
Seventeen (17) using the small arc template
Nine (9) using the large arc template
Use a removable marker or pencil to mark the centre line on each piece.
Preparing the blades
Step 15
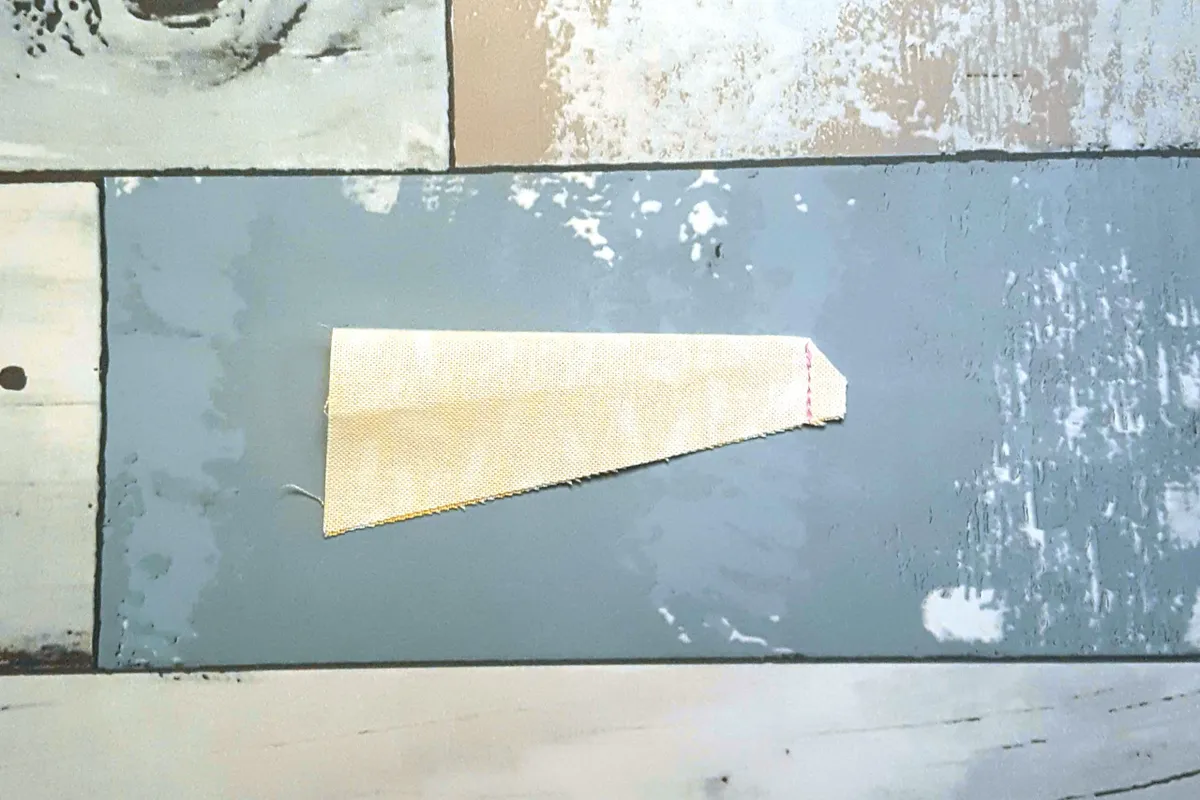
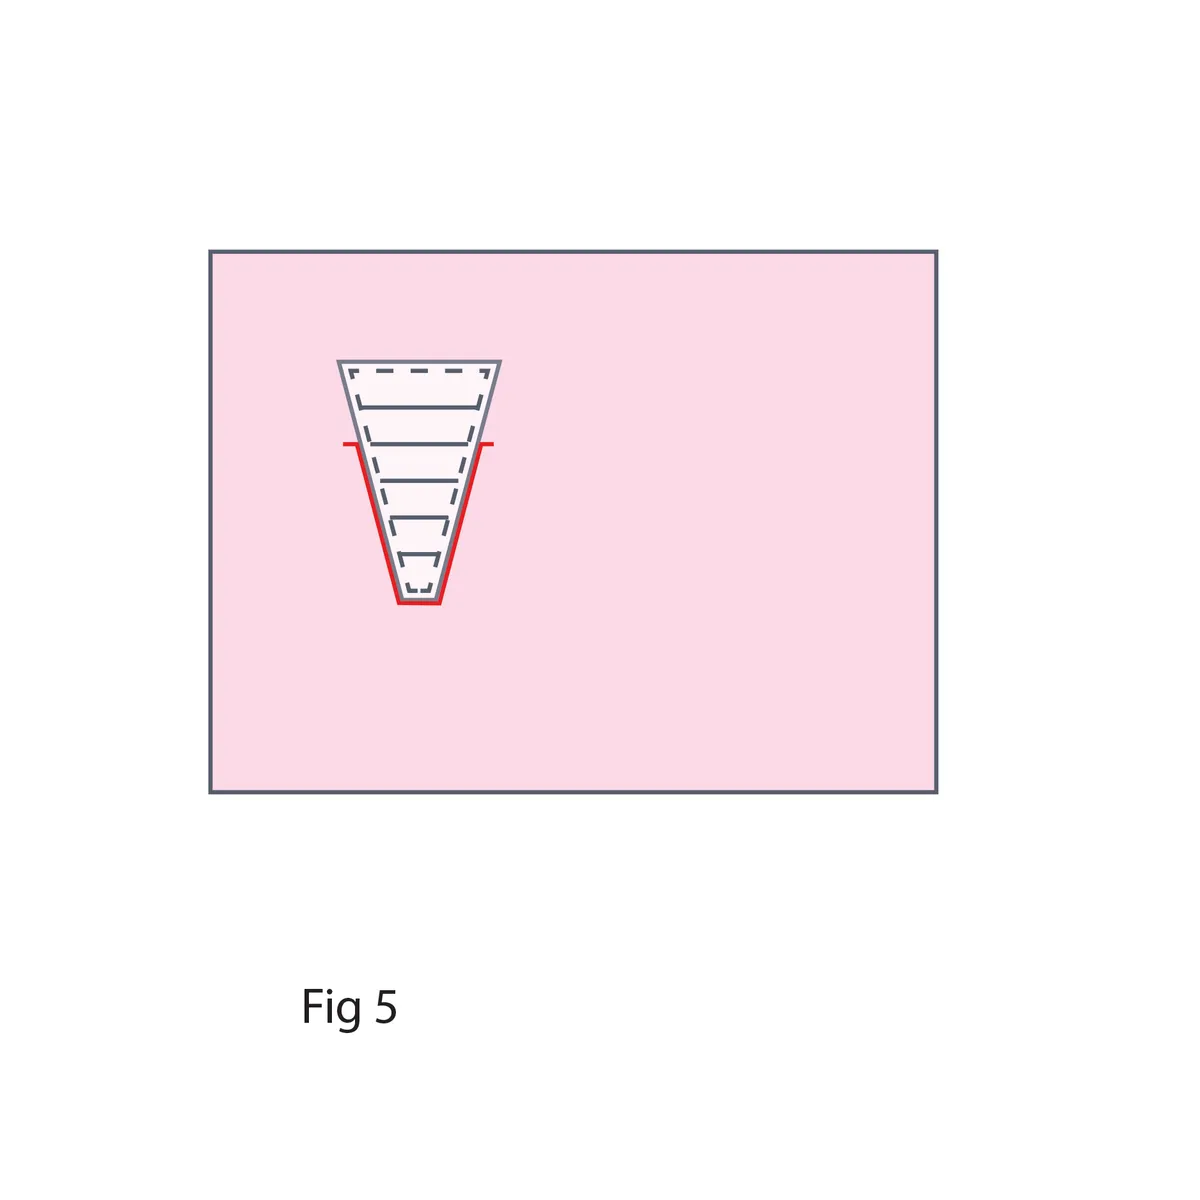
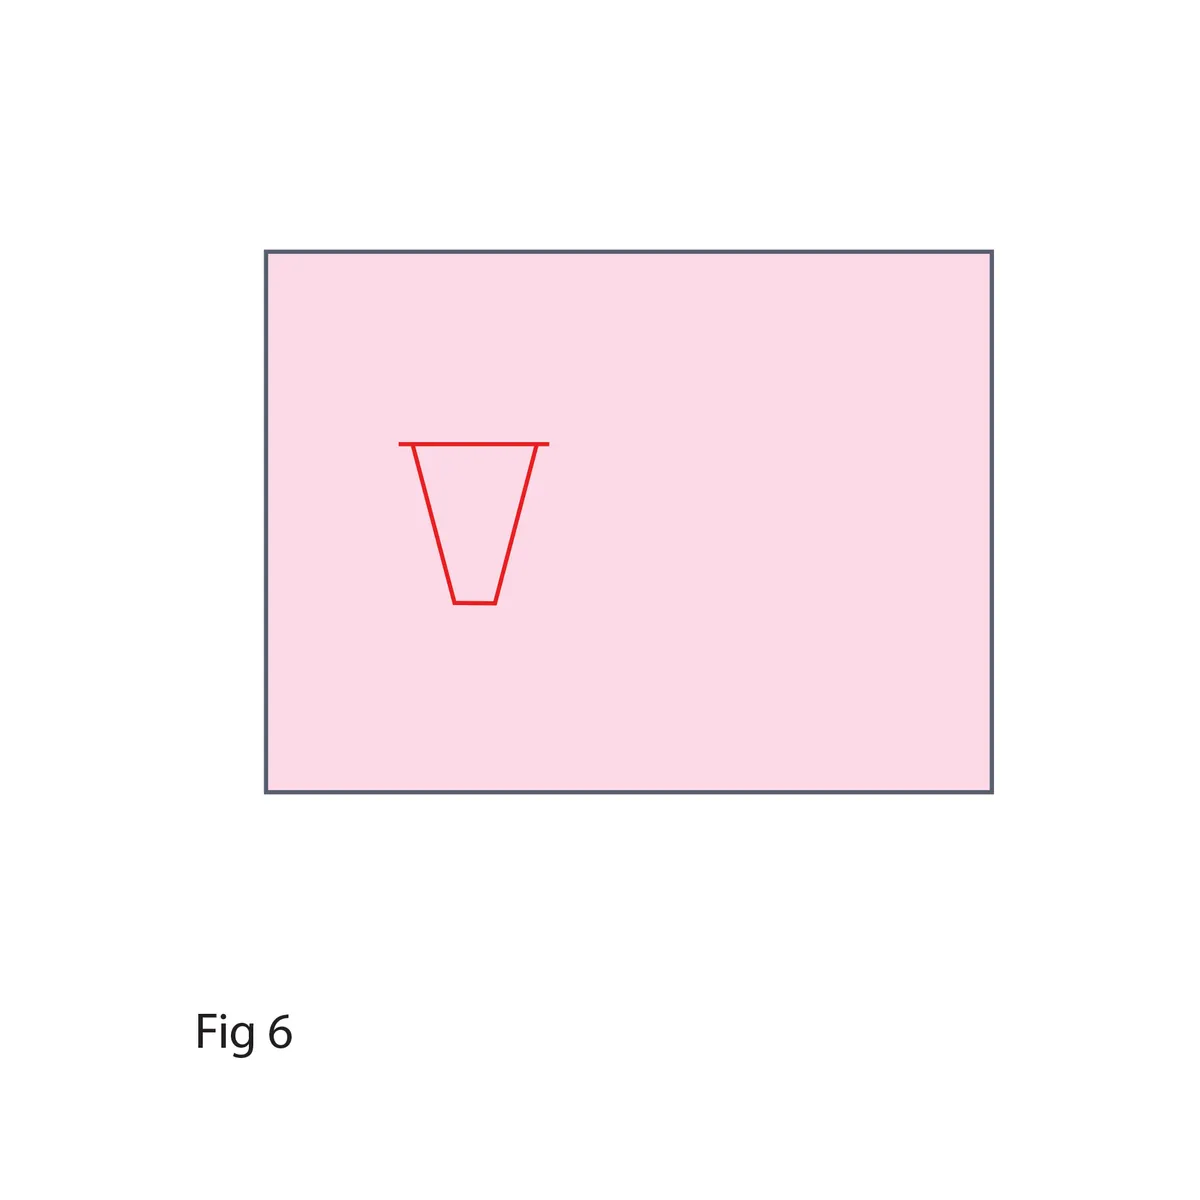
Take one Dresden blade. Fold in half lengthwise, WST, and sew along the short flat end, backstitching at the folded edge. Trim the corner, being careful not to cut into your line of stitches.
Step 16

Turn the Dresden blade RS out, finger pressing the seam open, to form a point at the bottom end. Press with an iron to set.
Step 17
Repeat steps 15–16 to create a point at the bottom of each Dresden blade.
Sewing the blades
Step 18
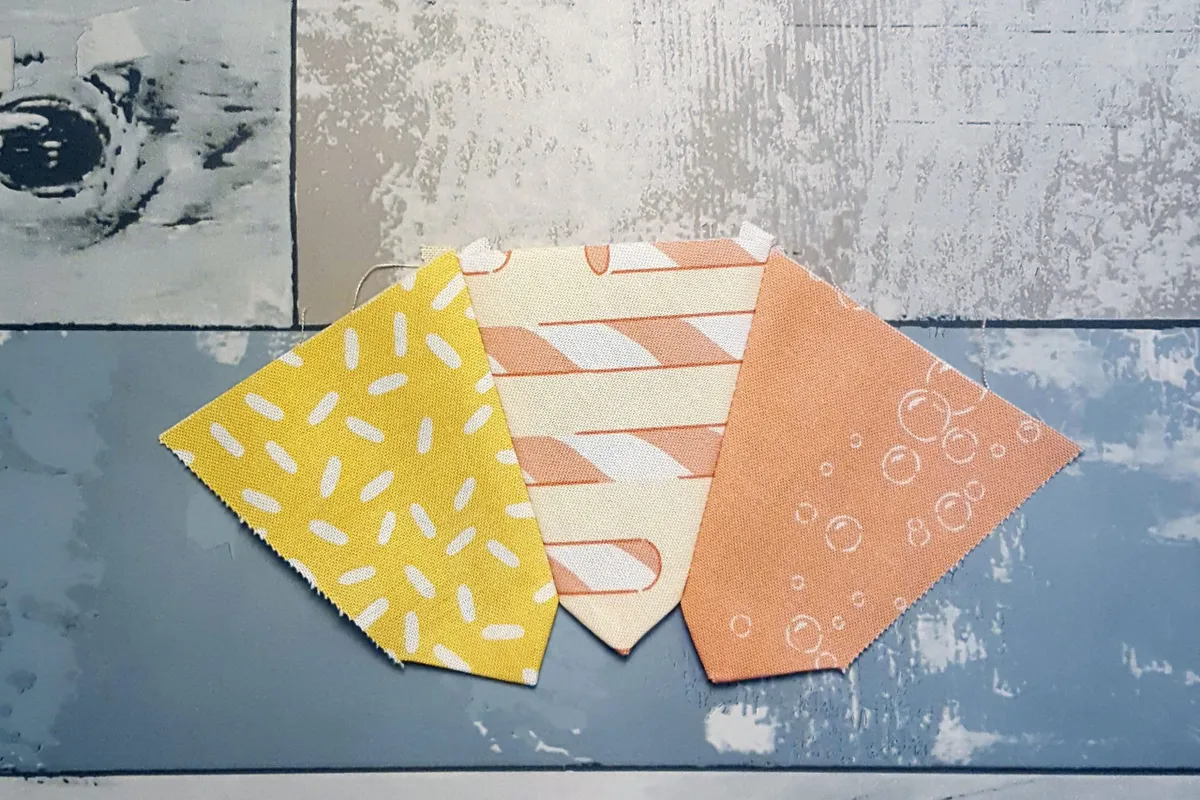
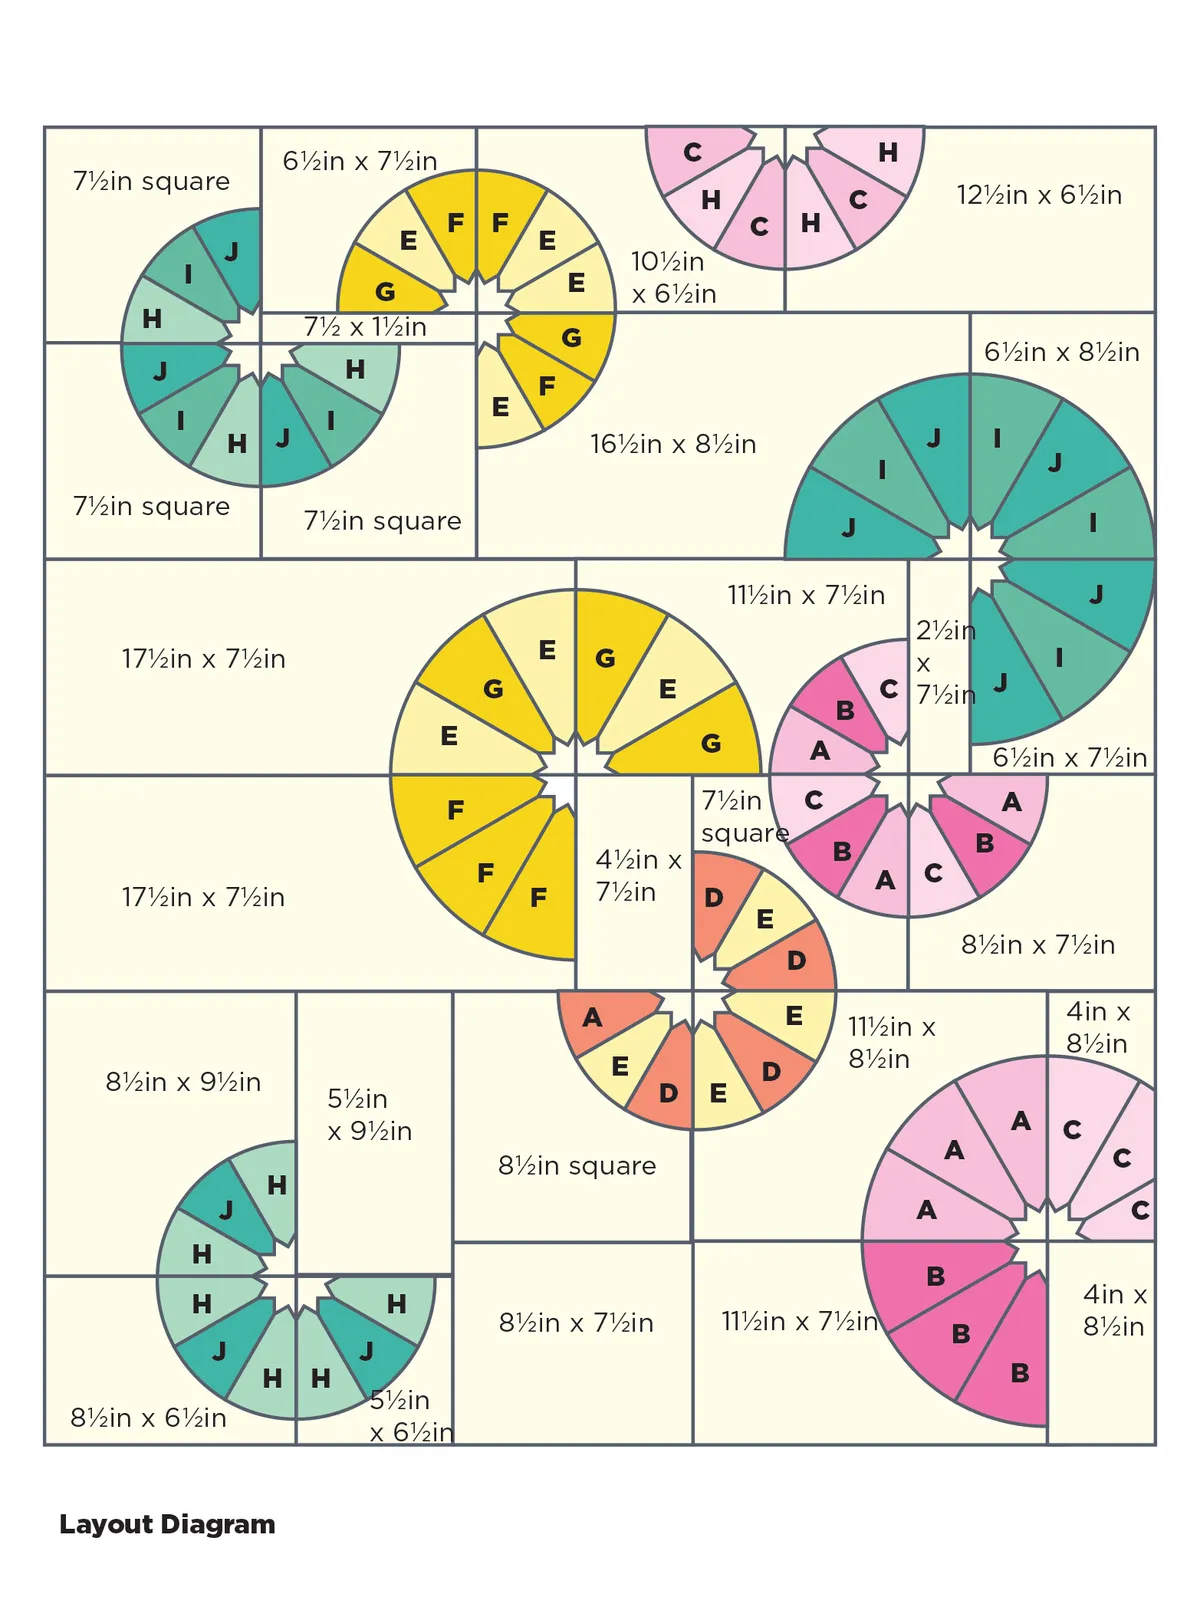
Arrange the prepared blades in sets of three, referring to the Layout Diagram for colour placement, or choosing your own layout. Join the sets along the long edges.
Top Tip
If you don’t want to use interfacing to curve the edges of your blades, you can simply press under 1⁄4 in along the top edge of each blade, before sewing in sets of three, for a straight finish.
For more quilting tips and tricks, check out these blog posts:
Step 19
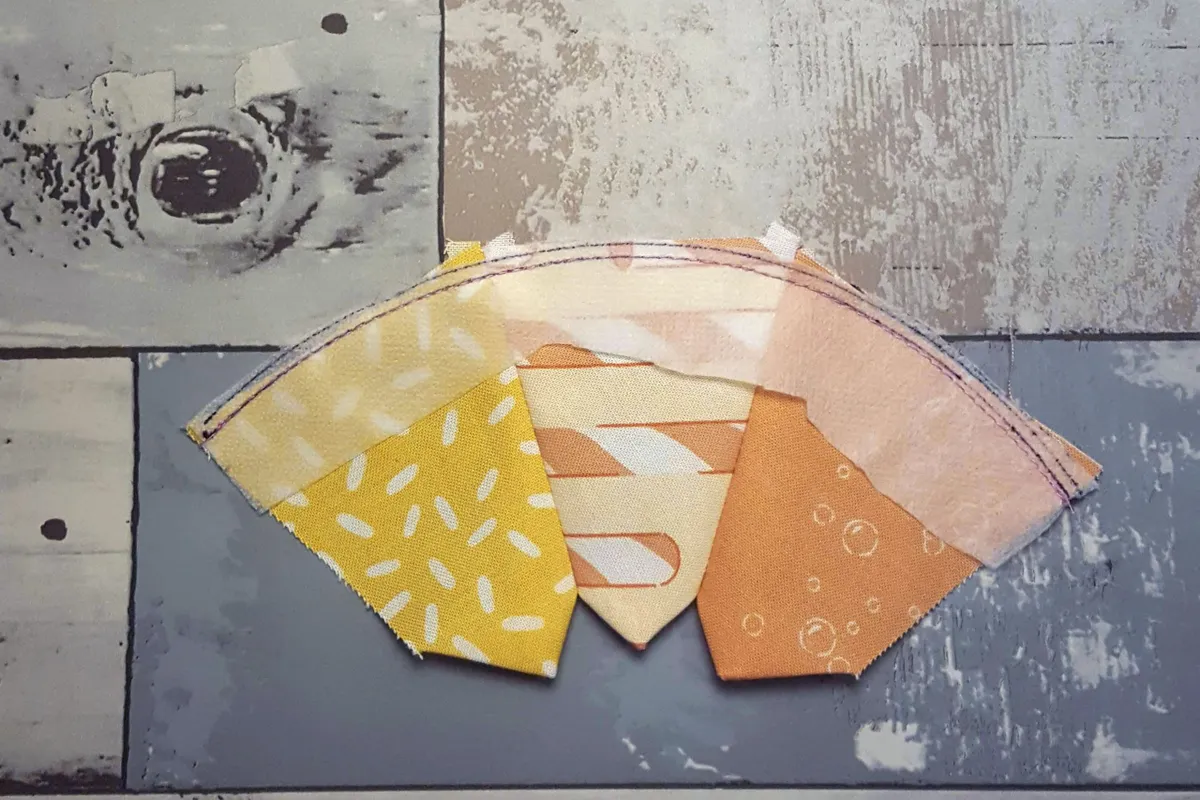
Take one set of three small blades and place right side up on your work surface. Place one of the small arcs cut from interfacing on top, tacky side up, and aligning at the edges of the blades. Pin in place, then sew along the marked curve.
Step 20
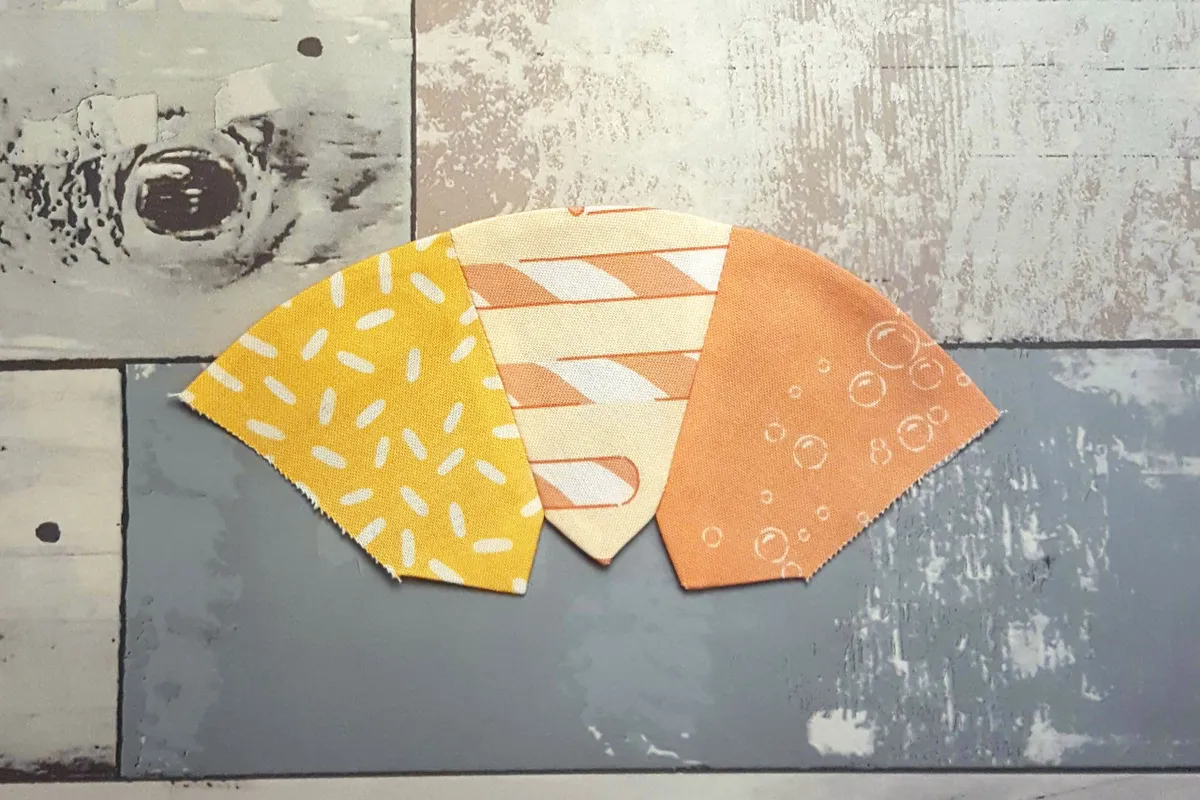
Turn the interfacing to the wrong side. Use a Hera marker to smooth the edge of the fabric, rolling the seam, so a tiny bit of fabric goes to the wrong side. This will ensure no interfacing shows on the final quilt. Press, adhering the interfacing to the wrong side, and finishing the curved edge.
Step 21
Once all sets are sewn, arrange on background pieces, referring to the Layout Diagram for placement. Sew the sets one at a time as follows.
Step 22
Align one Dresden blade set in the corner of the background piece, aligning raw edges, and pin in place. Applique in place using matching thread along the outer curved edge and inner points. Leave the raw edges unsewn. Sarah chose to use a zigzag stitch along the outer curve and a straight topstitch along the inner points.
Step 23
Once sewn, carefully cut away the background fabric from behind the Dresden blades, leaving a 1⁄4 in seam allowance, and being careful not to cut into the pieced fabric.
Step 24
Repeat steps 22–23 to sew all the Dresden blade sets in place on their corresponding background pieces. Note, the Fabric J segments in the lower right corner will overhang the background piece.
Piecing the quilt
Step 25
Sew the background pieces together in sections as described in the following steps. Refer to the layout diagram throughout to keep your pieces in the correct order.
Step 26
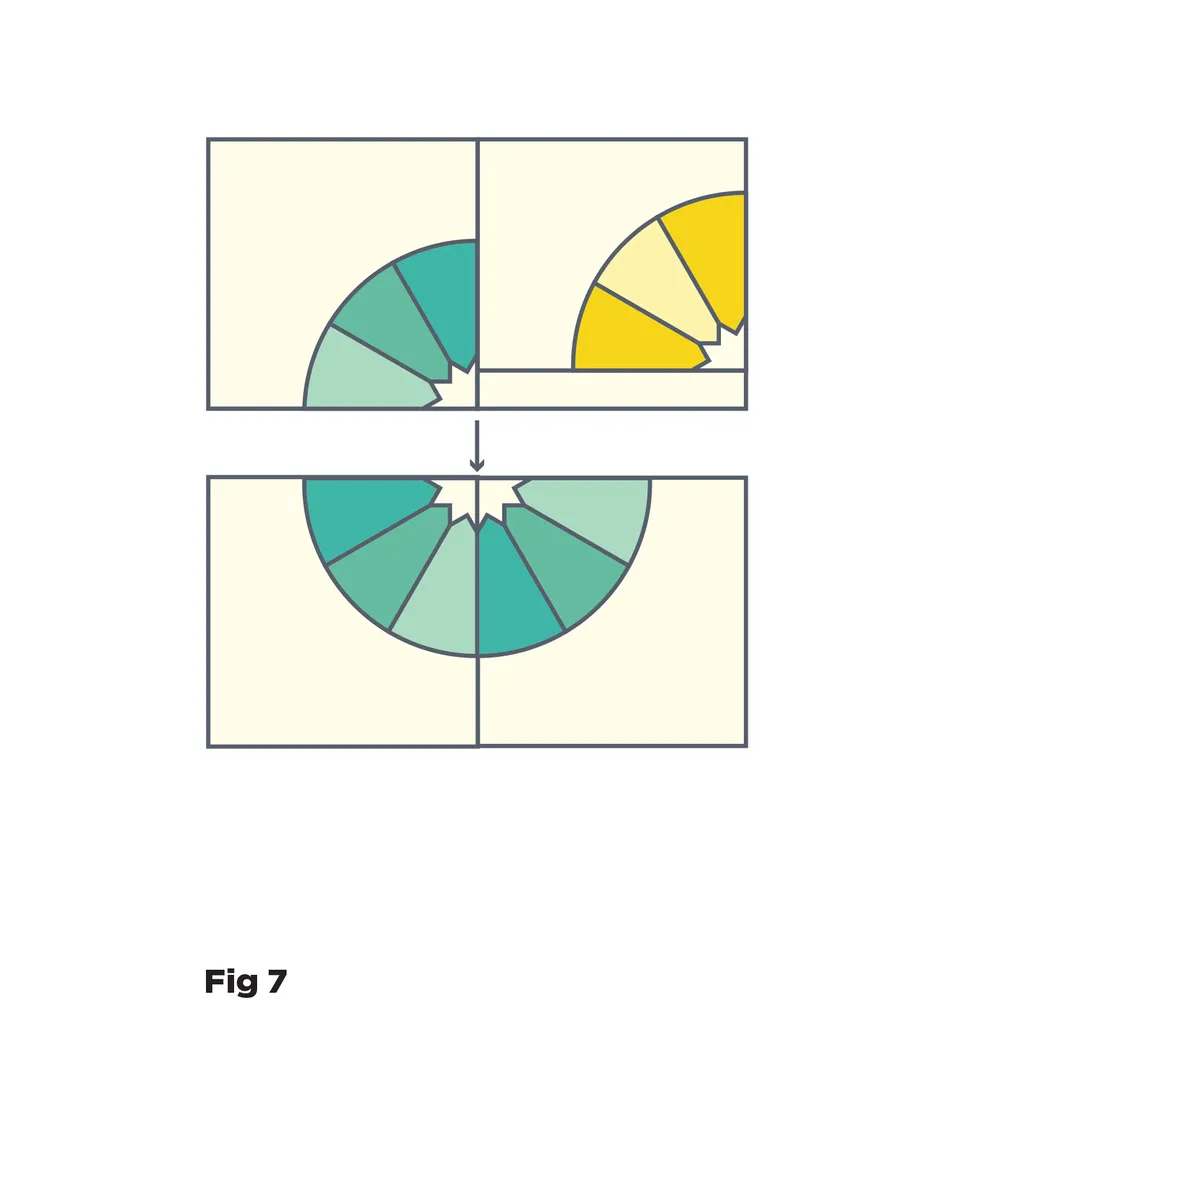
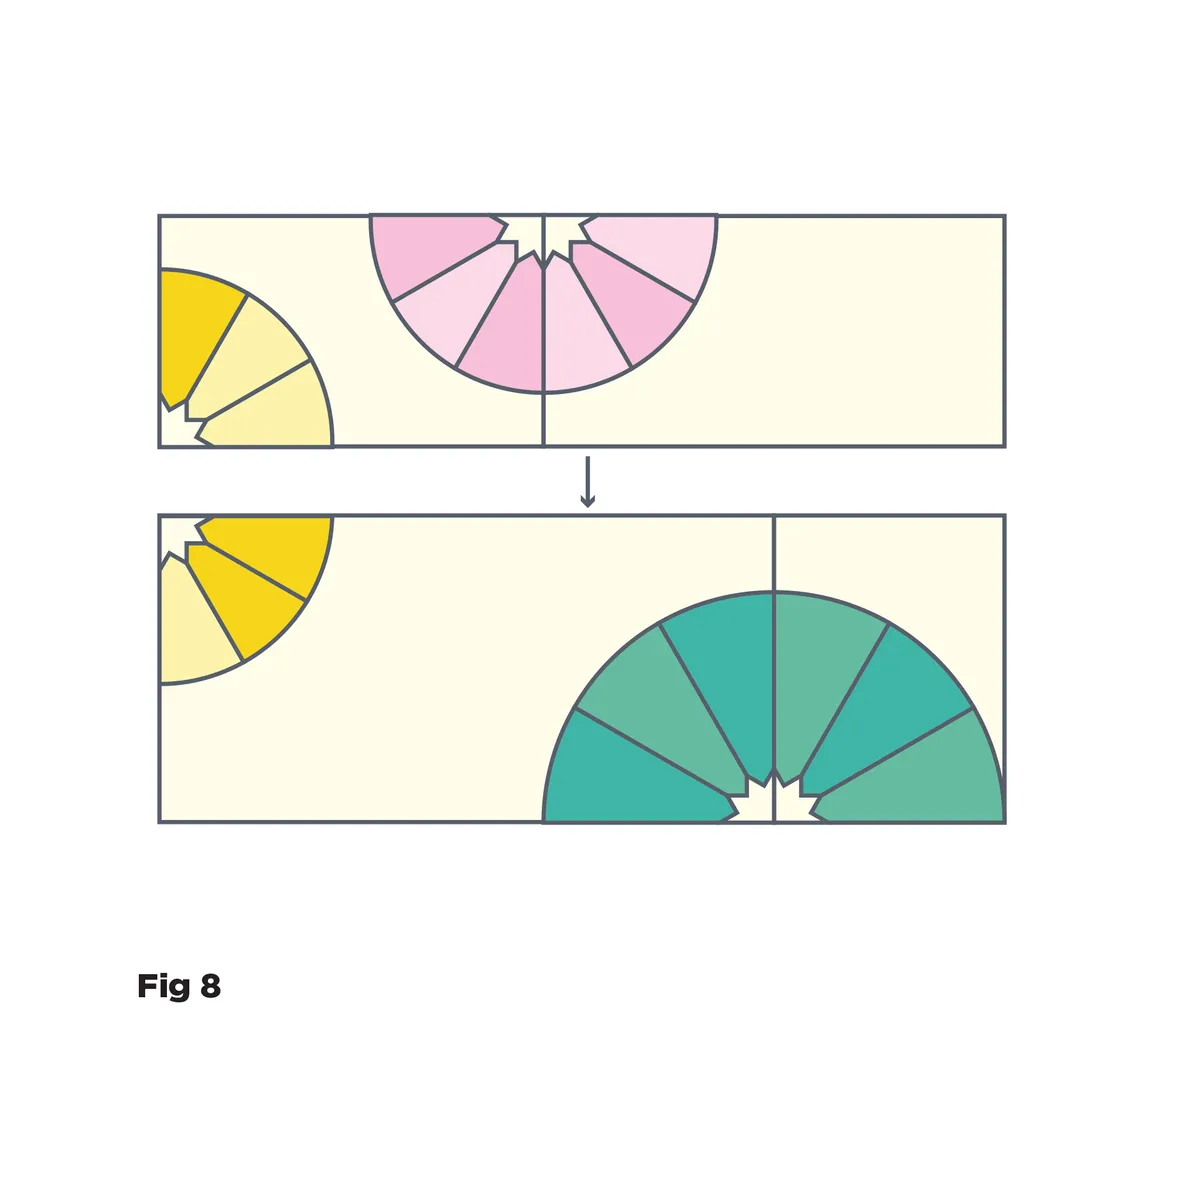
To sew the top left section, first sew a 7½in x 1½in background piece to the bottom of the yellow block. Then sew together in a four patch with the three green blocks (Fig. 7). To sew the top right section, arrange the blocks as shown. Sew together in two rows, then sew the rows together (Fig. 8).
Step 27
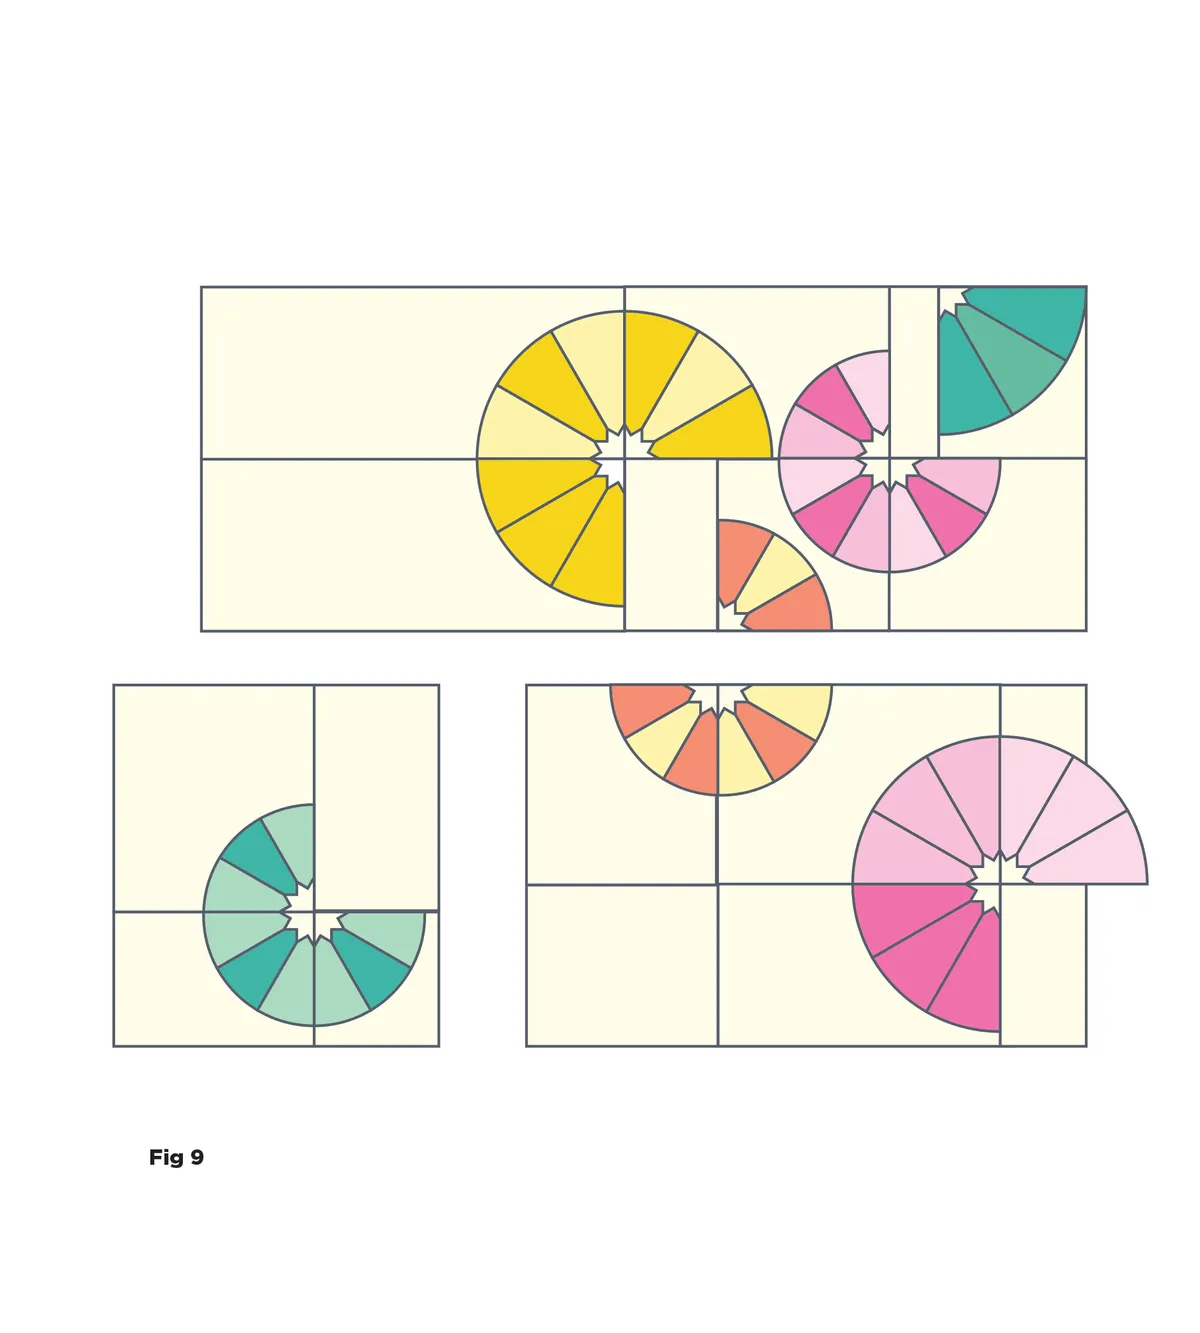
Arrange the central, bottom left and bottom right blocks as shown. Sew the blocks for each segment together in rows, then sew the rows together, as in the previous step. Trim the Fabric J Dresden segment even with the background fabric once the block is sewn.
Step 28
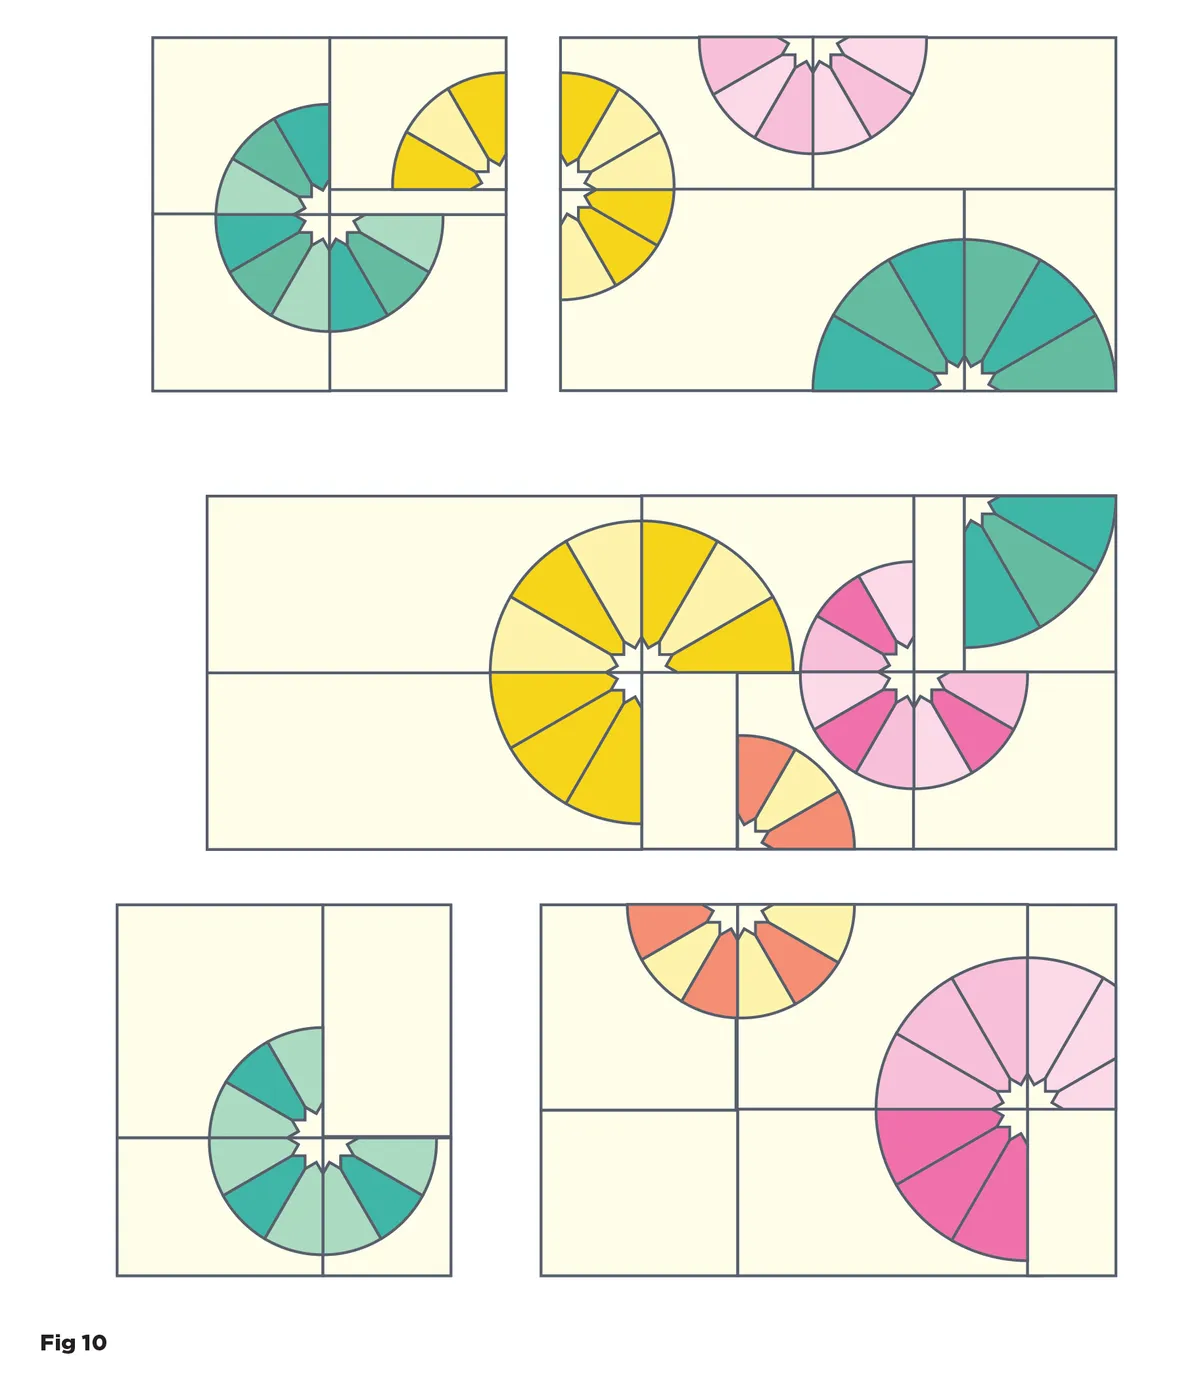
Arrange the completed sections as shown (Fig 10). Sew the top corners and bottom corners together in pairs, then sew to the central section to complete the quilt top.
Finishing the quilt
Step 29
Cut the backing fabric in half across the width. Remove the selvedges and sew the two pieces together using a ½in seam. Press the seam open.
Step 30
Press the quilt top and backing well. Make a quilt sandwich by placing the backing fabric right side down, the batting on top, then place the quilt top centrally and right side up. Baste the layers together using your preferred method.
Step 31
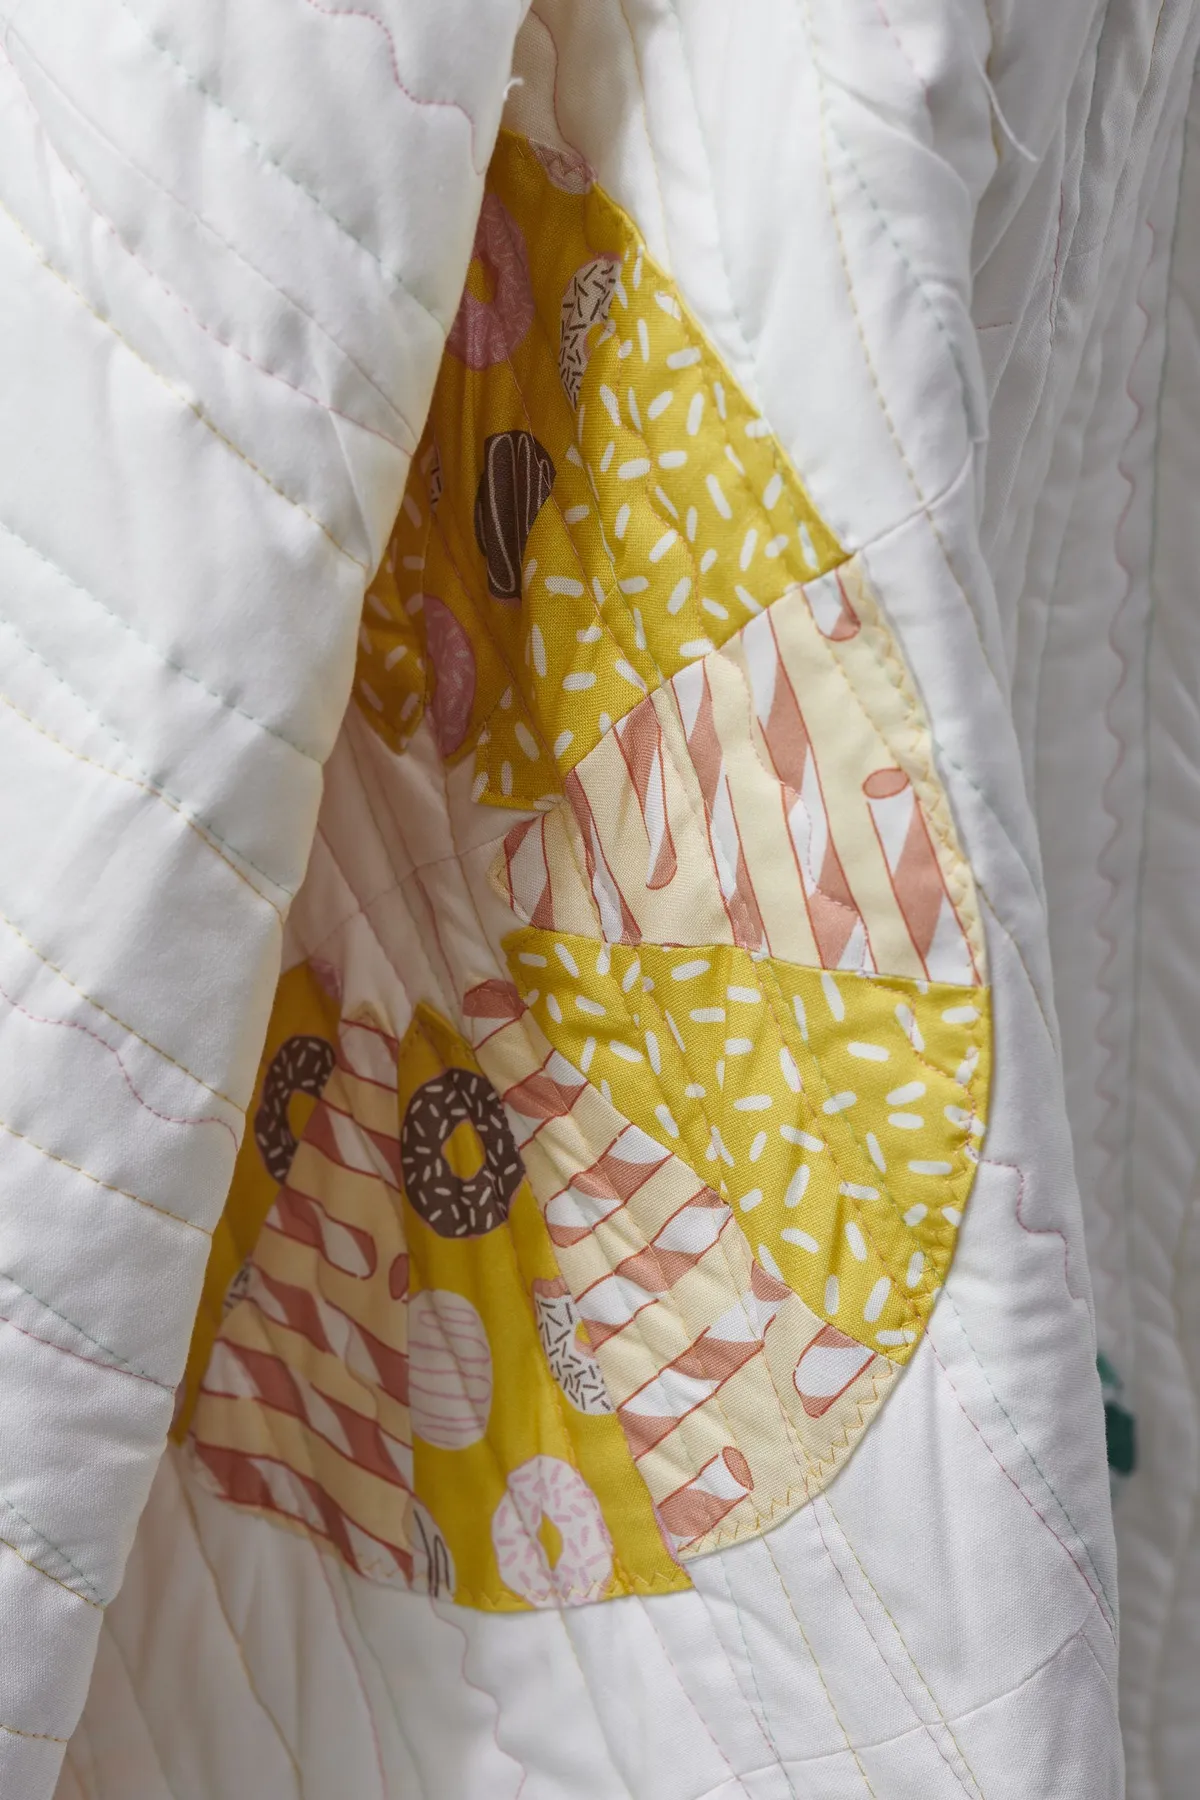
Quilt as desired. Sarah quilted straight vertical lines approximately 6in apart, then filled in with wavy lines, using her walking foot.
Step 32
Sew the binding strips together end-to-end using diagonal seams. Press the seams open. Fold in half lengthways, wrong sides together, and press.
Step 33
Sew the binding to the right side of the quilt, creating a neat mitre at each corner. Fold the binding over to the back of the quilt and hand stitch in place to finish.

Stitch your own Dresden quilt
Contemporary and beautiful, this Dresden quilt pattern is truly a work of art. Use your scrap stash to make up the segments and expirement with different colours until you find your favourites.
Discover more modern quilt patterns
We hope you enjoy stitching Sarah's Dresden quilt pattern. If you're looking for more fun quilt patterns, then why not make our geometric quilted cushion or our modern geometric quilt?