
Beginner's Guide to Hawaiian Quilts
Welcome to your complete guide to Hawaiian quilts! This 200-year-old craft is one we greatly admire and the bold central appliqué is recognised across the world.
- Your comprehensive guide to high quality fabrics
- Free English Paper Piecing Templates
- Download your own printable traditional log cabin quilt pattern!
In this essential guide, we'll talk you through the history of the Hawaiian quilt, and how to create Hawaiian quilt designs and we've included a free Hawaiian-inspired template for you to download and make.
All our designs are inspired by incredible Hawaiian quilts but we'd urge you to follow native quilters and support their work too!
Your complete guide to making Hawaiian quilts
What is a Hawaiian quilt?
Hawaiian quilts began life when natives combined traditional patchwork skills brought over by missionaries with their own traditional techniques to create motifs inspired by their beautiful surroundings.
Each Hawaiian quilt is unique but most have symmetric appliqué patterns and are a symbol of love for the island and all its people.
Often created from two contrasting fabrics, typically a bright green, red or blue for the appliqué against white, Hawaiian quilts are striking and special to Hawaiian culture.

What needle should I use for making Hawaiian quilts?
Straw needles are perfect for appliqué. The eye of the needle is stamped into the shank, so the eye glides through the fabric as you stitch.
The long, flexible size 10 or 11 will help you create fine stitches, nearly invisible to the eye.
How to quilt a Hawaiian appliqué design
We're going to show you how you can create a Hawaiian-inspired appliqué so you can celebrate this incredible culture!
Step 1
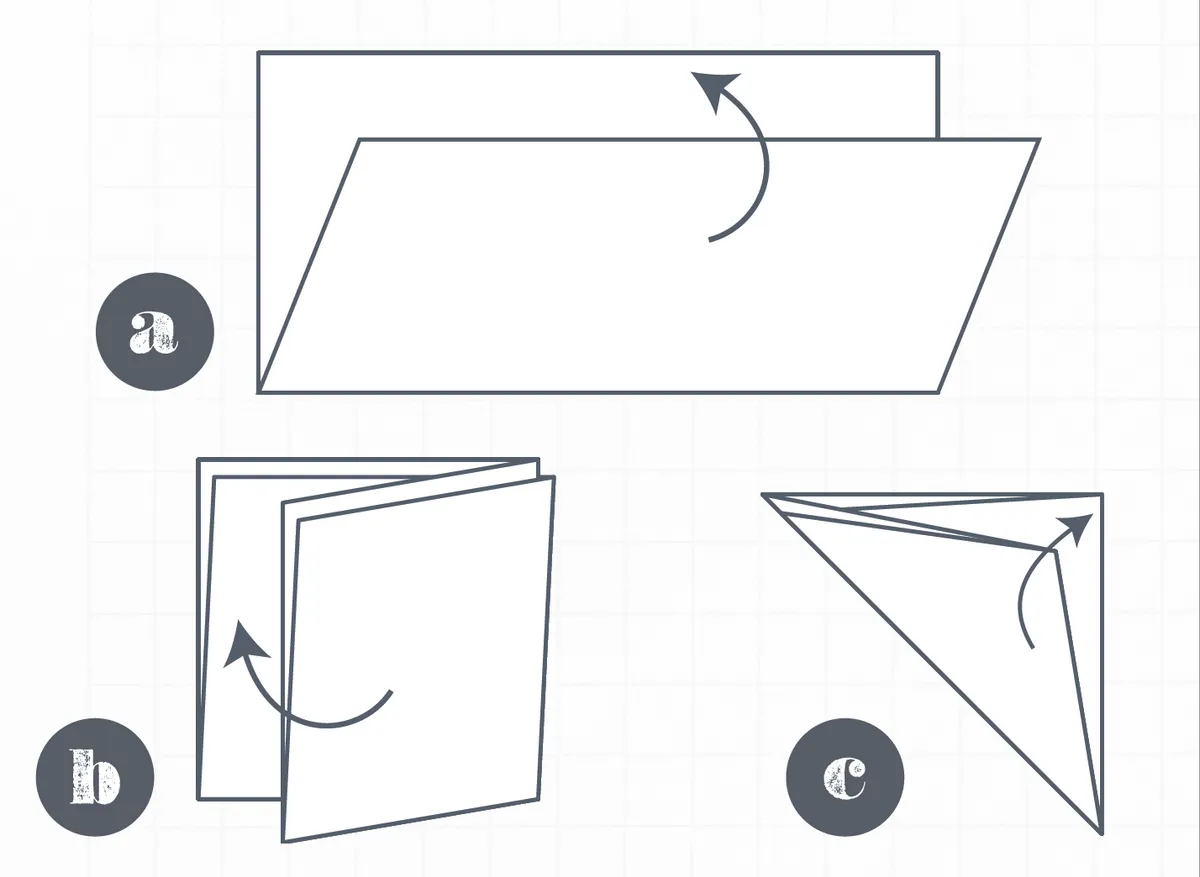
Fold a square of fabric for the appliqué in half (a), and in half again to form a square (b).
The square will have two raw edges and two folded edges. Bring the two folded edges together to form a triangle (c) and press.
All the raw edges of your fabric should now be along one edge of your triangle.
Step 2
Trace your pattern onto a piece of card and cut out. Line up the pattern with the corner of your fabric.
Make sure the edges match up with the folds exactly and trace around your template.
Pin the layers together, then carefully cut along your drawn line through all your layers.
If you find it difficult at sharp corners, go back and neaten with a small pair of scissors after cutting the main shape.
Remove any template marks and unfold your appliqué.

Step 3
Fold a square of background fabric the same way you folded your appliqué fabric in step one. Press lightly and unfold.
Centre your appliqué piece on the background fabric, carefully matching up the fold lines and pin in place.
Baste in place ¼in from the edge.
If you're new to the world of quilting and so unsure of how to baste and other techniques head over to our complete guide for quilting.

Step 4
When stitching your appliqué in place, you want to achieve nearly invisible stitches.
Choose a thread colour that matches your appliqué piece. We’ve used a contrasting thread so it’s easier for you to see the stitches!
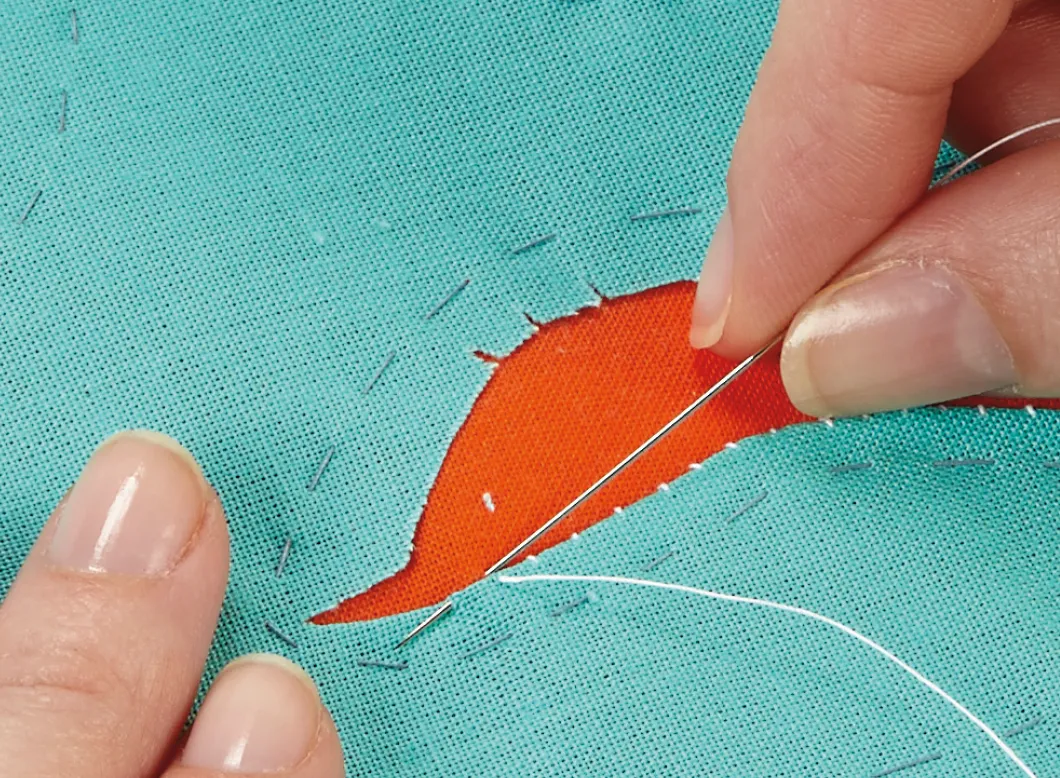
Bring up your needle from the raw edge of your appliqué. Turn the fabric ahead under, using your needle, to meet your basting stitches.
Turn under only about an inch at a time. Use the thumb of your non-stitching hand to hold down the turned fabric while you’re stitching.
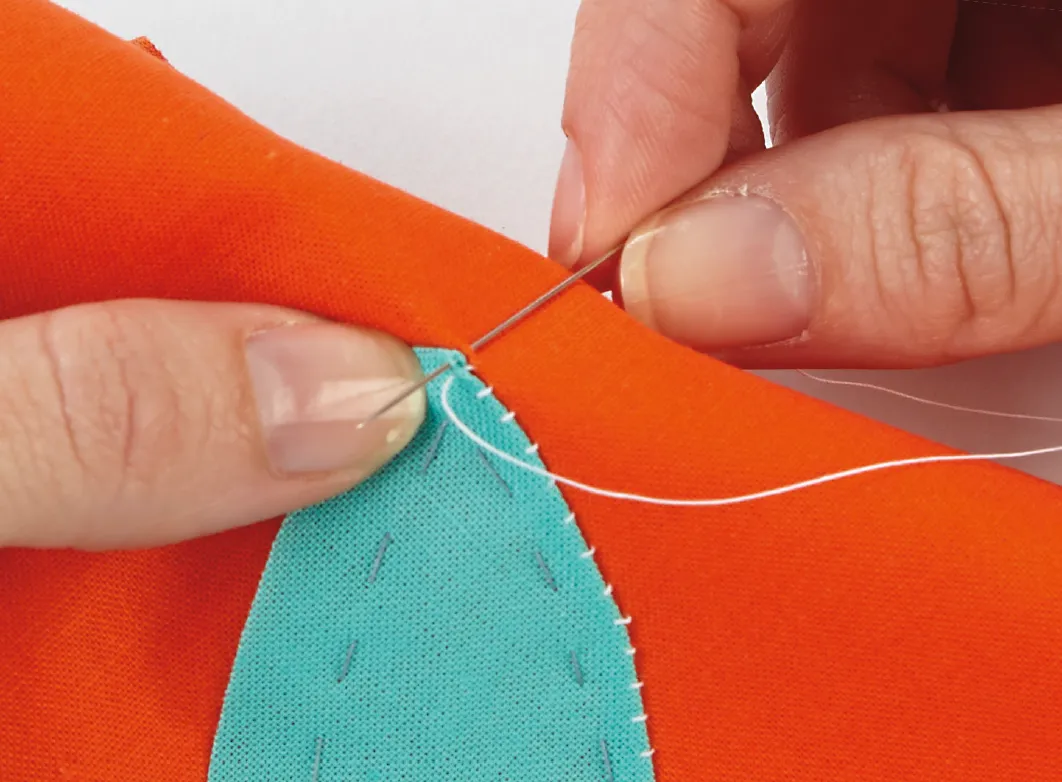
Bring your needle back down into the background fabric, directly opposite from where you came up.
Take a small stitch and bring your needle up again at the edge of the folded fabric.

Step 5
When stitching outer curves, there is no need to clip the fabric. Simply smooth the edges under and make your stitches slightly closer together.
For inner curves, make small clips in the seam allowance, a bit less than 1/8in.
For sharp ‘V’ shape curves, make one straight clip, ending 2–3 threads outside your basting stitches. Ease under your fabric edges and stitch very closely at the point.
Step 6
To create a sharp point, stitch up to the tip of the point on one side. Turn the point under, straight across and flatten with your thumb.
Take another stitch, almost on top of your previous one, pulling tight. Fold under the remaining side and continue stitching.
Step 7
Once you’ve stitched all the way around your appliqué piece, remove your basting stitches and press well.
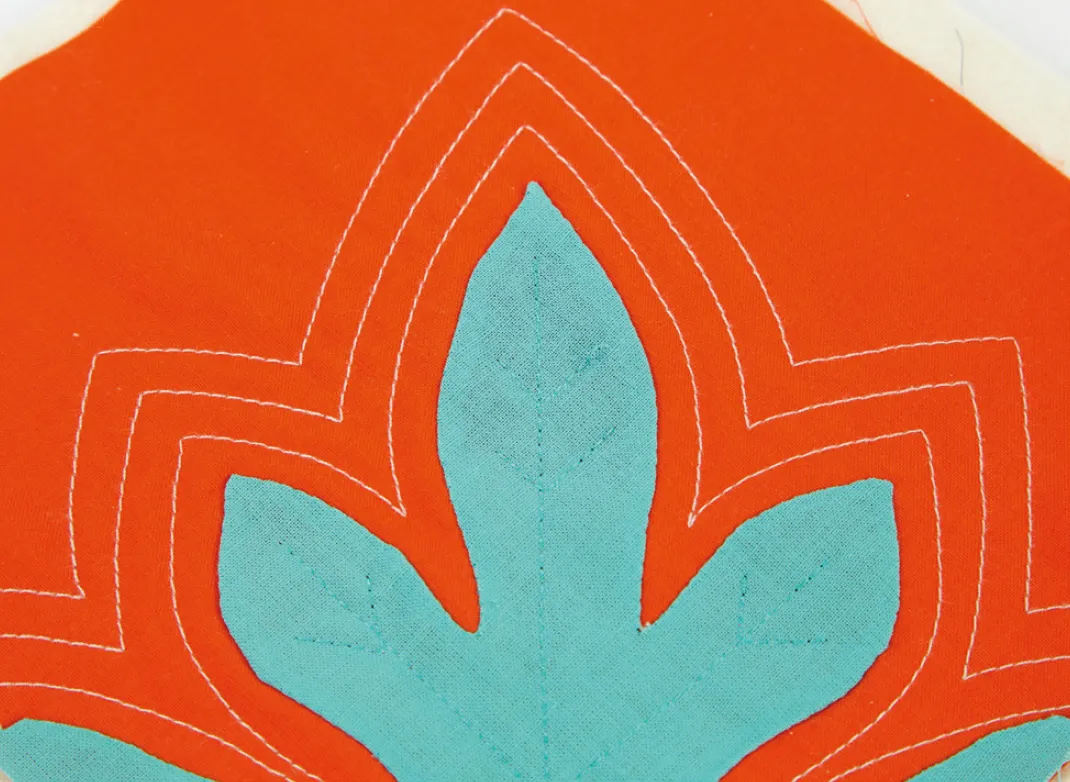
Layer with a piece of batting and backing and quilt as desired.
Hawaiian quilts traditionally feature echo quilting around the central motif, and sometimes include leaf details over the appliqué.

Need to stock up your quilting kit?
It's important to have the right equipment when making Hawaiian quilts! Head over to our collection of the best quilting tools to find all your quilting must-haves.
Creating your own Hawaiian-inspired design
You can easily create your own design for Hawaiian quilting. It’s similar to making a paper snowflake.

Step 1
Fold a square of paper as you would your fabric (Step 1) and make cuts through all the layers, keeping at least part of each folded edge of the triangle in tact.
Step 2
Experiment until you find a design you love.
Step 3
Fold the paper back into its triangle form, and trace it onto a triangular piece of card.
Step 4
Add a in seam allowance outside your lines, easing into any ‘V’ cuts, and cut out to create your own template.

Discover more about historical quilting traditions in our guide to barn quilts.
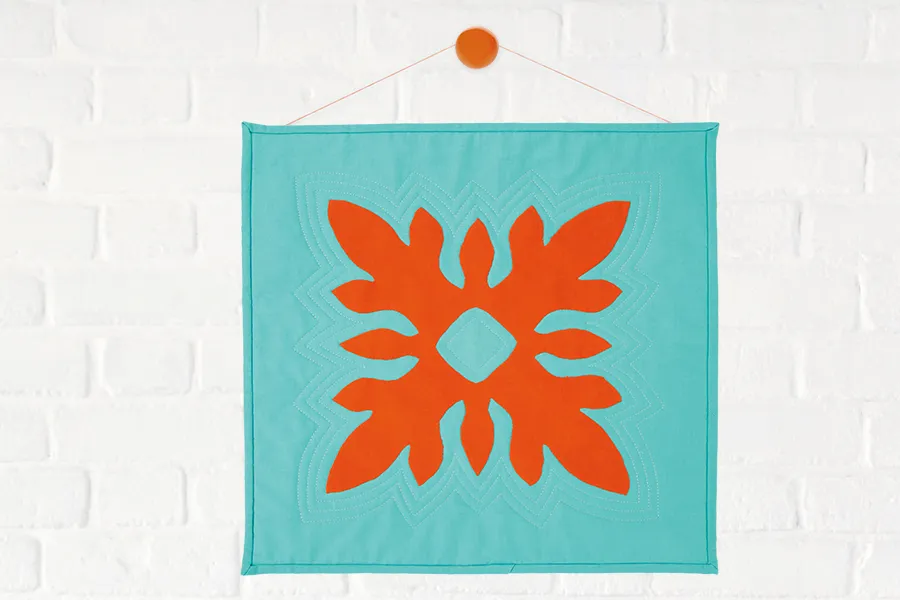
Free Hawaiian quilt pattern – Folded Flora
Pair hot and cold colours for a tropical mini quilt with traditional roots.
No reproduction without permission.
/m/loader/metro_loader/LQP12/LQP12.tech_feature/
Hawaiian quilt notes and measurements
You will need
- Appliqué fabric 12in square
- Background fabric 1yd
- Batting 18in square
- Dowel 18in long (optional)
- Download our 'Folded Flora' free Hawaiian quilt template
Fabrics Used
- Bella Solids by Moda in Mango.
- Quilter’s Basic Solid by Stof in Aqua.
Finished Size
- 18in square
How to make our Folded Flora Hawaiian Quilt
Step 1
Cut your background fabric into two 18in squares and two 4in squares. Also cut two 2½in strips, for binding.
Step 2
Create a quilted Hawaiian appliqué block following steps 1–7 above, using your appliqué fabric and 18in background squares. You can use the template included, or create your own. Square up your block.
Step 3
Fold your remaining background squares in half diagonally. Line up the raw edges in the top two corners of the reverse of your block and baste in place.
This will create two ‘pockets’ for your dowel to hang your block.
Step 4
Join your binding strips with a diagonal seam and press in half. Use to bind the edges of your block.
Step 5
Insert your dowel in the fabric ‘pockets’ and hang. Your gorgeous Hawaiian quilt is finished!

If you're after more exciting quilting projects that are full of bright colours, check out our guide to temperature quilts.
Embrace Hawaiian tradition through quilting
These wonderful quilts are steeped in history and made with a whole lot of love.
By making your own Hawaiian inspired quilt your showing this incredible culture the respect it deserves!
Discover more classic quilting patterns
Now you've created your first Hawaiian quilt why not have a go at making a memory quilt? They're another lovely type of quilt you can hand down through the generations.


