Cutting out
Step 1
From the background fabric cut three (3) 3½in x 65¼in strips (cutting parallel to the selvedge) for the sashing strips and one hundred and forty (140) 25⁄8in squares for the Flying Geese.
Step 2
From the backing and binding fabric cut seven 2½in x WOF strips for the binding. Set aside the remaining piece for the backing.
Making the flying geese
Step 1
You will need one 4¾in print square and four 25⁄8in background squares to yield four Flying Geese. Mark a diagonal line on the wrong side of all the background squares.
Step 2
RST, place one background square on opposite corners of the print square, with the diagonal marked lines running from the outer corner to the centre of the print square. The squares will overlap where they meet in the centre. Stitch ¼in either side of the marked lines (Fig 1).

Step 3
Cut apart on the drawn lines and press open (Fig 2), making two Flying Geese.

Step 4
RST, place a background square on the remaining print corner of a unit made in step 5, with the marked line running from the print corner. Stitch ¼in either side of the marked line (Fig 3). Repeat for the remaining background square and unit made in step 5.

Step 5
Cut the units apart on the drawn line and press open (Fig 4), making four 4in x 2¼in Flying Geese.

Step 6
Repeat steps 4–7 to make a total of one hundred and forty Flying Geese. You will need one hundred and thirty-eight.
Piecing the strip sections
Step 1
Take the 2½in x WOF print strips and lay them out, long edges together, to plan your design. Experiment with colour and print placement – you can piece from dark to light or in a random order. Join the strips to make a 66½in x WOF strip-pieced panel. To help prevent bowing, sew adjacent seams in opposite directions.
Step 2
Trim the strip-pieced panel to 65¼in x WOF, trimming the panel evenly on both top and bottom.
Step 3
Subcut the strip-pieced panel to give one 32½in x 65¼in rectangle and one 8½in x 65¼in rectangle.
Assembling the quilt top
Step 1
1Join a 3½in x 65¼in sashing strip to each long edge of the 32½in x 65¼in strip-pieced rectangle.
Step 2
Rotate the 8½in x 65¼in strip-pieced rectangle by 180 degrees, so the fabrics are running in the opposite direction to those in the larger strip-pieced rectangle. Join the remaining sashing strip to the right-hand edge of this rectangle, then join the left-hand edge to the unit made in step 12 to complete the quilt centre.
Step 3
Take your Flying Geese units and lay them out, long edges together and all pointing in the same direction, into two strips of thirty-seven Flying Geese for the side borders and two strips of thirty-two Flying Geese for the top and bottom borders. Experiment with colour and print placement, as you did with the pieced strips.
Step 4
Once you're happy with your layout, join the strips together to make two borders for the sides, each measuring 4in x 65¼in, and two borders for the top and bottom, each measuring 4in x 56½in.
Step 5
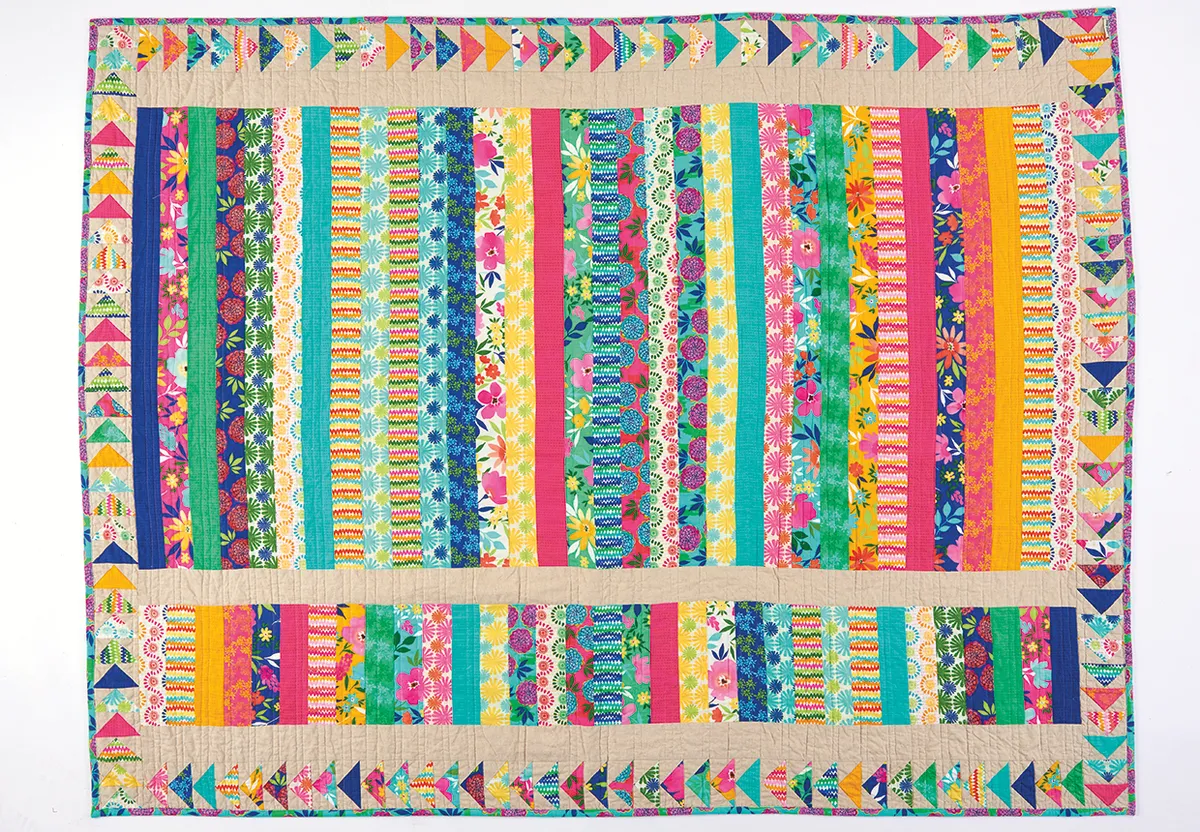
Join the side border Flying Geese strips to each side of the quilt centre. In the left-hand border the units should all point upwards and in the right-hand border they should all point downwards – refer to the layout diagram for placement.

Step 6
Join the top and bottom border Flying Geese strips to the quilt centre and side borders. In the top border the units should all point left and in the bottom border they should all point right.
Quilting and finishing
Step 1
Take the backing fabric set aside in step 2 and cut it in half across the WOF. Then remove the selvedges and re-join the pieces along the length. The backing needs to be least 2in bigger all around than the quilt top.
Step 2
Make a quilt sandwich by placing the backing fabric right side down, the batting on top, then the quilt top centrally and right side up. Baste the layers together.
Step 3
Quilt as desired. Natalie quilted pairs of lines ½in apart at 1in intervals. Trim any excess batting and backing.

Step 4
Sew the binding strips together end-to-end using diagonal seams. See our guide to how to bind a quilt. Press the seams open and trim away the dog ears. Fold in half lengthwise, WST, and press.
Step 5
Sew the binding to the right side of the quilt, folding a mitre at each corner. Before completing your stitching, neaten the short raw end of the starting piece and insert the ending piece into it.

Step 6
Fold the binding over to the back of the quilt and finish by hand stitching in place.