All products were chosen independently by our editorial team. This review contains affiliate links and we may receive a commission for purchases made. Please read our affiliates FAQ page to find out more.

How to make a DIY weighted blanket

Weighted blankets are the sewing project equivalent to a warm hug! Learn how it is done with our weighted blanket uk tutorial

Try our magazines – get 6 issues from just £9.99!

Published: January 5, 2023 at 12:20 pm

Weighted blankets have grown in popularity in recent years due to their soothing properties, as anyone who has curled up under one can attest to – they are seriously soothing and many believe they can ease a variety of health conditions. The Sleep Foundation explains that invoke deep pressure stimulation, which is believed to stimulate the production of everyone's favourite mood-boosting hormone, serotonin, which is known to reduce body's stress levels and improve your sleep. There are all sorts of fabulous weighted blankets out there to buy, but making your own is the ultimate project, and we're here to show you how to do it.

Sewing your own is great idea, because you can choose fabrics and materials to your own taste, so we've asked our expert Sarah Griffiths (Senior Technical Editor of Love Patchwork & Quilting magazine, aka Spindle and Shears) to show you how to make a weighted blanket – step by step. We are using quilted pockets in different fabrics for each of our weighted blanket sections. We love this patchwork look! But we have instructions for using just a single piece of fabric rather than the patchwork if you prefer that look.

You can easily make one with just a few bits of fabric, filling and basic sewing kit. Before you begin, you will need to consider what size blanket you want and how much filling you need. A good guide is to use no more than 10% of the body weight of the person who will use the blanket. We used plastic poly pellets for filling because they are washable, durable and made from recycled materials. But there are many other materials you can choose based on your own needs.

You can use any materials you find cosy, but we recommend something durable without too much stretch, such as quilting cottons, brushed cotton, organic cotton or flannel fabric. Our tutorial will show you how you can make either a patchwork fronted version with quilted pockets or use plain fabrics for both the front and back.

If you're new to sewing, swot up on the basics with our guide to sewing for beginners, and if you're looking for easy home sewing projects, you might also like our favourite Rug Making Kits for beginners.

DIY weighted blanket – supplies

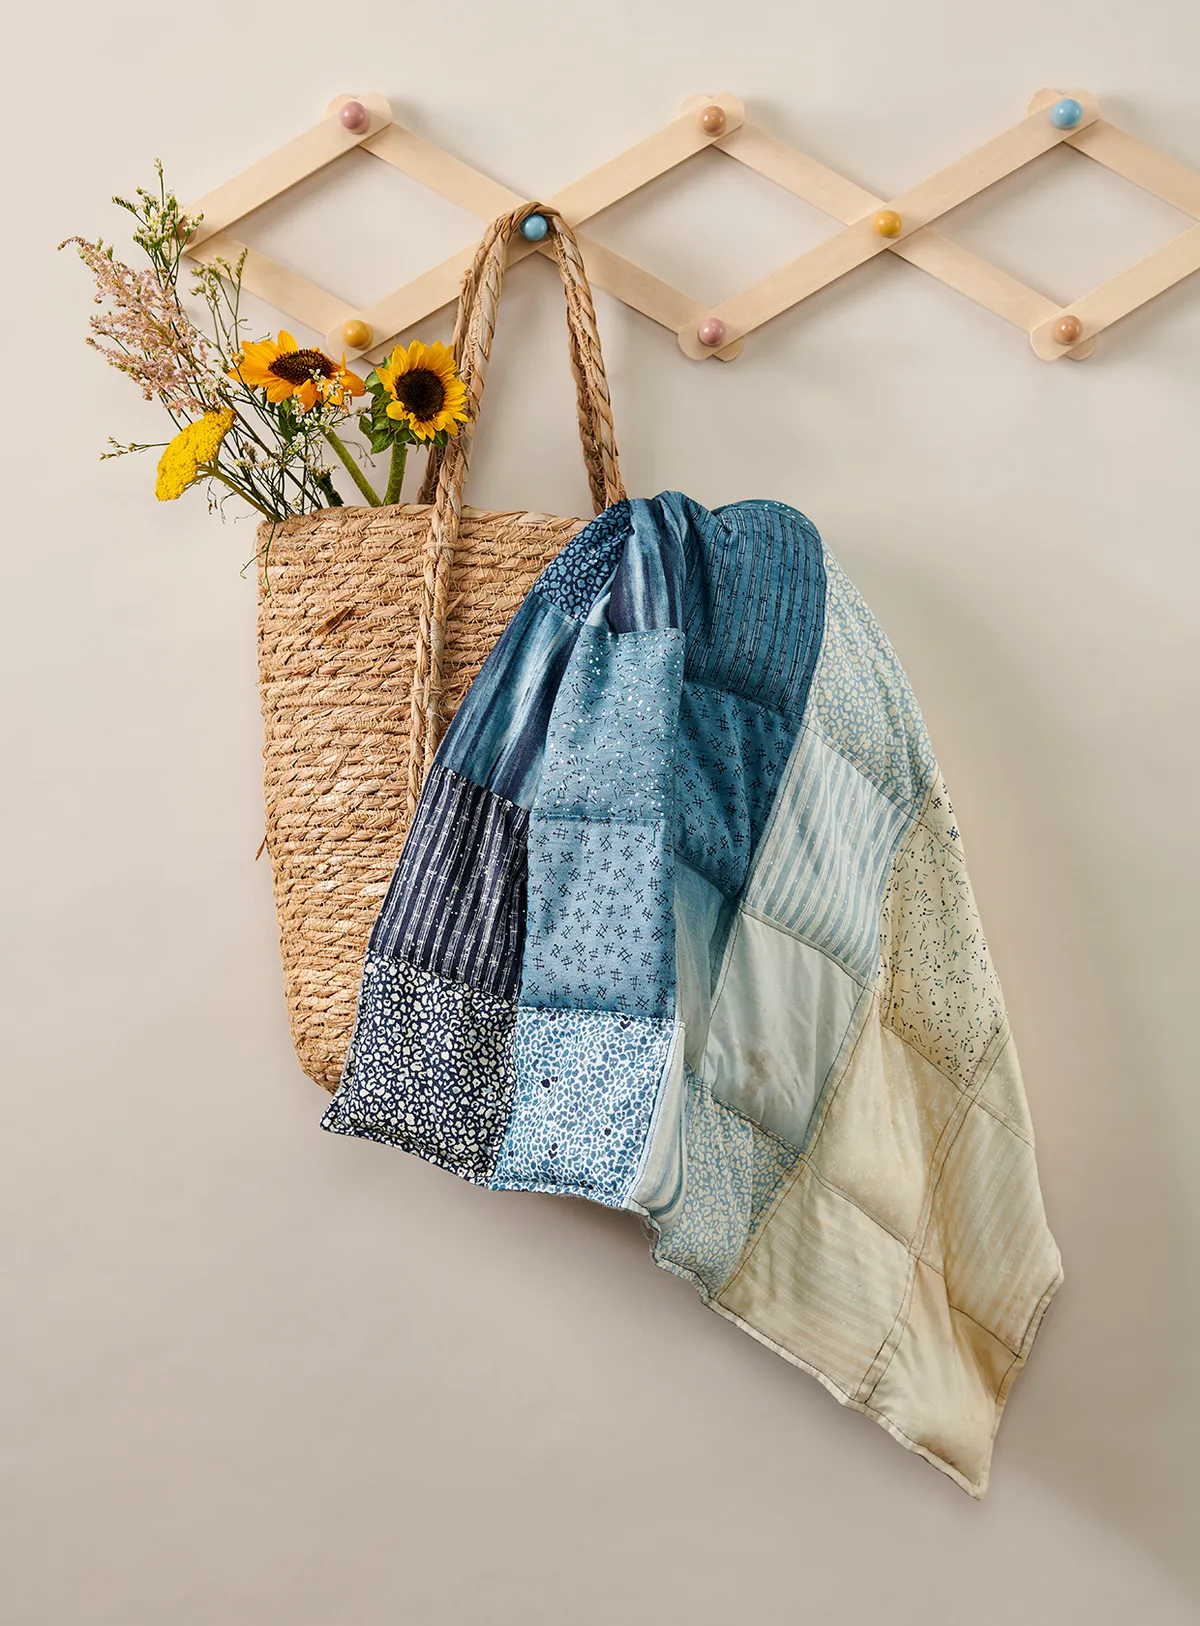
Finished size

27in x 31in (approx 70cm x 80cm)
Notes:

  • Seam allowances are 0.25in throughout, unless otherwise instructed.
  • Press the seams to one side, unless otherwise instructed.
  • Backstitch at the beginning and end of each seam and line of topstitching to secure.
  • Small stuffing beads are not recommended for children 3 and under. Regularly check the seams before use, as well as before and after laundering to avoid beads escaping
  • This pattern makes an approx 1.5kg/3lb weighted blanket. Adjust the amount of filling used for the weight required in your blanket.
  • If you're not sure what filling to pick, Weighted Blanket Guides have a great article on 6 popular weighted blanket fillings

How to make a weighted blanket tutorial

You will need:

  • Fabric
  • Plastic pellets (or weighted filling of your choice (See notes))
  • Sewing machine
  • Basic sewing kit

Step 1

Piece the blanket top as outlined below. If you do not want to piece patchwork to make the blanket top, skip to step 4 and simply cut 1 piece of top fabric to the same size as the back fabric.

If, like us, you’re partial to a spot of patchwork though. Here’s how to make a quilted pocket patchwork top for your blanket…

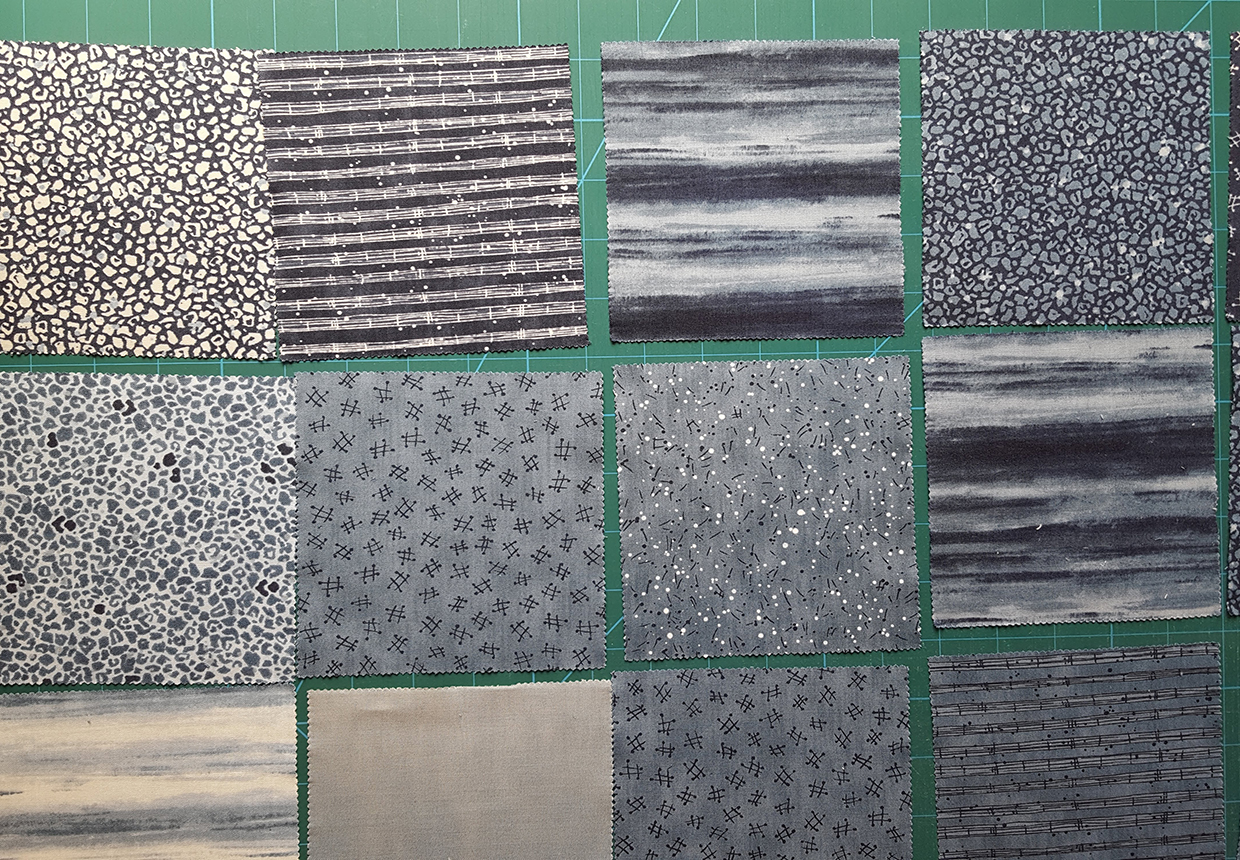
Arrange your 5in squares of fabric in six rows of seven squares.

How to make a weighted blanket: arrange your fabric squares

Step 2

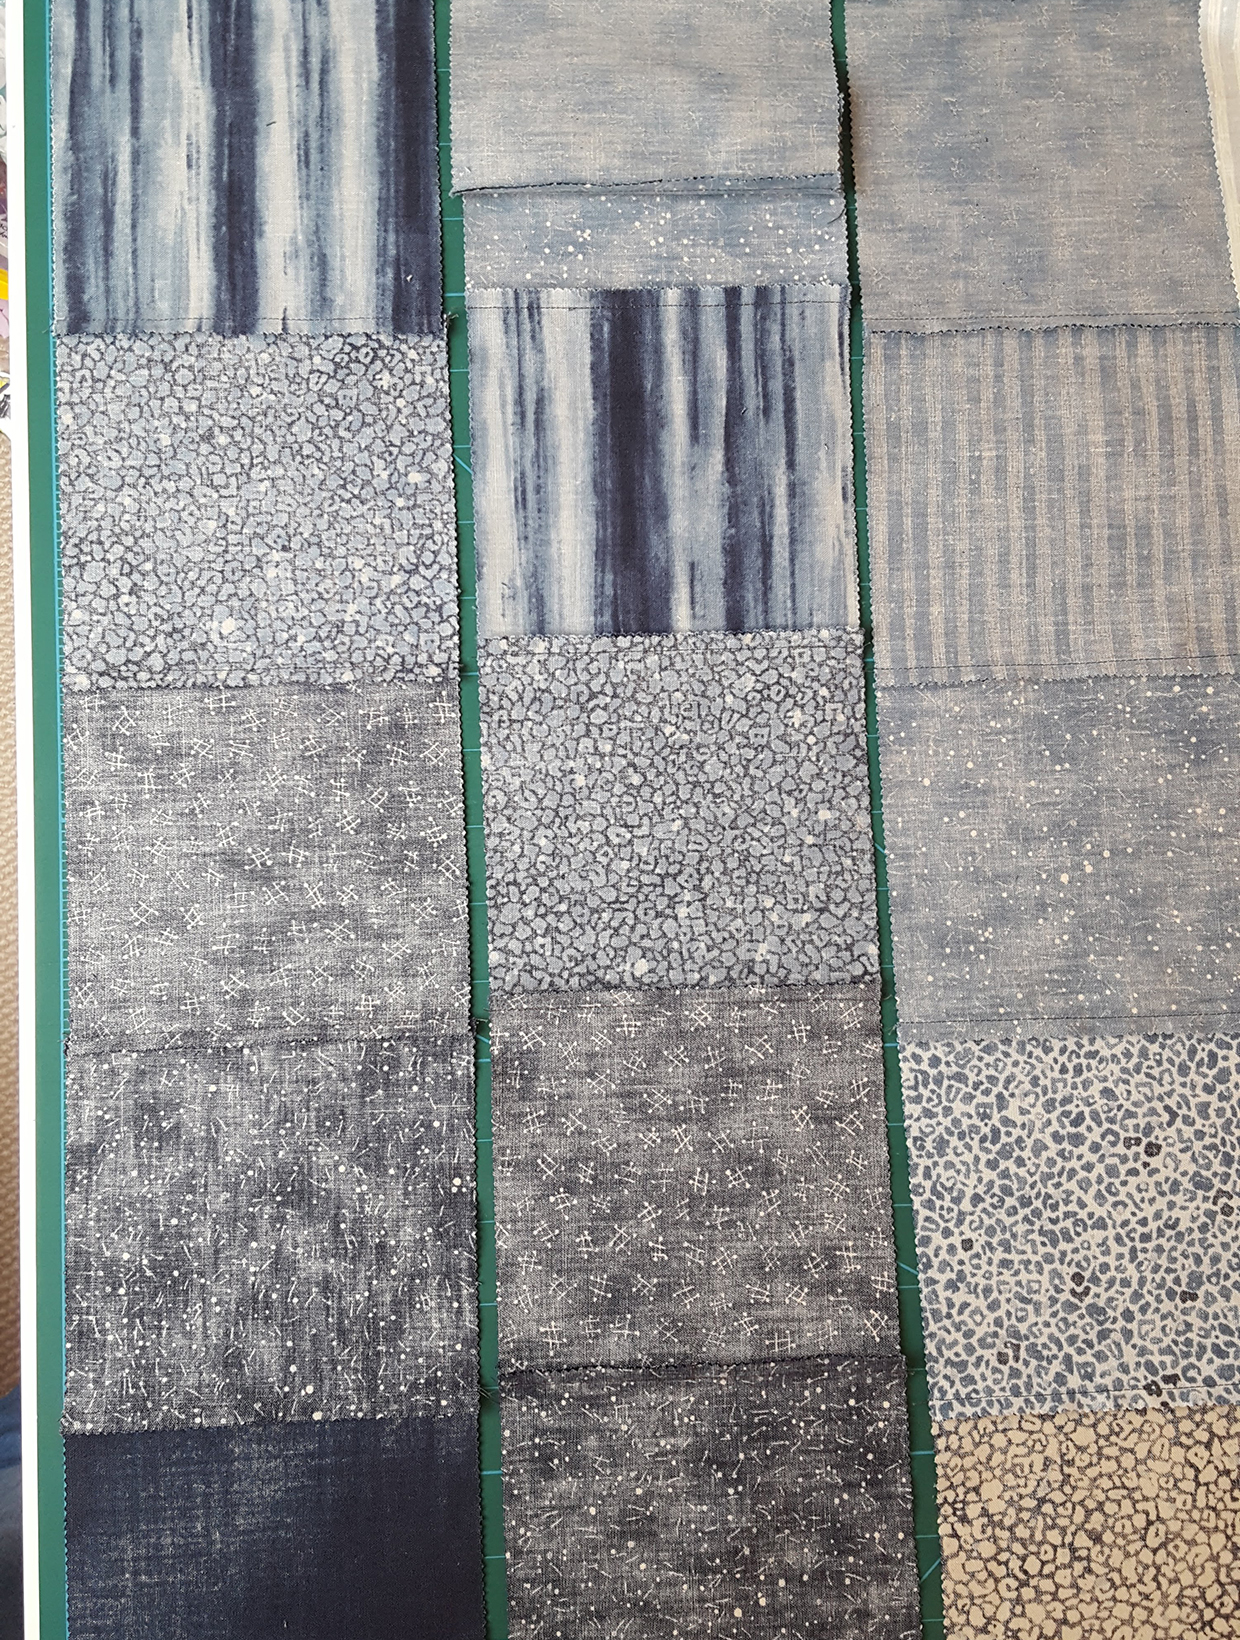
Once you’re happy with the layout sew the squares together in rows, pressing seams in opposite directions across the row as shown.

How to make a weighted blanket UK step 2

Step 3

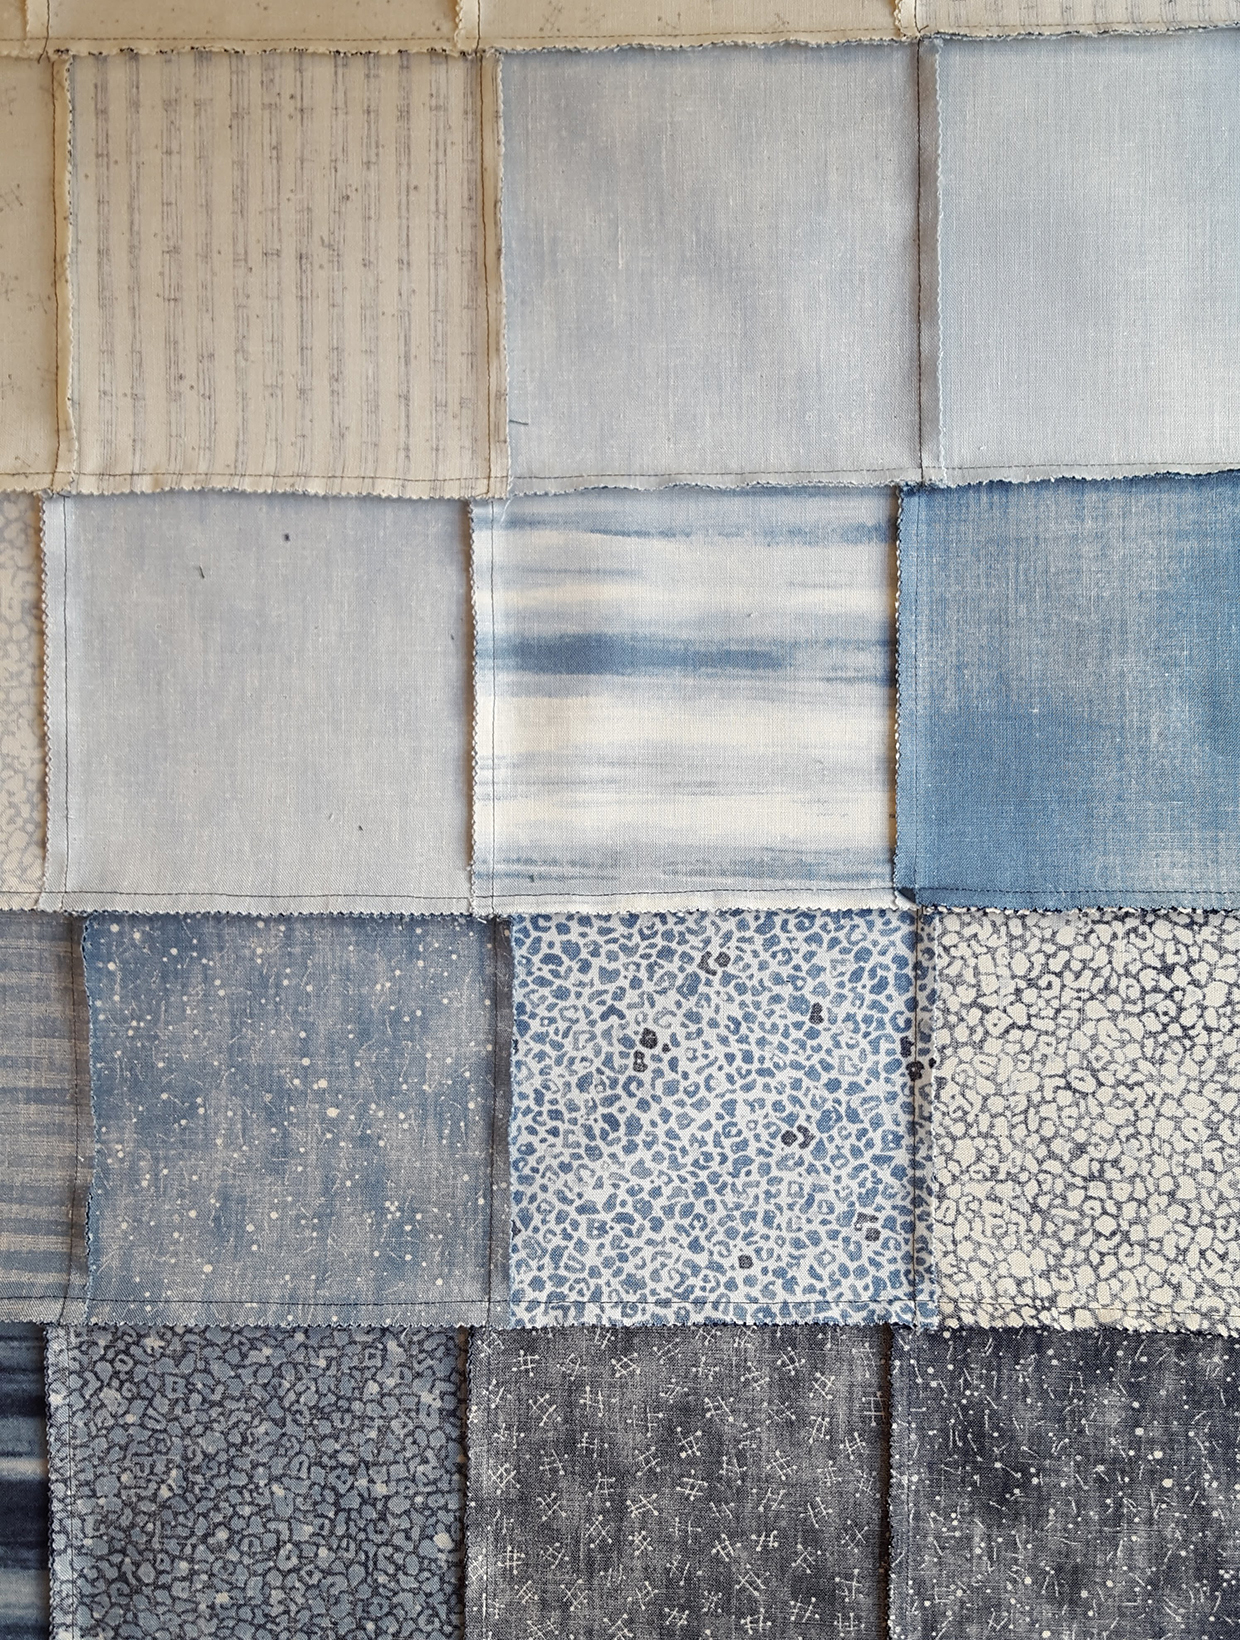
Sew the rows together, carefully nesting the seams in each row. Press the seams toward the bottom of the blanket top. This will help to keep any filling beads from getting caught in the seams when you begin to fill the blanket.

How to make a weighted blanket UK step 3

Step 4

Cut your backing fabric to the same size as your completed blanket top (ours was 27.5in x 31.5in). Place the backing fabric right sides together with the blanket top. Sew along the two long edges, making sure to backstitch at each end of both seams to secure. Sew along one short edge in the same way.

How to make a weighted blanket UK step 4

Step 5

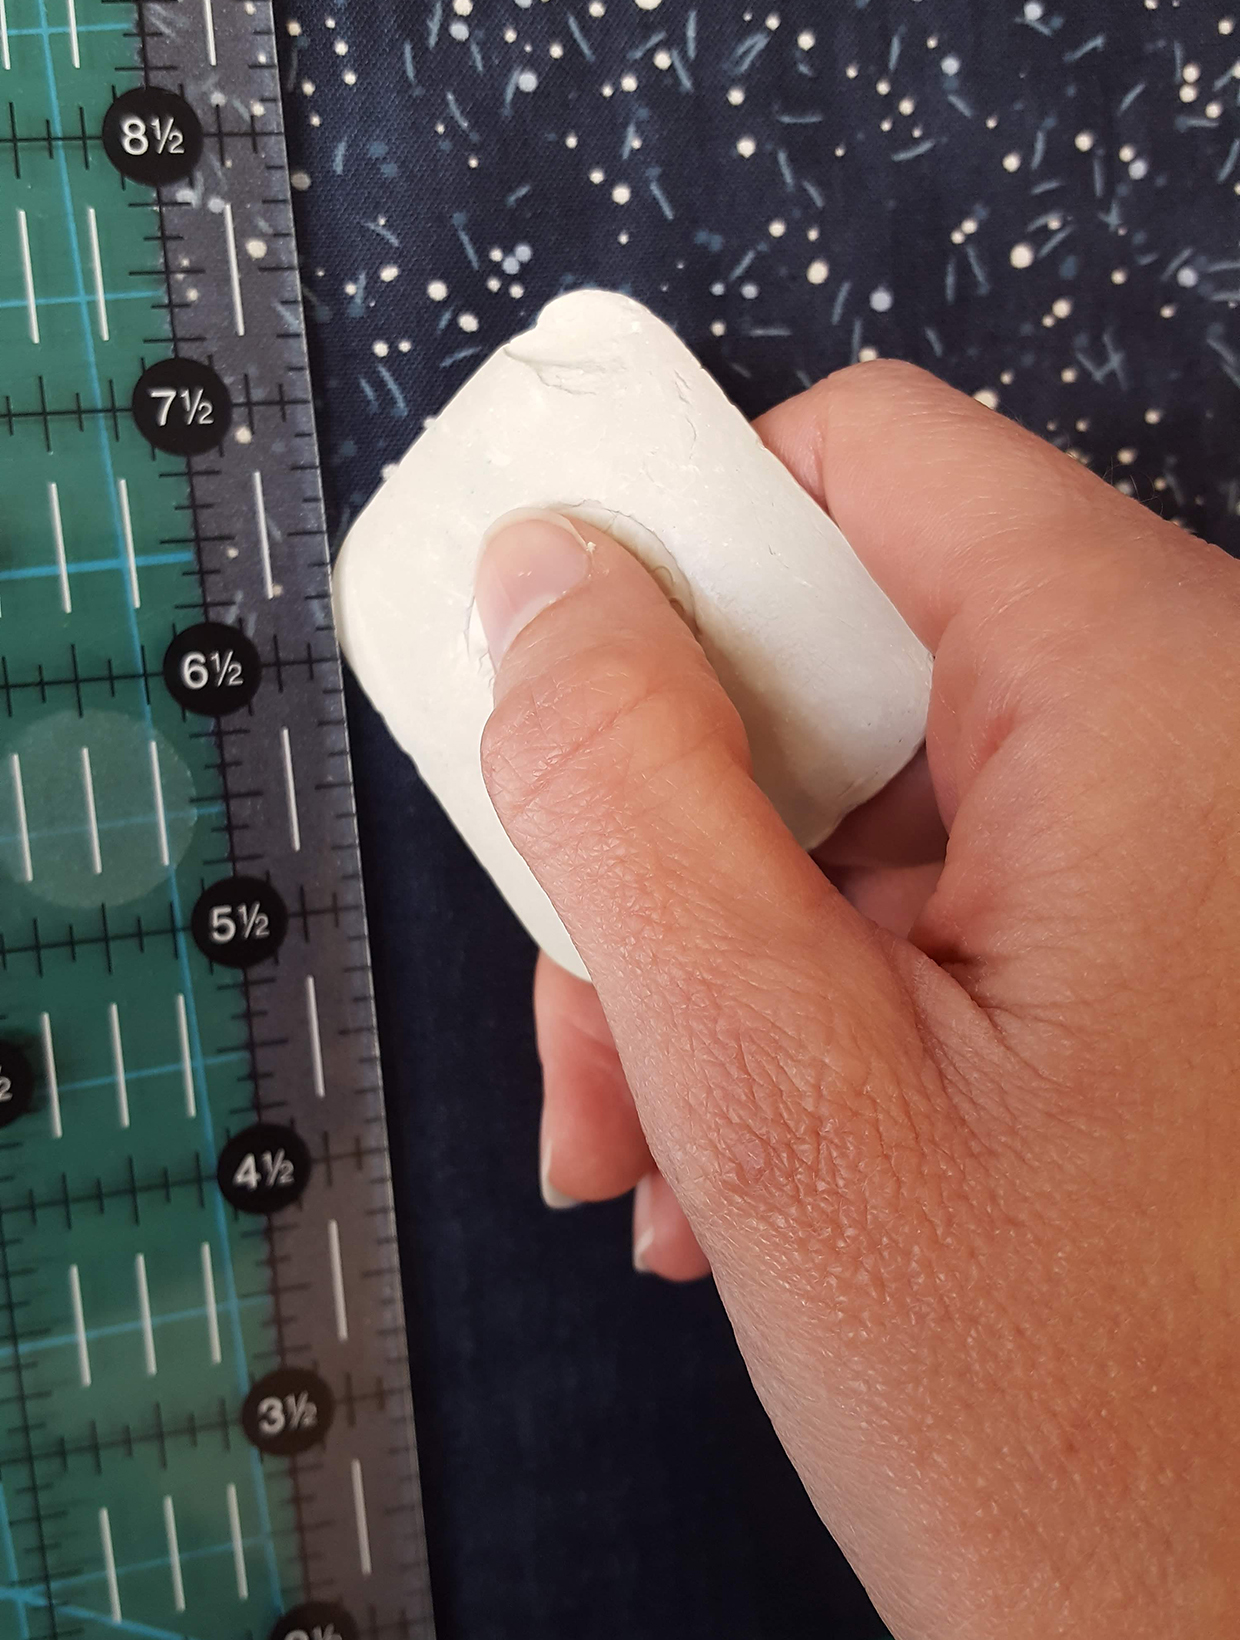
Turn the blanket right side out. Press the edges well. Mark a line ½in below the open edge of the blanket using a removable fabric pencil or tailor’s chalk.

How to make a weighted blanket UK step 5

Step 6

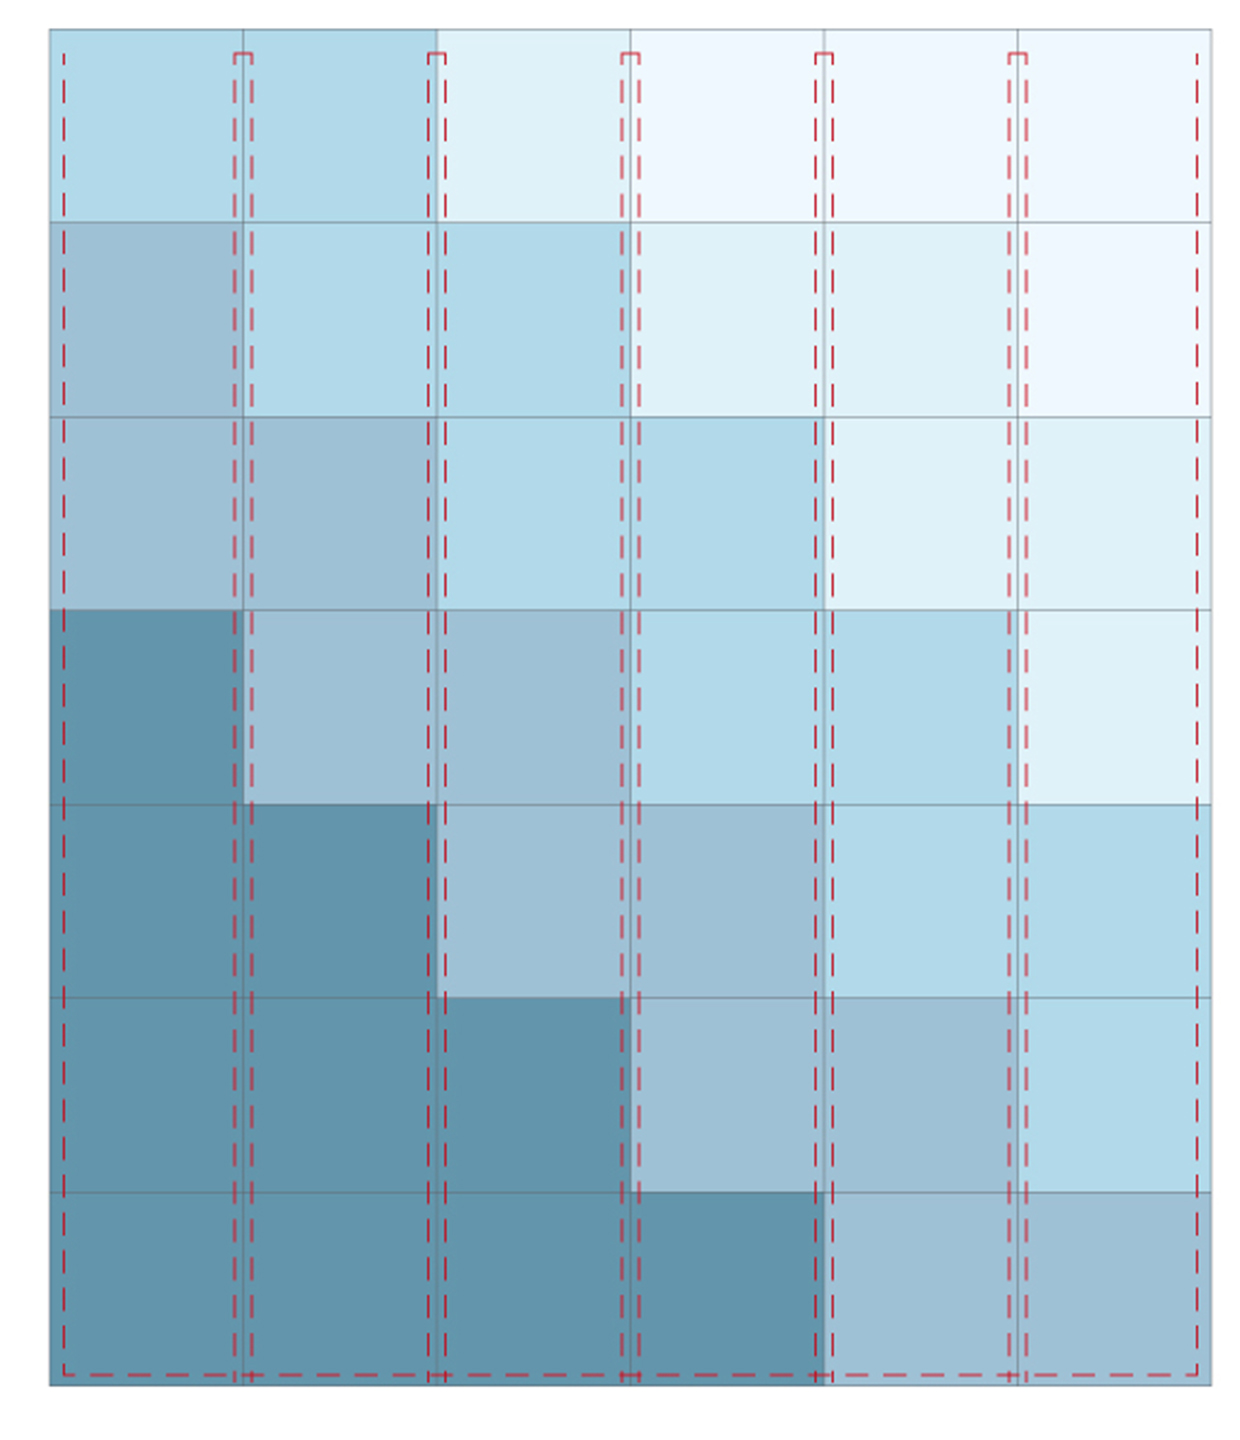
Starting and ending at the marked line, topstitch around the three closed edges of the blanket, ¼in from the edge. Backstitch at the beginning and end of the line of topstitching to secure.

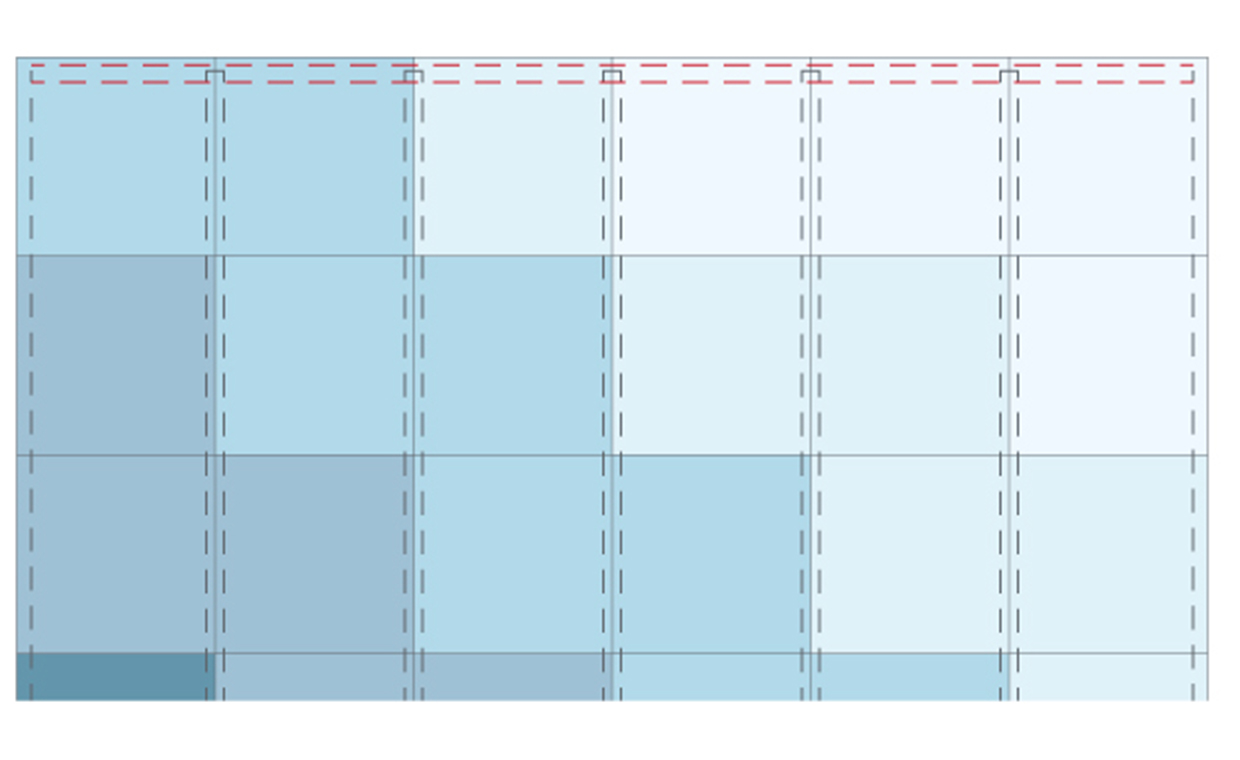
Also topstitch ¼in from either side of the column seams of patchwork squares, making sure your stitching lines do not extend past your marked ½in line. This will form channels across the quilt top to add the weighted filling. If you are just using a piece of plain fabric for the front, you will need to mark out a 4½in grid across the fabric before beginning this step.

How to make a weighted blanket UK step 6

Step 7

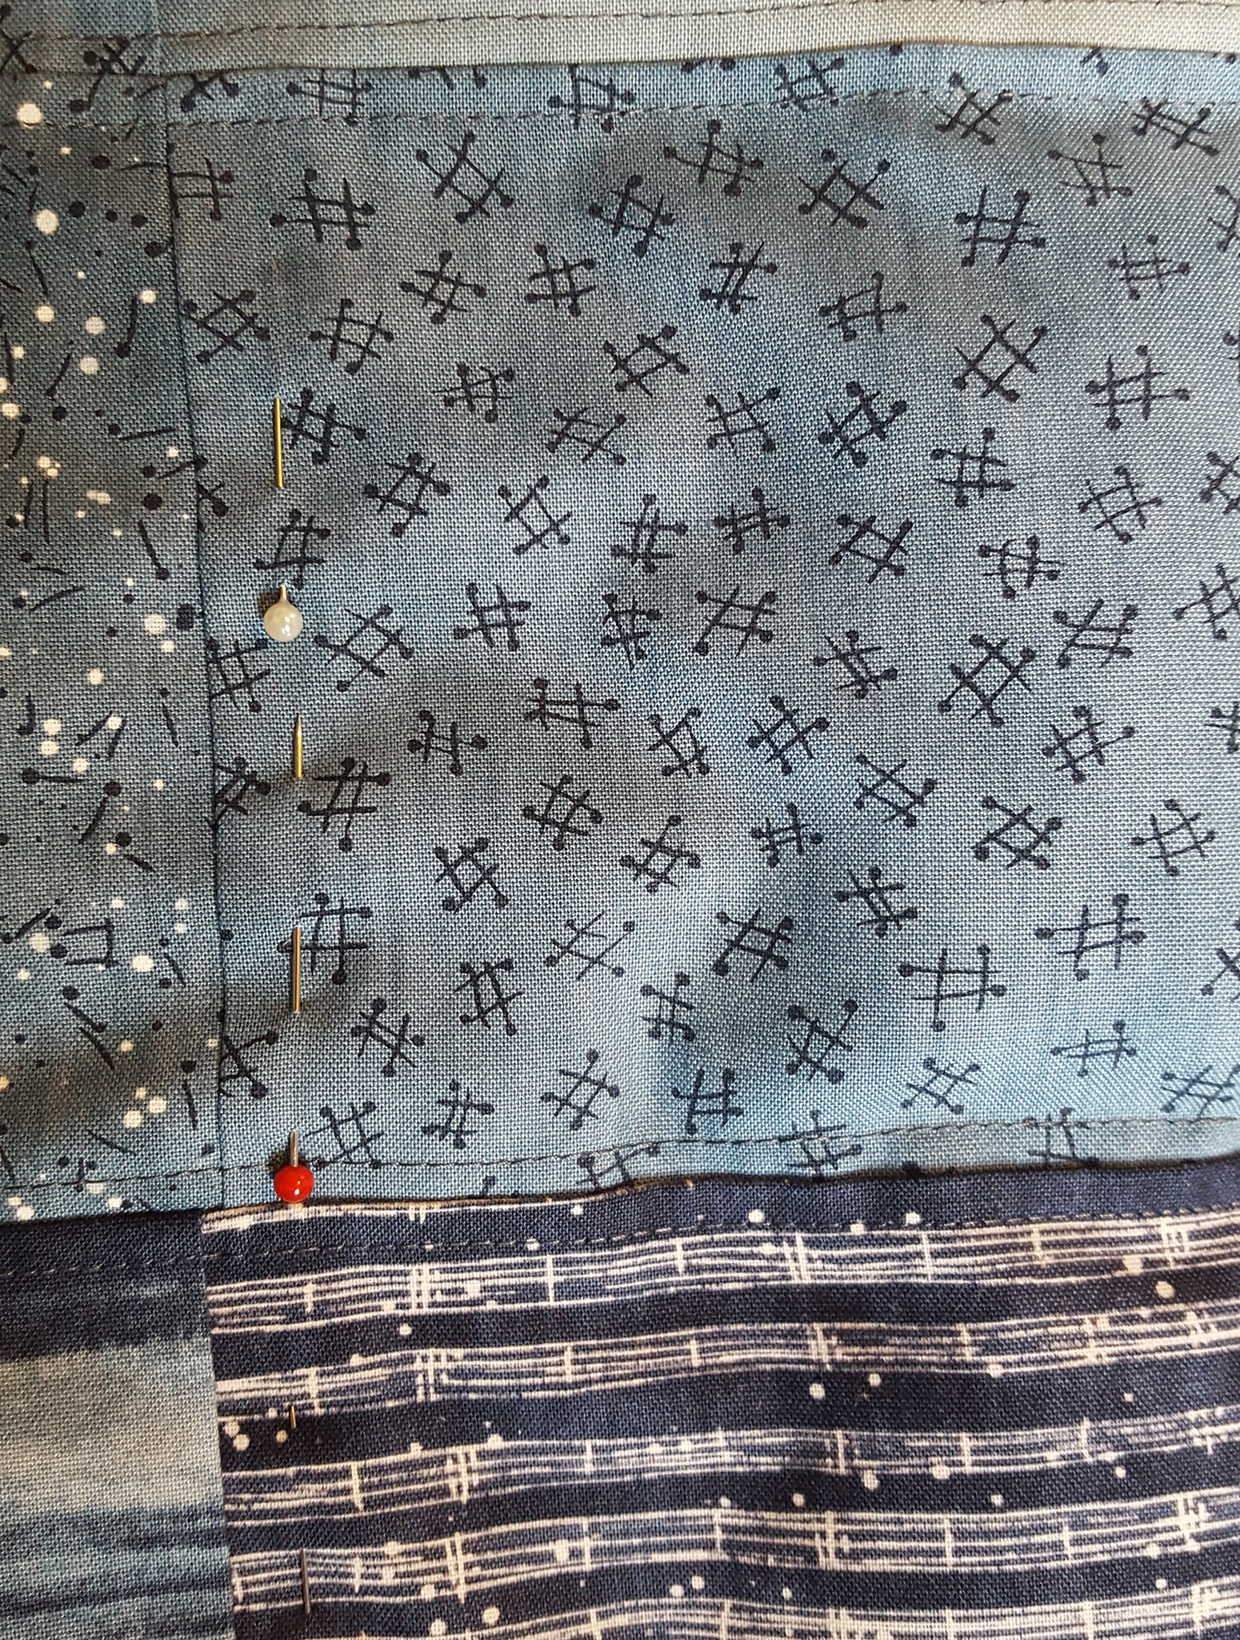
Use a scoop or measuring cup to place an even amount of filling in each of the channels of the blanket. We used approx 35g of filling in each channel. Shake the blanket to make sure the filling goes all the way down to the bottom of the channel. Pin just below the bottom seam to help keep the filling in place.

How to make a weighted blanket UK step 7

Step 8

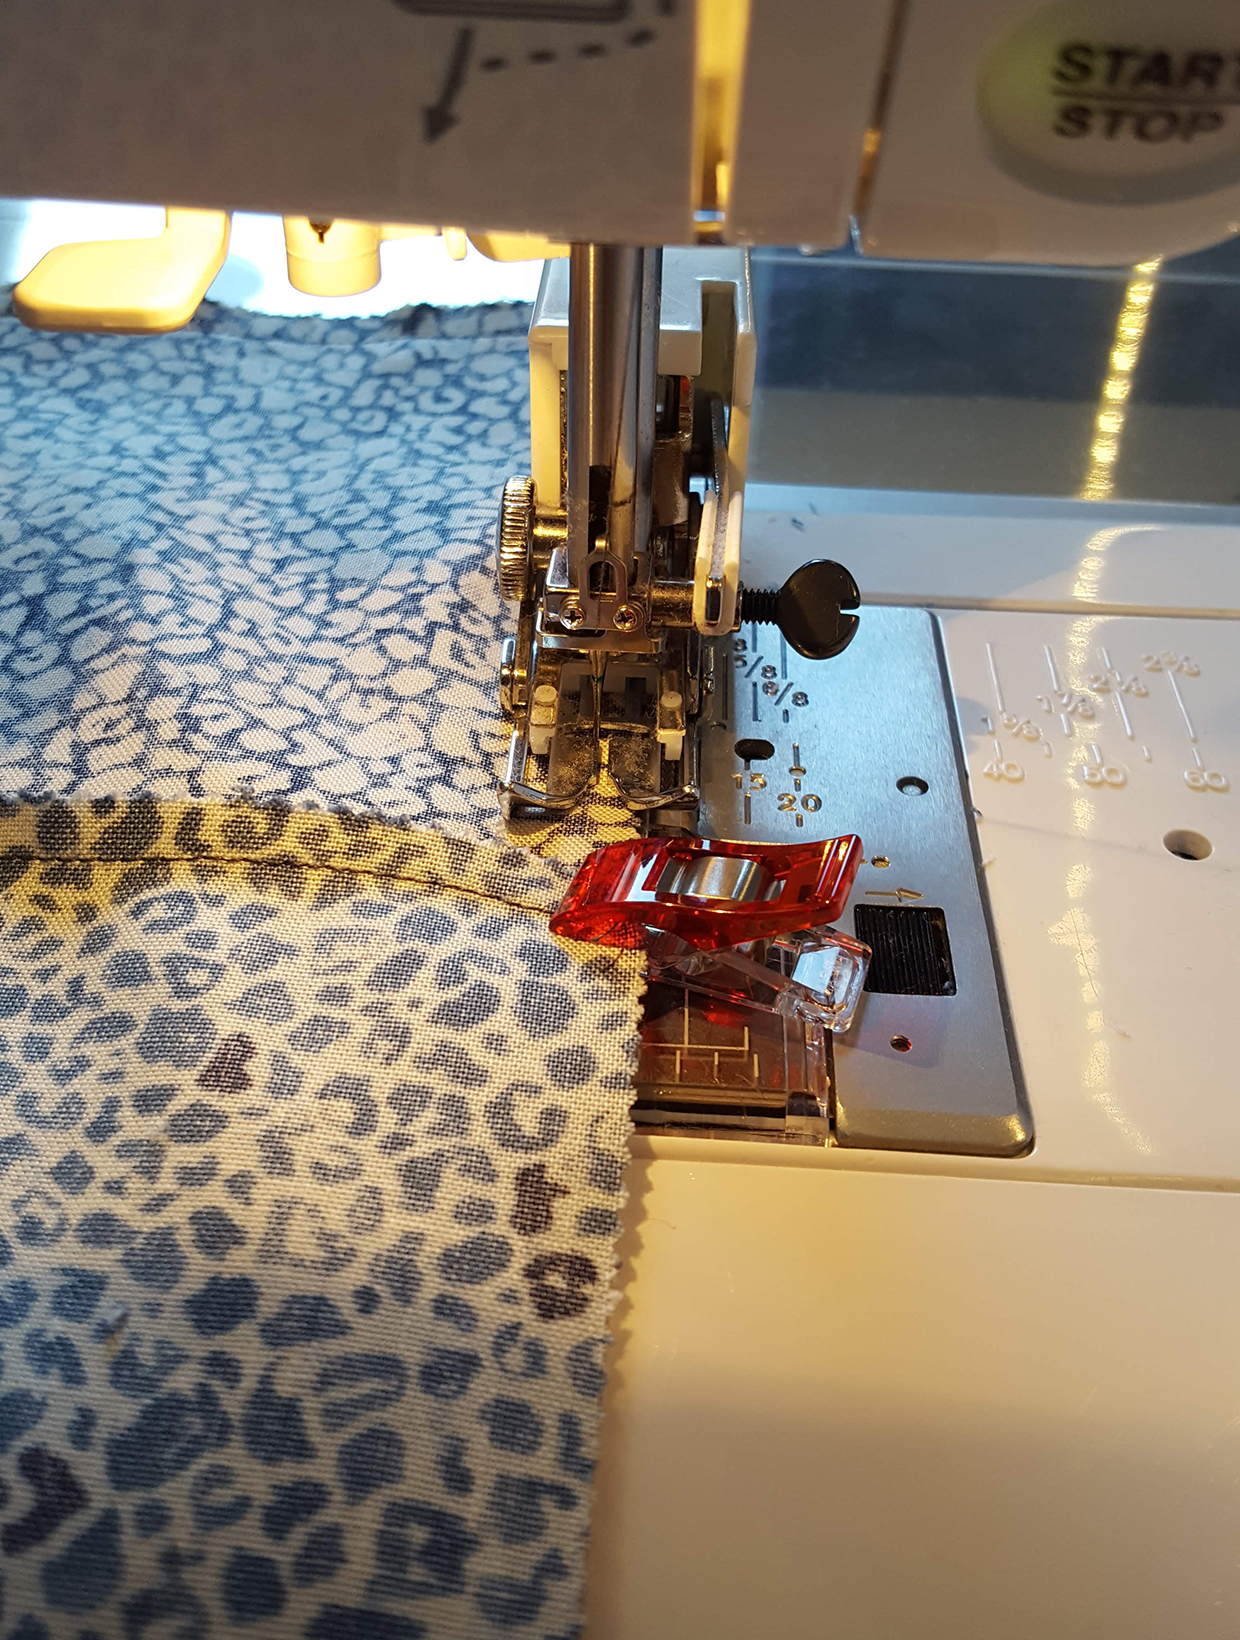
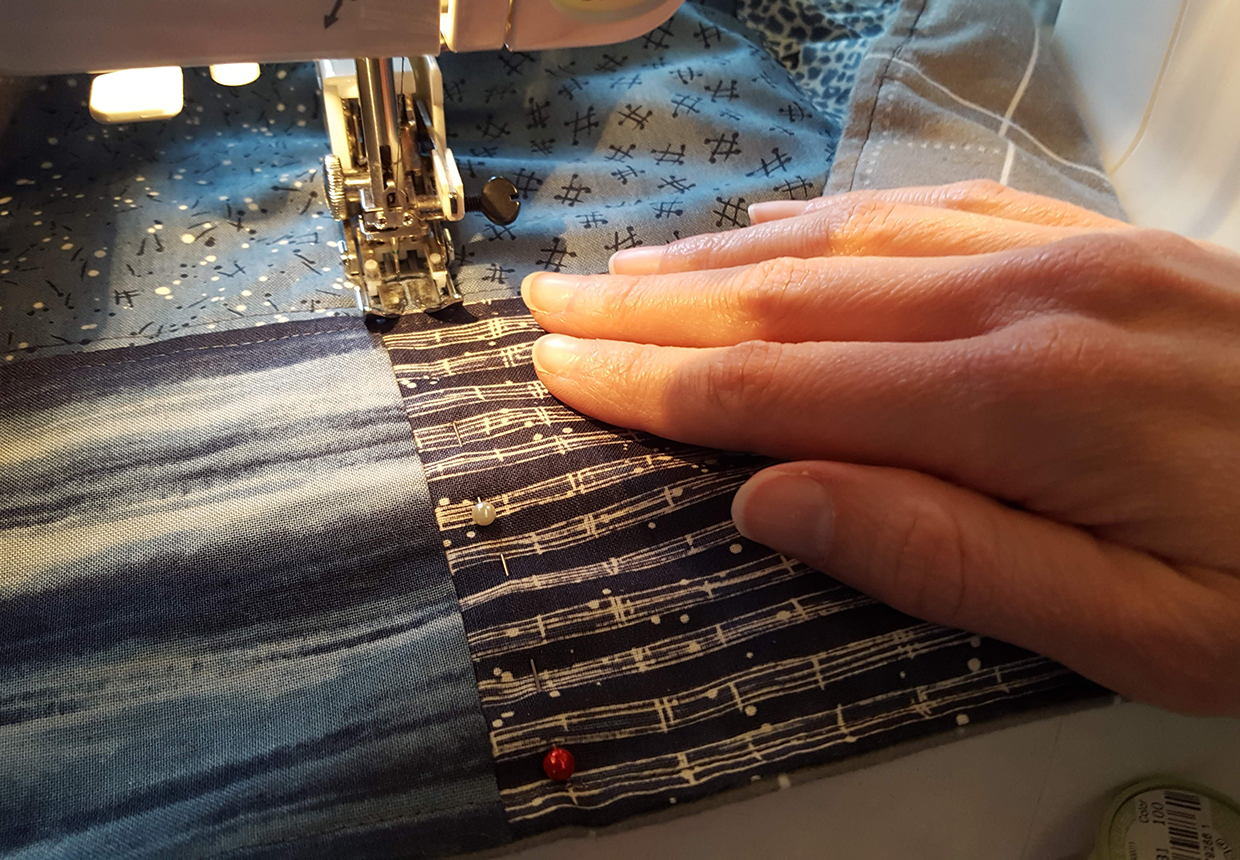
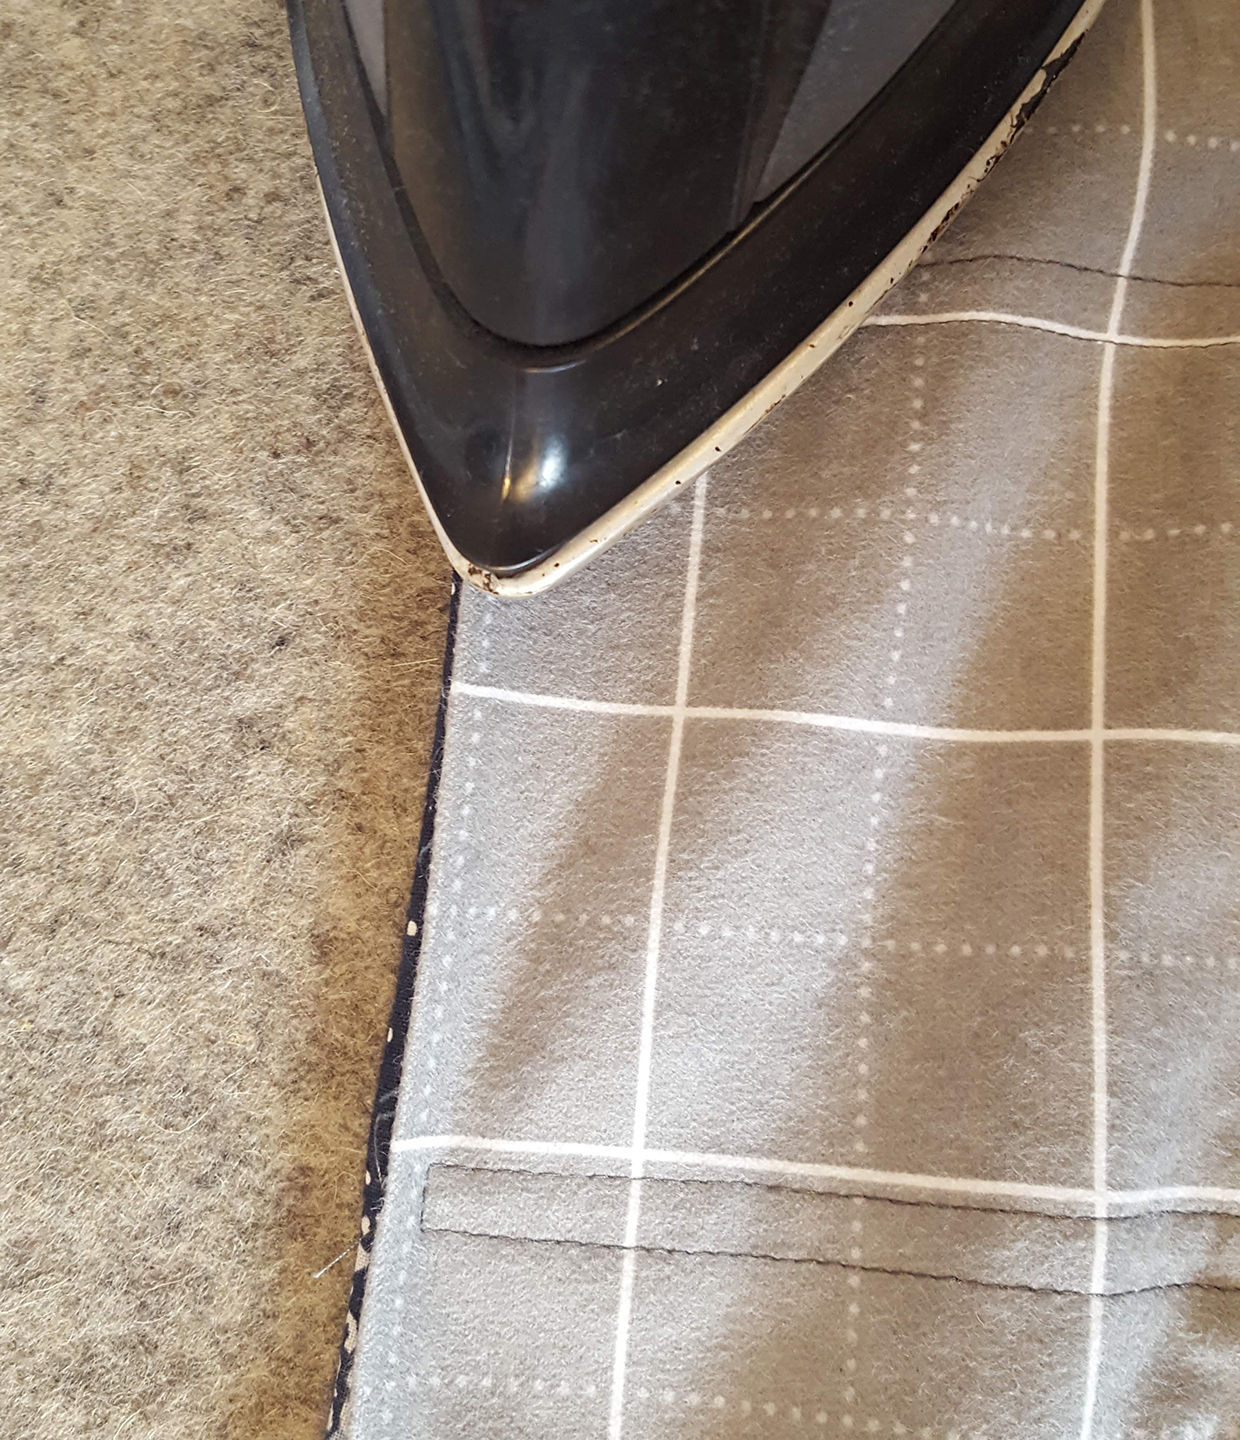
Topstitch ¼in below the seam of the bottom row of patchwork squares, removing pins as you go. Work slowly and carefully to avoid sewing over any of the plastic beads, pushing them toward the bottom of the blanket as you feed it into the machine. You may find it helpful to place your sewing machine on a large table to support the blanket as you sew. Or try placing an ironing board lowered to the level of your machine along your left side.

How to make a weighted blanket UK step 8

Step 9

Repeat the last step to fill and sew each of the rows one at a time. Make sure to use a consistent amount of filling in each section to keep the weight even across the blanket.

When you reach the last row, carefully press the raw edges of both the front and back to the inside by ¼in.

How to make a weighted blanket UK step 9

Step 10

Add the filling, then pin or clip along the top edge to temporarily secure. Topstitch, making sure to overlap the topstitching at each side of the blanket and across the channels, approx 38in from the edge. Add a second row of topstitching above this, approx 18in from the edge to ensure the folded edges of the blanket are caught. Make sure you backstitch at each end of the topstitching for a secure finish. Clip any loose thread ends, and your weighted blanket is complete!

How to make a weighted blanket UK step 10

DIY weighted blanket FAQs

Can I wash my DIY weighted blanket in a washing machine?

This depends on how you have made your blanket. If the fabric you have used for your weighted blanket is washable, that’s good for machine washing. If you have stuffed it with plastic pellets rather than an organic material like rice or grain, that’s good for machine washing too. But we recommend using the hand wash wool cycle and use the lowest spin possible. The biggest risk to your DIY weighted blanket in the washing machine is  the weight of each of the pockets causes the seams to give. You can minimise the risk by using a very low spin. For spot soiling, it’s better for the long-term life of your blanket to use a  spot cleaner rather than routinely washing in the machine.

What fabric should I use for my DIY weighted blanket?

You can use any materials you find cosy, but we recommend something durable without too much stretch, such as quilting cottons, brushed cotton, organic cotton or  non-stretchy flannel fabric. Avoid any fabrics with lycra or anything sheer like chenille as you don’t want to see the filling through the fabric. Organic cotton is a nice choice to emphasise the well-being nature of this project.

5 of the best shop brought weighted blankets

Not sure making your own is for you? Check out our favourite weighted blankets to buy online…

YnM Bamboo weighted blanket


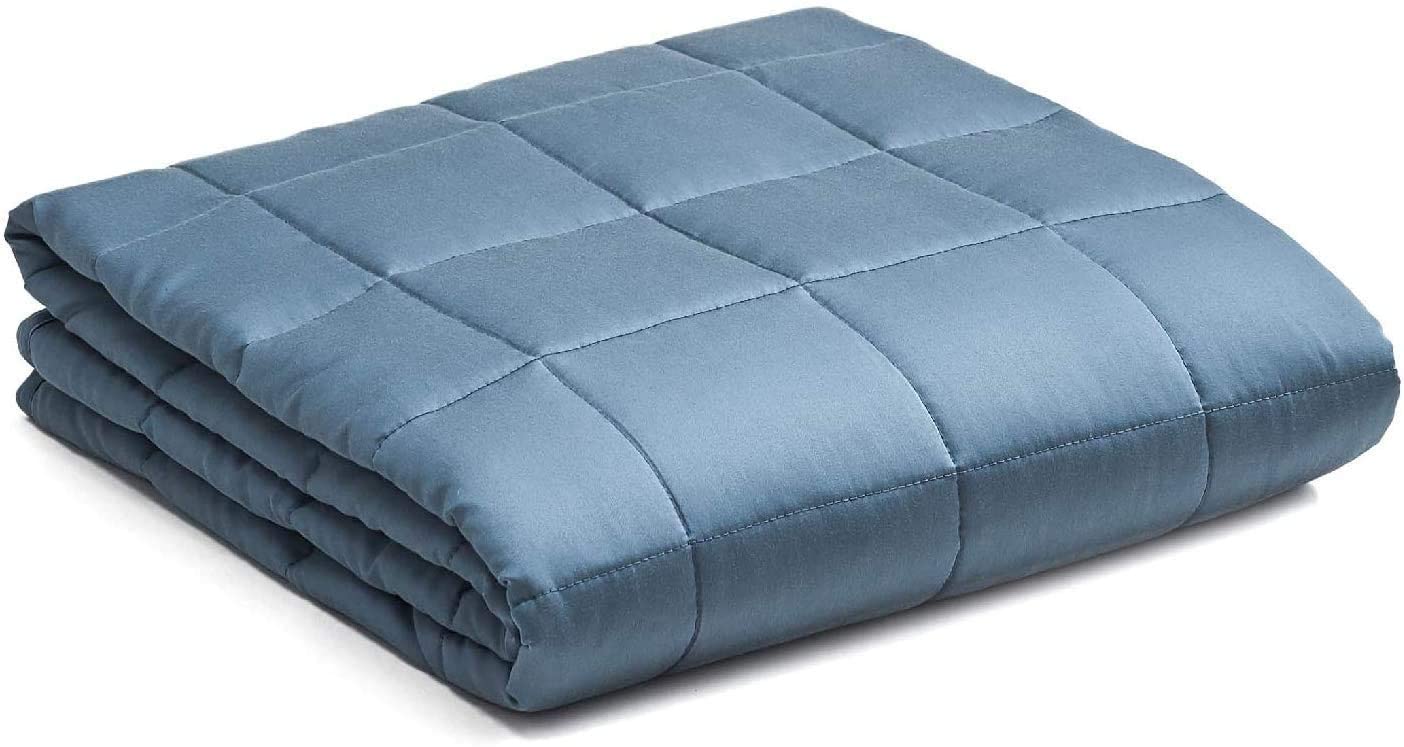
the weighted blanket uk us made from pale blue fabric with a slightly sheen and is folded neatly into a square shape

Bamboo-derived viscose is a really flexible fabric for a weighted blanket. It has the breathability of a natural fibre with the durability and stability of  man made. This blanket from YNM has small pocket sections (4.7in square) to help spread the weight more evenly across the blanket area. The filling is glass beads which makes it washable too. With bed size ranging from child up to to super king, and weight options from 2.3 – 13.6 kg, there is a wide range of customisation options.

SWSensory weighted blankets

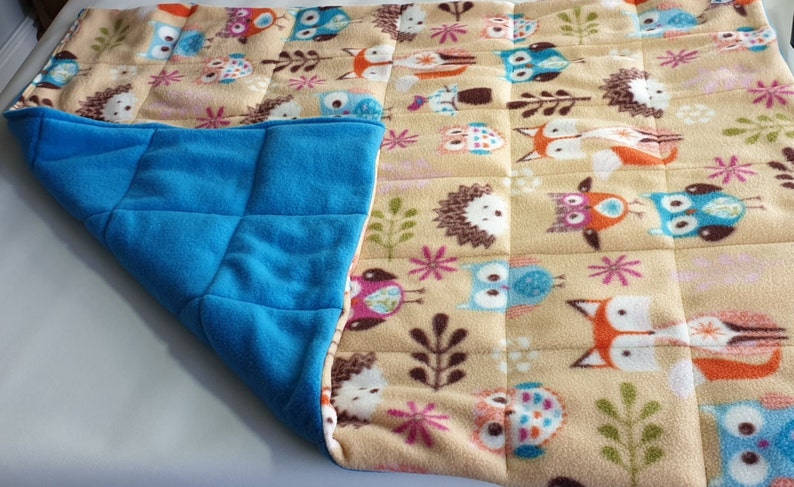
the weighted blanket has a fleece fabric with woodland animal print on one side, and a blue fleecy fabric on the other side

Buy the blanket on Etsy

If you want the option of a weighted blanket uk handmade and customisable, Etsy comes to the rescue. SWSensory on Etsy will make weighted blankets for people of 20-70kg, and you can communicate your fabric colour and pattern preferences to the maker. Or you can browse the store to see what is already available if you don’t want to wait. Fabrics are generally fleeces, with patterns designed to appeal to children.


Rest Easy Sleep Better star weighted blanket

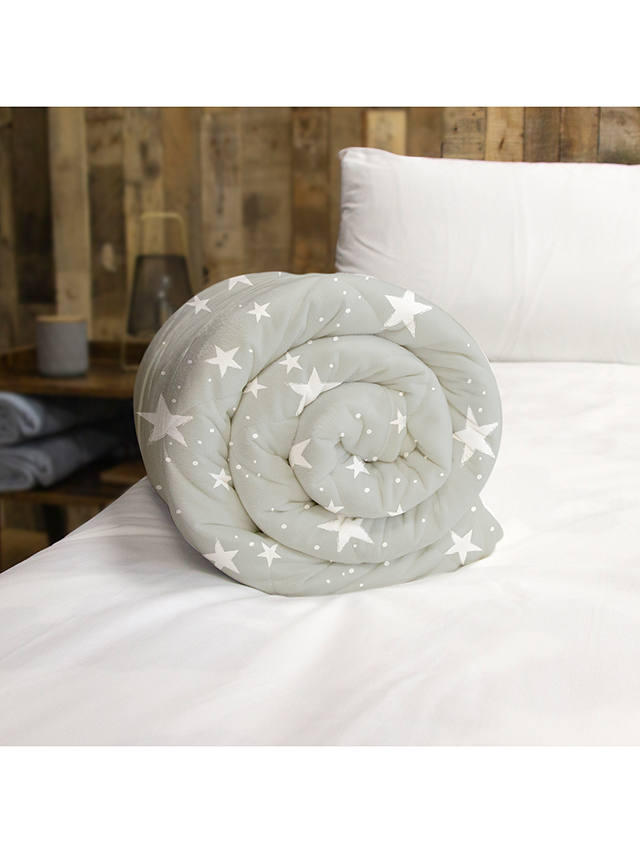
a weighted blanket uk with a white star pattern on a grey fabric background is rolled into a coil on a bed with a lava lamp visible in the background

This star print weighted blanket from the Rest Easy Sleep Better range comes in 2 or 3kg weights, so is suited and sized towards children. The reverse of the weighted blanket is a wonderfully soft and cosy micro-fleece, giving this a sung finish directly on the skin. This makes it great for snuggling on the sofa as well as having on your child’s bed. The right side fabric is cotton grown in a more environmentally aware way, with a lovely star print. The filling is micro glasswork beads with a polyester padding, so the blanket is machine washable on a cold, gentle cycle.

Children’s personalised weighted blanket

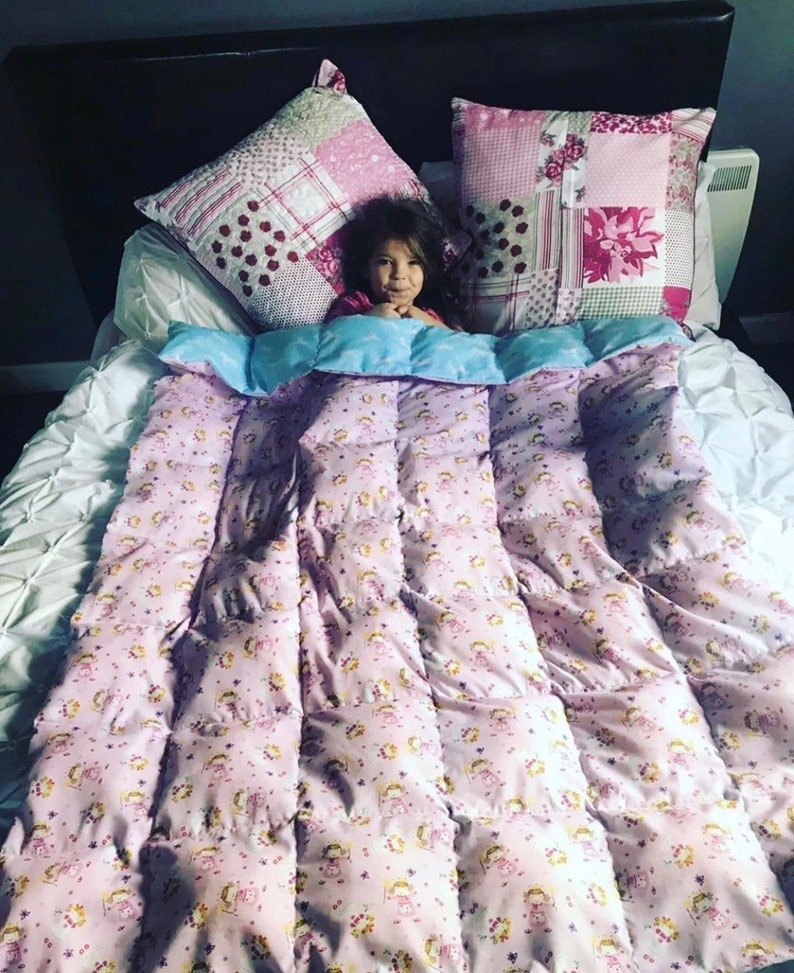
the weighted blanket is spread across a child in bed with a pink patterned fabric on one side and a plain blue fabric on the other side

Buy the weighted blanket on Etsy

Help get your child to embrace bedtime with a personalised weighted blanket with their name on. Etsy seller RoxysPersonalMakes will embroider your chosen name to their handmade weighted blanket, and let you have imput on fabric colours and prints, too. You ned to allow 3-5 days making time for customisable blankets. You can opt not to have the name added if you prefer. The blankets are stuffed with poly pellets, with the central pockets being stuffed and the outer pockets being left unstuffed, so the weight sits in the centre of the blanket.

Crochet weighted blanket

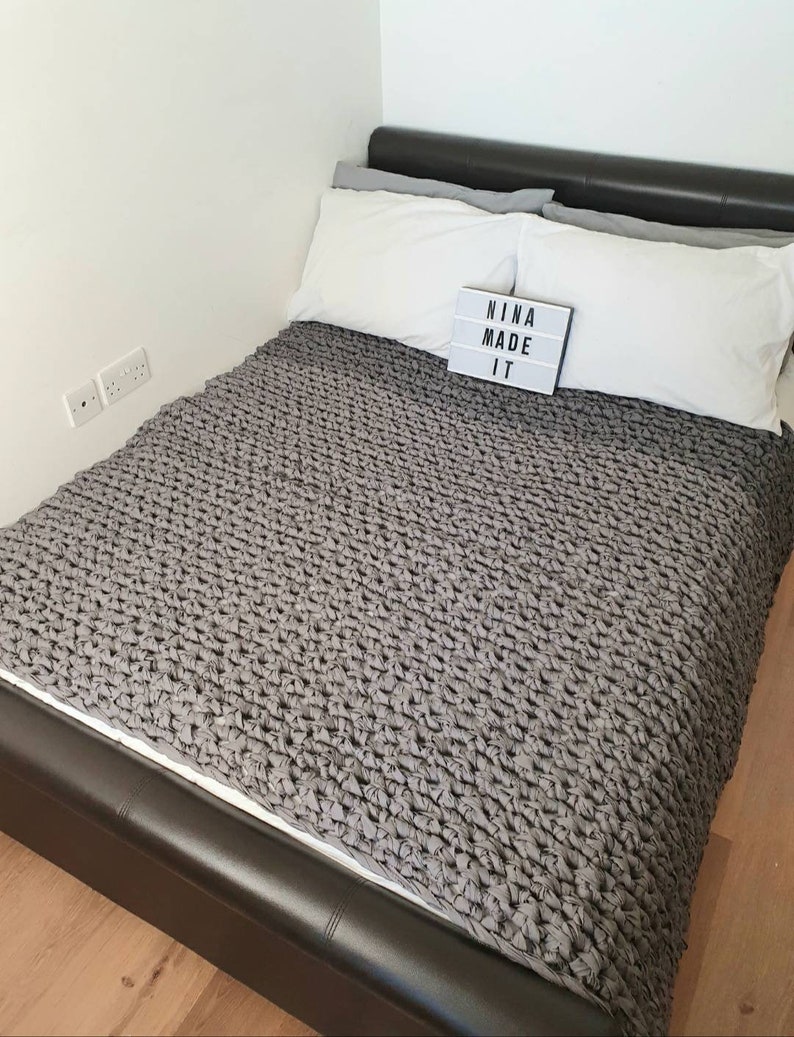
the wighted blanket is grey and has a rough

Buy the blanket on Etsy

If you want the option of a pellet-free blanket, this crochet version from Etsy seller NinaKnittedThis is a sound choice. Rather than filled pockets, the weight comes from strips of cotton fabric crocheted into a blanket. It has a very chunky finish, with holes visible within the fabric as you would expect from a crochet material. But the weight is very satisfying and gives the same secure and calming feeling as the plastic-filled blankets while being 100% cotton. A unique finish, great for those who dislike the sounds of the pellets moving in the more standard weighted blanket design.