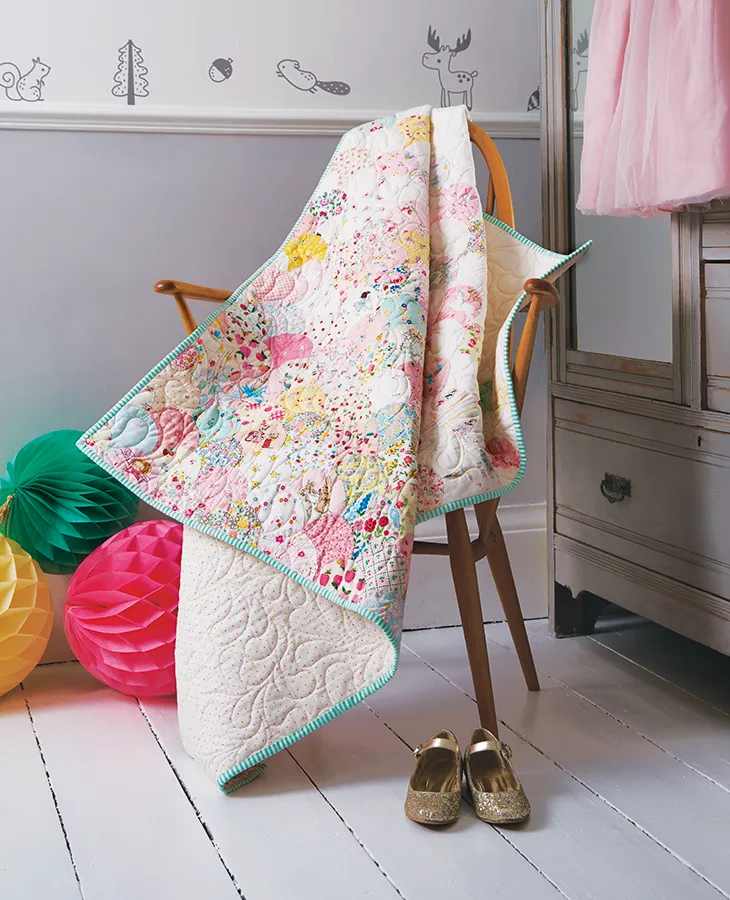
Step 1
Cutting out the pattern
From the white fabric cut:
■ One (1) 12in x 44½in strip.
■ Forty eight (48) 5in squares. Subcut each square into a clamshell shape using the Clamshell Fabric template.
Step 2
Use the Clamshell Fabric template to cut a clamshell shape from each print fabric 5in square, fussy cutting some of the prints if desired.
Step 3
From the binding fabric cut:
■ Six (6) 2½in x WOF strips.
Step 4
Sewing the scrappy clamshells
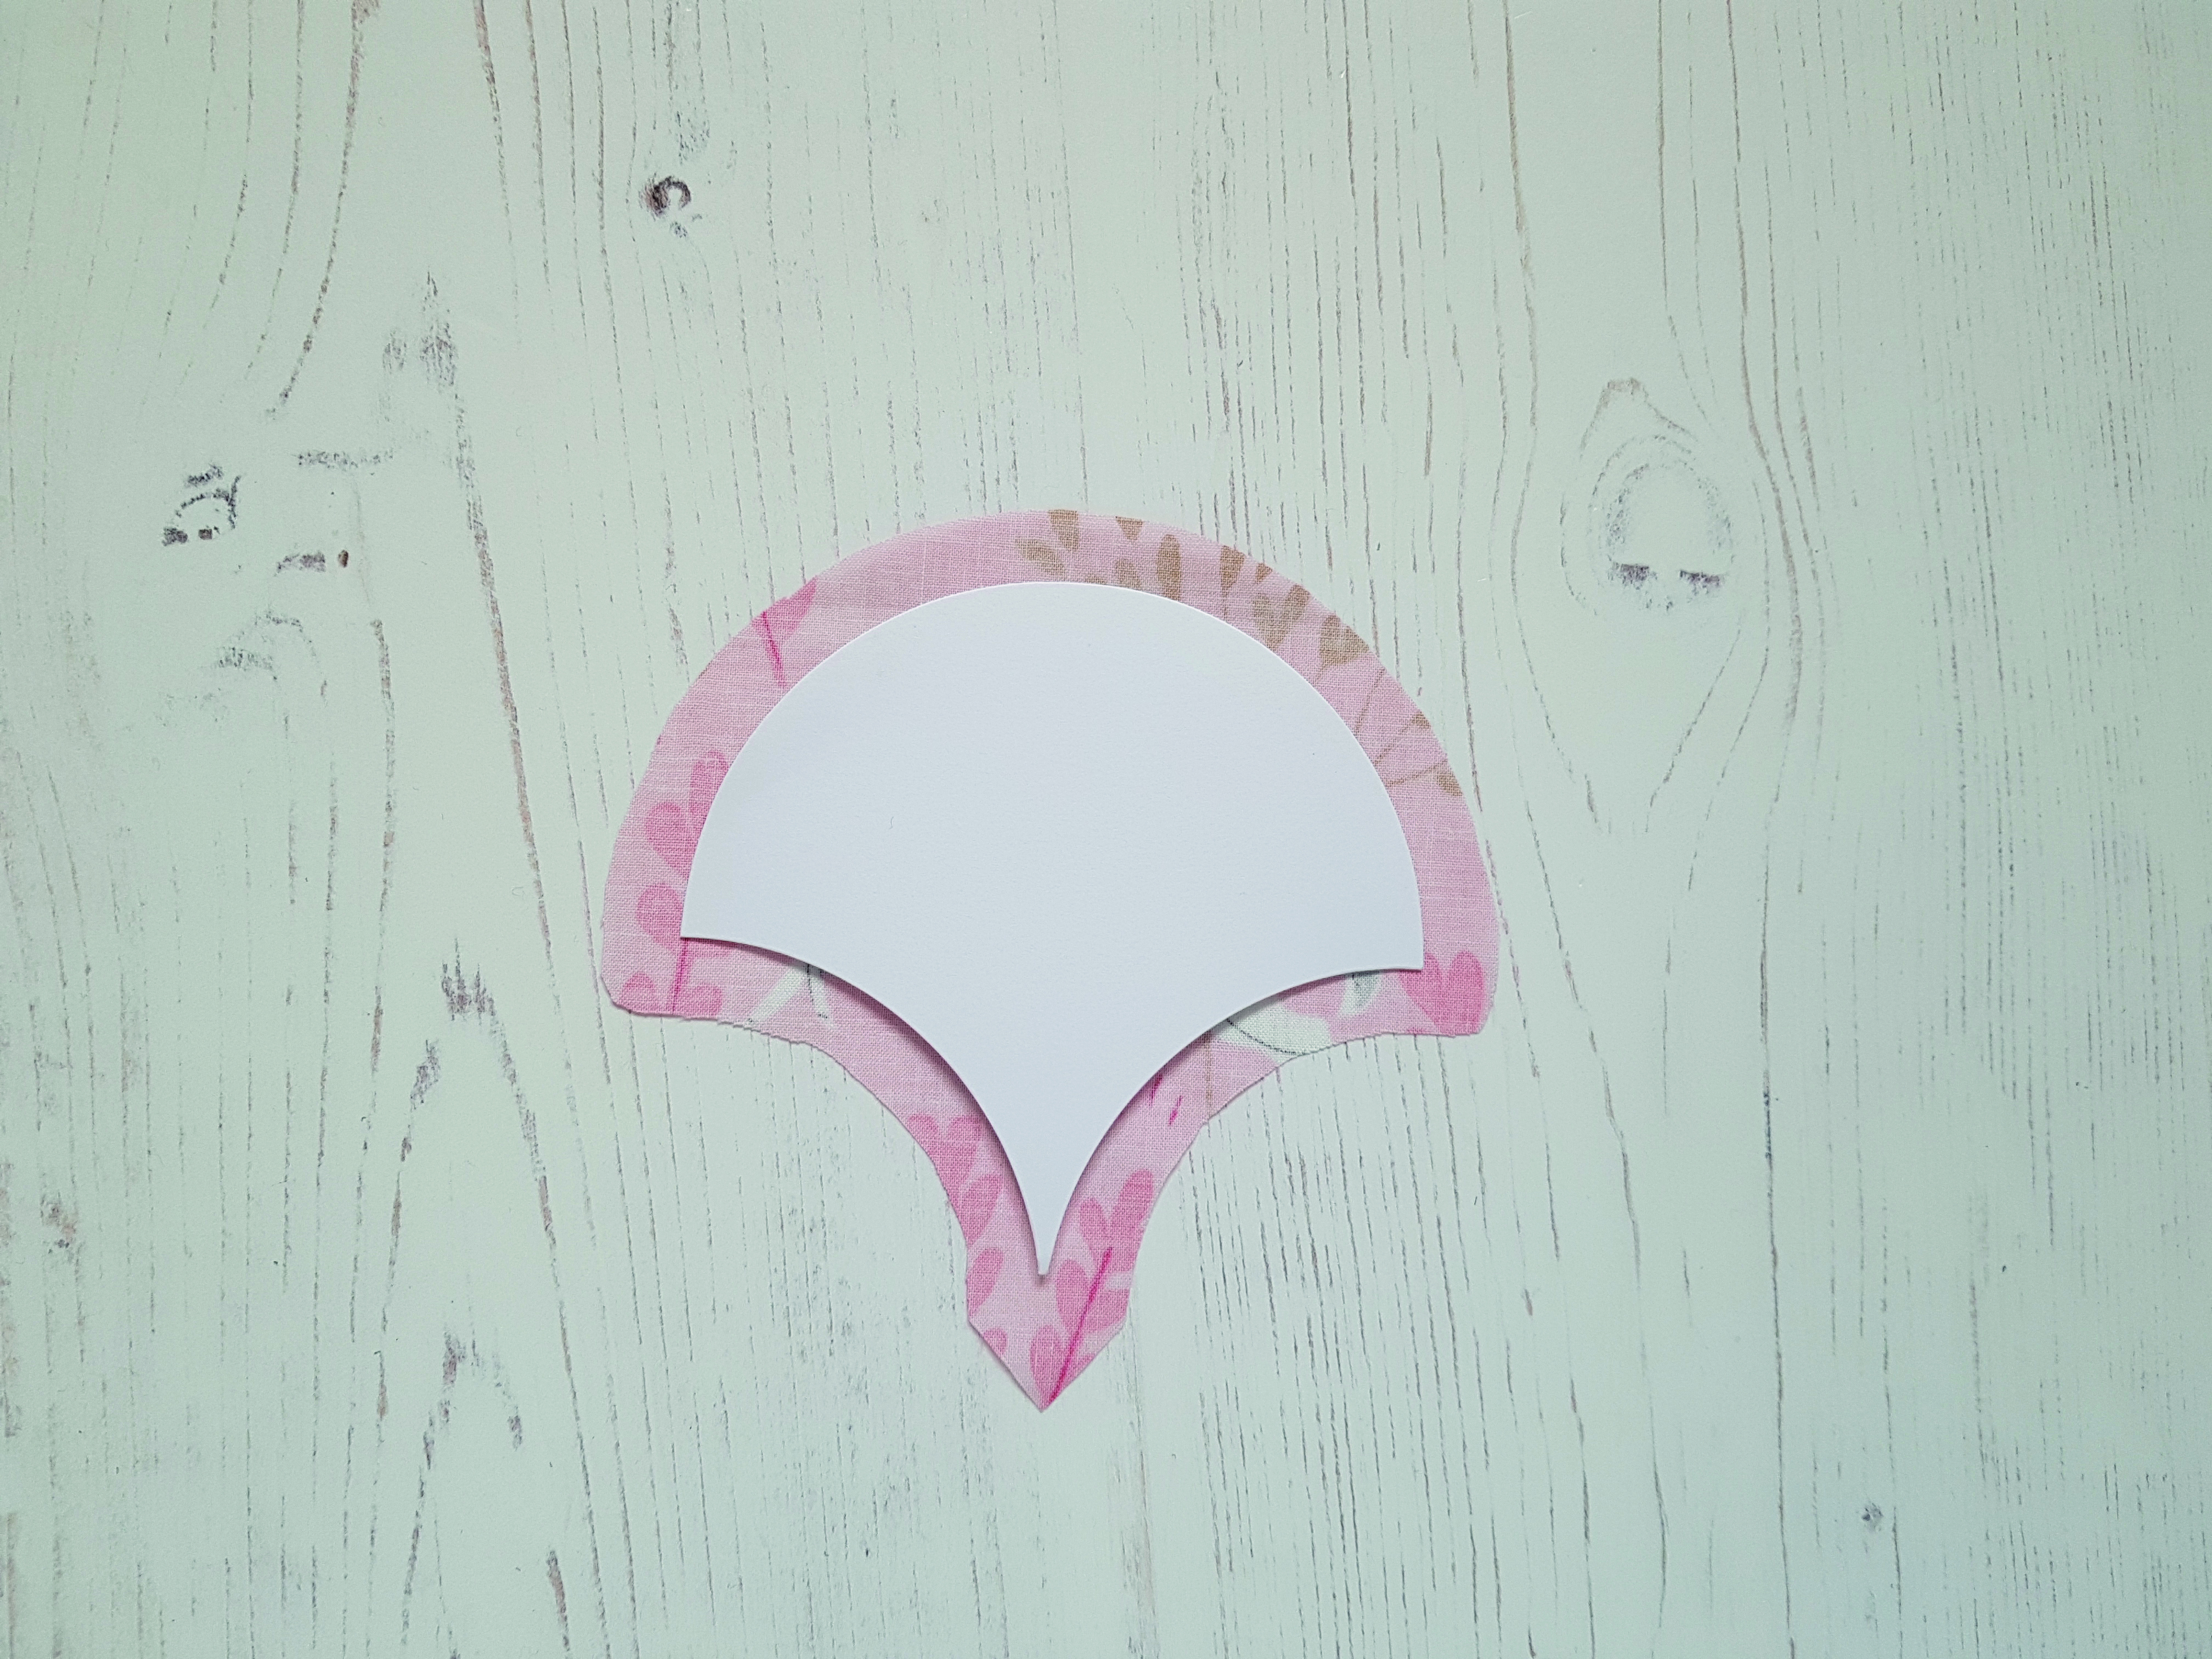
Place the Clamshell Paper template onto the wrong side of a print fabric clamshell piece, ensuring there is at least a ⅜in seam allowance around the top edge.
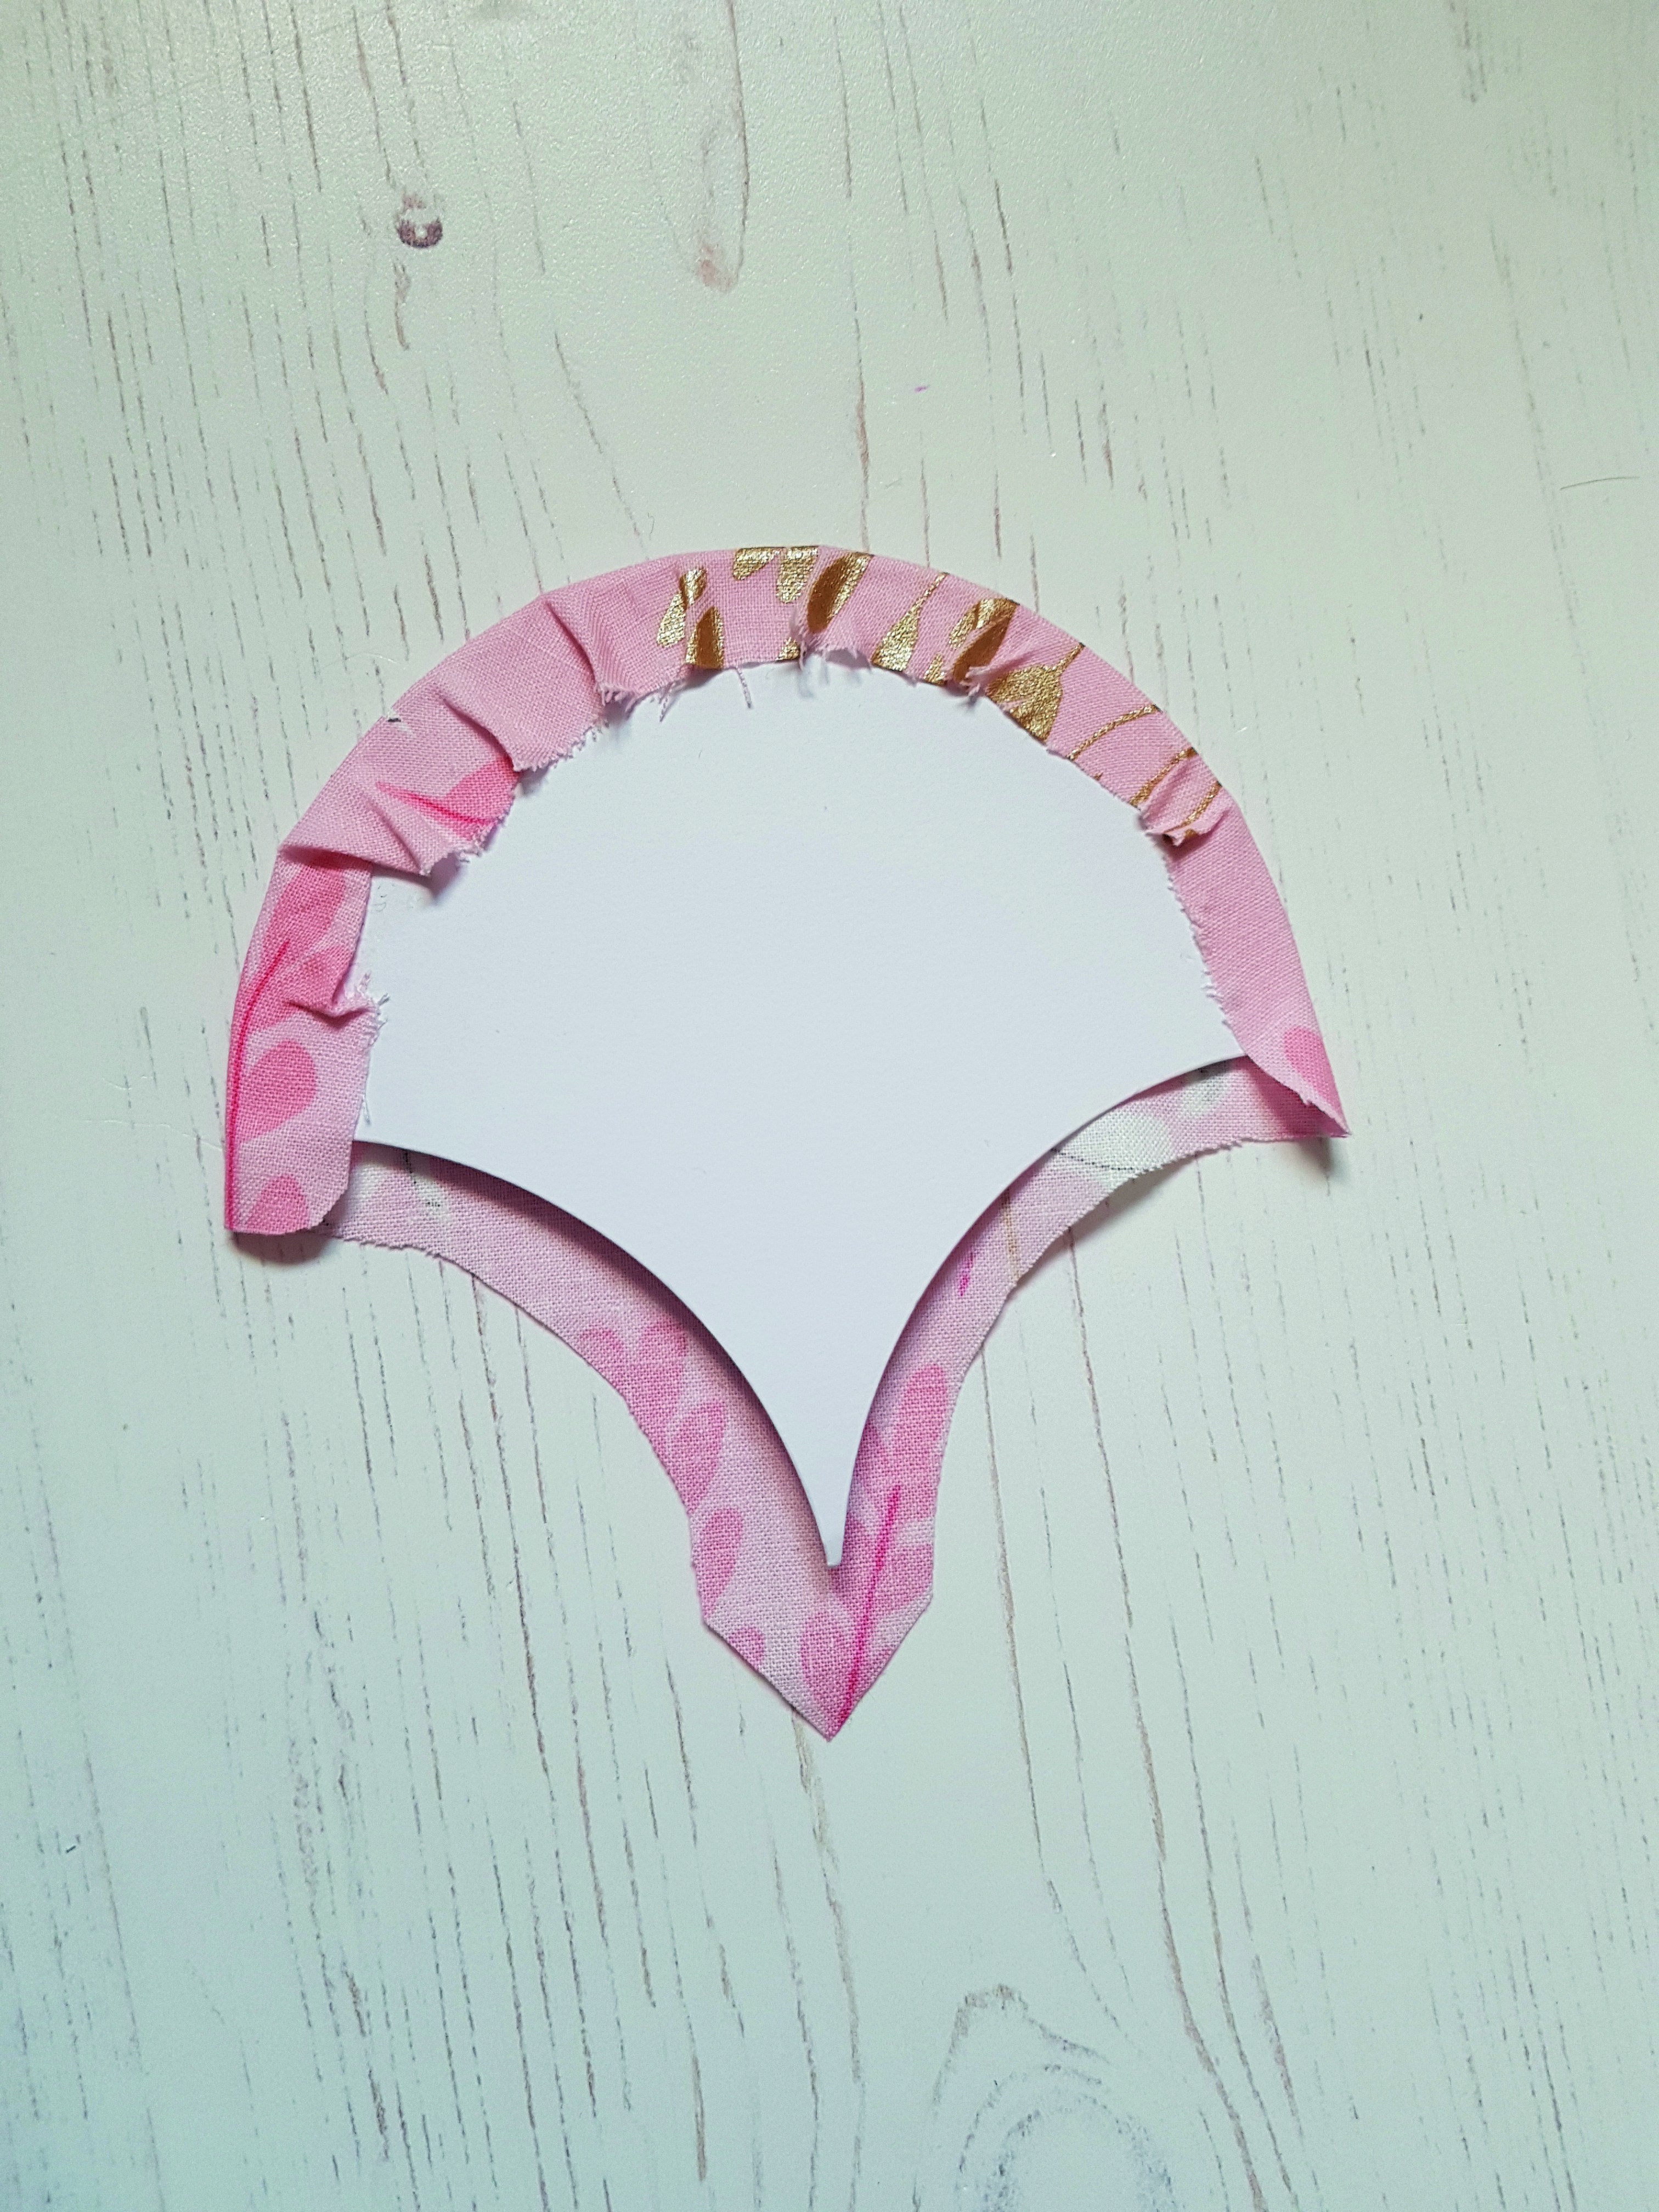
Using a glue pen, swipe a line of glue ⅛in from the edge of the paper. Starting on one side of the clamshell, gradually fold over the edge of the fabric, working your way around the upper curve only until you get to the other side.
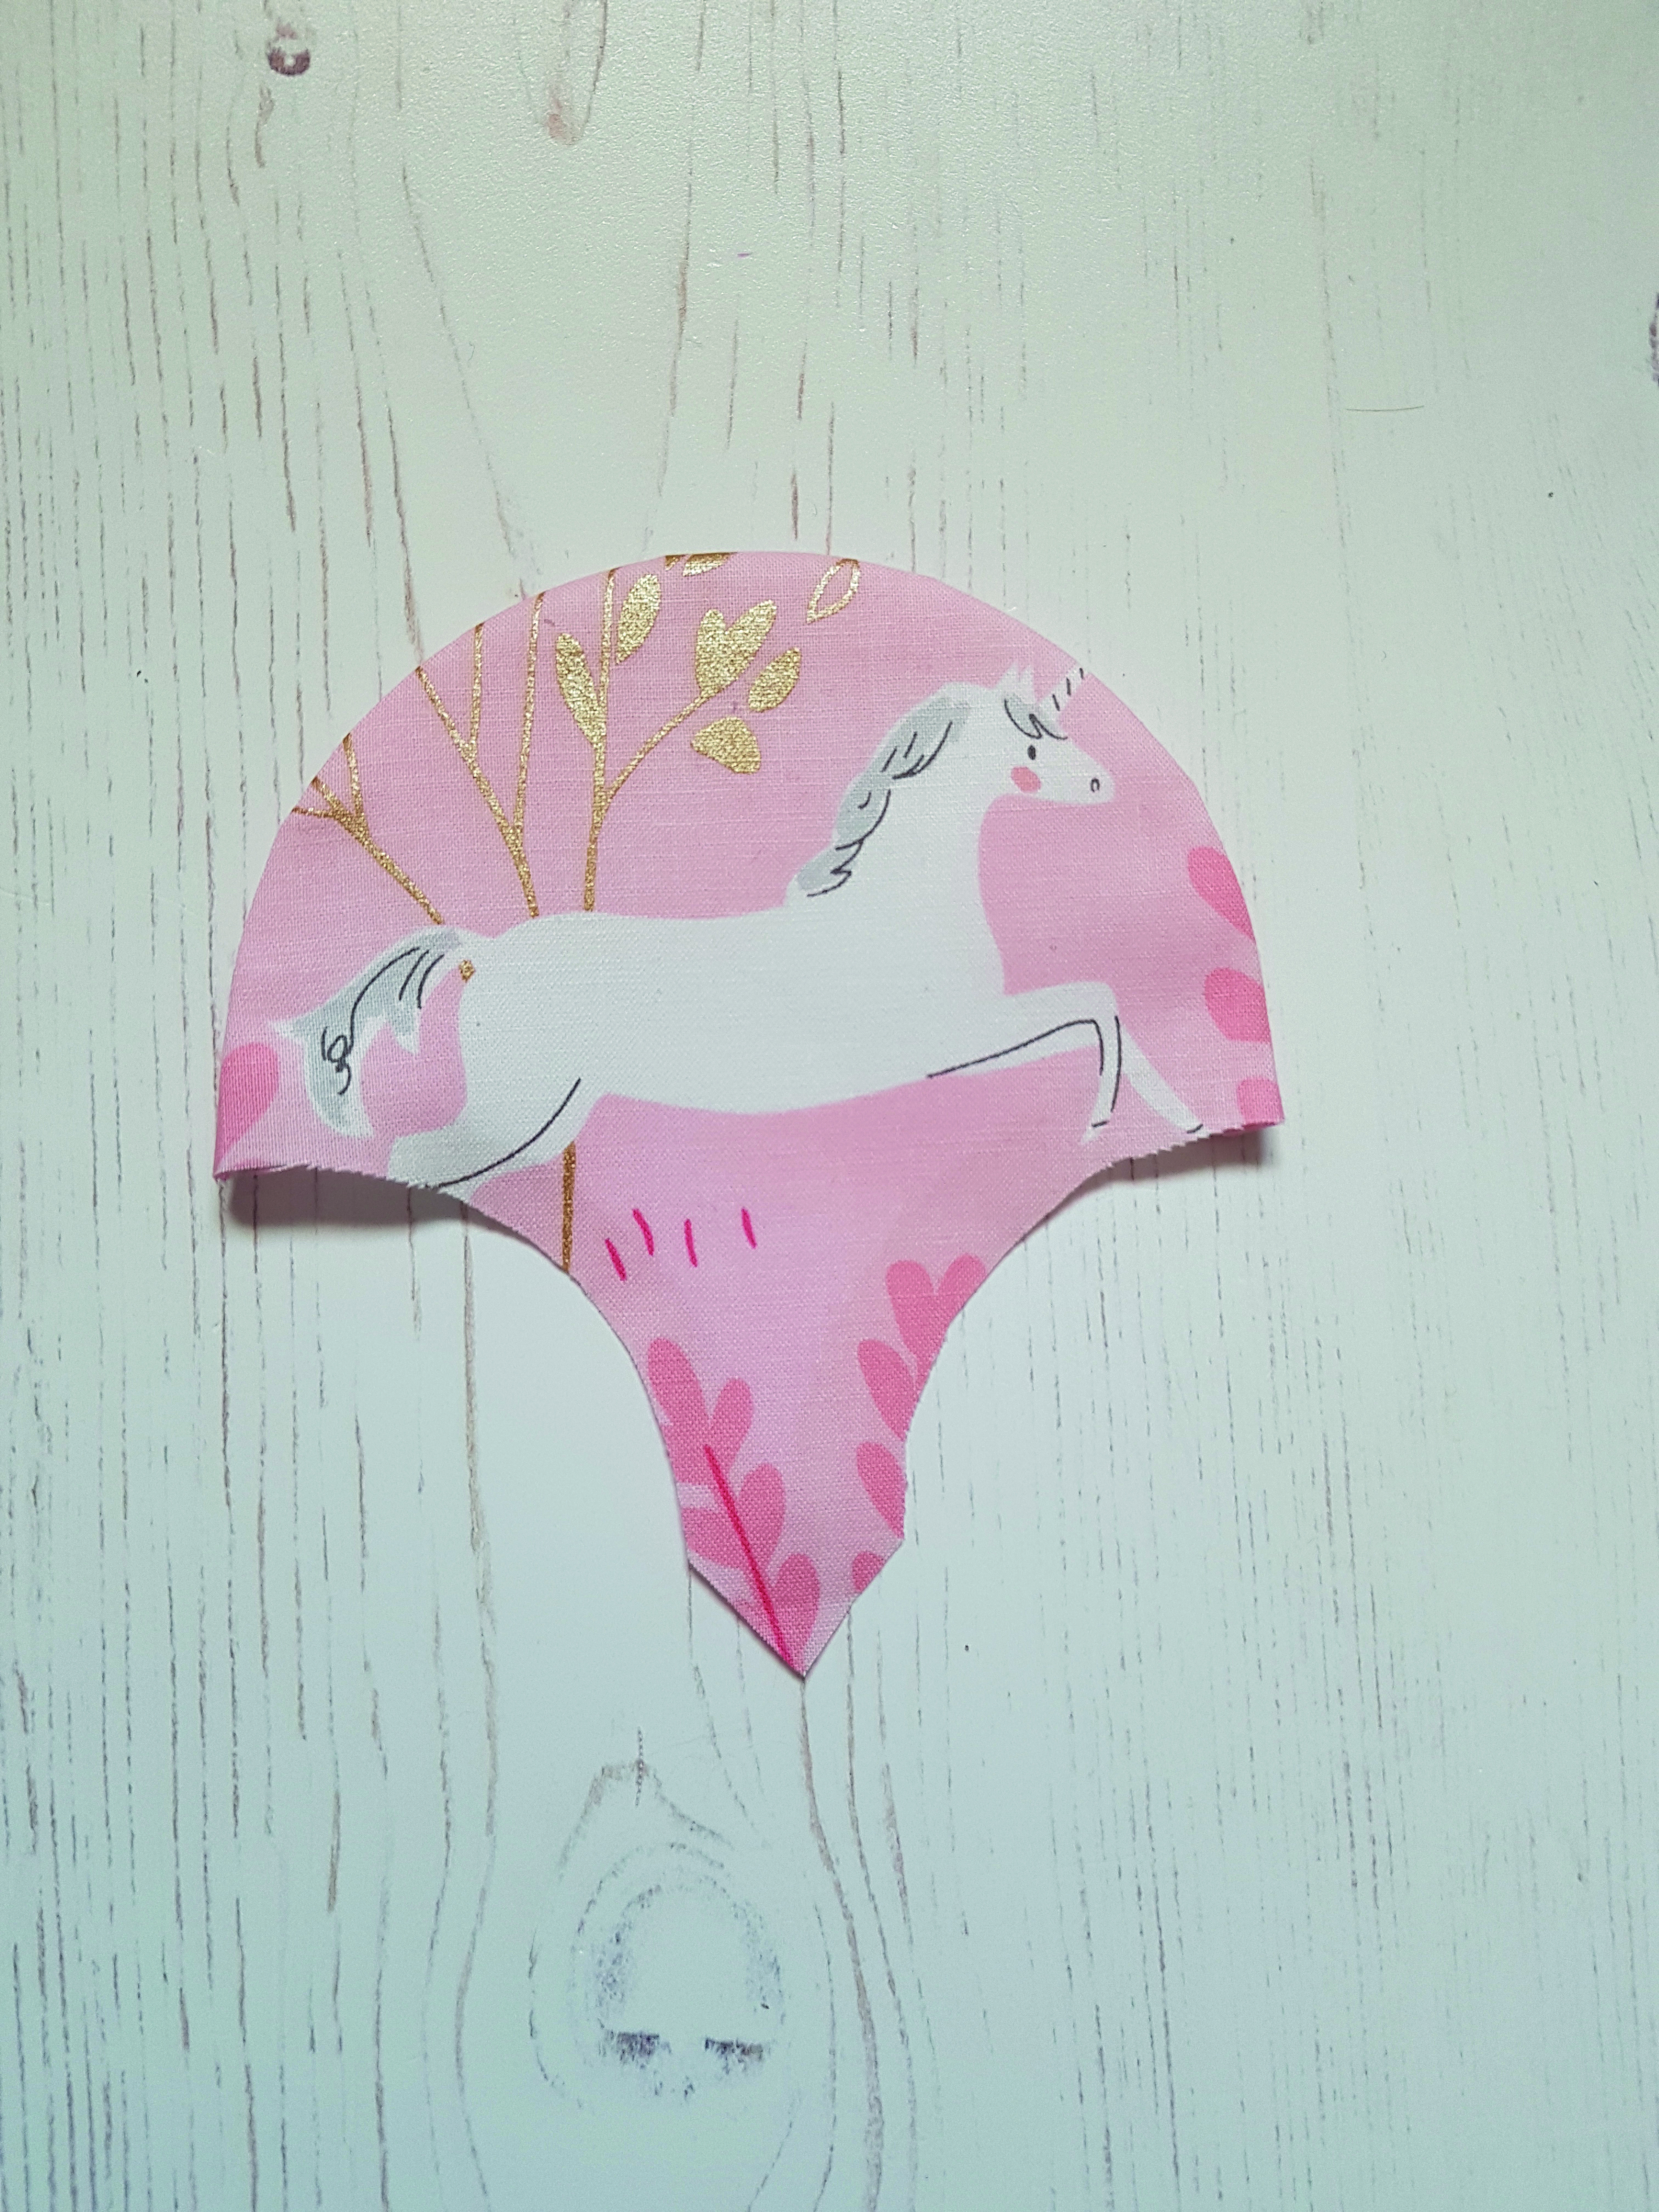
Leave the two lower sides loose. Check from the right side that the edge is nice and crisp. Smooth it out with a fingertip if necessary. Repeat with all the clamshell pieces.
Step 5
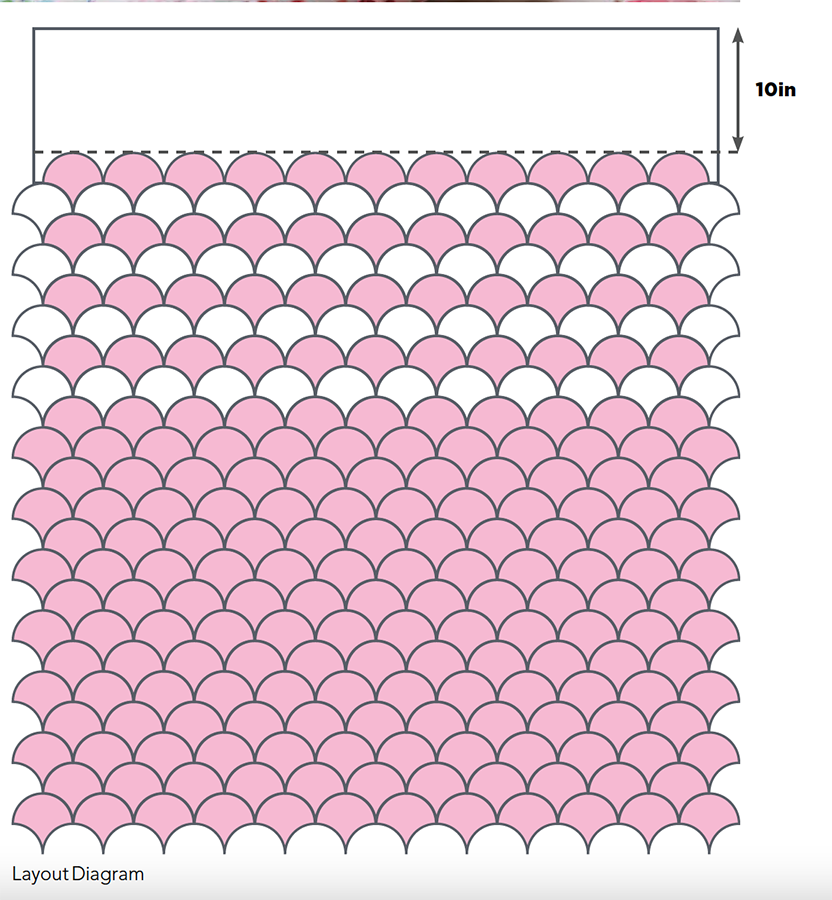
Once all the clamshells have been glue-basted, begin arranging them into your desired layout (above is recommended). Start the first row with eleven of the scrappy clamshells. The next row will be twelve white clamshells.
Continue in this way until you have four rows each of scrappy and white. The rest of the rows will all be scrappy, alternating between eleven and twelve clamshells.
Step 6
Once you are happy with your layout, join the clamshells into rows.
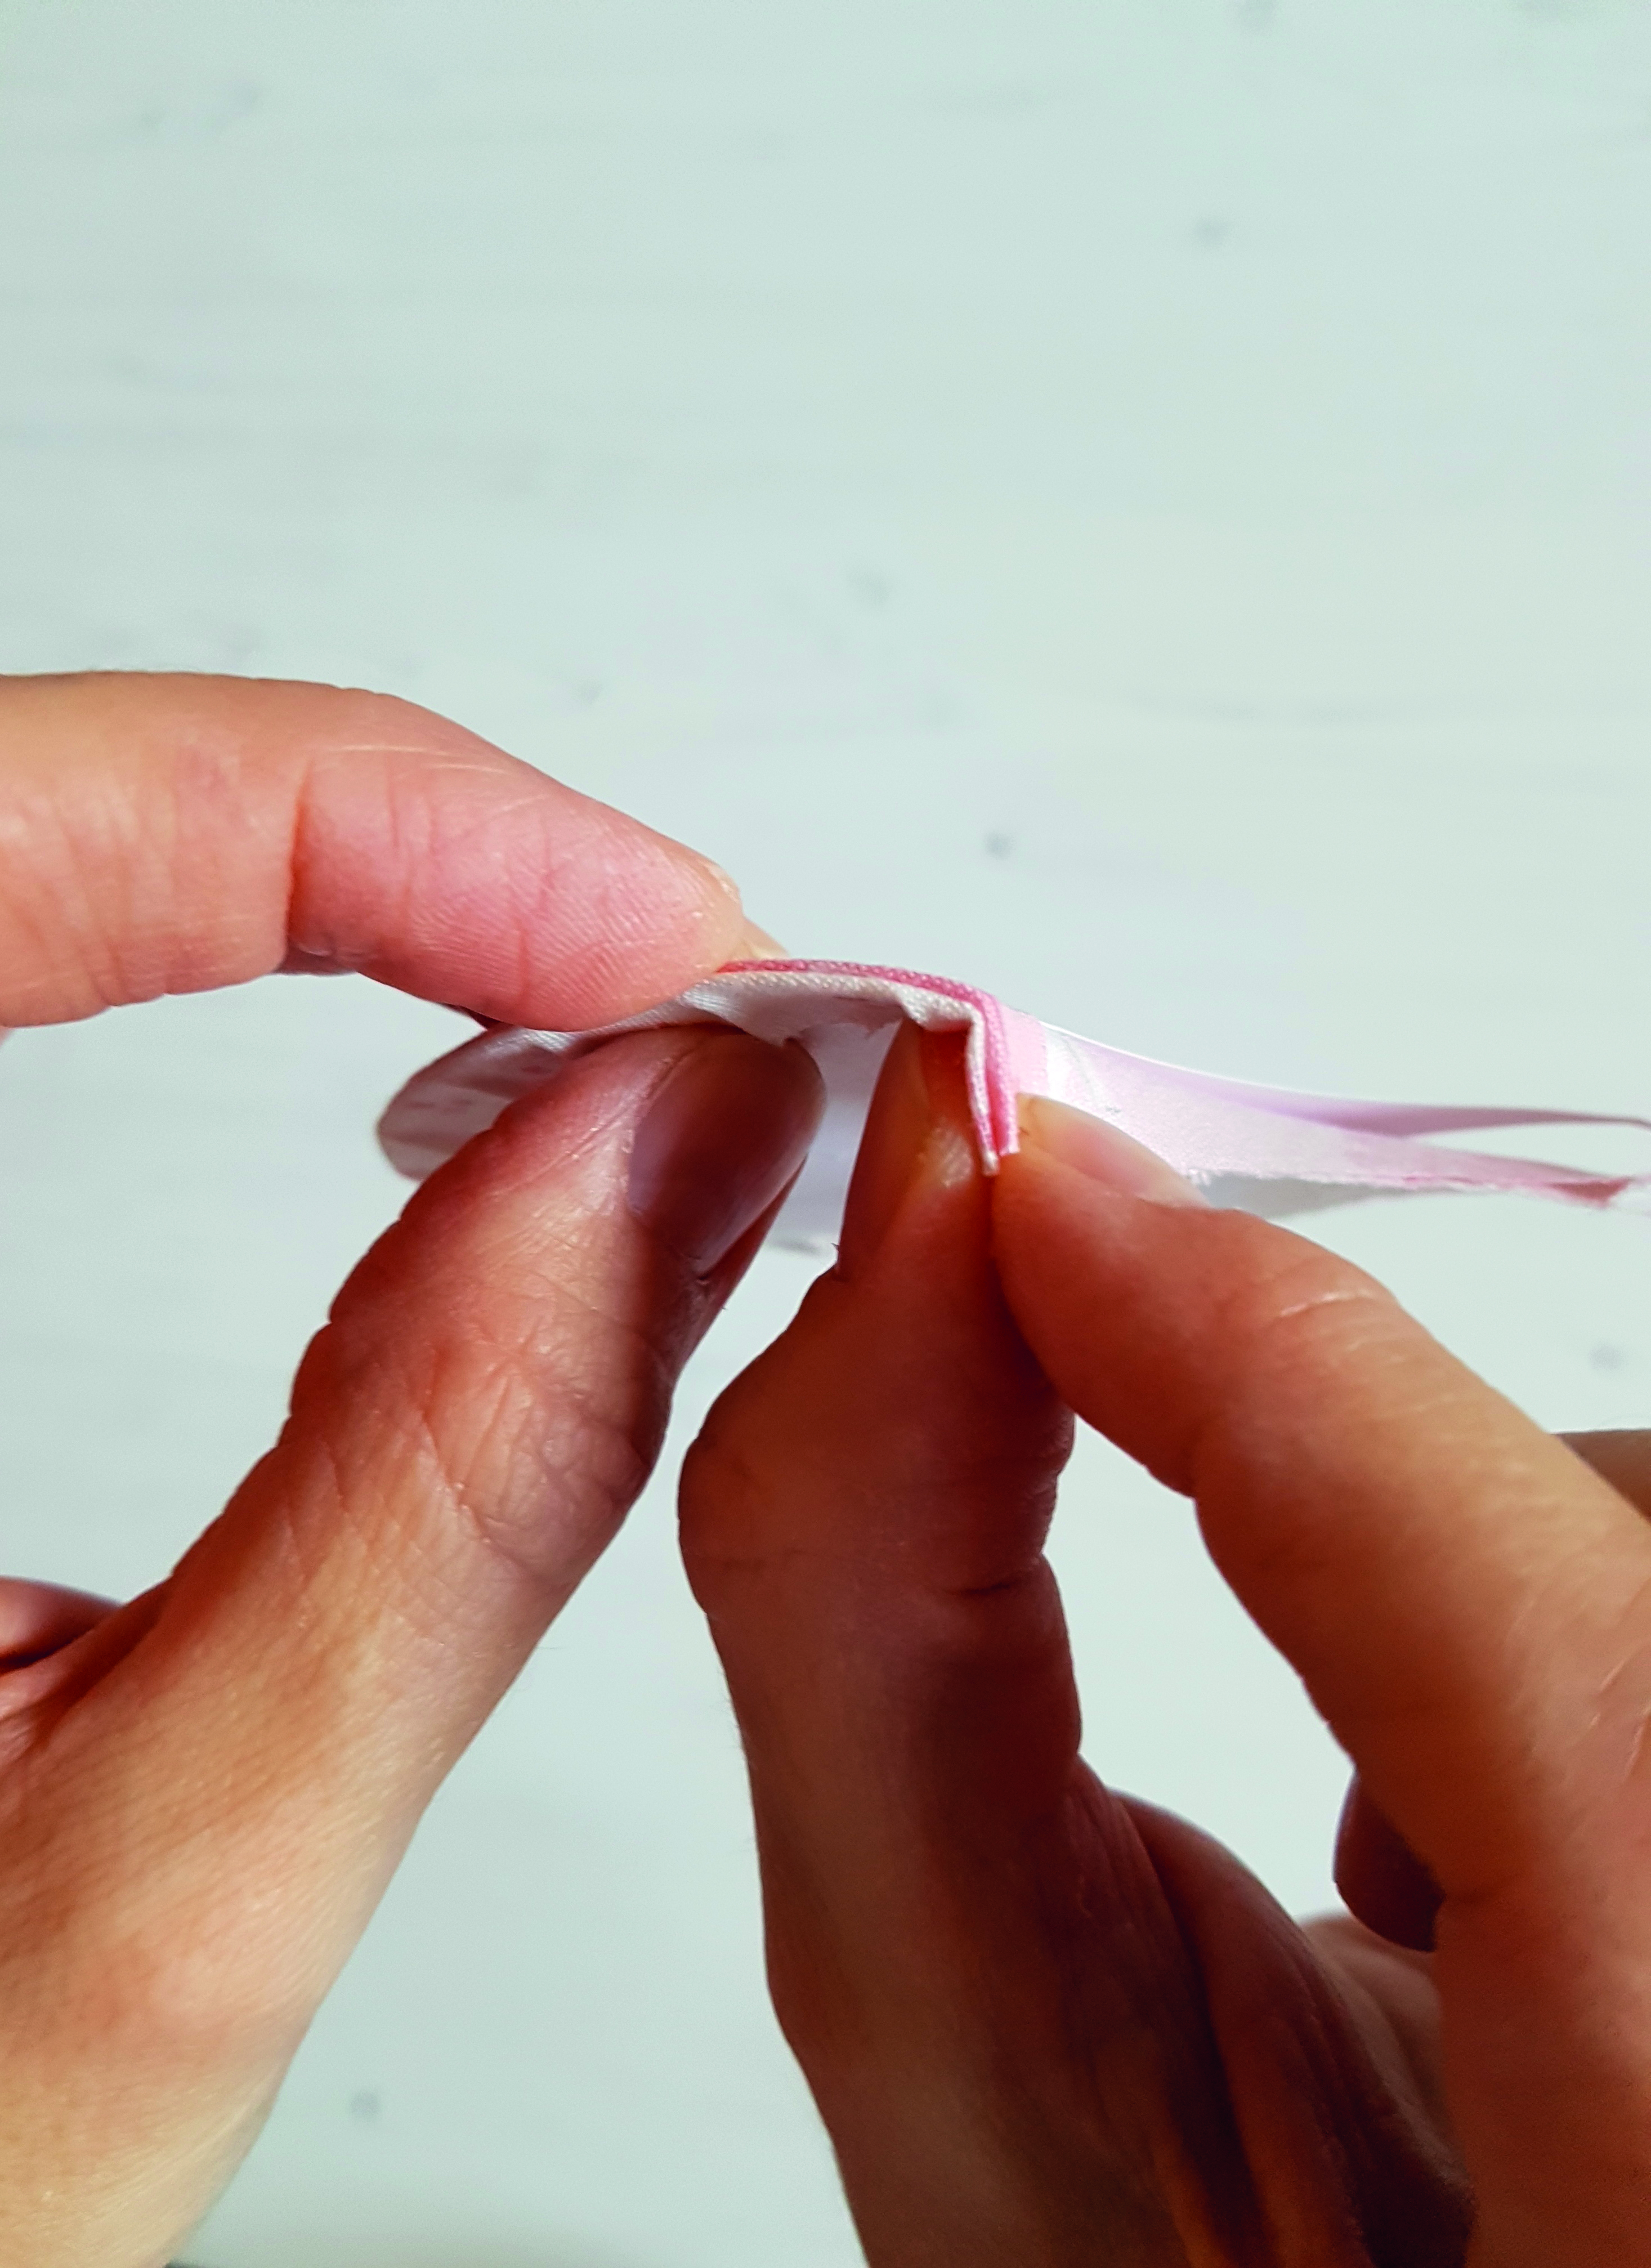
Place the first two clamshells from the top row RST, making sure to align the curves so the points just “kiss”.
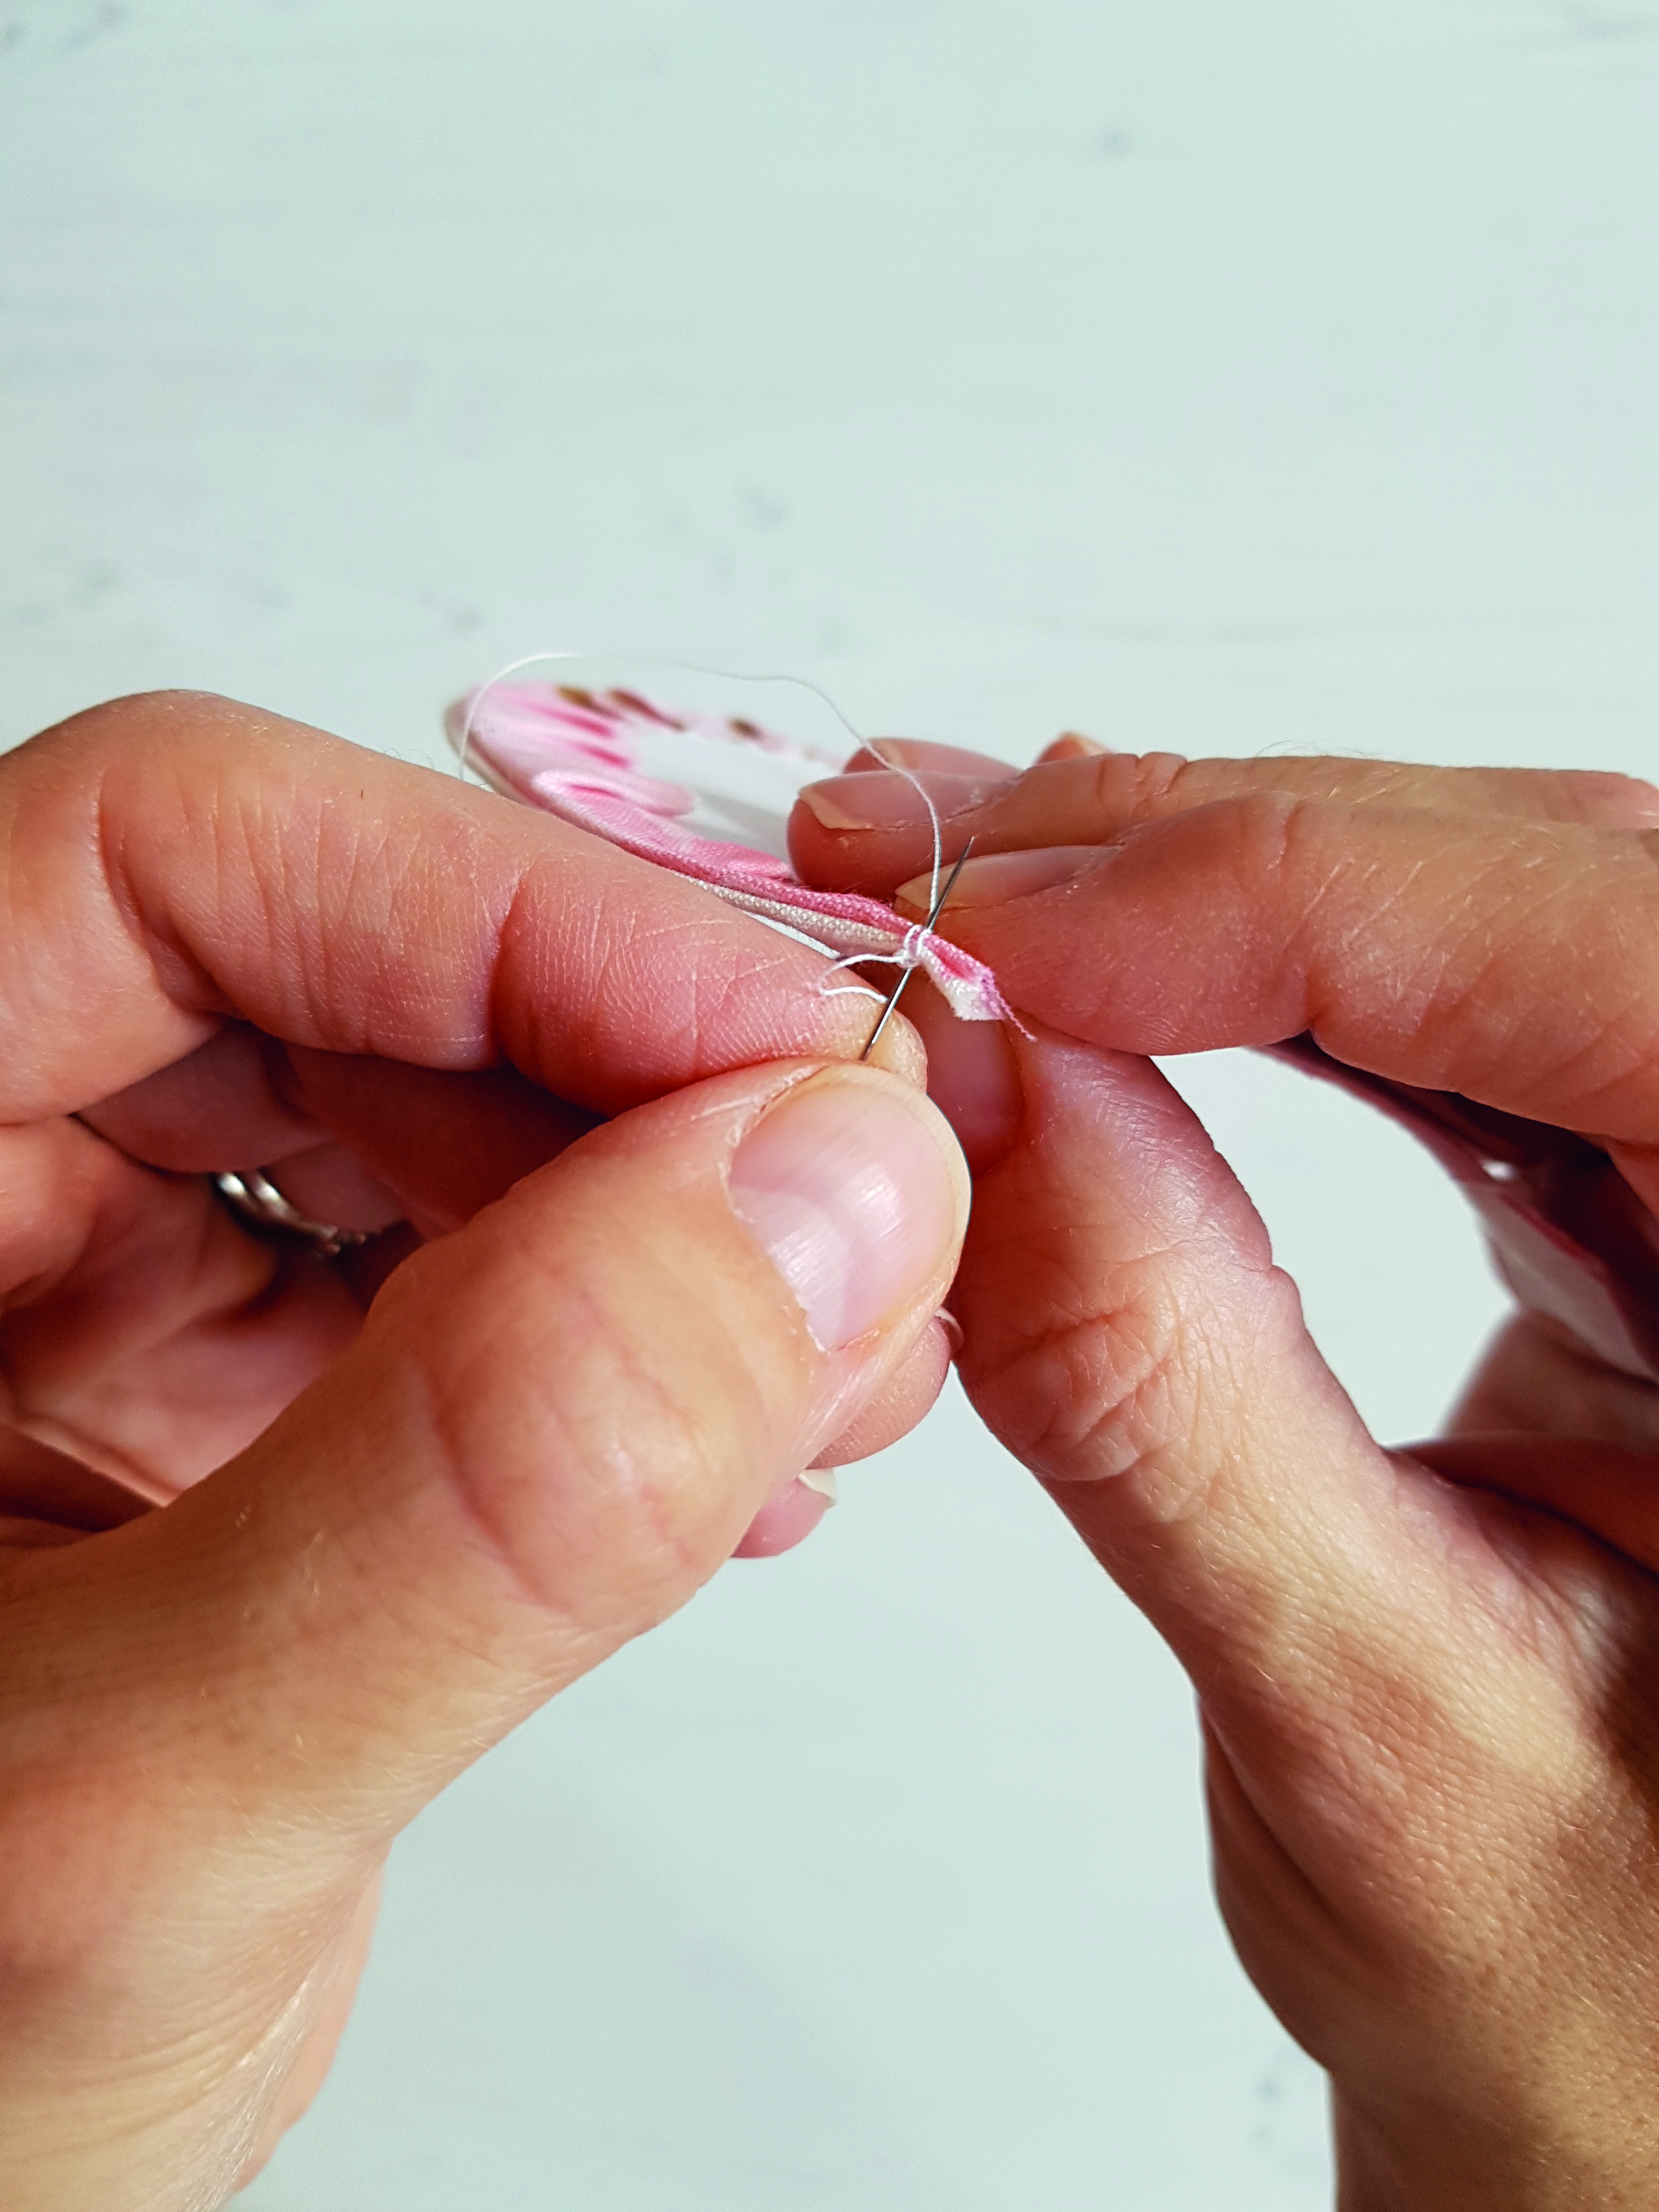
Just below the corner point of the papers, whipstitch together with a matching thread three times.
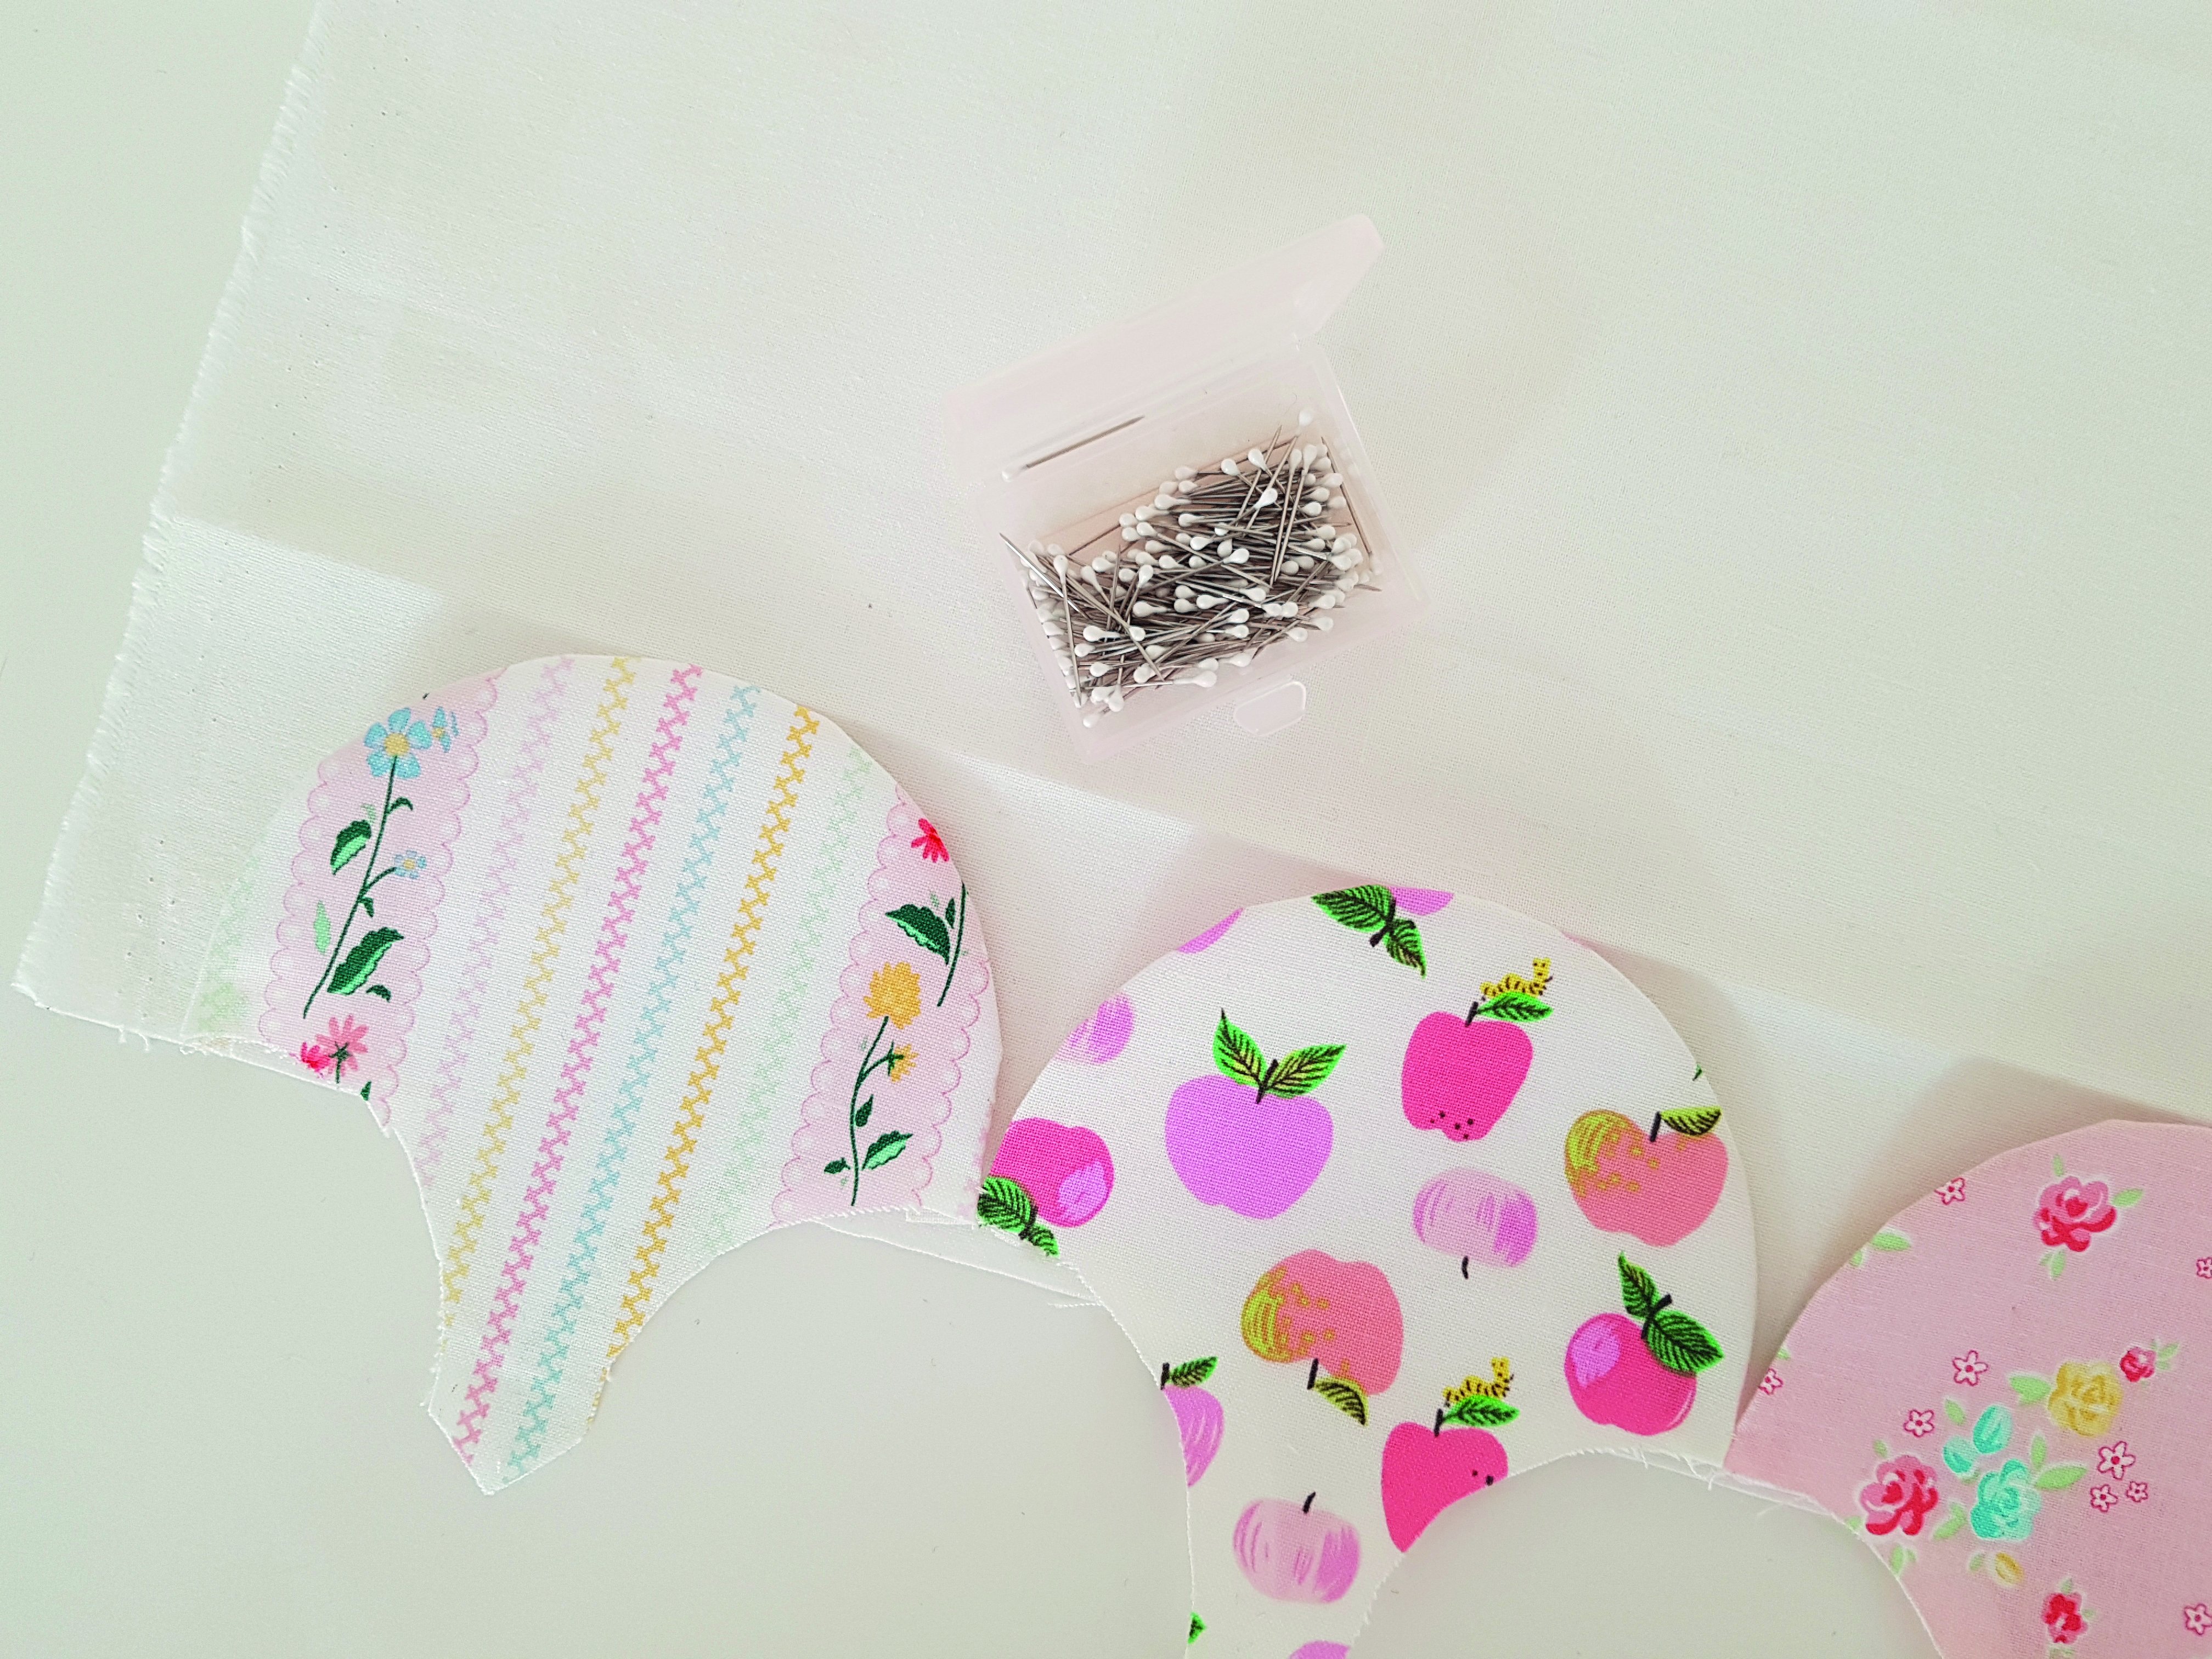
Repeat until you have reached the end of the top row, and for all remaining rows.
Step 7
Fold the long edge of the 12in x 44½in background piece 2in to the wrong side and press to mark the placement for the top row of clamshells.
Step 8
Gently remove the papers from just the top row of clamshells, being careful not to distort the crisp edge you have created.
Step 9
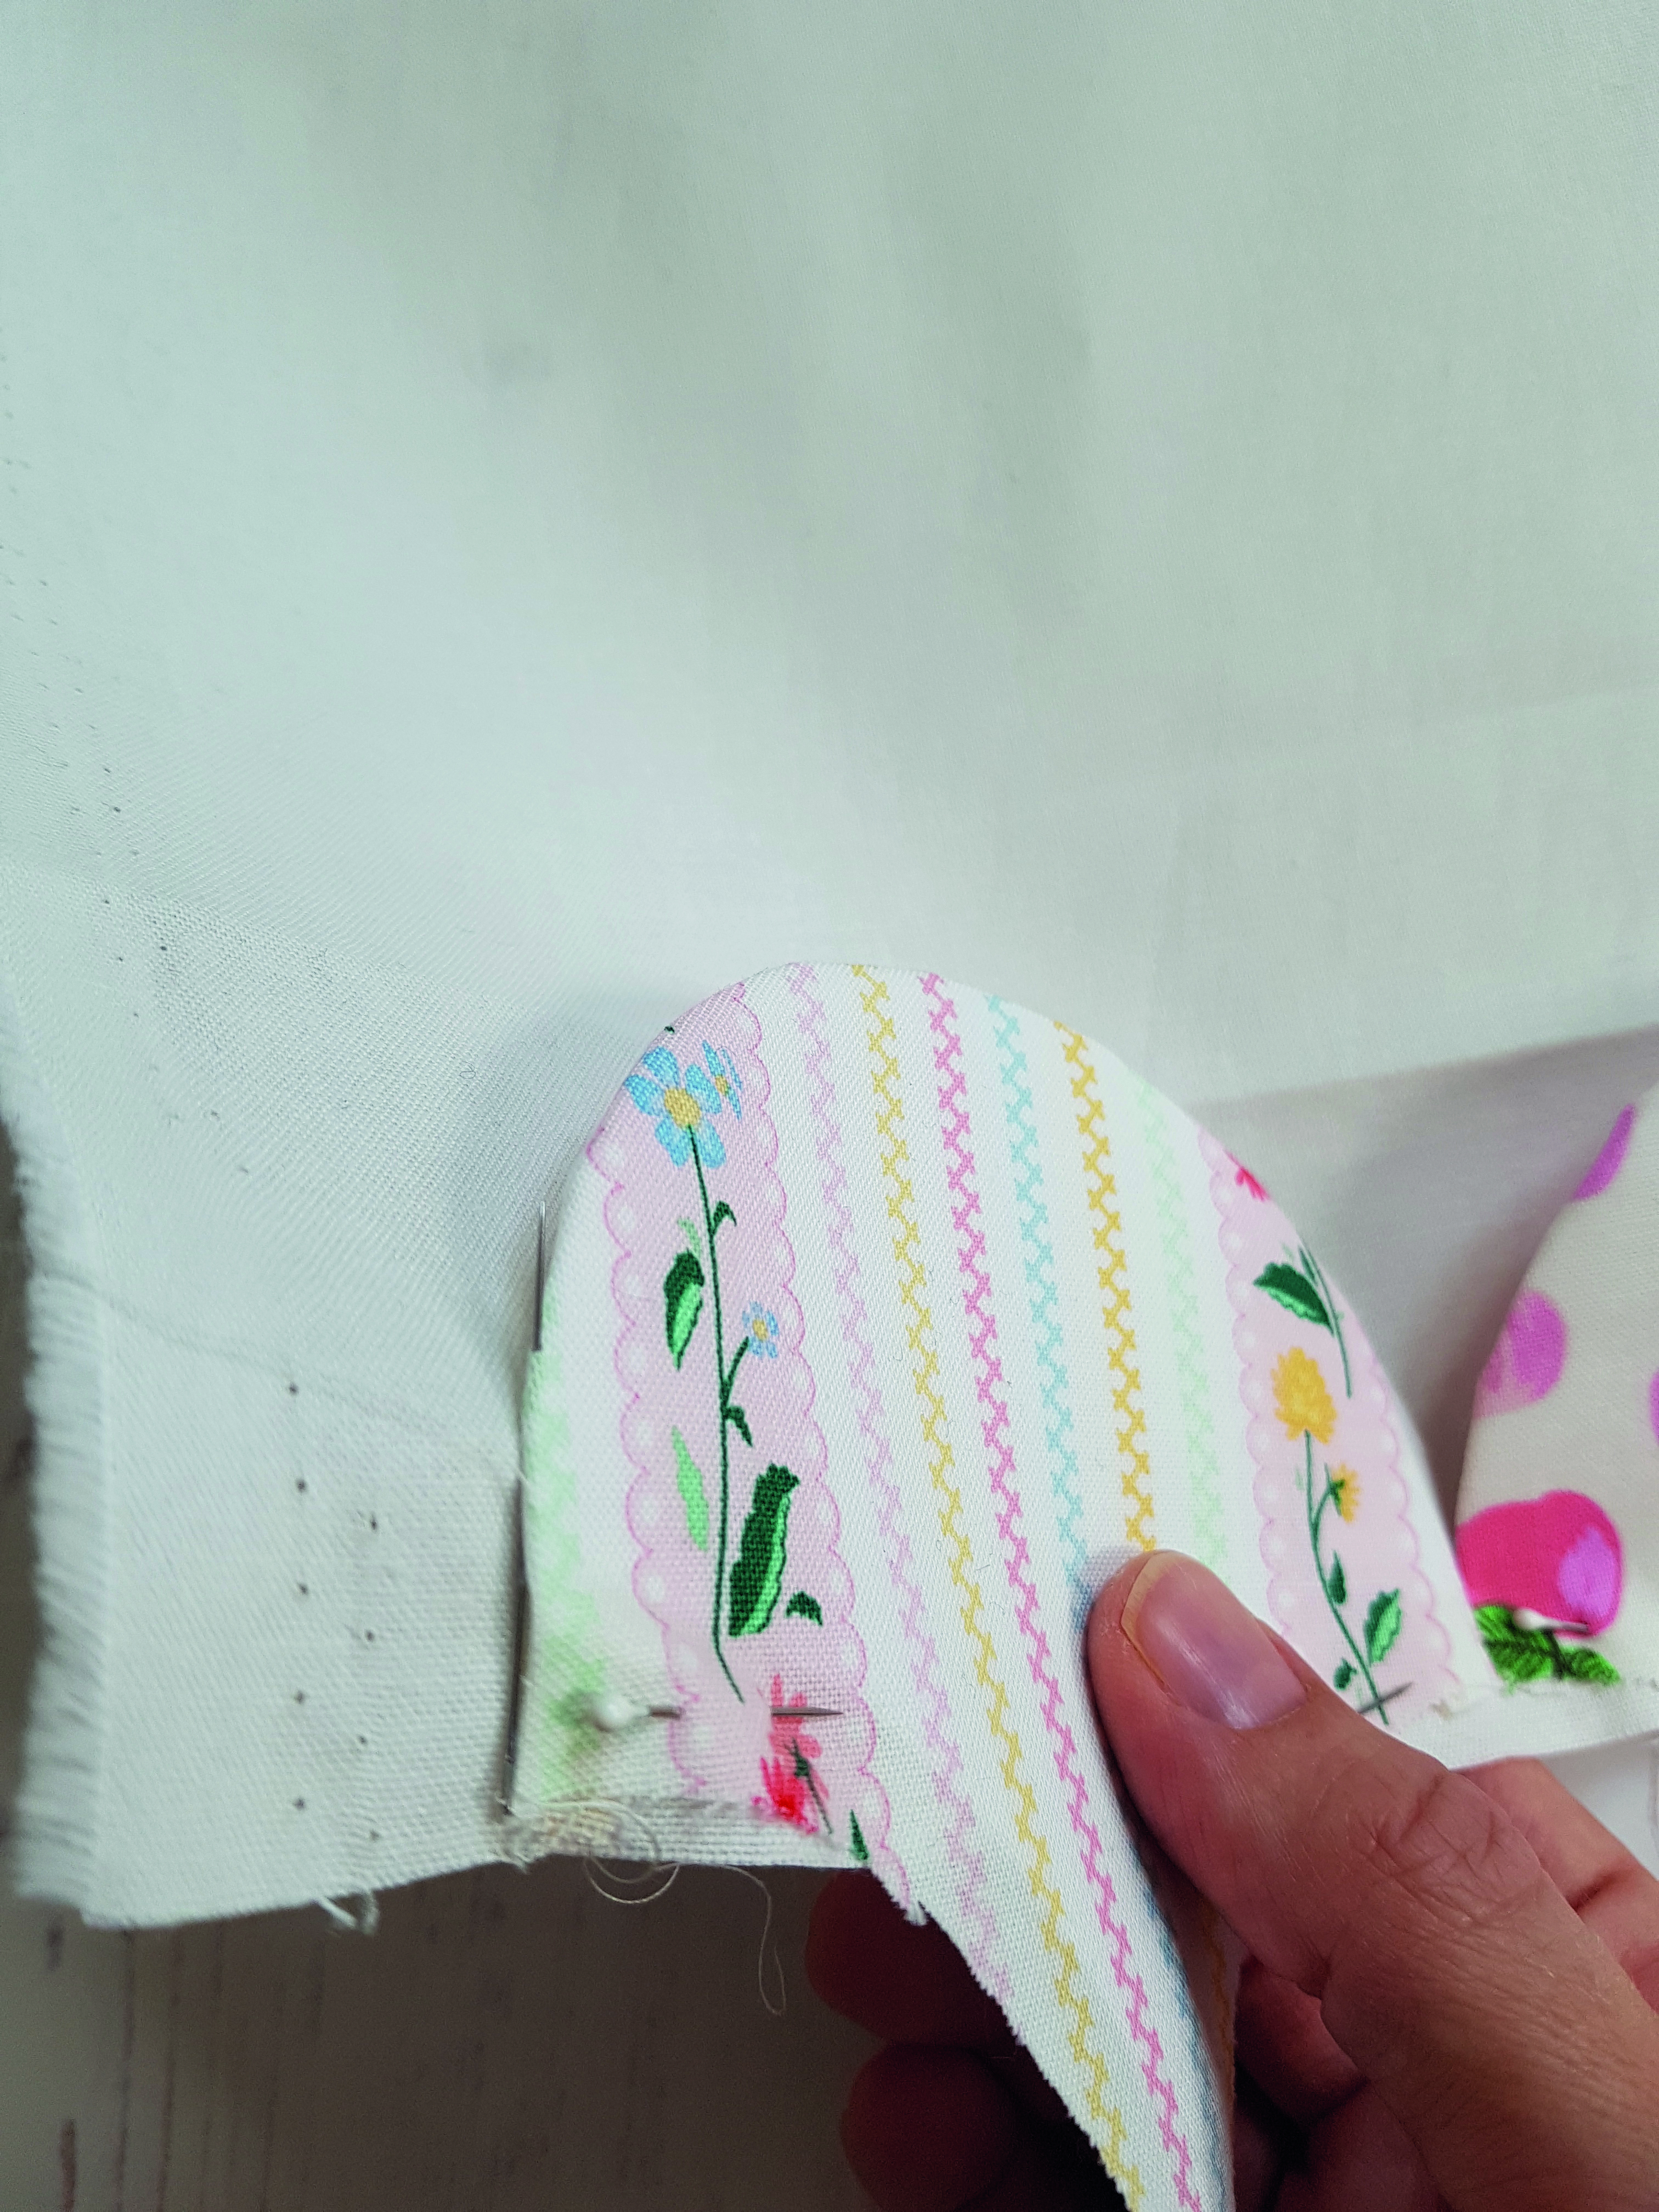
Open up the folded background piece and align the top edge of the first row of clamshells with the crease, centred on the background with ¼in seam allowance on each end. Pin in place.
Step 10
Starting at one end of the row, hand sew the upper edge of each clamshell to the background with an applique stitch, so the stitches won’t be visible.
Work to the opposite end of the row and make sure to neatly secure your thread at the end.
Step 11
Remove papers from the second row of twelve joined clamshells and place on top of the bottom edge of the first row. The middle top of the curve will cover the whip stitch in the previous row.
The clamshells at the outer ends will extend beyond the edge of the background and will be trimmed off later.
Applique the upper curves of the row to the bottom of the previous row underneath.
Step 12
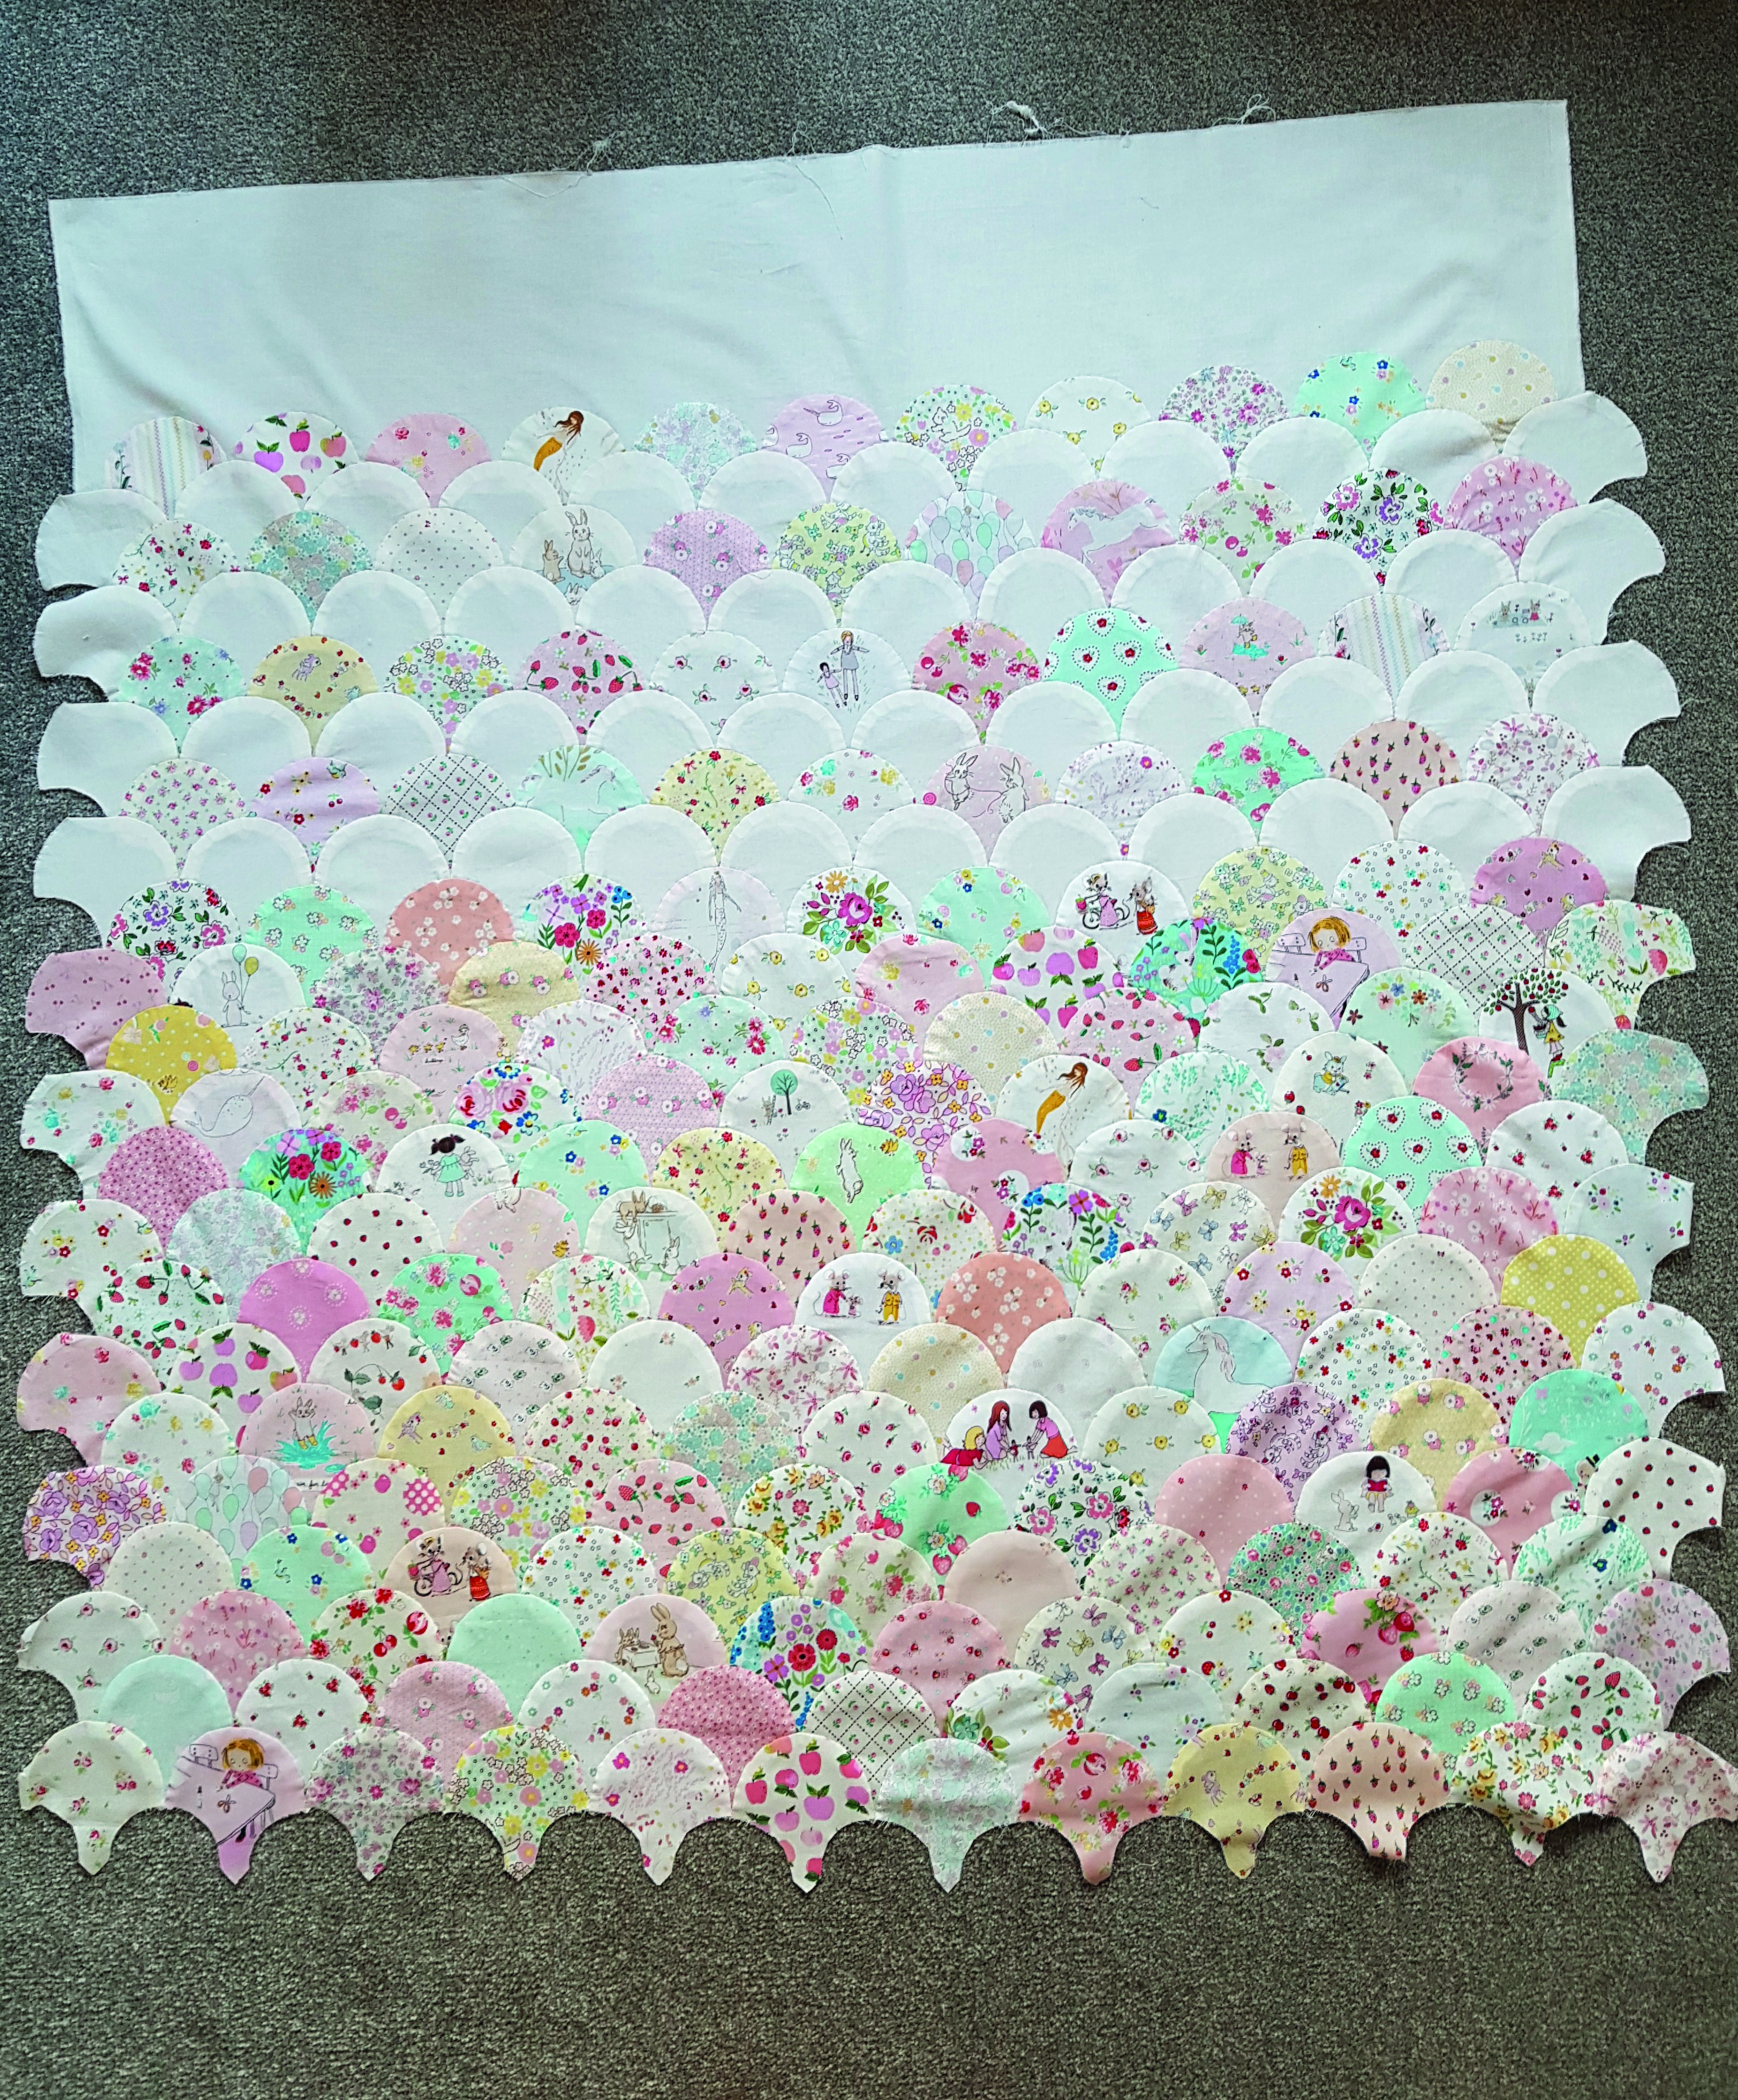
Repeat step 11 until all twenty two rows (four white, eighteen scrappy) are sewn together.
Step 13
Carefully trim the left and right sides of the clamshells, trimming the clamshells ¼in away from the outer points. Trim the background fabric evenly with the clamshells at the sides. Then trim the bottom edge of the quilt straight.
Step 14
Finishing off your scrappy quilt
Cut the backing fabric in half across the width. Remove the selvedge and sew the two pieces together using a ½in seam. Press the seam open.
Step 15
Press the quilt top and backing well. Make a quilt sandwich by placing the backing fabric right side down, the batting on top, then place the quilt top centrally and right side up. Baste the layers together using your preferred method.
Step 16
Quilt as desired. Ileana quilted a feathered design using a longarm quilting machine. Trim off the excess batting and backing fabric and square up the quilt.
Step 17
Sew the binding strips together end-to-end using diagonal seams. Press the seams open. Fold in half lengthways, wrong sides together, and press.
Step 18
Sew the binding to the right side of the quilt, creating a neat mitre at each corner. Fold the binding over to the back of the quilt and hand stitch in place to finish.
