
How to sew hexagons with English Paper Piecing
Paper piecing has to be one of the most relaxing, addictive and satisfying sewing skills known to quilter-kind. We love English Paper Piecing (or EPP as it is known affectionately by quilt makers around the world) for its accuracy, portability and the mindfulness of slow stitching.
- How to make a Foundation Paper Piecing template from a quilt block pattern
- 10 of the best quilting rulers: our guide to the must-have speciality kit
- Quilting for beginners: your go-to guide!
It’s ideal for keeping our hands busy when we’re kept away from our sewing machines: be it on the train, visiting friends for a craft night, taking the children to swimming lessons or simply relaxing in front of the television.
We've known friends take their EPP on holiday to stitch on the beach, stitch on the train and on planes (airline needle policy allowing).
This article includes:
- What is English Paper Piecing?
- Free English Paper Piecing Templates
- How to do English Paper Piecing for Beginners – a step by step guide
- What do you need to start paper piecing?
- 3 ways to baste fabric to your paper shapes
- How to finish your English Paper Piecing
- Ideas for what to make out of your English Paper Pieced hexagons
What is English Paper Piecing?
English Paper Piecing is the art of hand-sewing small fabric shapes together, wrapped around a paper template to create patchwork patterns. Quilting expert Sarah Griffiths is here to talk you through the basics of how it's done. Read on for her step-by-step guide.
Download our free English Paper Piecing templates below and read our Beginners guide to English Paper Piecing to learn how it's done. You may have come across a sister technique for English Paper Piecing called Fussy Cutting. This basically involves being selective about which part of a fabric print or pattern you cut your shapes from, so that when you join them together they form kaleidoscopic bigger patterns or simply highlight your favourite parts of the design.
For more about fussy-cutting see our guide to Fussy Cut in Patchwork and for more hexagon quilt inspiration, head to our round up of our favourite Hexagon Quilt Patterns.
Free English Paper Piecing templates
Paper hexagon templates are your first step in sewing the sweetest of hexie patchwork effects. To sew mini hexagons, head over to our free hexagon templates post.
Or if you want to try other shapes, why not try our Free Diamonds English Paper Piecing Templates or give octagons and squares a go?
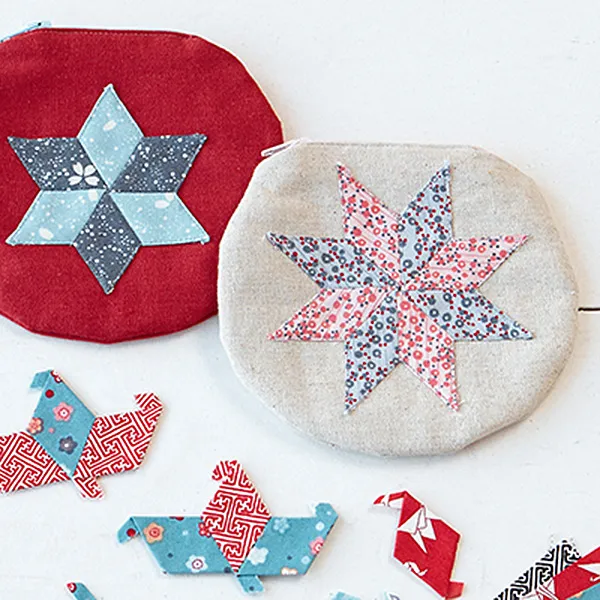
Quilt School: English Paper Piecing Diamonds
EPP isn't just great for piecing together hexagons, it works a charm with all sorts of geometric shapes. Head to our special Quilt School post on how to paper piece diamonds for this cute coin purse tutorial and tips on piecing other shapes.
How to do English Paper Piecing for Beginners
You will need
- Hexagon English Paper Piecing Templates – download our free PDFs above or buy a pre-cut pack to save time (£9.08, Amazon)
- Paper
- Pins or quilt binding clips (a pack of 50 binding clips costs £6.99 on Amazon and they will change your life – seriously we love them!)
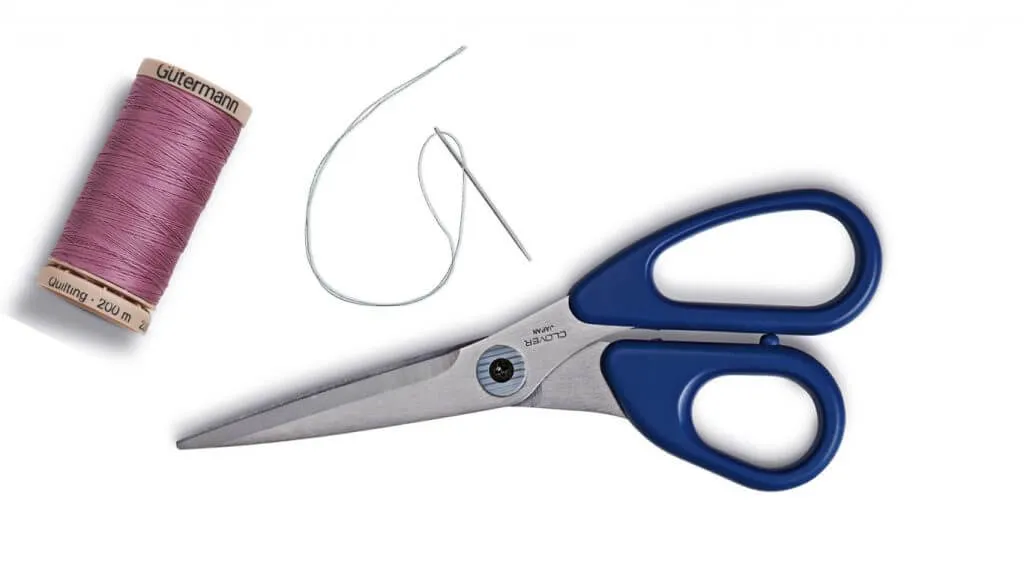
- Needle and thread
- Fabric
If you make your own paper templates, rather than buying them, you'll find a slightly thicker paper than usual will give you a firm edge to fold the fabric over. The size is usually measured along one side so that the edge of a 2in diamond would fit next to a 2in hexagon for example.
Which fabric to use?
Quilting cotton, Lawns and linens are all good choices for English Paper Piecing. If you choose to pre-wash your fabrics make sure they are dry, and ironed flat before you start cutting. Starch can help keep the fabric really flat and give it some structure for basting for a crisper result.
Many quilters use fabric scraps from their stash as paper piecing is a great way to use up small scraps of treasured prints, but if you want to start with a fresh fabric pull, head over to Minerva Crafts – they have a huge range of quilting fabrics to choose from.
Which threads to use?
For basting you can use anything you have, the stitches will be removed or hidden so use up something old or cheap. The thread for stitching the shapes together is more important. Use a colour that matches your fabric closely, or a neutral shade such as grey or taupe that will act as a shadow and sink into the fabrics without showing up. A 50wt is a good choice. You can't go wrong with a good Aurifil 50 weight spool of white thread (£11.95, Amazon) – it's likely to last you years – (ours has!)
Useful extras for your English Paper Piecing kit
You will also need a needle; whatever you’re comfortable with, some pins or binding clips and some scissors for both fabric and paper. An optional supply is a fabric glue pen, which can be used for basting. A pouch or tin is really useful for transporting and keeping your shapes in order, ready for stitching on the go.
Try a Beginner English Paper Piecing starter kit
We like the selection of EPP kits on Etsy (from around £10) – just double check your kit is for English Paper Piecing, not Foundation Paper Piecing, before you buy. Foundation Paper Piecing kits involve a different method and it's a bit fiddlier and involves a sewing machine. Find out more in our guide to Foundation Paper Piecing for beginners.

How to do English Paper Piecing
Step 1
Cut out a batch of paper shape templates (or buy pre-cut paper shapes). Use your template to trim your fabric squares to a hexagon shape but about ½in bigger around each edge.
Centre your hexagon template on the wrong side of the fabric and fold down the seam allowance on two edges. Pin or clip to hold in place.

Step 2
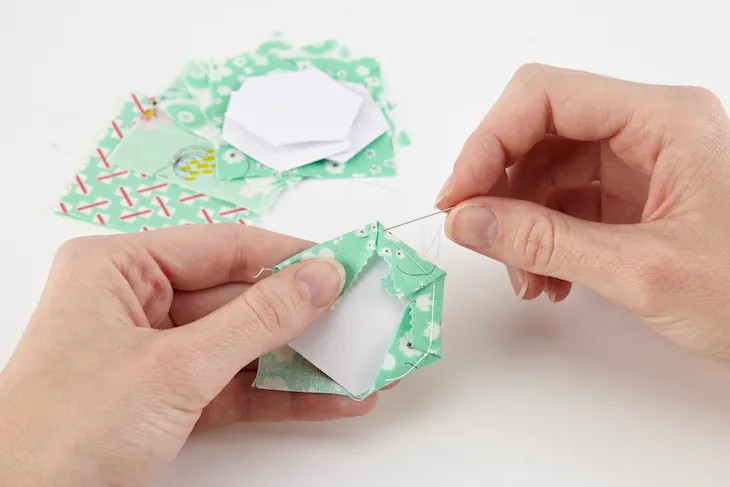
Thread your needle with waste thread. Beginning on the folded corner, going from right to left, push the needle through both flaps of fabric but not the paper. Pull the needle through and repeat to make another stitch in the same spot (backstitch).
We’re showing you the corner tacking method of basting your fabric to your paper shape here, but there are actually a few different ways that different quilters like to “baste" their fabric to their paper templates, this technique being one of them. To swot up on other options, scroll to the bottom of this article to read about the 3 most common methods.

Step 3
Fold down the next seam allowance. Move to the next corner and backstitch, as before. Repeat at each corner, working your way around the hexagon.

Step 4
When you reach the first corner again, make another backstitch and knot off your thread. Press the hexie with a dry iron.

Step 5
To join hexies, place two hexies right sides together and whipstitch along one edge, stitching both hexies together.
We’ve used a contrasting thread so you can see our stitches, but you’ll want to use a neutral thread to blend with the fabrics. Stitches should be about a needle width apart across the seam. Knot off when you reach the end of the first edge.

Step 6
To join the next hexie, place right sides together with the first pair, and stitch along one edge. Knot the thread at the end of the joined edge, but leave your thread uncut.

Step 7
Unfold the hexie, and place right sides together with the next one, folding the first hexie. Continue stitching along the next edge and knot the thread at the end.
We’ve added some useful tips for how to finish your English Paper Piecing at the bottom of this post.

Step 8
Keep joining hexies in the same way until you’ve completed the desired shape. We’ve joined our hexies in a Grandmother’s Flower unit. You can make lots of smaller units and then join together, or keep adding rows of hexies around the centre.

Tip: Knotting off the thread
It’s important to knot off your thread securely, to make sure your seams don’t unravel. As you make your last stitch, leave a small loop of thread. Then pass your needle through the loop two times, before pulling the thread tight. Snip the thread close to the knot.

Once your hexes are complete you can remove the paper pieces gently from inside each one to leave perfectly-hand-pieced patchwork!
3 different ways to baste your fabric to your paper
While we’ve shown you our favourite way of basting your shapes together above, different quilters have preferred ways of doing it. Here are 3 options to try…
Basting method 1: through the paper piece
With a knotted length of thread on your needle sew elongated running stitches through the fabric, paper piece and seam allowance to hold the layers together. Finish with a small backstitch to secure. This is a quick method but stitches will need to be removed at the end as they show on the front of the work.
Basting method 2: Through the seam allowances
Fold over the first edge, and then the second and hold in place with your thumb. Work a backstitch through the two seam allowances to hold the corner folds in place. Fold over the next edge and repeat. Finish with a small backstitch to secure. With this method you can leave the basting stitches in at the end. Choose a thread lighter than the fabric colour to ensure you won’t see it through the fabric.
Basting method 3: Glue basting
Swipe a line of glue along the edge of the paper piece and then fold the fabric over the edge. Any washable glue will work but fabric glue pens are easiest to use. If you are glue basting and find that the fabric is stuck firmly when you come to remove the papers, dampen the fabric a little and it will peel away.
"When basting diamonds or triangles there will be little ‘dog ears’ of fabric at the sharp points. Fold the edges of the fabric for each piece so these ears all point in the same direction. This will make it easier to piece them together as they will lie flat and nest together to not leave a hole in the centre."
Laura Pritchard

How to finish English Paper Piecing
Once your pieces are attached on all sides, it’s time for the fun bit! Removing the paper templates from inside your patchwork. Use a cocktail stick or similar to ‘pop’ them out. If your shapes have a punched hole, you can simply place the stick through the hole to easily flick the paper out.
There are a few ways to finish an English Paper Piecing block:
To piece the edges of a completed EPP shape, place the block on a square of paper the same size as you want the finished block. Trace around the edges and then cut along your drawn lines. Use the remaining edge shapes as paper pieces to complete the outer edges of the block.
A finished block can also be attached to a background as appliqué. Top stitch your block onto a background using your machine, or hand stitch it down with invisible appliqué stitches.
To add mitred borders to a finished block, measure your patchwork exactly and draw a line on paper this length. Decide the width of your border and draw a parallel line this distance away from the first, and this much longer at each end. Line up the 45-degree marking on a quilt ruler and draw an angled line from the short edge out to the longer edge. Repeat on the other side. Make four paper border pieces, cut out and baste using your preferred method. Add to the block in the same way as the other paper pieces.

Now head to Laura Pritchard’s Kaleidoscope EPP wall art post to download the free templates to sew this beautiful wall hanging, one paper piece at a time!
Ideas for what to do with English Paper Pieced Hexagons
Sew a starter set of hexagons using English Paper Piecing and add them to a simple folded felt needlecase to practise your english paper piecing skills. It’s a cute gift idea for friends who love to sew too. Read our how to make it in our tutorial for How to make a sewing needle case.


