Kids animal mask templates

Sew up these animal mask templates for your little ones to play with.

Try 6 issues of your choice of craft magazine from just £9.99

Published: April 26, 2021 at 8:00 am

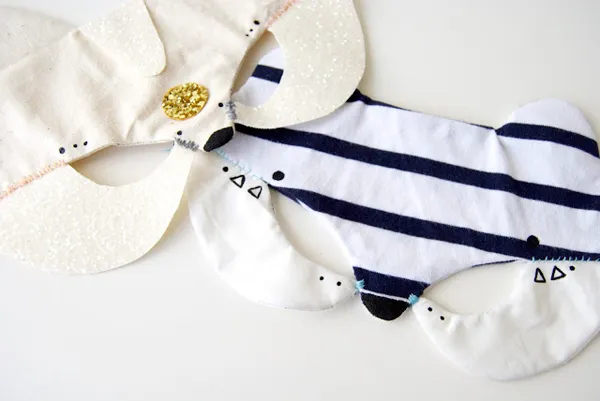
Scamper from one stage to the other with Rachel Basinger’s animal mask templates: a cute tutorial that's perfect for the summer holidays. For more kids crafts check out these 42 fun craft ideas for kids to make at home.

Join us as we get started making on Oh No Rachio's animal mask templates.

Everybody loves a good mask at a festival, not to mention it’s merit covering up an otherwise worse for wear festival face! Plus I don’t know about you but I’m preeeetty partial to a woodland creature or two, especially the feline variety!

Rachel

These animal mask templates were created by Rachel for Mollie Makes magazine – for more easy-make craft projects and creative inspiration, subscribe to Mollie or click here to find out more.

You will need:

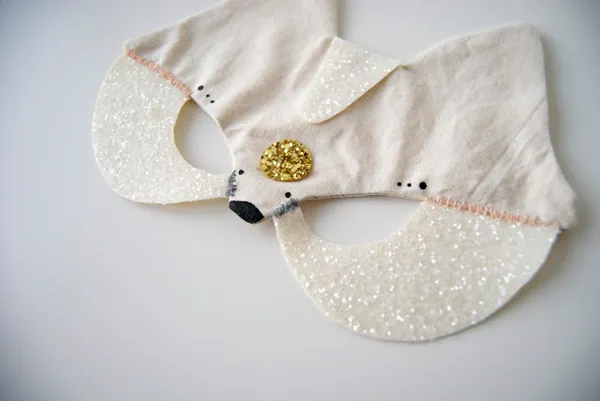
  • A mask design (Rachel made a cat and a bear)
  • Scraps of fabric
  • Needle and thread
  • Ribbon
  • Pins
  • Acrylic paints
  • Scissors
  • Sewing machine (if you have one)
  • Pencil and A4 paper

Animal mask templates

You will need:

  • Fabric
  • Needle
  • Thread

Step 1

Kids woodland masks tutorial step 1

Measure your face across your eyes from ear to ear, and jot down the width of your nose and the width of each eye (it’s easier with a helper at this point!). Take a piece of A4 paper and fold it in half. From the centre line, measure half the width of your face and draw your desired animal. Keep the paper folded in half and cut around your shape as a whole – you can see the outcome of this above.

Step 2

Kids woodland masks tutorial step 2

Now you can cut your pieces apart. At this point I labelled the cheek parts L (left) and R(right) so that I knew which was which…I’m the worst at getting things muddled up, also as I was doing two I labelled each piece R (Rachel) or J (Jack) too.

Step 3

Kids woodland masks tutorial step 3

Fold your fabrics in half and pin your animal mask templates to the wrong side. Fold your fabrics in half and pin your templates to the wrong side.

Step 4

Kids woodland masks tutorial step 4

Cut around your templates leaving a 0.5cm seam allowance all the way round. Sew around the edge of your paper template leaving a small gap to turn.

Step 5

Kids woodland masks tutorial step 5

Turn (you may need handy implements like a chopstick or a knitting needle). Lay your woodland creature masks out to make sure they still fit together nicely.

Step 6

Kids woodland masks tutorial step 6

Use your thread – I always go for a contrasting colour – and stitch the mask together. Start with the inner corners of the eyes and sew them to the edges of the nose. I didn’t overlap them at all; just stitched them edge to edge.

Step 7

Kids woodland masks tutorial step 7

Finally decorate your little animal masks with paint, glitter, embroidery, gems, feathers… anything!

Kids woodland masks tutorial single mask

Wowzers! How awesome are Rachel’s kids animal mask templates? We hope you enjoyed making Rachel’s project. For more summer holiday ideas head to our Kids Craft section. We even show you how to make balloon animals for beginners! Share a picture of your woodland creature masks with us on Instagram using #molliemakers, and don’t forget to subscribe to Mollie Makes to get creative inspiration delivered to your door every month!