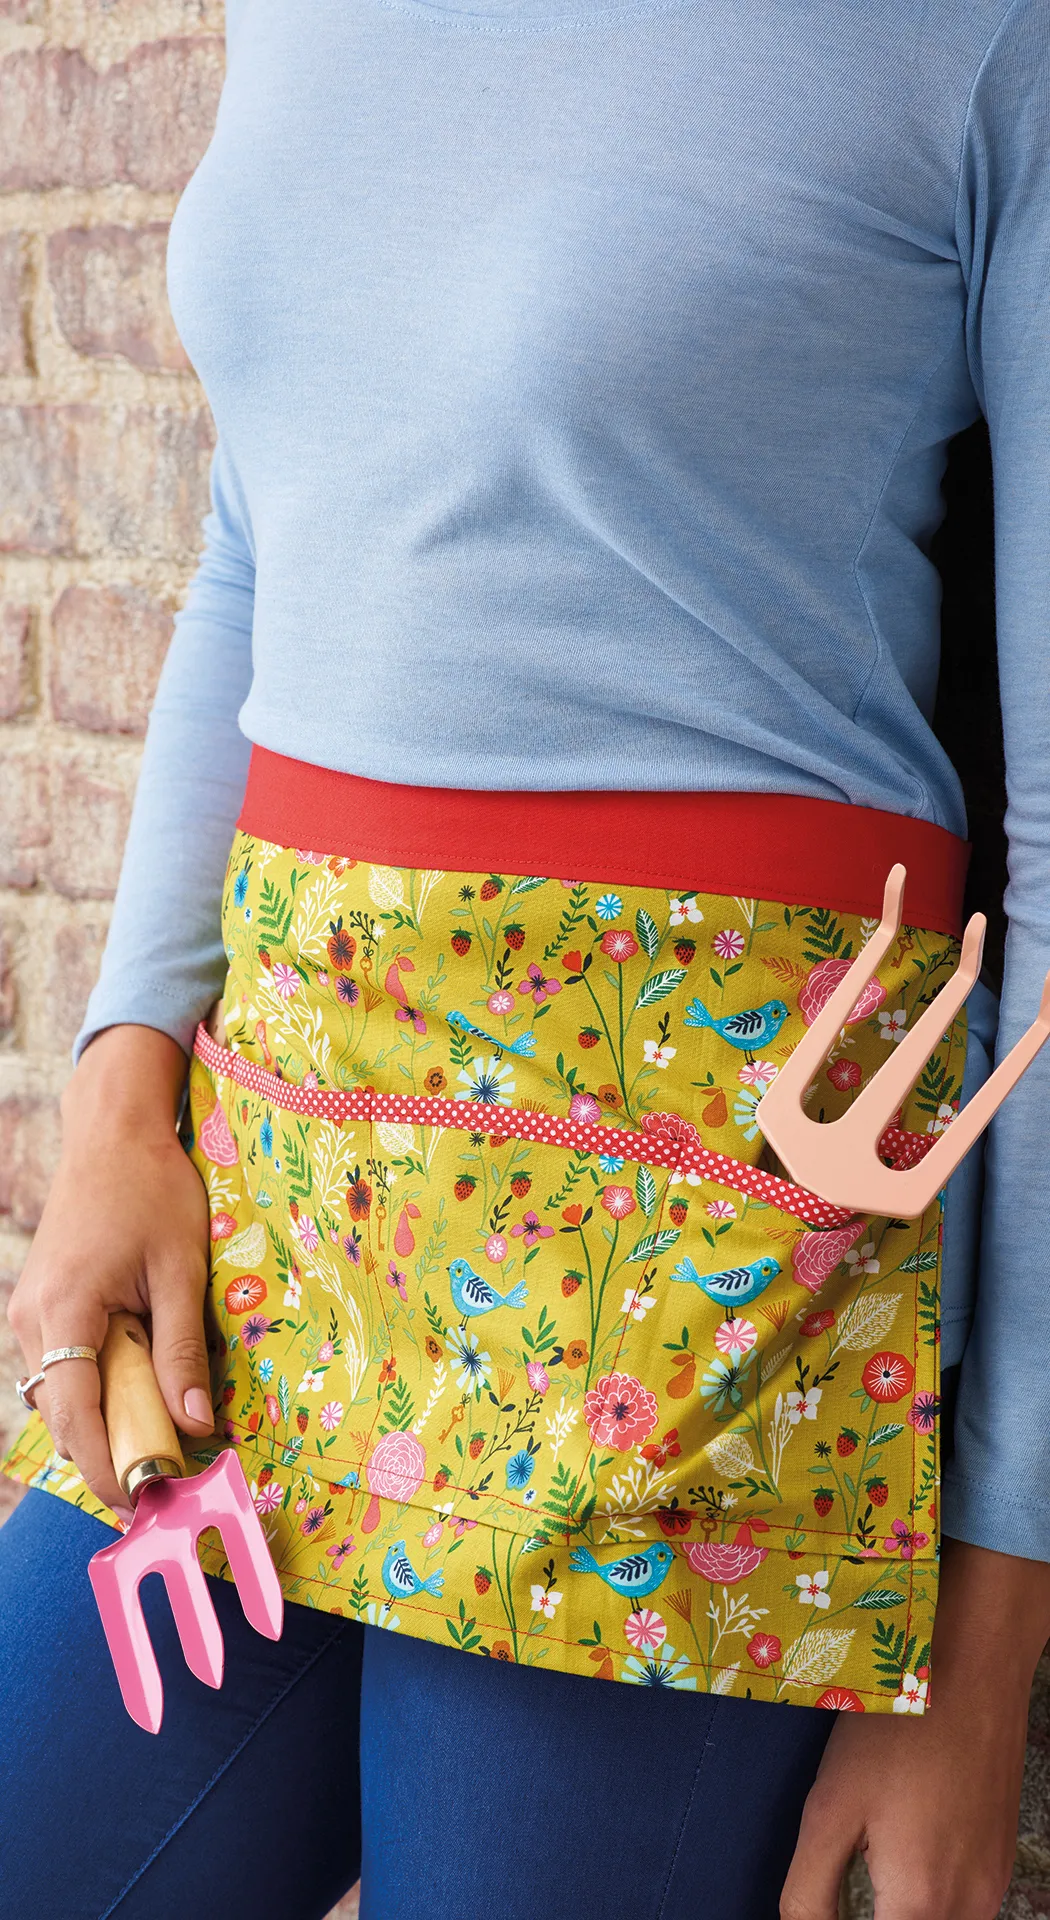
How does your garden grow? Whip up our easy-to-make gardening apron pattern to grow your own, homemade style this summer. If you're on the hunt for more free sewing projects, you might also like our guide to how to make bunting.
For more free projects and inspiration sign-up to our newsletter!
You will need
- 1 fat quarter of fabric
- A small piece of contrast plain fabric: 30x70cm (12x28in)
- Bias binding: 52cm (20½in)
- Basic sewing kit
Gardening apron pattern: cutting out
Step 1
Cut the contrast fabric strip for the waistband into three strips, each measuring 10x70cm (4x28in).
Step 2
Cut the fat quarter as follows:
- For the main apron: 31x56cm (12x22in).
- For the pocket: 15x52 (6x20½in).
Making the waistband
Step 3
Pin two waistband strips right sides (RS) together at right angles and then sew together diagonally across.
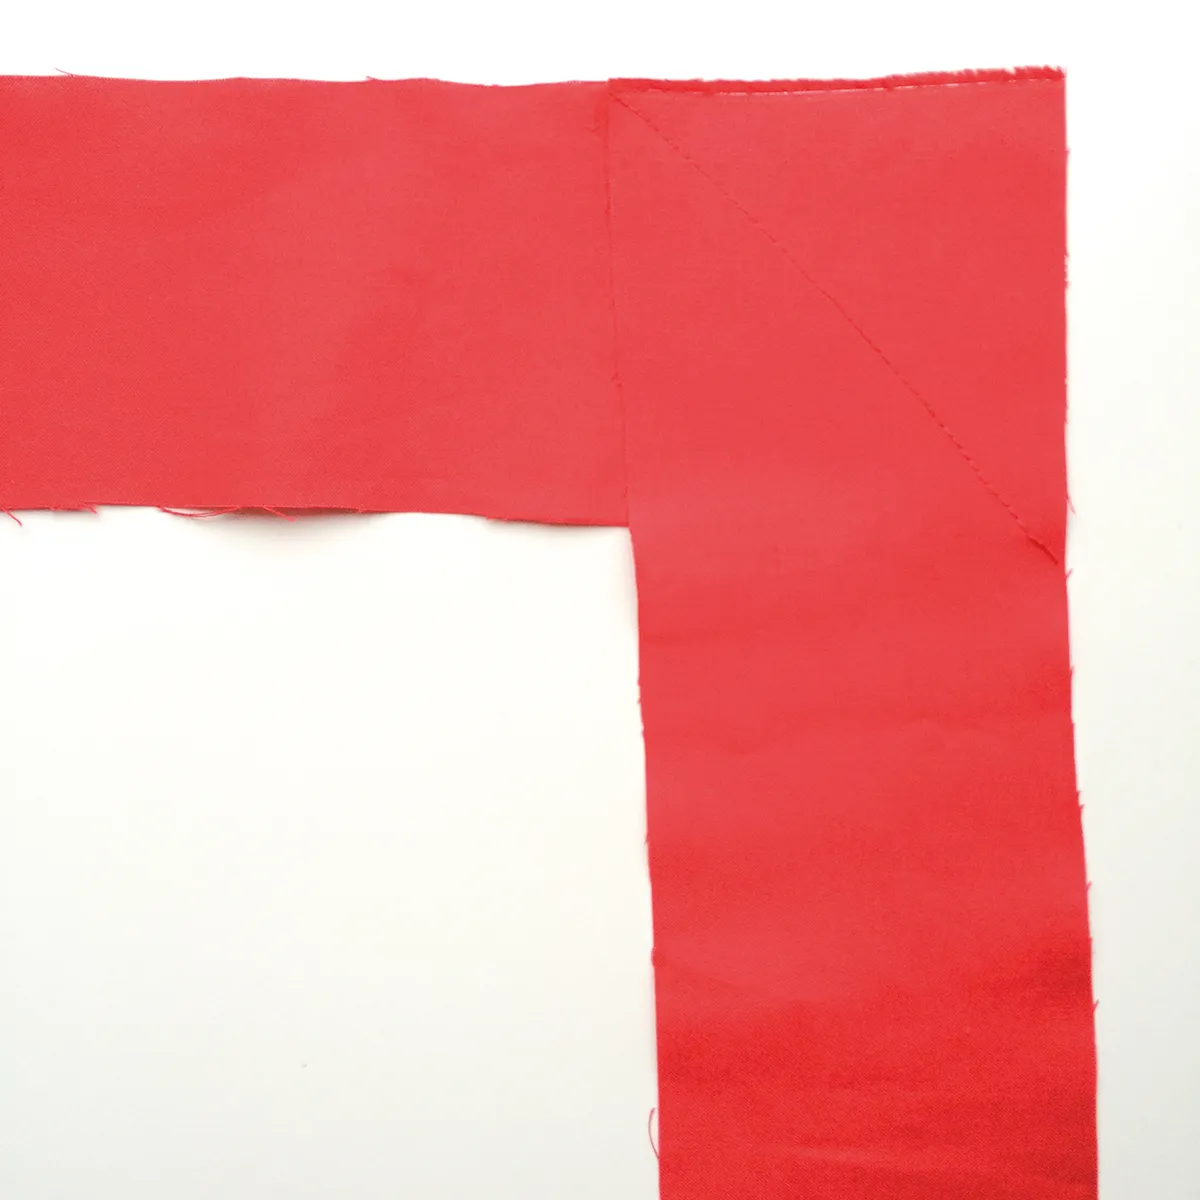
Step 4
Trim the seam and press open.
Step 5
Join on the other strip in the same way to make one long strip.
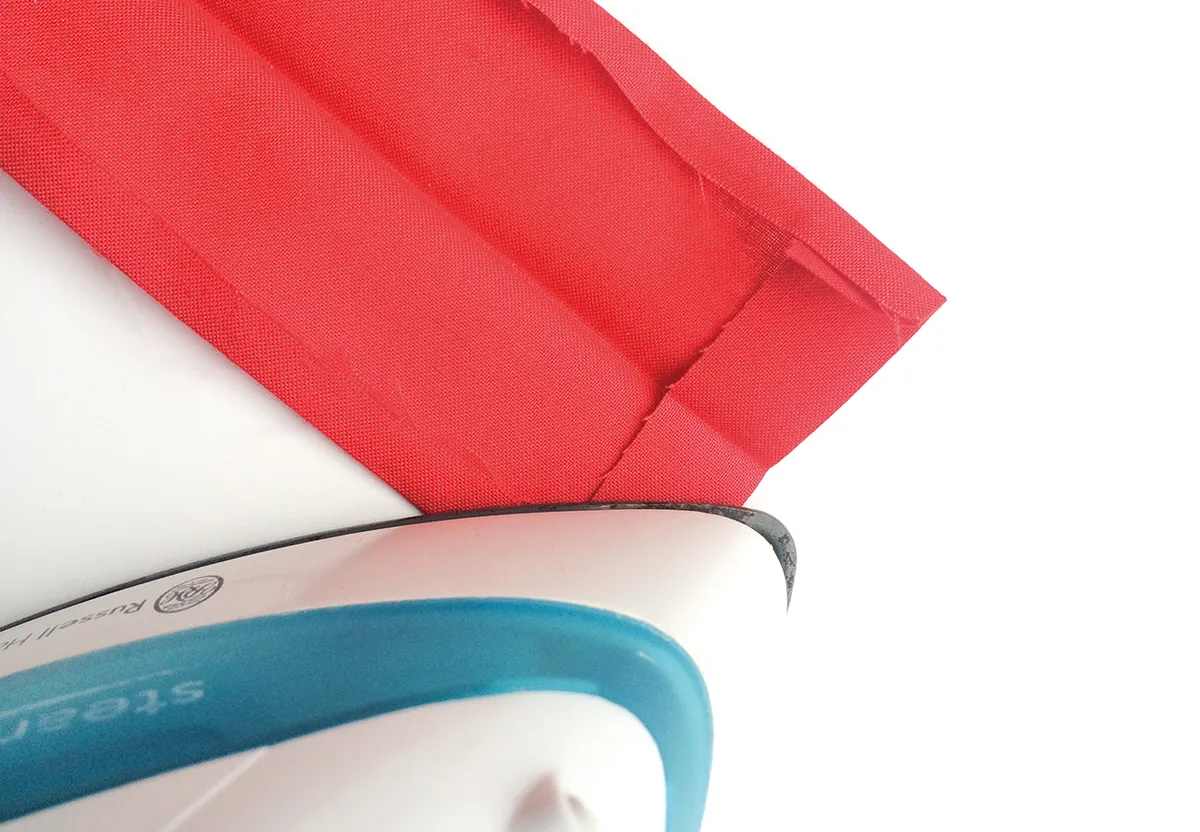
Step 6
Fold the strip in half lengthways wrong sides (WS) together then press under all the raw edges by 1cm (3⁄8in) to the WS.
Make gardening apron with pockets
Step 7
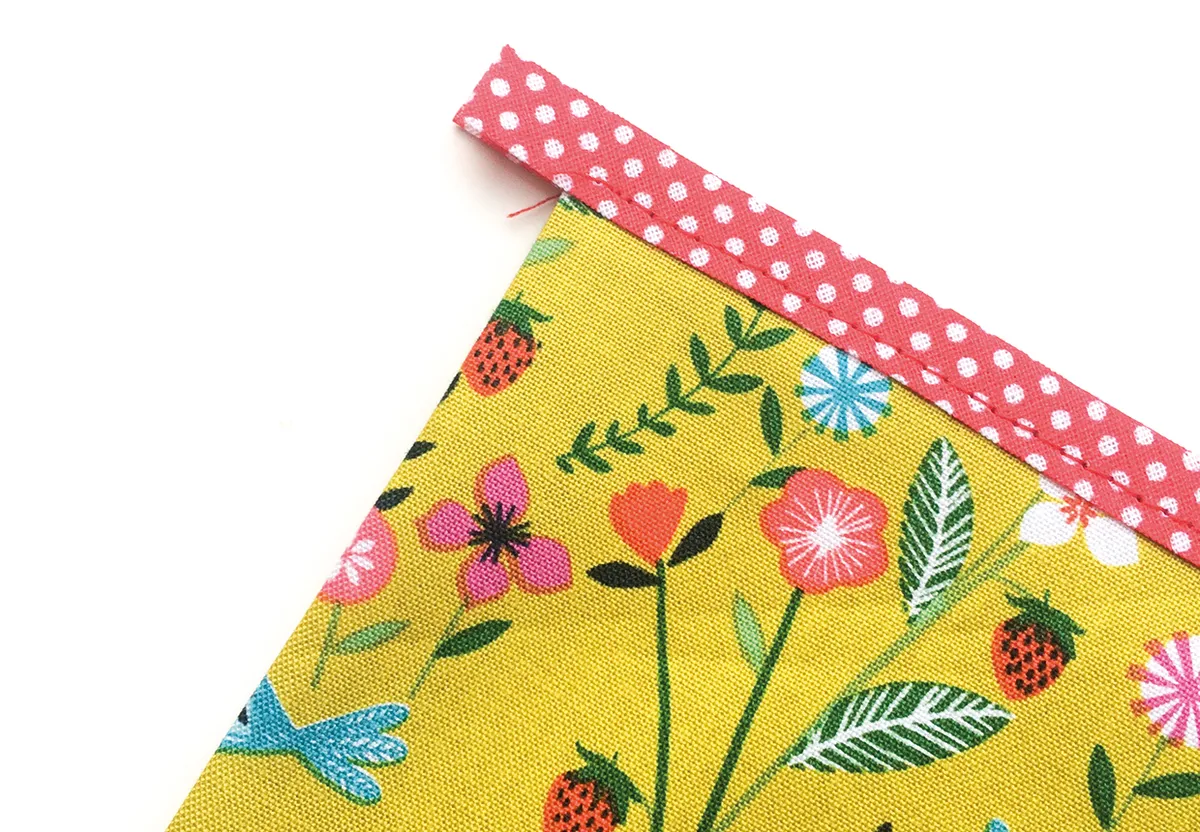
Turn the short sides and bottom long edge of the pocket piece under by 2cm (¾in) to the WS and press, leaving the top edge raw.
Step 8
Fold the bias binding around the top raw edge so there is 2cm (¾in) extending beyond either side of the turned-under short sides and pin.
Step 9
Topstitch the binding in place along the top of the pocket.
Assembling the gardening apron
Step 10
Turn under the short sides and the bottom long edge of the apron fabric by 2cm (¾in) then the same again and press. Leave the top edge raw.
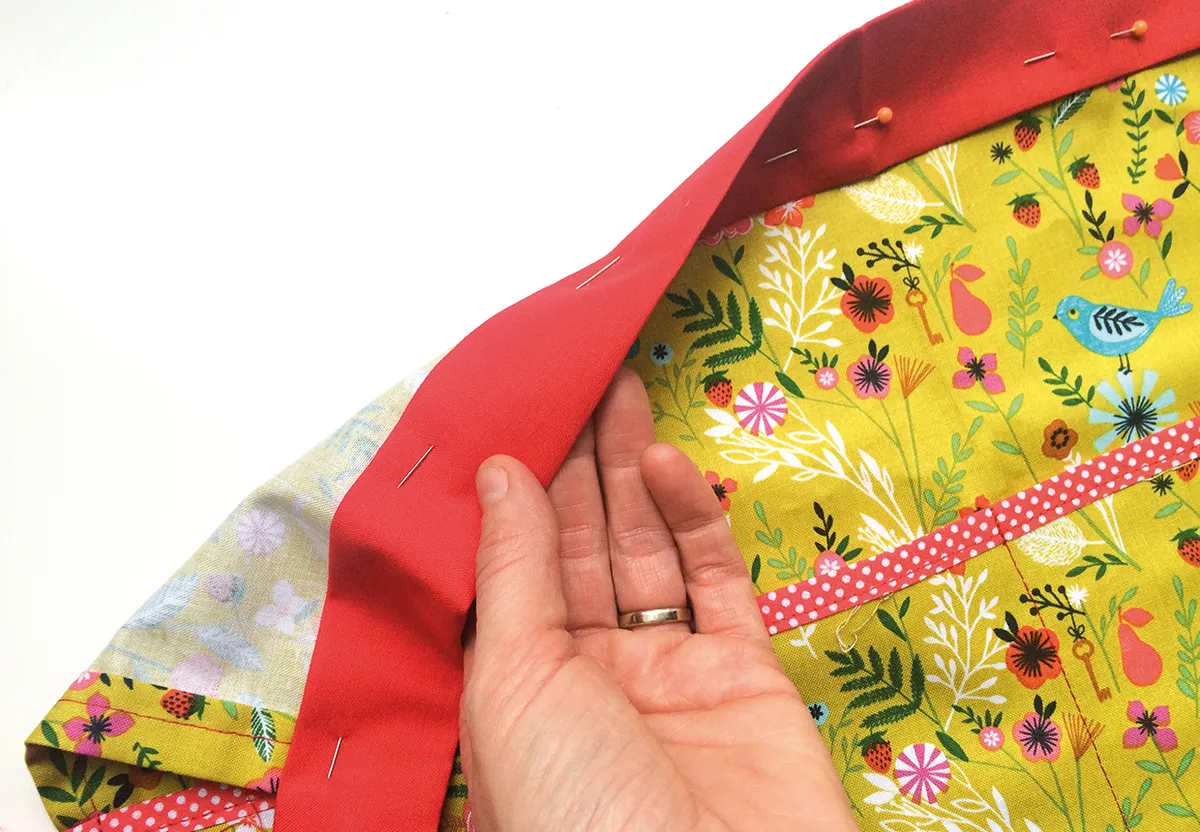
Step 11
Pin the pocket onto the apron, positioning it 5cm (2in) up from the hemmed lower edge and matching the short sides.
Step 12
Turn the ends of the bias binding at the top of the pocket under to meet the apron sides and pin into place.
Step 13
Stitch the side and lower hems of the apron and pocket into place.
Finishing the gardening apron pockets
Step 14
To make the pocket divides, measure and mark three equally spaced vertical lines down the pocket then stitch them into place.
Step 15
Stitch along the bottom of the pocket.
Attaching the waistband
Step 16
Fold then pin the pressed under waistband edge around the top of the apron, with the apron placed centrally. Position the top of the apron 1cm (3⁄8in) inside the waistband.
Step 17
Stitch the waistband together 5mm (¼in) up from the folded under edges. Stitch down the sides and along the length, encasing the top of the apron as you go.
We hope you enjoyed our free apron pattern and can whip up your own gardening apron with pockets this evening.
This gardening apron would make a great mothers day gift but for more gift ideas check out our free Mothers Day flower bouquet pattern and free floral Mother's Day printables.
Looking for your next sewing project? Have a go at our free kimono top pattern, explore our sewing patterns for beginners, or learn how to make a face mask.