Make this funky little ice cream brooch this summer with our tutorial! It's the perfect beginner project for those wanting to learn how to sew with beads.
Sewing with beads - learn the techniques
Beads can transform an already lovely garment into something gorgeous and extra-special, with sparkle, shine and colour! There are endless ways to embellish with beads, from small details to large-scale designs. They come in all shapes, sizes, colours and finishes and their versatility is vast.
Seed beads
Seed beads are round and chopped from a length of glass cane, which is then heated and smoothed to create their lovely, rounded shape. They come in lots of different finishes.
Japanese seed beads are really good quality as they are consistent in size and colour. Czech and Chinese beads are cheaper, but you’ll find these are less consistent and irregular in shape. Seed beads are sized by number – the higher the number the smaller the bead and thread hole.
Bugle beads
Bugle beads are tubular in shape and have been trimmed to the correct length from glass cane There is little shaping or smoothing at this point which means bugle beads have sharp ends, so this needs to be considered when sewing them into place or if using as fringing.
These beads can either be smooth and cylindrical or twisted, which creates a faceted surface – beautiful for reflecting light and shine. They come in different finishes and lengths, too.
Specialist beads
Crystal beads are made from leaded glass, which gives them their wonderful high shine. The most commonly known crystals are Swarovski.
Delica beads are short, cylindrical glass beads which create a flatter, more uniformed finish when sewn.
Magnifica beads are cylindrical glass beads with large threading holes and thin walls, and they are most commonly used for bead weaving.
Working with beads
Before you start beading, make a simple beading mat to prevent beads from rolling around by covering a piece of mount board with velvet.
Remember that not all beads are colourfast as some are colour-lined, rather than solid in colour. Do a colour test with a little water to see if any colour is transferred before you start. When pressing beaded garments or fabric, cushion the beads with a towel and press from the back.
Which thread to use
Choosing the right thread for beading is important to prevent beadwork from breaking prematurely. Nymo is a popular beading thread – it's ideal as it is very strong and supple. A strong sewing thread is another option, but just remember to condition it before you start stitching to protect it. Use a thread conditioner such as Thread Heaven, or beeswax.
Choosing a needle
Beading needles are long, fine and flexible. They are available in various sizes and brands and a size 10 or 12 works well with size 11 seed beads.
Embroidery needles can be used too, though they're not as flexible as beading needles.
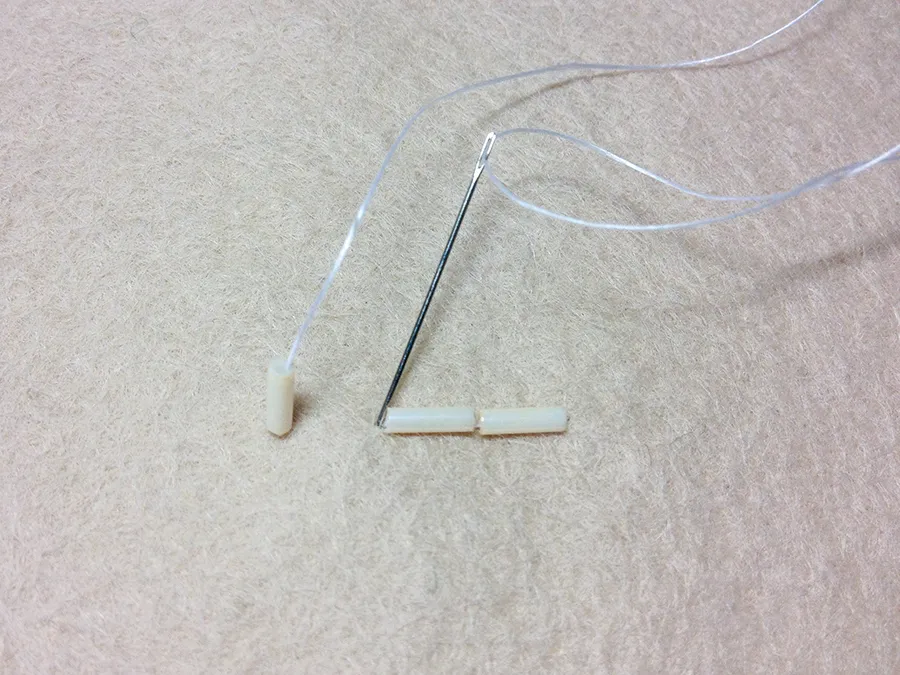
Back stitching bugle beads
- Knot the thread end and make a tiny back stitch on the reverse of the fabric to secure.
- Bring your needle up through the fabric a short distance away from where you want to start, to the length of the bugle bead.
- Thread on a bugle bead and take the needle down through the fabric at your starting point, with the bead sitting flat on the fabric.
4. Bring your needle up a bead length from the end of this bead. Thread on the next bugle bead, make a back stitch then continue to add the remainder of the beads in the same way.
Creating a lattice effect
- Work a series of diagonal, beaded back stitches to create the lattice pattern of the ice cream cone.
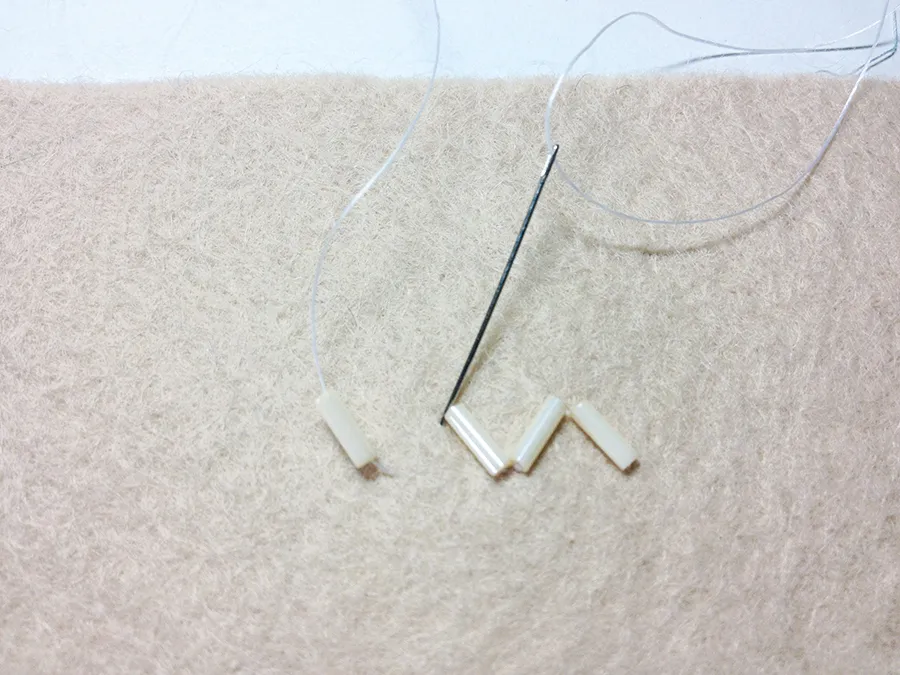
2. Work the diagonal lattice pattern row by row, stitching each bead towards the previous bead as shown.
Couching seed beads
- Couching is a secure technique for sewing several beads in place at a time. Bring your needle up at the starting point.
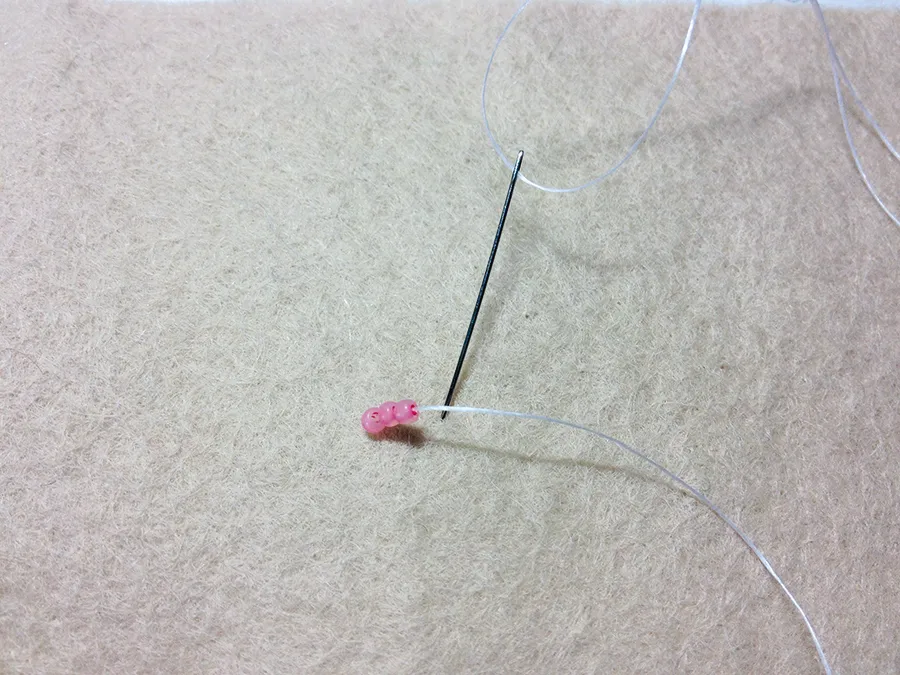
2. Thread on three seed beads then take the needle back down through the fabric with the beads sitting flat against the fabric.
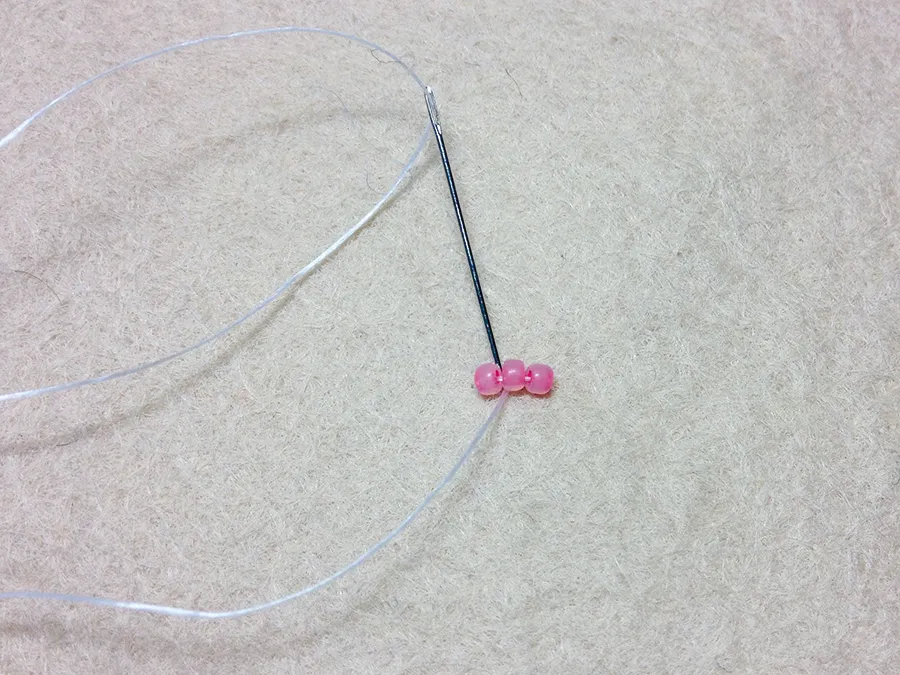
3. The next step is to secure the beads by making a couching stitch between each one. This is a tiny stitch which holds the thread in place but is barely visible. Bring the needle up between the first and second bead and make a small securing couching stitch over the beaded thread.
4. Repeat this stitch between the second and third beads. 5. Repeat this series of stitches with the next three seed beads, making sure a continuous line of beads is worked, without any gaps.
To practice your new sewing with bead skills check out these projects:
Make the ice cream brooch
You will need
- Felt: 15x20cm (6x8in)
- Seed beads: size 11, pink
- Seed beads: size 11, cream
- Seed beads: size 11, green
- Bugle beads: 6mm, cream
- Beading thread, white
- Thread conditioner
- Beading needle, size 10 or 12
- Templates from issue 44
Materials Used