Make a statement with our wide leg pants pattern
Wide leg pants are both comfortable and stylish – especially in the summer months. The flowing fabric used in this wide leg pants pattern will help you to stay cool while looking smart.
They can be worn to work or simply for an evening out. You can easily dress them up for a formal occasion or dress down for more relaxed social occasions. Adjust the length to make yourself a pair of culottes or shorts for the summer.
This wide leg pants pattern can be easily adjusted to suit your figure, which is great if you struggle to find trousers that fit you properly. The wide leg pants sewing pattern can be made in your choice of fabrics. You'll soon want to make them in every colour!
If you're new to sewing, we'd recommend taking a look at our sewing for beginners and how to use a sewing machine guides.
Read on to learn how to make our wide leg trousers pattern…
Wide left pants pattern
Notes
- Seam allowance is 1cm (3⁄8in) unless otherwise stated.
- We used a stretch crepe fabric; if you choose a stretch fabric, you will need to use a ballpoint needle to avoid skipped stitches.
Fabric used
- Plum crepe stretch fabric from Minerva
You will need:
- Main fabric (2mx145cm (21/4ydx57in))
- Elastic (1.5in wide: approximately 1m)
- Paper (to draw out your pattern (optional))
- Matching thread
- Basic sewing kit
Making the pattern
Step 1
You can use paper to create a pattern that you can keep and reuse, or simply draw your measurements straight onto the fabric.
Measure around the widest part of your hips, divide by four and then add 5cm (2in) to this measurement. For example, a size 10: 92cm (36¼in) divided by 4 = 23cm (9in) + 5cm (2in) = 28cm (11in). This gives you your first marking, which is the width of the top of your trousers.
Next, measure from your waist to your calf and add 2.5cm (1in) for hemming; this gives you the length. You should now have a rectangle.

Step 2
Measure 35.5cm (14in) down from the waistband to give you the crotch line.

Step 3
Extend the crotch line out by 5cm (2in) and up by 5cm (2in) from this line. Draw a curve to join the two points. Then extend the crotch line straight down to the hem of the trousers, creating a nice wide leg.

Step 4
Repeat to make a Back Leg pattern, but extend the crotch lines up and out 10cm (4in).
Step 5
To make the Waistband, take the width measurement of the top of the trousers and double it, then subtract the seam allowance of 1cm (3⁄8in) from each end of the pattern piece. Make the depth 23cm (9in). Cut two of these.

Constructing the trousers
Step 1
Take one Front Leg and one Back Leg, and with right sides (RS) facing, pin together along the inner and outer leg seams, ignoring the crotch area. Pin and stitch together (pressing as you go) and repeat for the other leg. Finish the seams with an overlocker or zigzag stitch.

Step 2
Turn one leg RS out and put it inside the other leg so RS are facing and pin together at the crotch, matching the inner crotch seam. Stitch them together around the crotch seam from front to back. Overlock or zigzag the raw edges to finish the seam.

Making the waistband
Step 1
Sew the Waistband pieces together at the short ends, RS facing, and press the seams open. Your waistband will now look like a tube. Fold the top edge to the wrong side by 1.5cm (5⁄8in) and press in place.

Step 2
To join the Waistband to the trousers, start with the garment turned RS out and place the Waistband over the trousers with RS together and with the raw edges and side seams matching. Pin around the edge and stitch in place with a 1.5cm (5⁄8in) hem. If your fabric is thick, trim your seam allowance at this point, and press the seam allowance upwards.

Step 3
Take the top edge of the Waistband and fold it down into the inside of the trousers. The folded edge should line up with the waist seam stitch lines and all of the raw edges should be enclosed. Press in place and pin to keep the folded edge in place.
Stitch 3mm (1⁄8in) from the waistline seam on the RS of the Waistband, or stitch in the ditch, making sure you are catching the folded edge on the back. Leave a gap in your stitching of about 5cm (2in) to thread your elastic through later.

Step 4
Make a line of stitching 4.5cm (17⁄8in) down from the top of the Waistband to create the paper bag ruffle top of the Waistband. You might find it easier to mark this on with chalk before you start sewing.

Step 5
Cut a piece of elastic that fits comfortably around your waist. Make sure it will stretch enough to pass over your hips or else you will struggle to get the trousers on!
Step 6
Attach a safety pin to the end of your elastic and thread it through the waistband channel, making sure the elastic doesn’t twist in the process. Stitch the ends of the elastic together using a zigzag stitch. Close the gap in the waistband by stitching in the ditch again.
To prevent the waistband elastic from twisting, work a line of stitching through the centre of the elastic all around the waistband, stretching the elastic as you go and using a longer stitch length.
If you don’t want to stitch around the waistband, you could stitch vertically at the side seams to secure the elastic in place. Use a long stitch length for this and make sure the elastic isn’t twisted.

Finishing the trousers
Step 1
An optional step is to make a belt to wear around the waistband. To make a fabric belt, cut a strip of the trouser fabric measuring 15x159cm (6x59in). Fold the belt in half RS together, bringing the long sides together. Press along the fold and then mark a diagonal line at each end.

Step 2
Starting at one diagonal end, stitch along the length, leaving a 5cm (2in) gap in the centre of the length for turning. Continue stitching the remainder of the length of the belt and across the other short end.
Step 3
Trim the seam allowance, clip the corners and turn through. Poke out the ends with something pointed yet blunt, like a chopstick or knitting needle. Press the edges in place and stitch the opening shut.
Step 4
Before you hem your trousers, try them on quickly to double-check that you’re happy with the finished length.
Step 5
Overlock or zigzag around the raw edge, then press up a hem to the WS of your desired length. Stitch in place to finish.
You’re done! We hope you enjoyed making this wide leg pants pattern.

Step out in style with this wide-leg pants pattern
This wide-leg pants pattern is a stylish and comfortable project, perfect for creating a chic, handmade addition to your wardrobe.
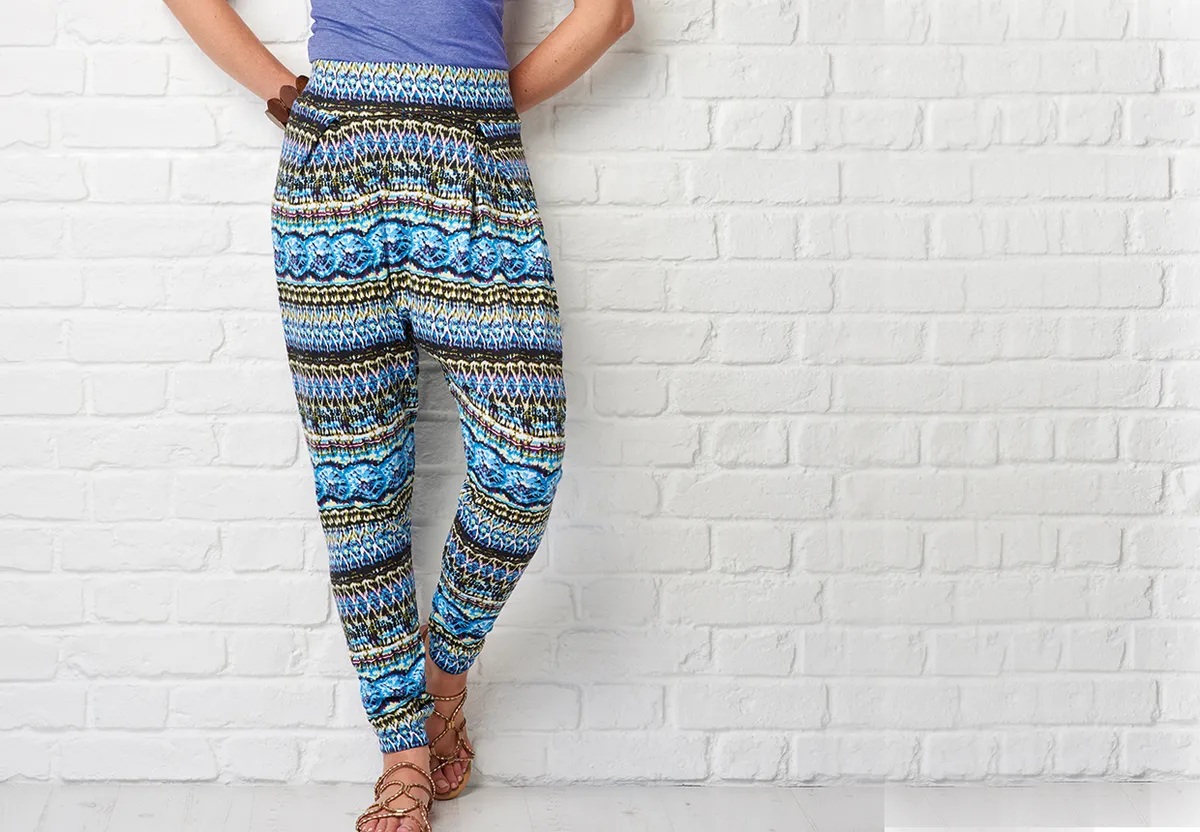
Make a pair of harem pants
Looking for more trouser patterns to sew? Try our harem pants pattern.