All products were chosen independently by our editorial team. This review contains affiliate links and we may receive a commission for purchases made. Please read our affiliates FAQ page to find out more.

How to make a paracord bracelet

Learn how to make a paracord bracelet with our easy-to-follow tutorial! There are two designs to choose from, which is your favourite?

Try our magazines – get 6 issues from just £9.99!

Published: December 18, 2021 at 7:08 am

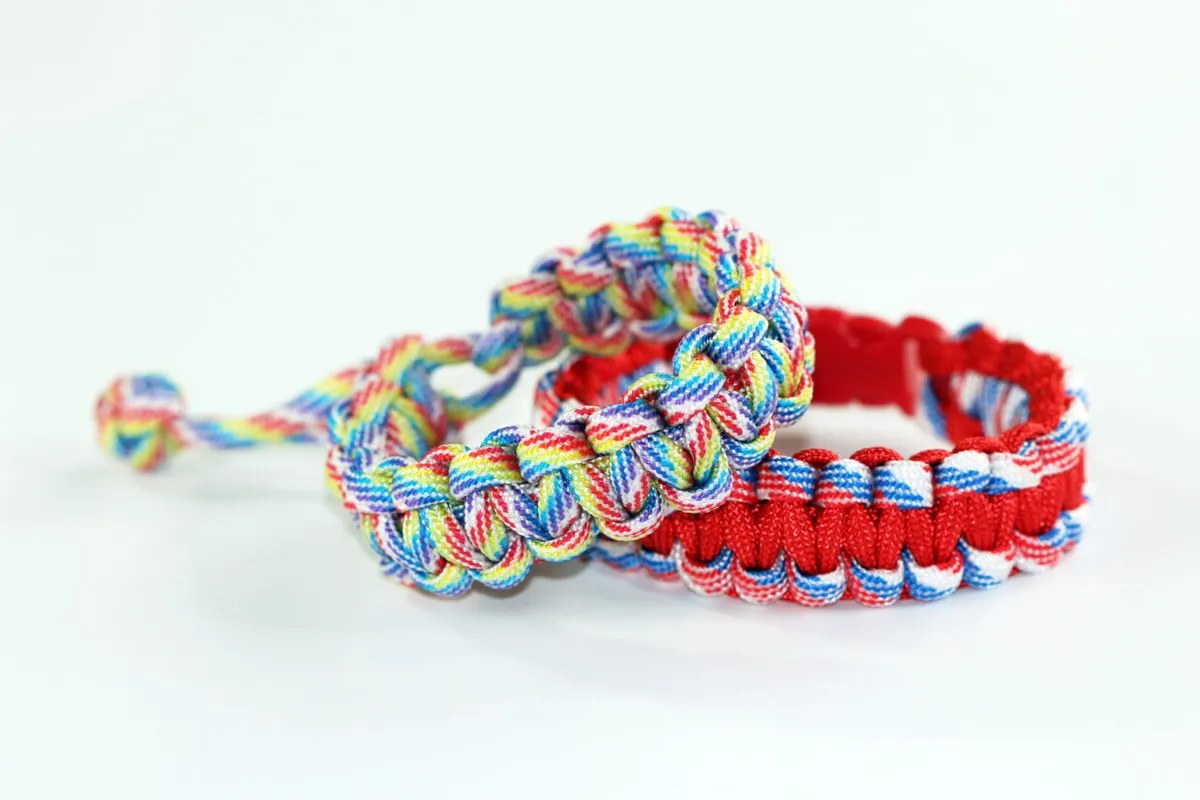
In this article, we share two comprehensive tutorials on how to make a paracord bracelet. 
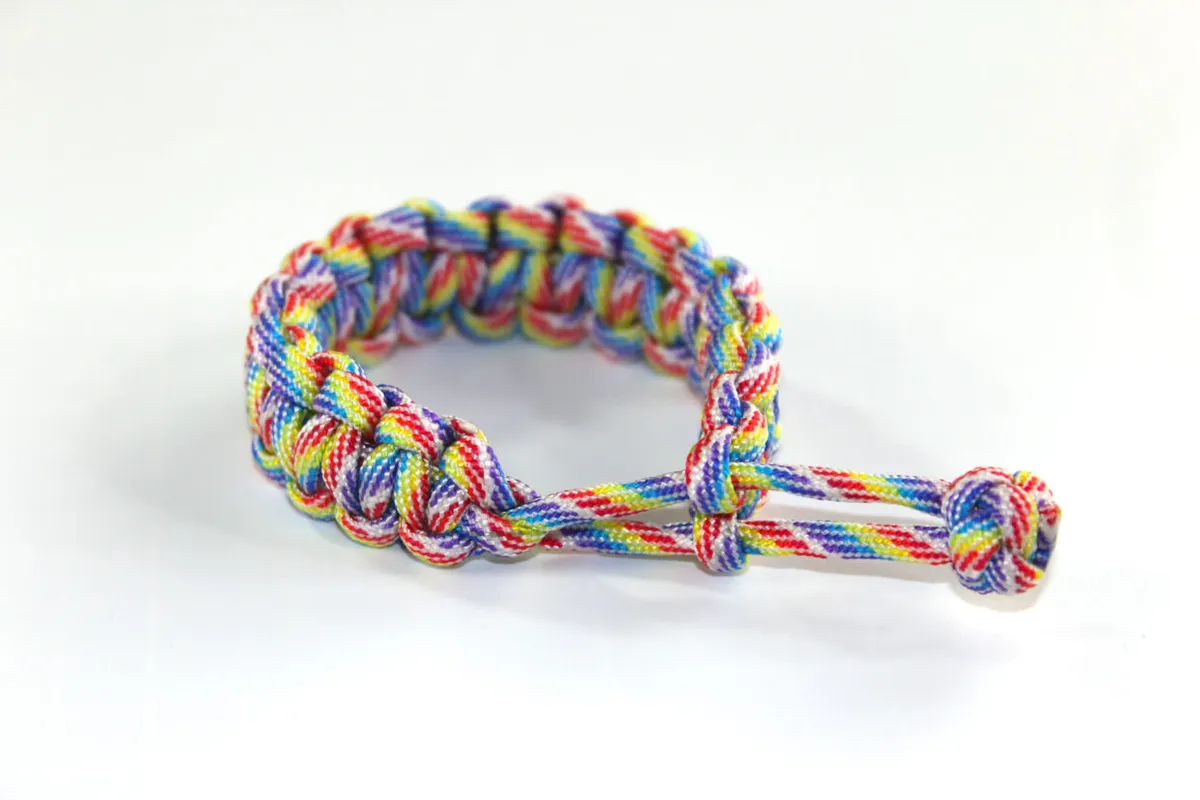
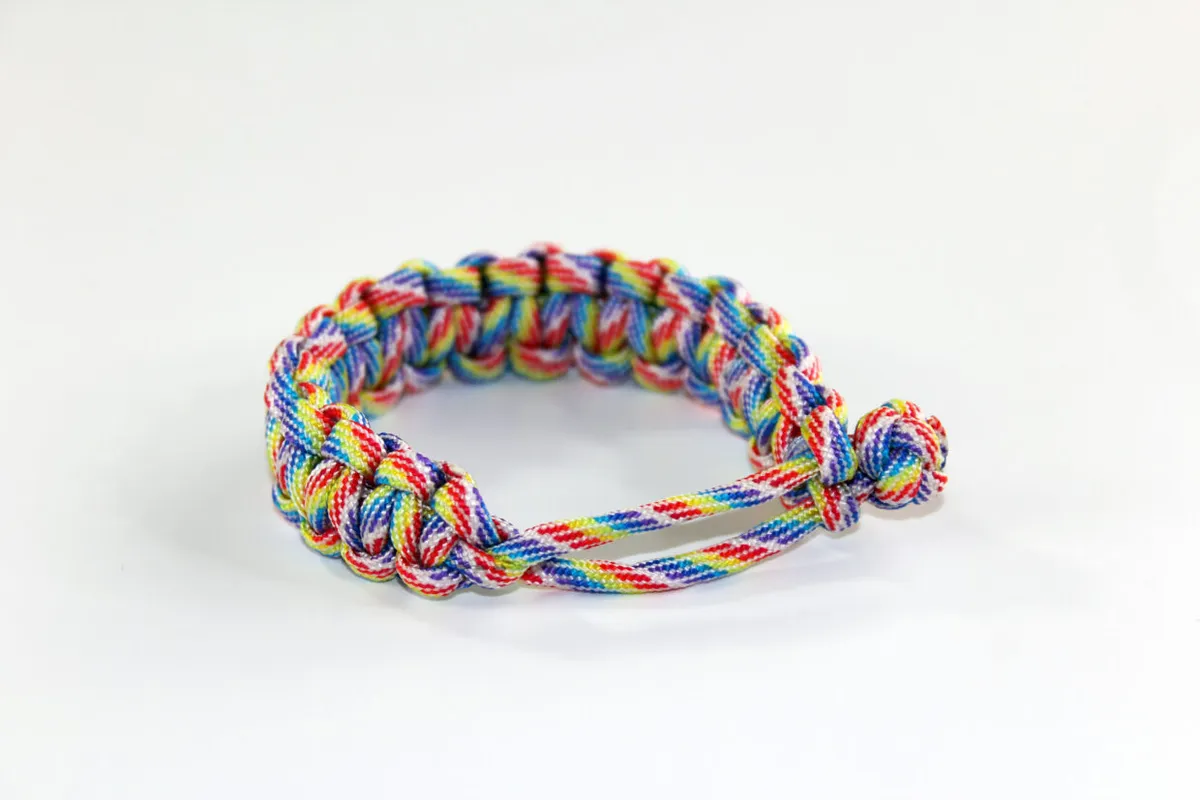
The first, how to make a paracord bracelet without a buckle, is similar to the one Tom Hardy wears in the 2015 film, Mad Max Fury Road. It's an adjustable bracelet that uses a Cobra Weave (also called Solomon Bar) and is finished off by a knot. 
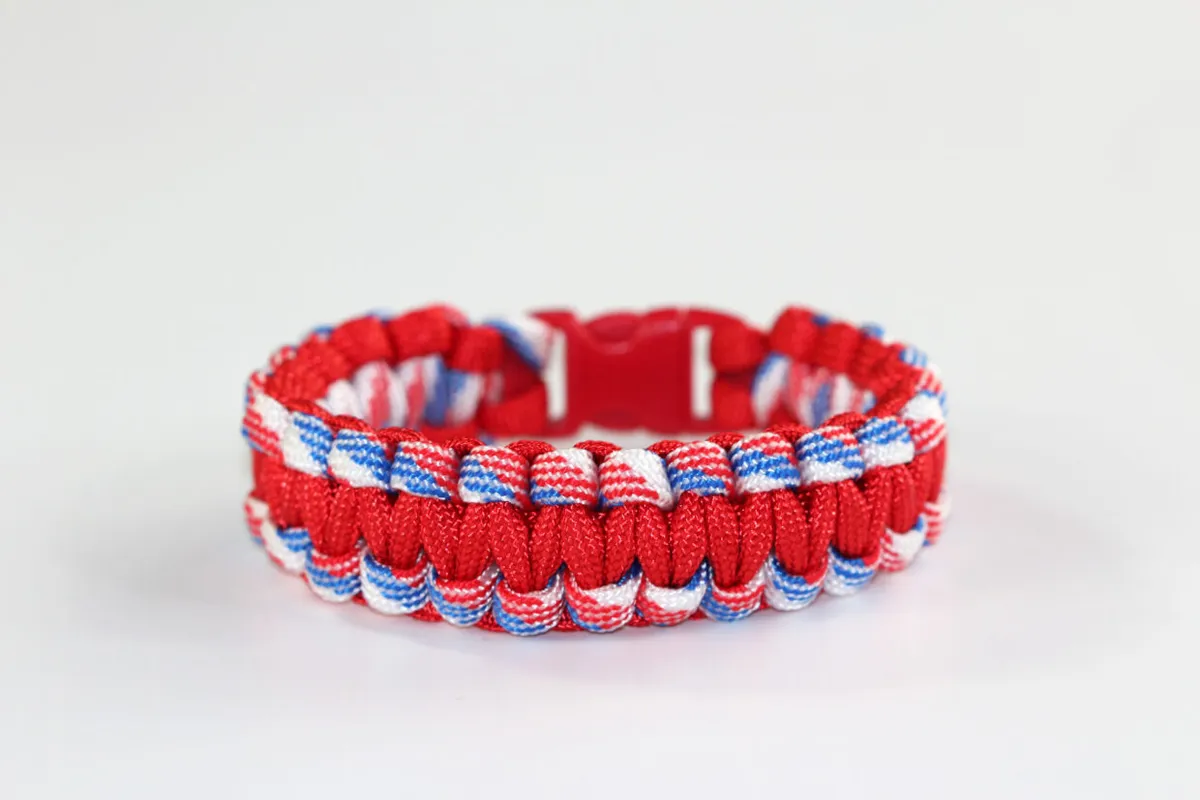
The other paracord bracelet tutorial, how to make a paracord bracelet with two colours, uses the same knot but is finished with a buckle. Paracord bracelets (any style) require a lighter or candle flame to seal the ends of the paracord, as it can fray very easily.

If you like this tutorial, how to make a paracord bracelet - check out some of our other bracelet crafts, right here on Gathered. We've got how to make loom bands, how to make chunky macrame bracelets, how to make friendship bracelets or how about browsing for more jewellery making ideas to get you feeling inspired?

Are you looking for gift ideas for men? Check out our round-up of the best Airfix kits and wood carving tools, perfect to keep them occupied during rainy days!

How to make a paracord bracelet

What is paracord?

So what is paracord? Paracord is a lightweight nylon rope, originally used in the suspension lines of parachutes - hence the name. It's made using a kermantle construction, where the inner core (providing the tensile strength of the paracord) is protected by a woven external sheath (which protects the core from abrasion during use). This type of construction means that it is incredibly strong, durable and flexible.

What is paracord used for?

As well as for its original use in parachutes, paracord is used today as a general-purpose utility cord - it's even used by military personnel. For craft purposes, paracord has been rising in popularity as not only is it easy to work with, but it comes in a huge range of colours and designs, too. Because the cord is so strong, it's easy to untie or detangle a knot and has practical applications too.

If you are a hiker or outdoor enthusiast, you'll have heard of paracord bracelets, as they're also called survival bracelets. If you're going rambling, a paracord bracelet can be very useful as it can be used to tie up your gear, secure camera equipment, make shelter or fish for your supper. Of course - you'll need to unbraid it, but that's the beauty of paracord, it's easy to braid and unbraid whenever you need it. You can even use it to make a padded handle for your utility knife. You can double your paracord for extra strength, or even deconstruct it for some finer thread.

Because of its nylon construction, its ends can be melted (or crimped) to prevent fraying and it will withstand the elements with ease. If you or someone you know is going travelling or embarking on a gap year - a paracord bracelet will be a useful tool and is widely recommended in emergency preparation kits.

How much paracord do you need to make a paracord bracelet?

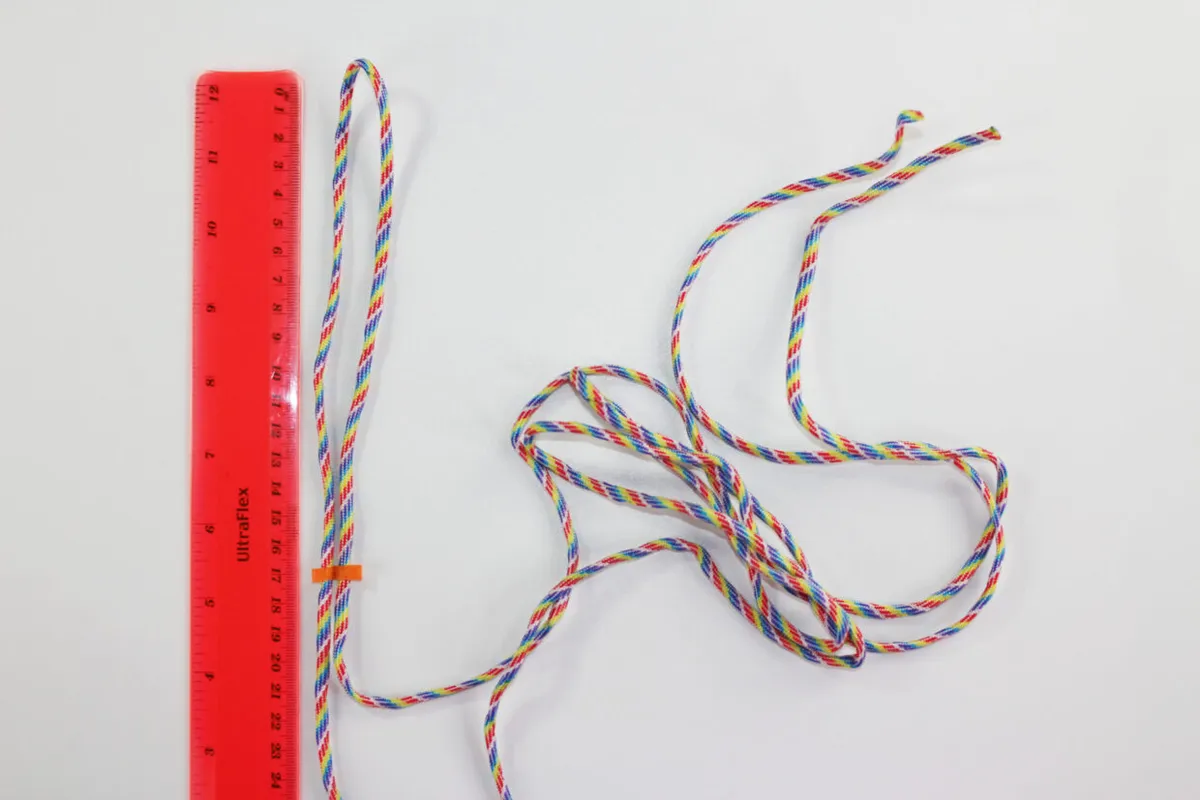
Generally speaking, an inch of the bracelet equals a foot (or 12 inches) of paracord. So, measure the circumference of your wrist - if it's for example, 8 inches, you will need up to 8 feet of cord.

Buy paracord for bracelets!

Buy now: £11.99, Amazon

If you're looking to buy paracord for crafting, then this is the kit we used! It comes in 12 different colours, each bundle having 10 feet of paracord (so each bundle is enough for at least one paracord bracelet) plus 24 snap buckles. The paracord itself is made from high-quality polyester for the outer nylon, which dries quickly, is fade and UV resistant, and is pleasant to the touch. It's good value for money and comes with a useful tool to help you make (or unmake) your paracord bracelet. Plus - look at the rainbow paracord!

How to make a paracord bracelet - Inntek paracord, Amazon

How to make a paracord bracelet without a buckle - Mad Max style!

In this tutorial, you will learn how to make a paracord bracelet using Cobra Weave (also called Solomon Bar), just like the one Tom Hardy wears in the 2015 film, Mad Max Fury Road.

How to make a paracord bracelet without a buckle

You will need

  • Paracord, 8-10 feet
  • Scissors
  • Lighter
  • Ruler or measuring tape

Step 1

How to make a paracord bracelet without a buckle - step 1

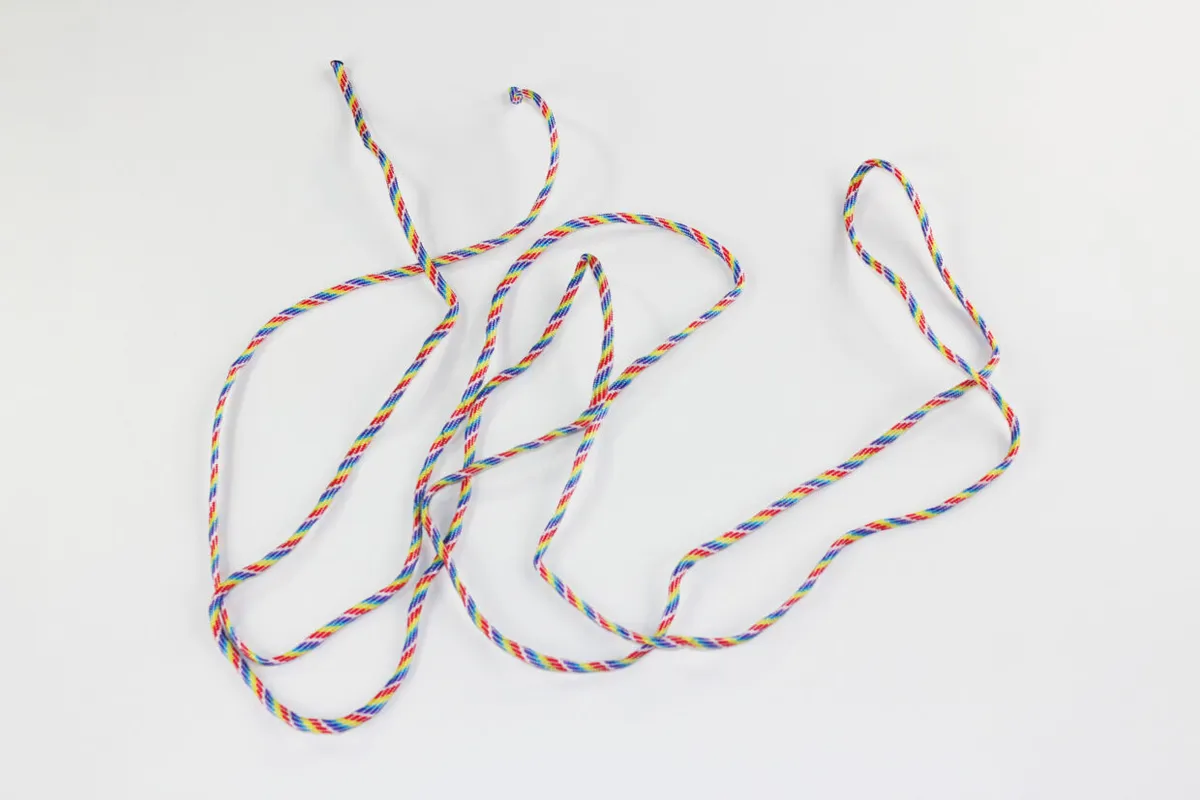
Measure the circumference of your wrist and make a note of it. Grab a bundle of paracord and find the middle by folding it in half.

My wrist circumference is 17cm or 6.5" and I'm using the whole 10 feet of this bundle of paracord.

Step 2

How to make a paracord bracelet without a buckle - step 2

From the folded end, measure out the length of the circumference of your wrist. It doesn't need to be too precise as this is an adjustable paracord bracelet. I've measured down 17cm (my wrist circumference) and left around 2cm for the loop.

So, wrist circumference 2cm for the loop. I've added a tiny strip of washi tape so you can see where I'm braiding to, but you can just keep your fingers there if you prefer. It's easy to lose the length of your bracelet when making your first knot, so I find the washi tape useful in that respect.

Step 3

How to make a paracord bracelet without a buckle - step 3

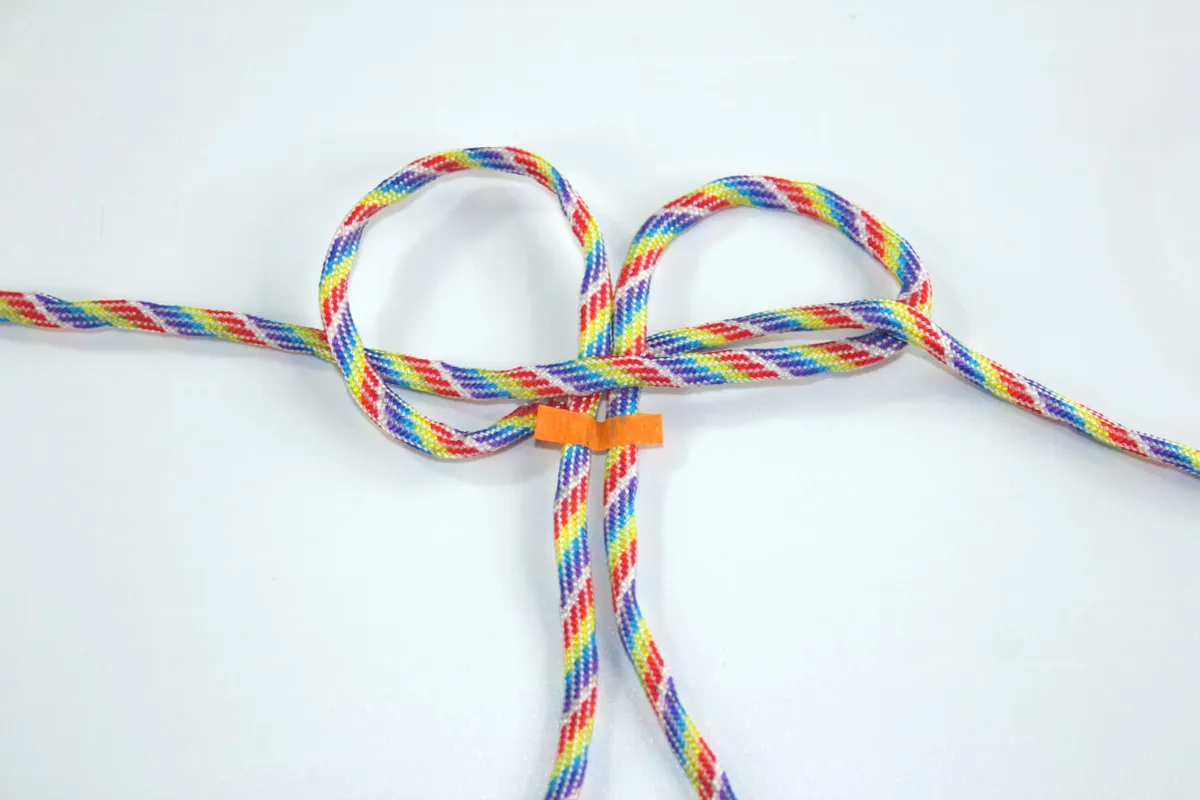
Okay - let's start braiding! With the open end of the bracelet at the top, take the right cord and lay it across the left, creating a loop.

Step 4

How to make a paracord bracelet without a buckle - step 4

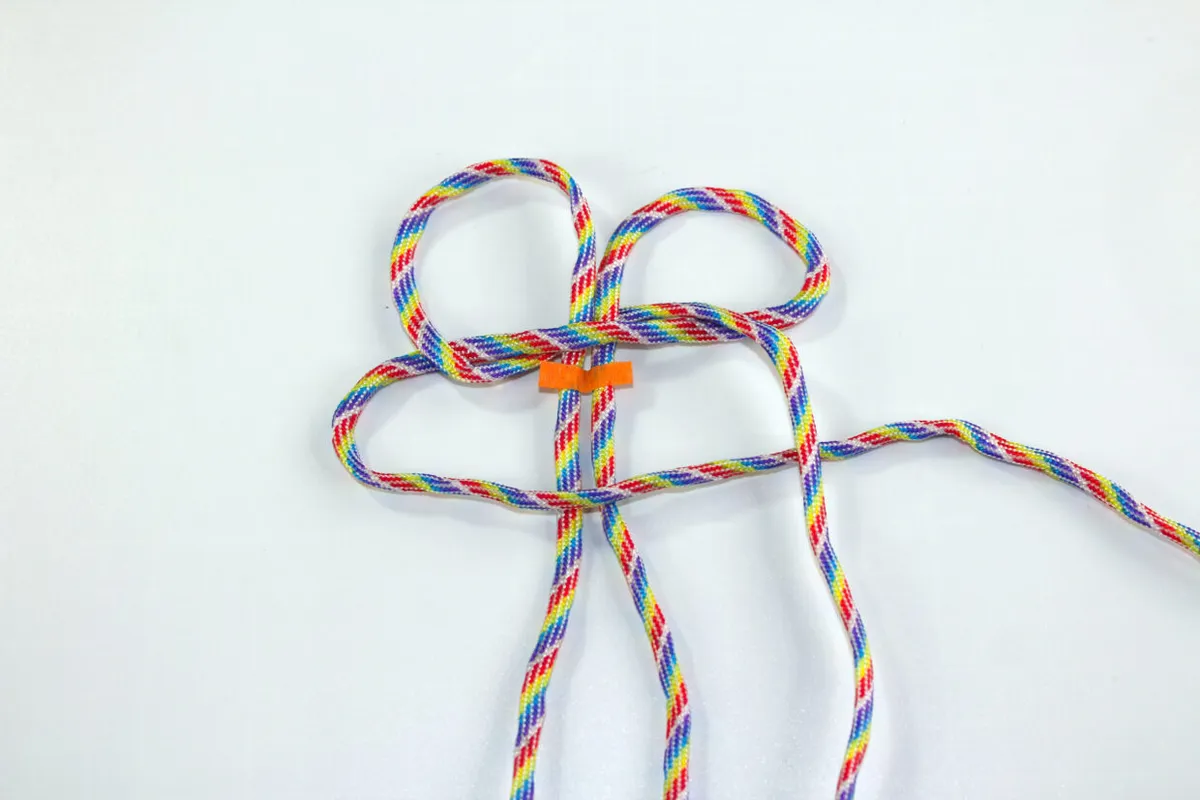
Next, take the cord on the left and loop it down over the piece you just brought over from the right.

Step 5

How to make a paracord bracelet without a buckle - step 5

Bring it through to the other side and pull it through the loop you made in step 3.

Step 6

How to make a paracord bracelet without a buckle - step 6

Take the left cord, and bring it across the right, creating another loop, and bring the right cord down over the top of this.

Step 7

How to make a paracord bracelet without a buckle - step 7

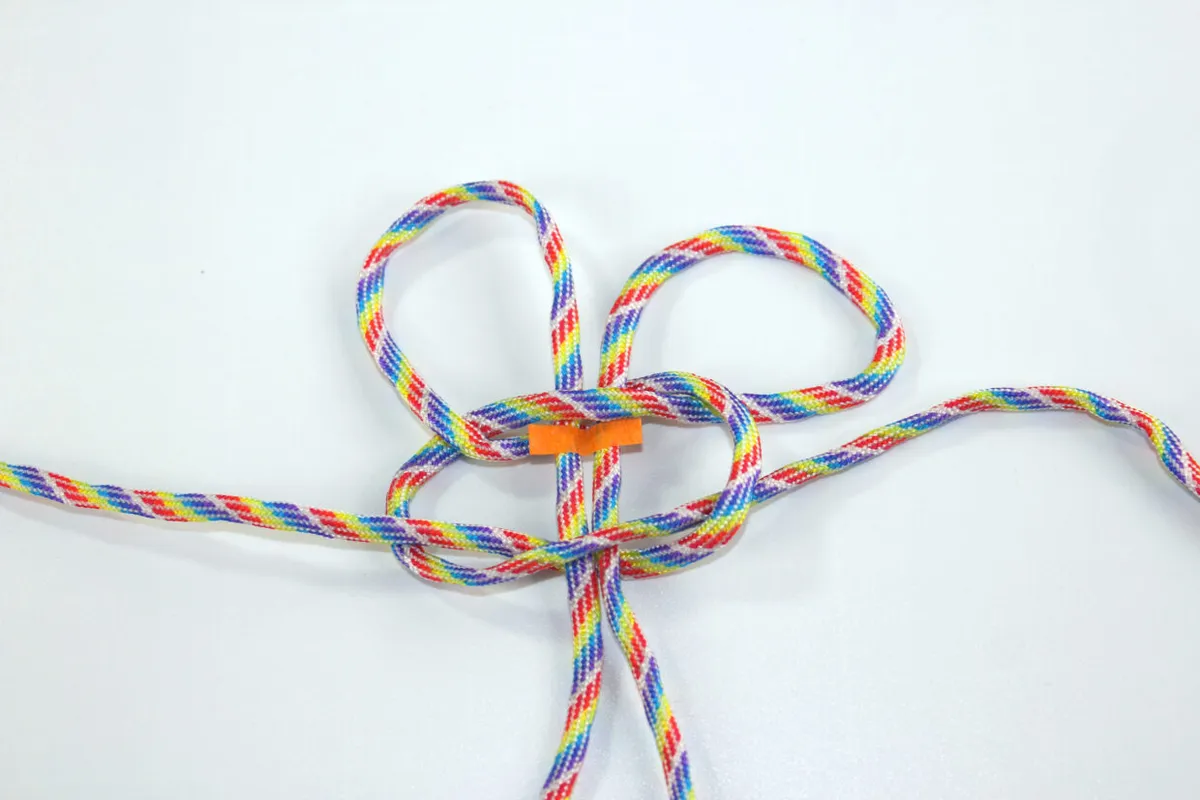
Bring that right cord round the back, and up through the new lefthand loop.

Step 8

How to make a paracord bracelet without a buckle - step 8

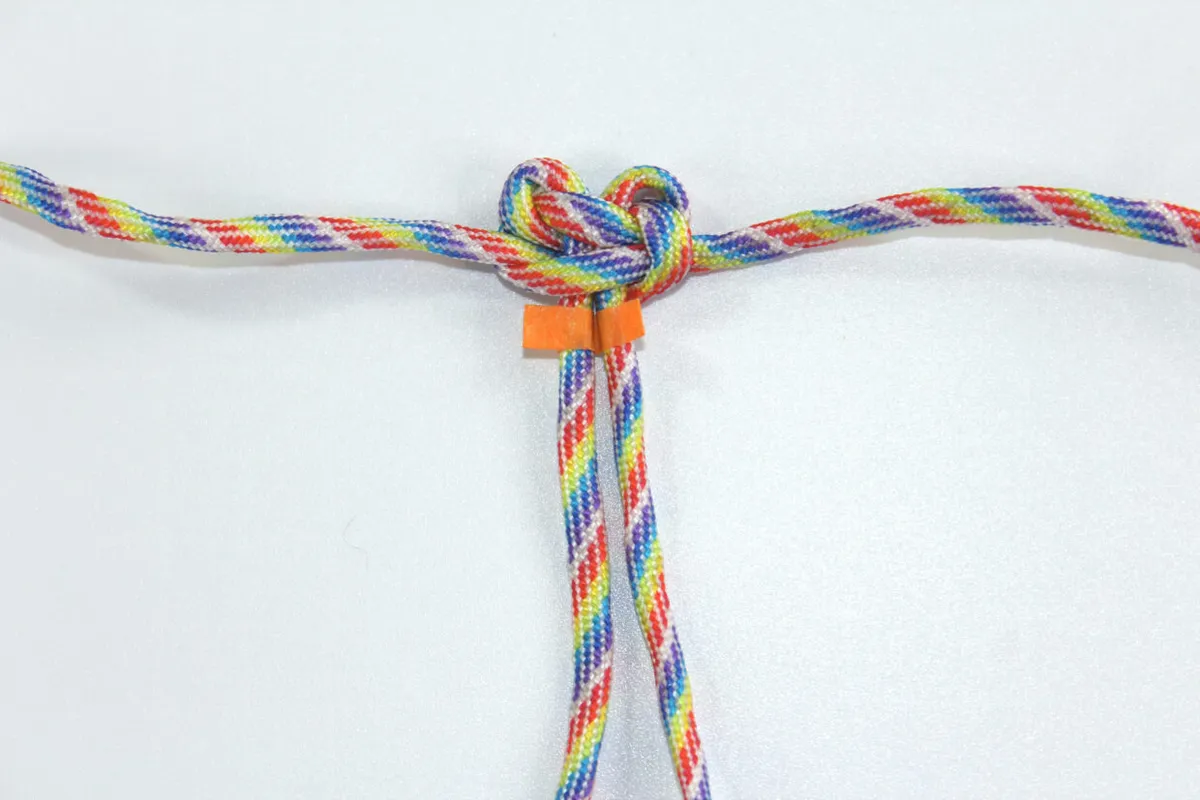
Pull the ends tight to secure. Close the two loops at the top so that they are almost shut. These loops will be where we feed the paracord through to make the bracelet adjustable, so it's important they are quite small. I took the tape off after this step.

Step 9

How to make a paracord bracelet without a buckle - step 9a
How to make a paracord bracelet without a buckle - step 9b

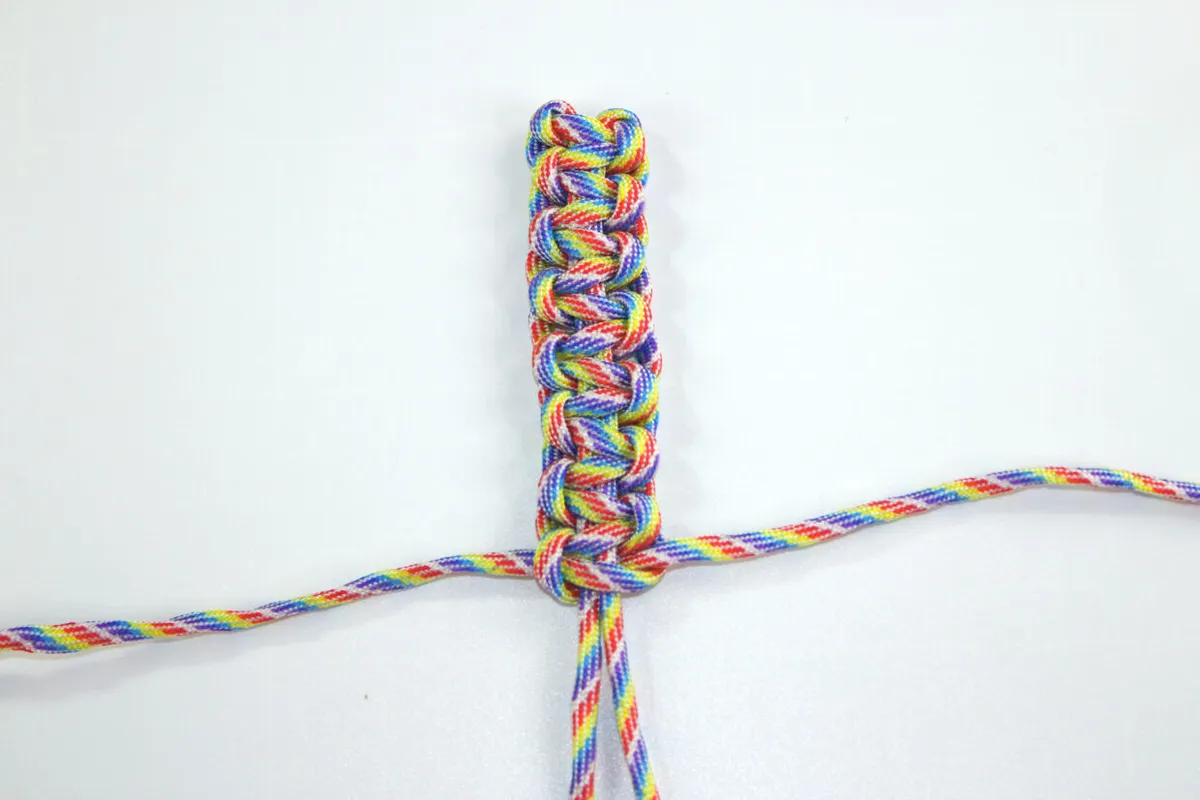
Continue making knots down the "spine" of your paracord bracelet. Remember to alternate sides as you go.

If you lose your place or forget which side to do next - remember this: Always start with the side where the cord is going down (you'll notice one side is coming up and one side is going down - in the example above, the left is going down and the right is going up).

Step 10

How to make a paracord bracelet without a buckle - step 10b

Continue all the way to the bottom so that you are left with a small loop.

Step 11

How to make a paracord bracelet without a buckle - step 11

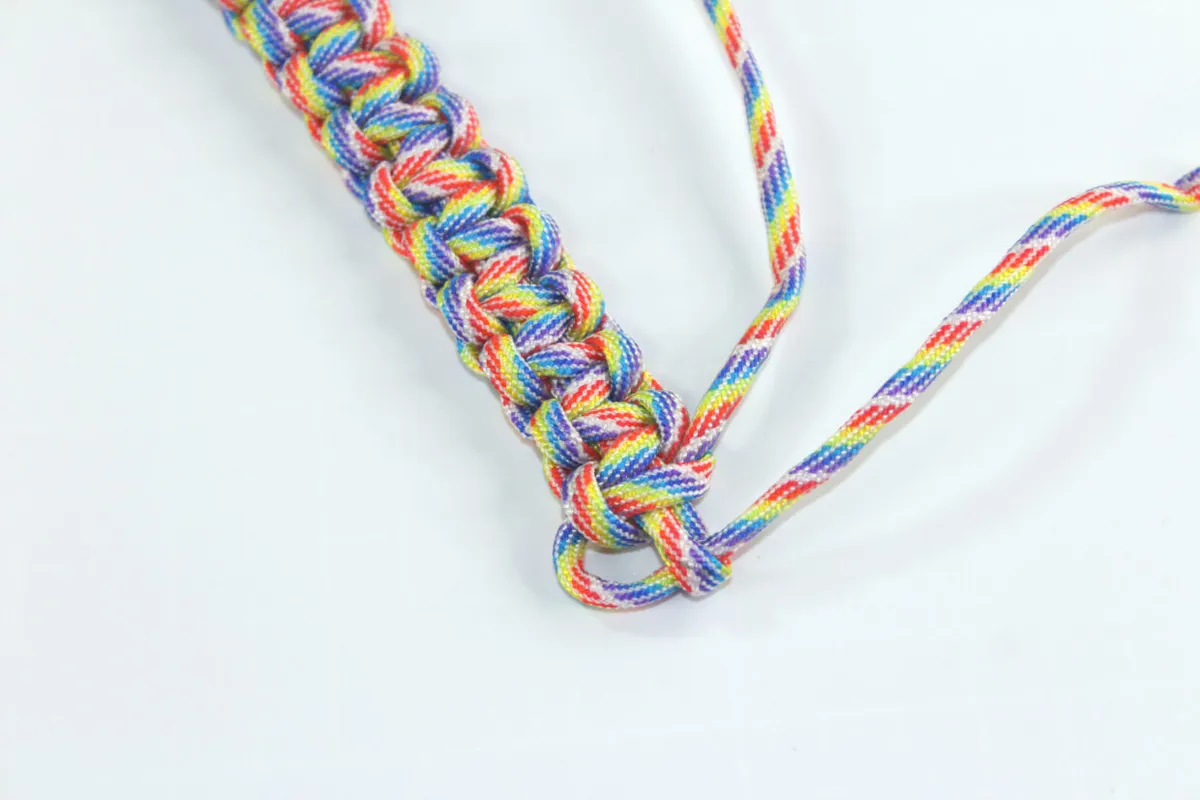
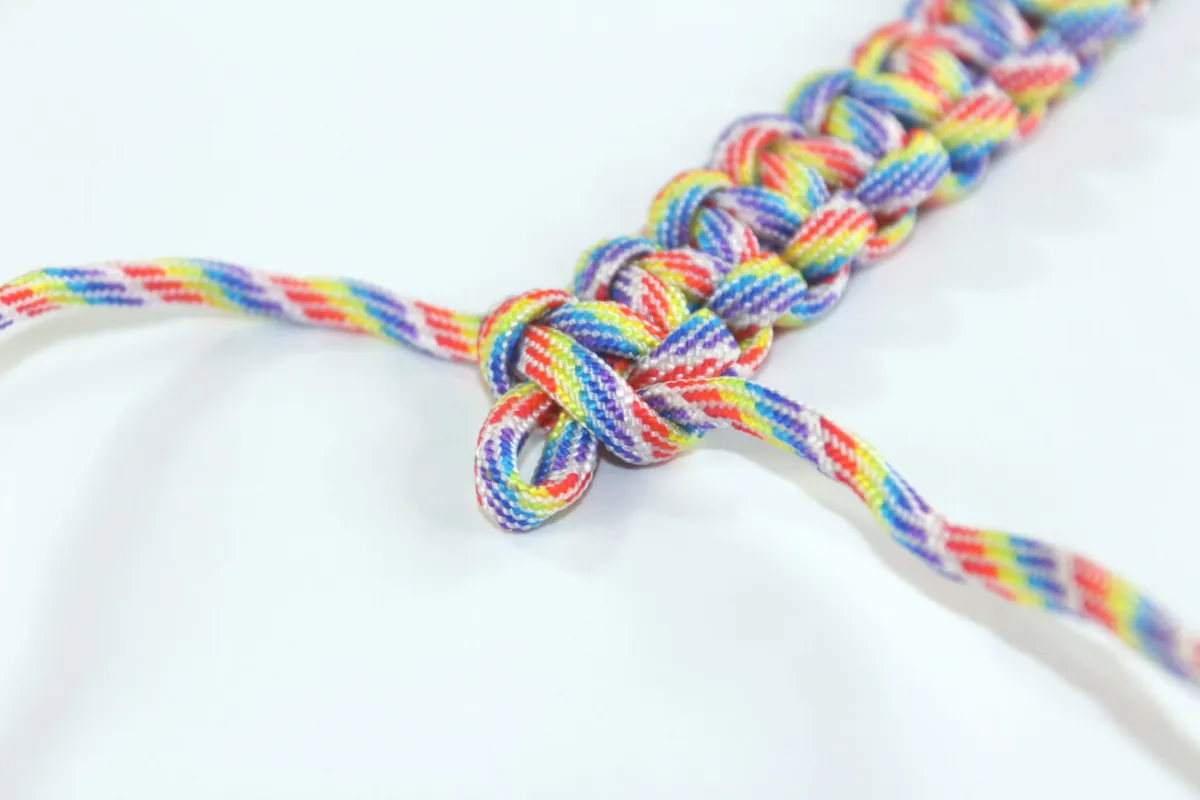
Once you get to the bottom, starting with the weaving that is coming out the back, thread this through the loop from behind.

Step 12

How to make a paracord bracelet without a buckle - step 12

Next, take the weaving strand that is coming out the front, and thread this through the loop from the front. Pull to neaten.

Step 13

How to make a paracord bracelet without a buckle - step 13

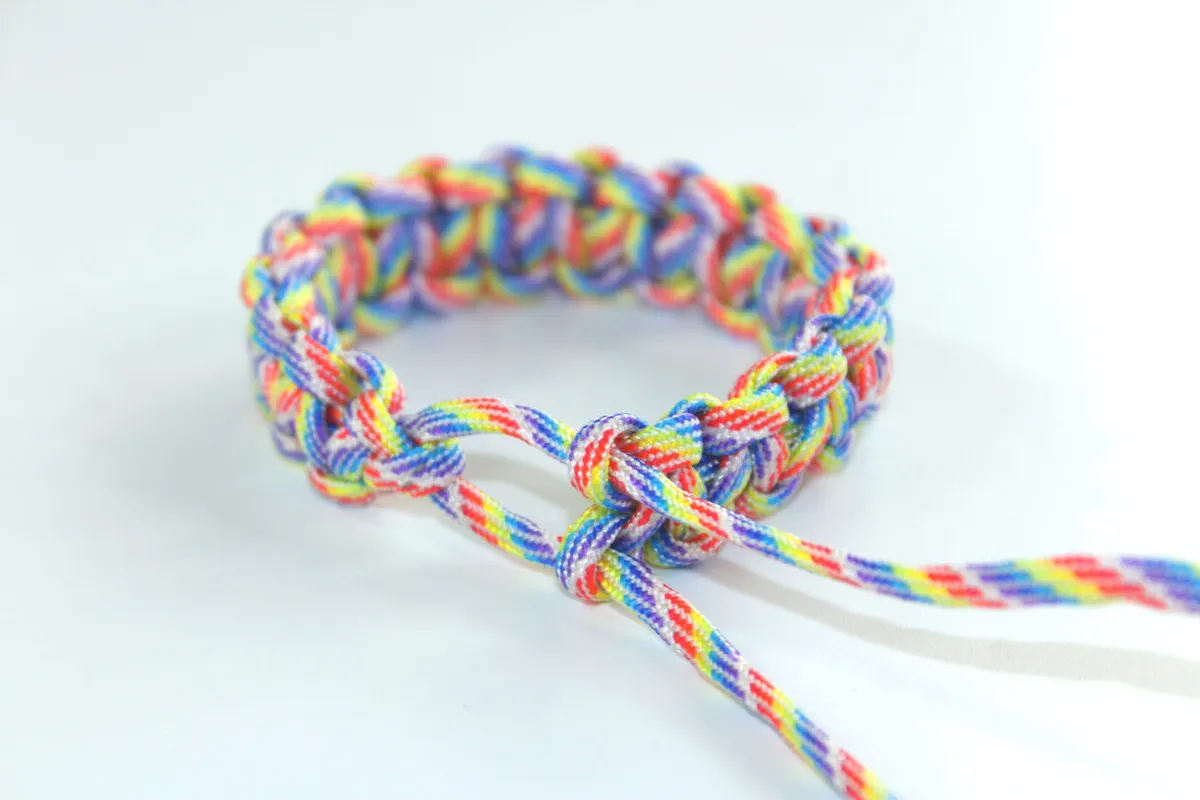
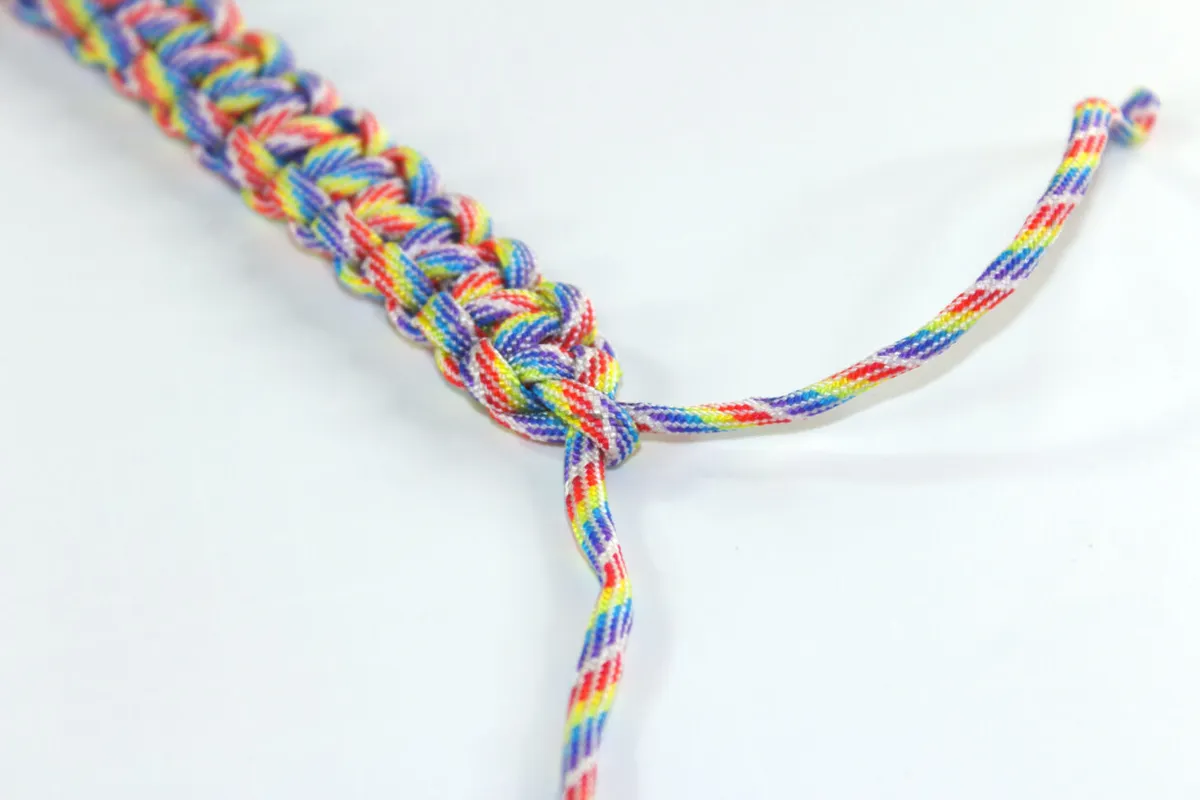
Take the two ends and thread them through the two top loops from before to make your bracelet shape (the ones we closed up in step 8). You might need to use a pair of tweezers or a pokey tool to help you. This forms the adjustable part of the paracord bracelet!

Step 14

How to make a paracord bracelet without a buckle - step 14

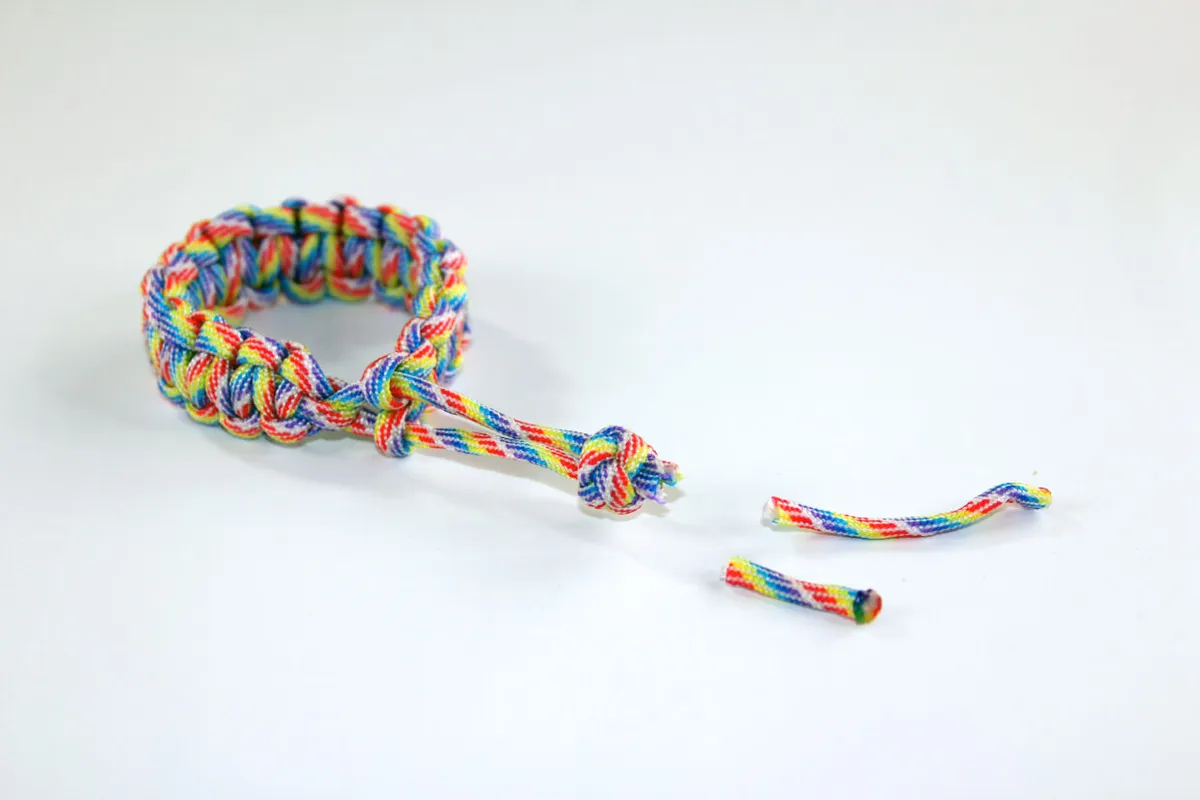
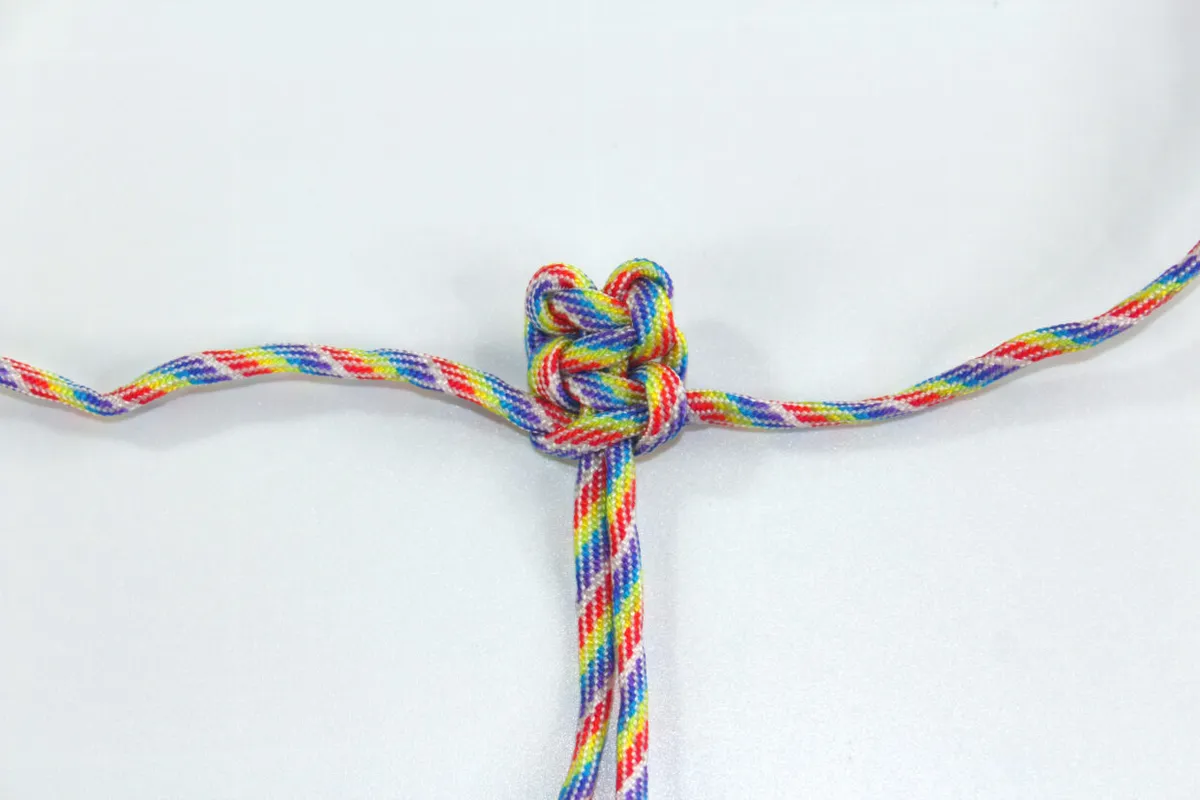
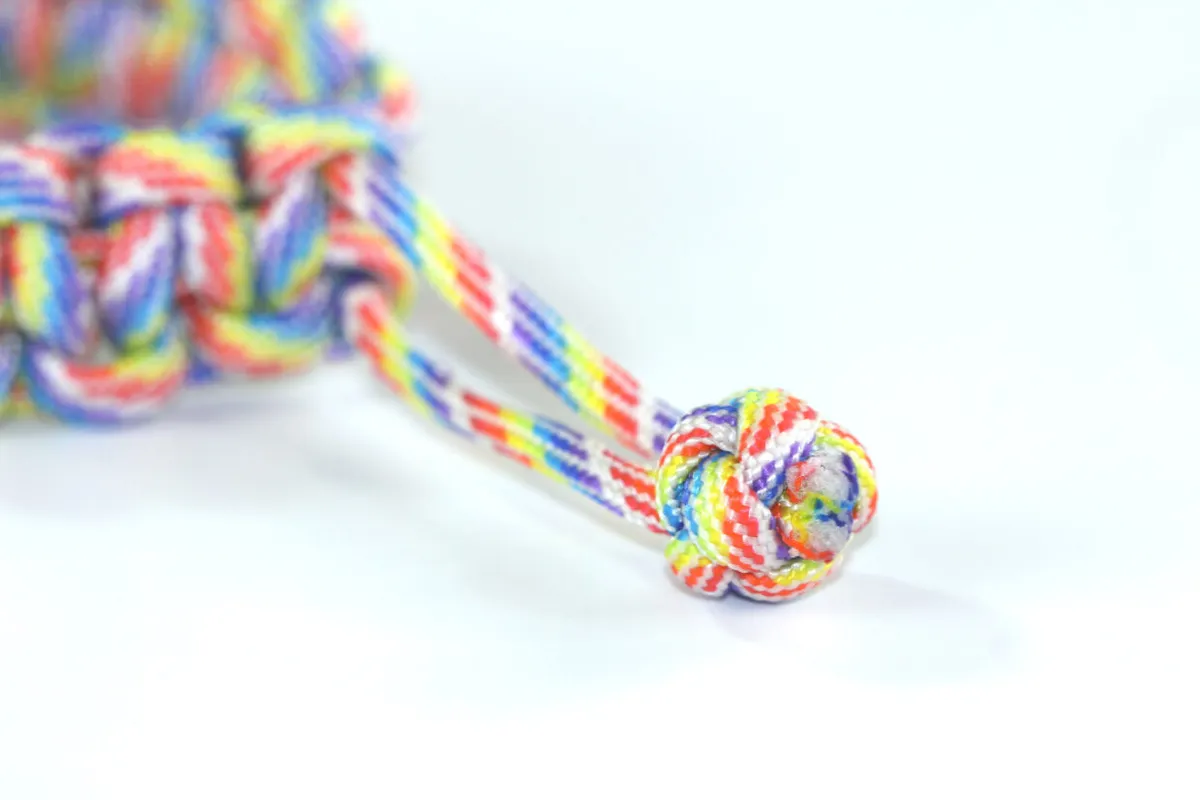
Tie a knot in the end and trim off the excess. Make sure you take into account how much you want your paracord bracelet to adjust when deciding on where to place your knot. I've gone for 4cm slack (so the bracelet will expand by 4cm).

In Mad Max Fury Road, Tom Hardy wears a paracord bracelet with a simple overhand knot, but I've gone for a diamond knot (also called a lanyard knot) as I think it looks neater.

If you've got quite a bit of excess - keep it - there are plenty of designs that use scraps of paracord.

Step 15

How to make a paracord bracelet without a buckle - step 15
How to make a paracord bracelet without a buckle - Mad Max Style

Finally, seal the open ends of your paracord with a flame to stop it from fraying.

How to make a paracord bracelet with two colours

In this tutorial, you will learn how to make a paracord bracelet with two colours, also using a Cobra Weave (aka Solomon Bar).

How to make a paracord bracelet with two colours

You will need

  • 2 colours of paracord, 4-5 feet each
  • Scissors
  • Lighter
  • Ruler or tape measure

Step 1

How to make a paracord bracelet with two colours – step 1

First, measure 4-5 feet of paracord in two different colours (so 8-10 feet in total) and choose a buckle.

Step 2

How to make a paracord bracelet with two colours – step 2

Next, join the two colours together by melting one end of each colour paracord and squishing them together. Melt both ends at the same time. Once melted, you’ll have about 3 seconds to join the colours together. Hold them together until they cool. Once joined together, it is very strong so don’t worry about it coming apart.

Step 3

How to make a paracord bracelet with two colours – step 3

Near the joint (but not directly on the joint), fold the paracord in half. Thread the loop through one end of the buckle, fold it over and tighten. This is called a cow hitch knot.

Step 4

How to make a paracord bracelet with two colours – step 4

Adjust the position of the melted joint so that it sits approximately 6-7 inches away from the buckle.

Step 5

How to make a paracord bracelet with two colours – step 5

Snick in the other end of the buckle if you haven’t done so already, and making sure they do not twist (keep the two strands parallel), thread the ends of each colour through the top of the other side of the buckle to form a loop.

Step 6

How to make a paracord bracelet with two colours – step 6

Pull the slack through the buckle until the bracelet is about the size of your wrist. Make a note of the circumference of your wrist if you wish.

Open up the bracelet and lay it along a ruler. Add another inch or so to the length, so that your bracelet measures the circumference of your wrist + 2cm (not including teeth of the buckle). This is to accommodate the additional thickness of the paracord bracelet once it’s finished.

My wrist circumference is 17cm + 2cm = 19cm length.

Step 7

How to make a paracord bracelet with two colours – step 7

Once you’ve measured the length of your bracelet, lay the bracelet out as I’ve done here, with one cord to each side and the middle cords parallel. Adjust the melted section so that it is near the buckle if you haven’t done so already.

Decide what colour you want to be the primary colour. The primary colour will be the colour in the middle, and the secondary colour will be the colour on either side. In this tutorial, red is the primary and multicoloured is the secondary.

Step 8

How to make a paracord bracelet with two colours – step 8

Cross the primary cord over the “spine" (the middle two cords) and place the secondary cord over it.

Step 9

How to make a paracord bracelet with two colours – step 9

Next, bring the secondary cord underneath the spine and put it through the loop on the primary colour’s side.

Step 10

How to make a paracord bracelet with two colours – step 10

Before you pull it tight, pinch where the cords go through the buckle to make sure that the length of the bracelet won’t change and then tighten. If you’re not sure, remeasure your bracelet to make sure it’s still the circumference of your wrist + 2cm.

Step 11

How to make a paracord bracelet with two colours - step 11The second knot is a mirror image of the first knot, so repeat steps 8-10 on the other side, so that your bracelet looks like this. Be sure to always use the primary colour as the cord that goes over the spine.

Step 12

How to make a paracord bracelet with two colours - step 12a
How to make a paracord bracelet with two colours - step 12b

Continue to alternate left and right as you make the knots. Push the knots upward every so often to make sure that your paracord bracelet is tight, keeping the two spinal cords (heh) parallel and the same length.

Step 13

How to make a paracord bracelet with two colours - step 13
How to make a paracord bracelet with two colours - step 13b

Keep making this pattern until you reach the end of the paracord bracelet at the buckle. Push the knots up - can you fit any more in? The more knots you add, the stiffer your paracord bracelet will become, so keep this in mind if you would prefer it to be more flexible.

Step 14

How to make a paracord bracelet with two colours - step 14a

When you can't fit any more knots on your paracord bracelet, pull it tight, and snip each end of the paracord, leaving a few millimetres of excess on either side.

Step 15

How to make a paracord bracelet with two colours - step 15

Finally, melt and flatten each end with a lighter. As soon as you've melted the end of the paracord, press the lighter up against the end to flatten it. Tuck the melted part underneath the paracord bracelet to hide it.

And you're done! You've learnt how to make a paracord bracelet without a buckle and how to make a paracord bracelet with two colours - which is your favourite?

How to make a paracord bracelet

Paracord bracelet kits

Keen to get started? Paracord bracelet kits are available in most good craft stores and online from places like Amazon. Here is our pick of the best paracord bracelet kits available on the market at the moment!

1. Paracord kit – just the paracord

Paracord kit, Amazon

Buy now: £20.64, Amazon

If you’re after choice, then how about this paracord kit on Amazon? You get 28 different colours, each in 10-foot bundles of paracord, and you get a mixture of patterned and plain cord. Just want plain or just patterned paracord? There’s an option to select that. This is a great kit to get you started, and it gives you a lot of options so you can try out different knots and designs.

2. Paracord combo kit

Paracord combo kit, Amazon

Buy now: £12.99, Amazon

Looking for more muted, natural colours? Or perhaps you’re thinking about crafty gifts for men? Well, how about this – a paracord kit in natural tones, complete with buckles, keyring loops, carabiners and tools. You don’t need the tools to get started, but they do make the job a lot easier, especially when working tight or fiddley designs.

3. Rainbow paracord

Rainbow paracord

Buy now: £9.79, Amazon

Love the rainbow look? You get a whopping 101 feet of paracord in this bundle, so why not make coordinating paracord bracelets, keyrings and other accessories. It also comes with 24 buckles to help you on your way.

4. Paracord bracelet maker

Paracord bracelet maker, Amazon

Buy now: £24.80, Amazon

Get a helping hand with this paracord bracelet maker kit. It’s well made from powder-coated stainless steel, so it can withstand heavy use and should last you many years – if not decades. As well as being sturdy, it’s easy to adjust, so you can make different lengths of paracord bracelet without having to measure against a ruler every time. This paracord kit comes with two bundles of paracord, buckles and tools.

5. Glow in the dark paracord

Glow in the dark paracord

Buy now: £9.99, Amazon

Be seen with this glow-in-the-dark paracord! Choose from 25, 50 or 100 feet, and bring your crafts to life – there are lots of great reviews for this product on Amazon, so check them out of you’re thinking about buying.


We hope you’ve enjoyed our tutorial on how to make a paracord bracelet. If you’re looking for more bracelet inspiration, check out our guide on how to make friendship bracelets, or how about trying your hand at these chunky macrame bracelets, or these super easy seed bead bracelets!