How to decoupage a tin

Everyone loves kitsch storage ideas and these small tins are hugely on-trend right now. Upcycle using any leftover papers!

Try our magazines – get 6 issues from just £9.99!

Published: September 4, 2021 at 5:34 am

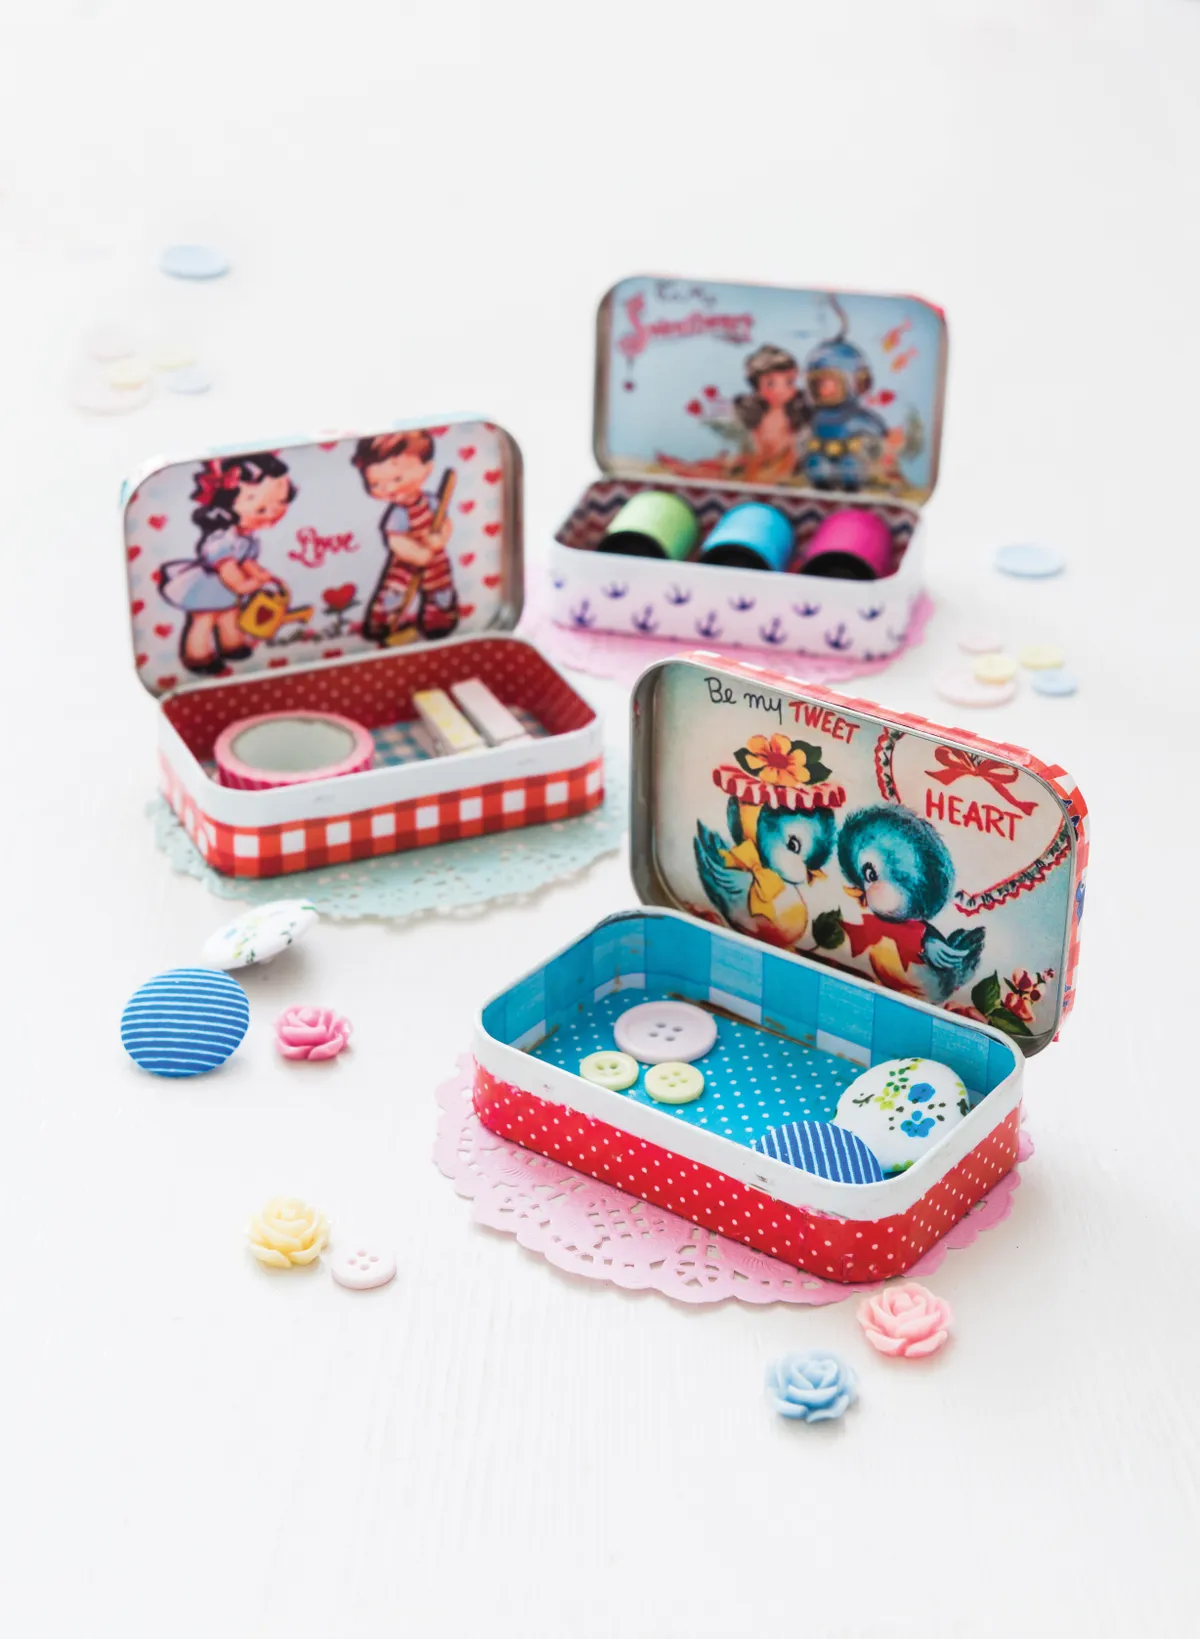
Downloadable papers are perfect for upcycling projects and these cute kitsch combinations are perfect for smaller projects. Take your time with cutting and trimming to create a neat and professional finish. These tins have a cute kitsch image on the inside but you could mix these up with geometric patterns or offer a personalised service with a supplied photo. These tins also make great wedding favours so offer these in sets to really pack a profit if you're looking to sell them as a side hustle. Brilliantly versatile and perfect for using up old tins and papers, they're a really fun make!

If you need to boost your stash of patterned papers, browse through our comprehensive library of patterned papers - all free to download. Here's a top tip: make sure you test a small area of paper before varnishing, just in case the paper discolours.

We have lots of other brilliant upcycling projects here on Gathered - check out these fun and colourful upcycled jam jars (featuring dinosaurs!), or how about indulging in a spot of cross-stitch and making these cross stitch jar lids? And if you love to decoupage but need a bit of a refresher, get the full low-down with our comprehensive article, how to decoupage.

We love seeing what you make, so don’t forget to share your upcycling or craft projects with us on Instagram, Facebook or Twitter, too!

How to decoupage a tin

You will need:

  • Small tins
  • Patterned papers
  • Craft knife
  • Pencil
  • PVA glue
  • Scissors
  • Clear varnish

How to decoupage a tin

Step 1

Sand the outside and inside of the tin to remove any roughness.

Step 2

Print out the papers you’re using. On the back of the printed paper trace around the lid of the tin and add 2cm (¾in) all the way around for the edge. Repeat this for the tin’s bottom, inside bottom and inside lid (the insides will be slightly smaller so bear this in mind when trimming. Remember to place the paper inside to check the fit before sticking down).

Step 3

Coat the lid with PVA glue and stick the paper to it. Clip ‘V’ shapes in the corners to allow the paper to overlap. Add a dab of PVA glue so the overlay can stick. When the paper has dried, run around the edge of the tin to trim off any excess making sure the paper is dry first.

Step 4

Repeat this for the bottom of the tin. Trim off the excess with the lid closed and around the hinges.

Step 5

Cut strips 17 x 28mm for the inside bottom of the tin. Check that this runs all the way around (you may need to do this in two separate strips). Glue in place. Stick the papers into the inside bottom and inside of the lid.

Step 6

Give the whole tin at least two coats of PVA and coat with clear varnish.

How to decoupage a tin – stacked


We hope you’ve enjoyed this quick and easy tutorial on how to decoupage tins. If you like organising, why not make this seed storage box or these fun upcycled jam jars – check out our upcycling projects for more brilliant inspiration.