How to make a DIY whiteboard

Take a run-of-the-mill whiteboard from drab to fab when you customise it with wine bottle corks and turn it into a best-seller.

Try our magazines – get 6 issues from just £9.99!

Published: December 30, 2021 at 7:00 am

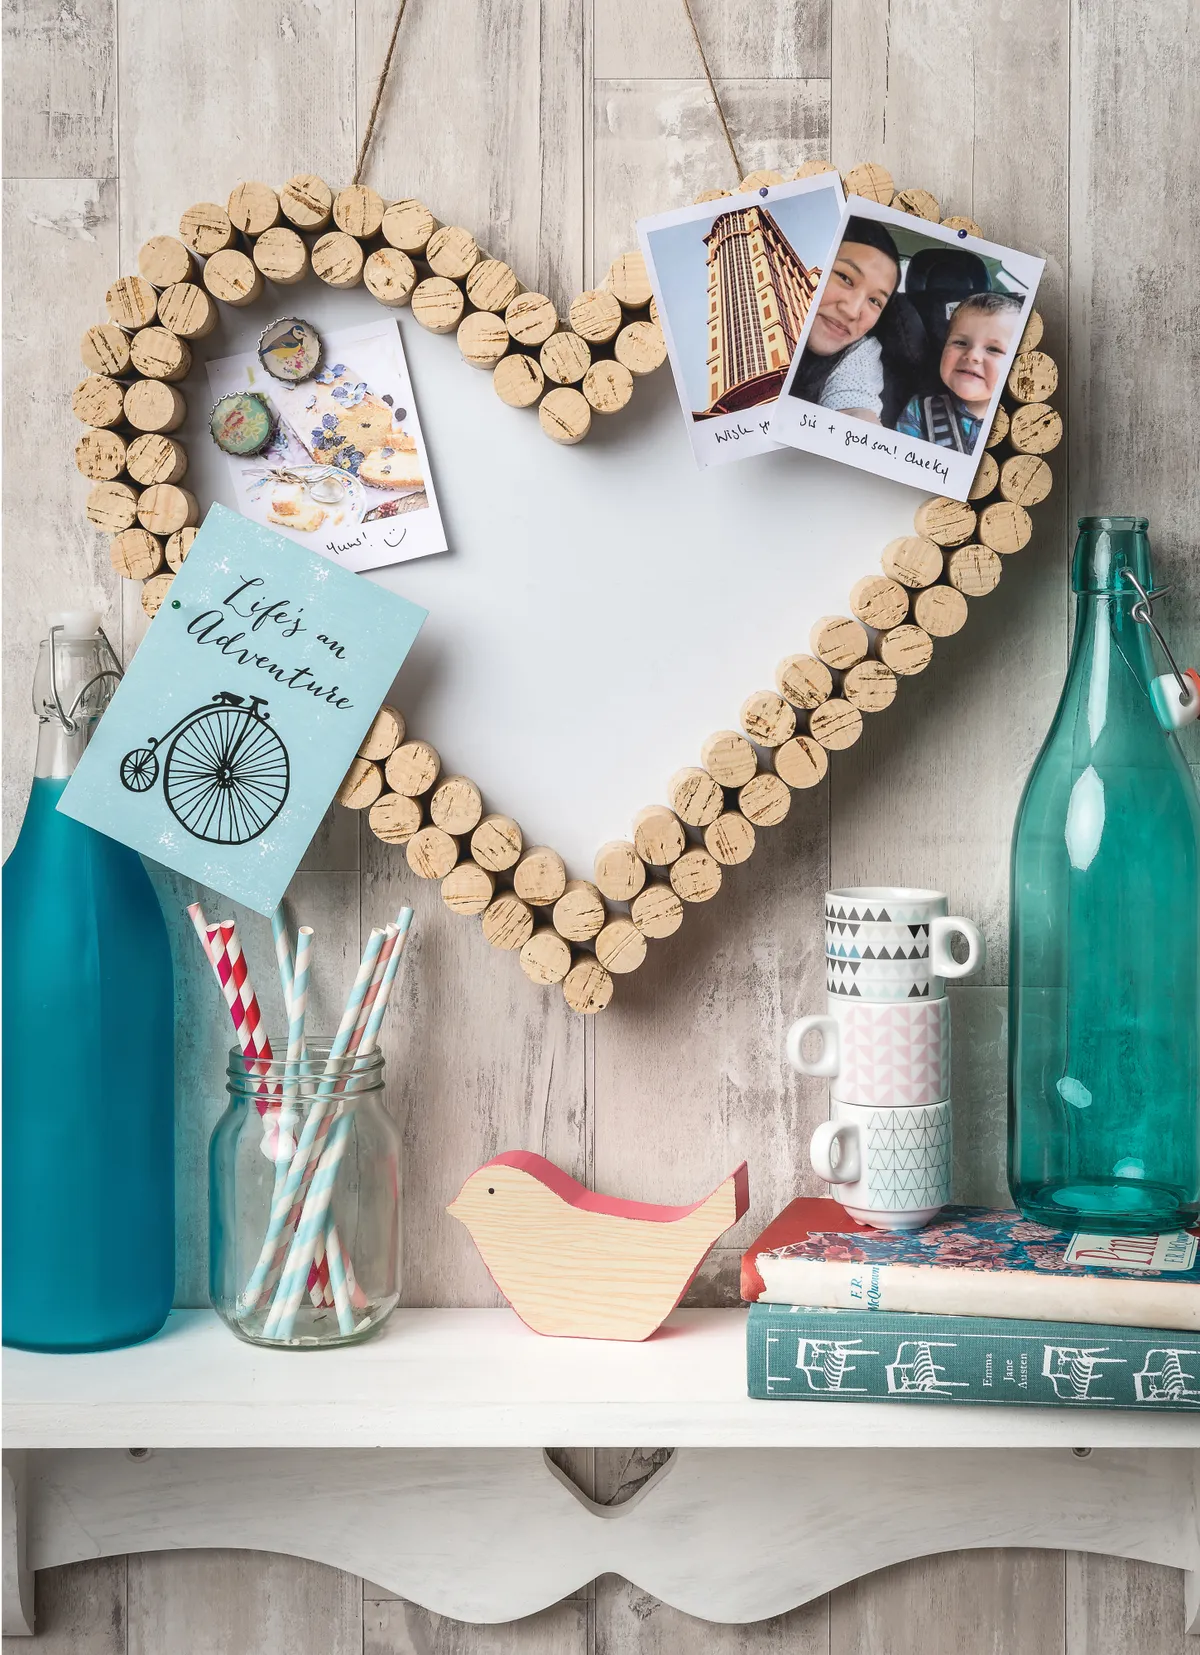
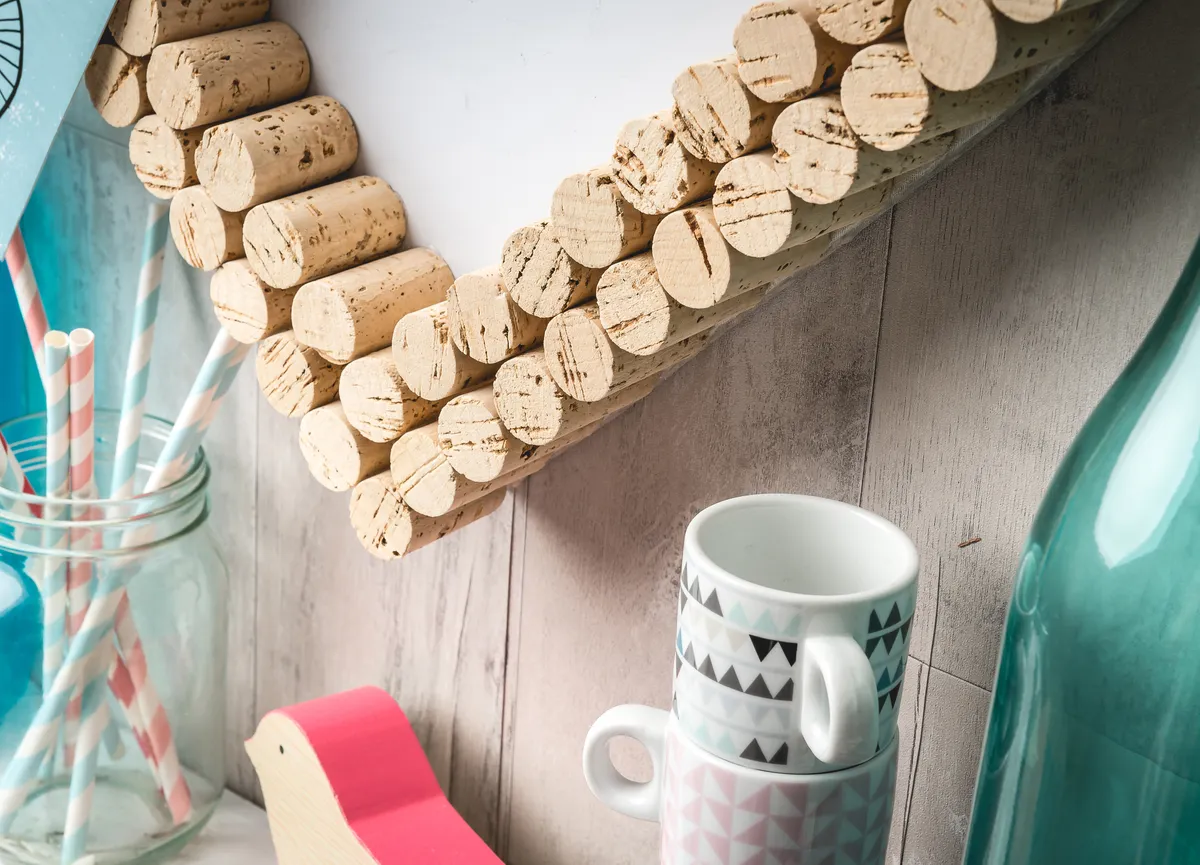
Makes that help you get organised are always great sellers in January, as everyone turns over a new leaf for the new year. This multipurpose whiteboard perfectly fits the bill – not only is it practical, but the rustic edging made from old wine bottle corks makes it a real showstopper that will look great in customers' offices, kitchens and kids' bedrooms. Here's a top tip: when building up your DIY whiteboard, stick the outside edge of the corks in place first, as this will make it easier to position the inner row.

If you like this project, how to make a DIY whiteboard, take a look at our other upcycling articles – we love this DIY terrarium – or how about these gorgeous wine bottle lights! Have you still got some corks leftover? Why not turn a few into tiny cork planters, or if you've got lots left - this fab DIY cork board will help you stay organised in the New Year.

Looking for some new DIY inspiration? Learn how to make a chest of drawers with this great guide from Homes & Antiques.

We love seeing what you make, so don’t forget to share your craft projects with us on Instagram, Facebook, or Twitter, too!

You will need:

  • 100 x wine bottle corks
  • 60 x 45cm (23½ x 17¾in) magnetic dry-wipe board
  • Jigsaw tool or hacksaw
  • Glue gun and glue sticks
  • Neutral coloured bias binding
  • Newspaper
  • Whiteboard pen
  • Wall hanging fixtures
  • String
  • Wire cutters
  • Measuring tape or ruler
  • PVA glue
  • Screwdriver

How to make a DIY whiteboard frame

Step 1

Fold a sheet of newspaper in half down the spine. Measure 20cm (8in) from the spine and draw a guideline in pencil. Draw half a heart shape onto the newspaper, making sure that the widest part of the heart shape reaches the guideline. Cut around the shape, then open out the paper to reveal a symmetrical heart shape.

Step 2

Lie the newspaper heart shape onto the whiteboard and draw around it using a whiteboard pen. Making sure that you work on a craft table or workbench, saw through the whiteboard, around the outline, using a jigsaw or hacksaw. Place the line you are cutting over the edge of the table and turn and repeat until you’ve cut out the entire heart shape. Snip away any sharp, messy edges with wire cutters.

Step 3

Use bias binding to line the edges of the whiteboard. To do this, brush PVA glue around the edges of the whiteboard, slightly overlapping the glue onto the front and back of the board to make sure the bias binding will be stuck securely in place. Use your fingers to push the bias binding onto the glue – this is a bit of a messy job but using your fingers will give you a better finish than brushes, as you can manipulate the fabric how you feel best. Wipe off any excess glue with a damp cloth and leave to dry.

Step 4

Once the glue on the bias binding is dry, use a screwdriver to screw the hanging fixings into the back of the board, about 8cm (3½in) from the top, on either side of the heart. Add string for hanging.

Step 5

Arrange the corks around the edge of the whiteboard – it’s best to play around with the positioning to make sure you are happy with how it looks before you commit to sticking them in place. You may choose to space them out for a symmetrical look or squash them together for a more full appearance. Once you are happy with the layout, use a glue gun to cover the bottom of each cork in glue and push firmly onto the whiteboard. Repeat until all your corks have been used, then leave to one side to dry.

How to make a DIY whiteboard


We hope you’ve found some inspiration for upcycling your old wine corks into a DIY whiteboard! If you are looking for more upcycling projects, check out these easy wine bottle lights, or how about these cute herb pots.