How to make egg cup candles

Brighten up your homeware range with these cool egg cup candles – they’re perfect for cooking up some light as the nights draw in.

Try our magazines – get 6 issues from just £9.99!

Published: November 7, 2021 at 7:05 am

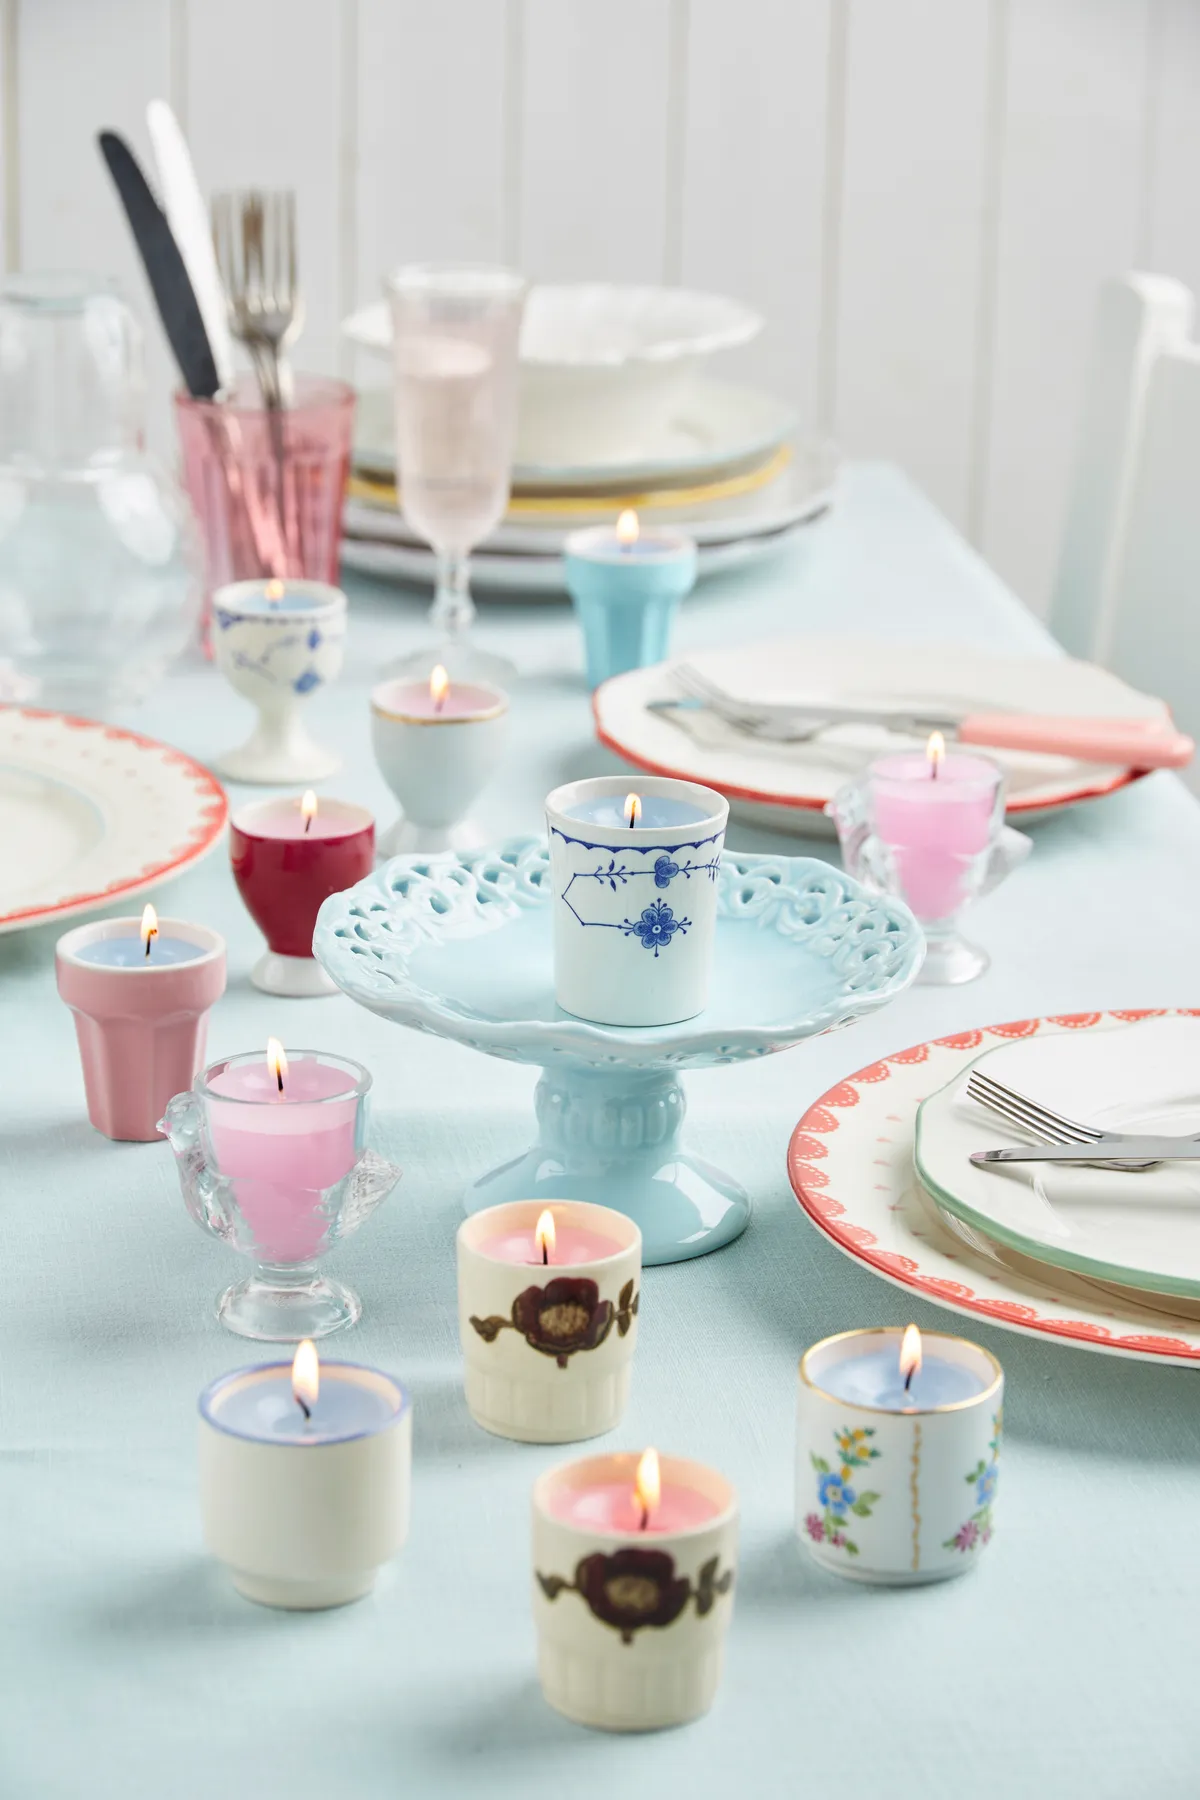
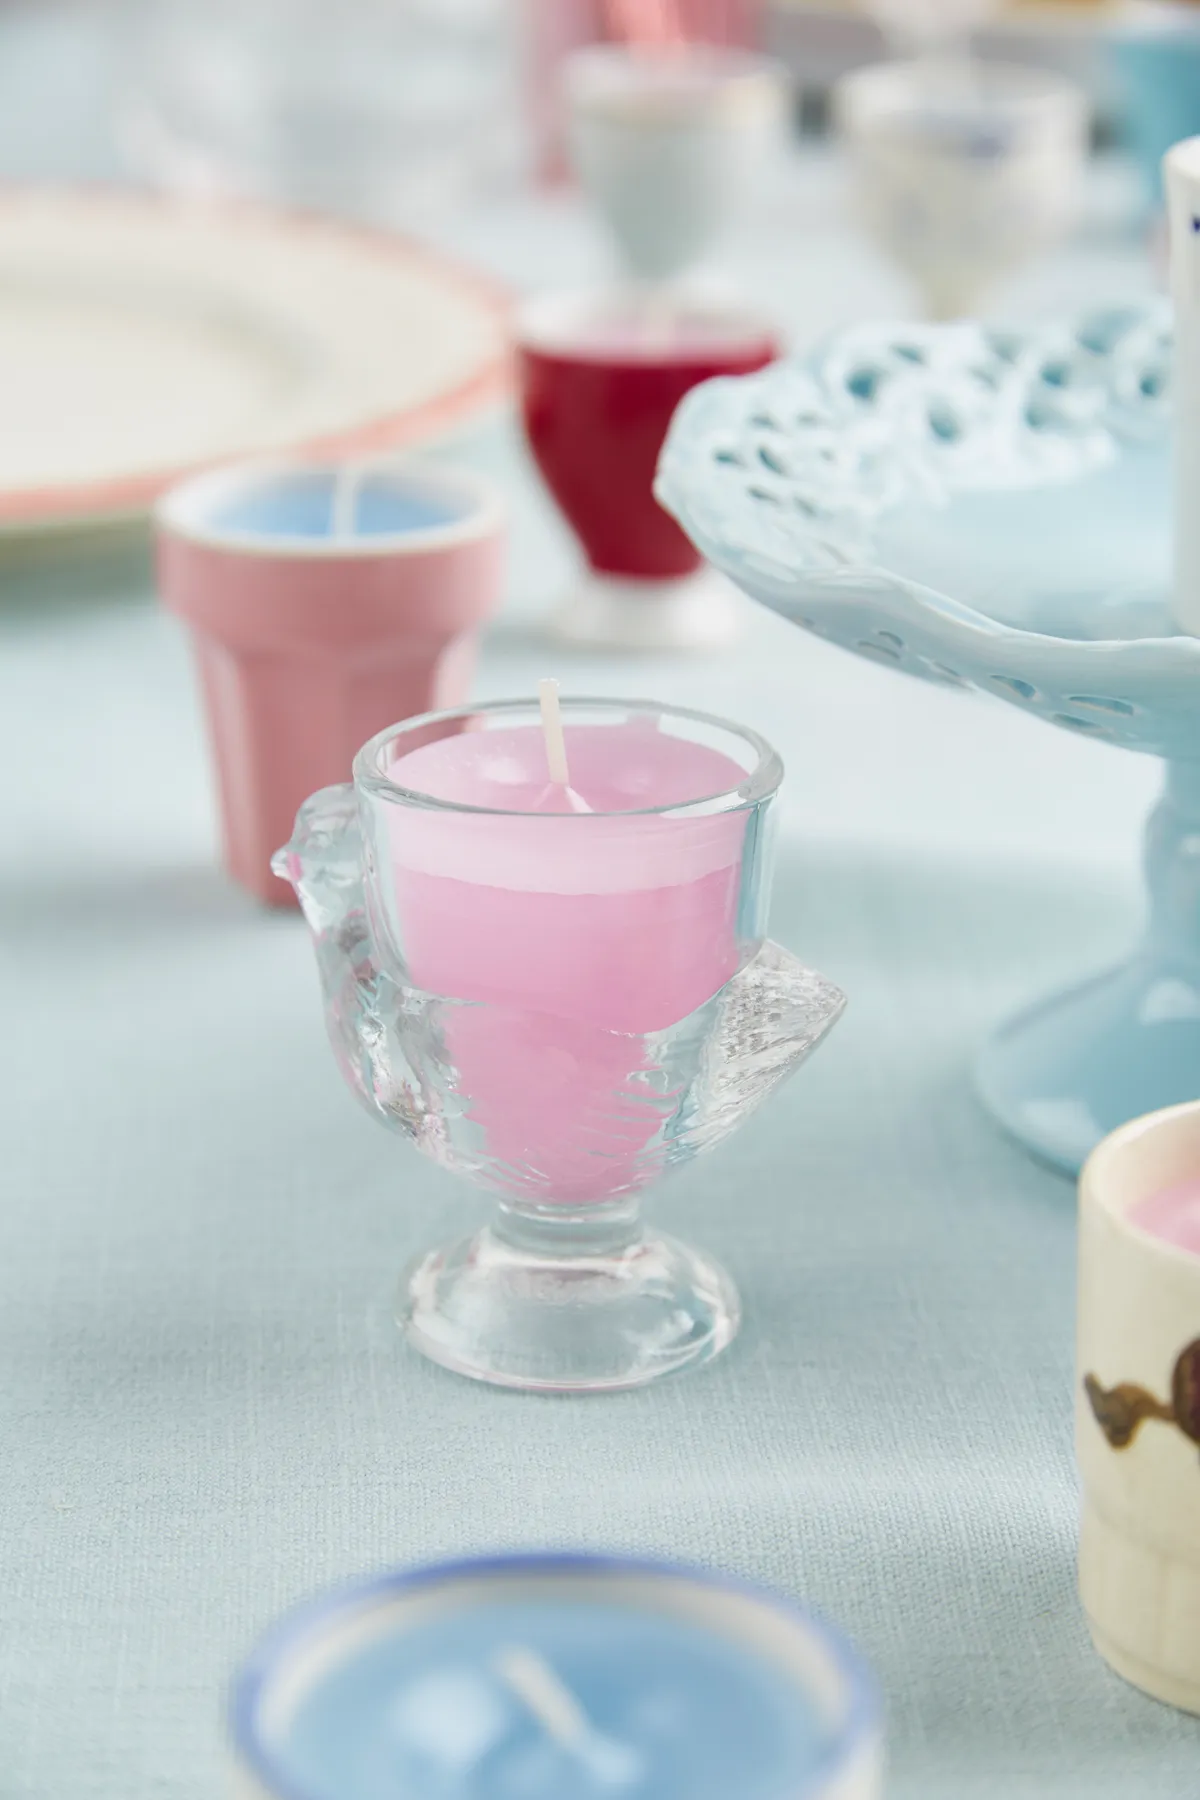
Candles are always great sellers at craft fairs, and these pretty egg cup versions are so easy to make that you can whip up a batch in an evening. We found our egg cups from car boot sales from as little as 20p – organise them in similar colours or patterns and sell in pairs to max the profits. Grouped together on a plate they make lovely wedding table centrepieces or even a stylish display for Christmas.

We love candle making here at Gathered, they make excellent gifts and can completely change the atmosphere of a room during the winter months. If you've got the candle-making bug, check out our round-up of the best candle making kits, or why not learn a new skill with this fab tutorial on how to make wax melts.

Egg cup candles

We have plenty of other upcycling projects for more inspiration here on Gathered, including these stunning vintage bookmarks or how about making your own DIY birdhouse? We love this thanksgiving doormat!

We love seeing what you make, so don’t forget to share your upcycling or craft projects with us on Instagram, Facebook or Twitter, too!

You will need

  • Egg cups
  • 500g container candle wax (makes roughly 12 egg cup candles)
  • 7.5cm (3in) pre-waxed wire wicks with 15mm clips
  • Coloured dye
  • Saucepan
  • Double boiler insert
  • Scales
  • Old spoon for stirring wax
  • Scissors
  • Measuring jug
Egg cup candles

How to make egg cup candles

Step 1

To make your egg cup candles, you need to work out how much wax you’ll need for each candle. To do this, pour water into the egg cup, filling it up to the point where you want the wax to sit, then tip the water into a measuring jug. Measure the amount of water in the jug, then subtract 10% from this measurement – this is how much wax you will need for each egg cup (assuming they are all the same size if you’re making multiples).

Step 2

Put the wax into the double boiler and place it over a saucepan of water. Turn the water down to low heat so that it starts to steam the wax (never place the wax directly into a saucepan as it may catch fire).

Step 3

Once the wax has completely melted, then add the dye. A 10p size piece of dye is enough for around 100g (3½oz) of wax. Stir the dye into the wax and add scent at this point if making scented candles.

Step 4

Pour just a small amount of wax into the bottom of the egg cup and pop the pre-waxed wick tab into it. Make sure the tab is central in the bottom of the egg cup and upright. This wax will fix the tab in place. Once the wax is dry (it should take about five minutes), then pull the wick to check it’s in place, but don’t pull too hard or you’ll dislodge it. As we’re using pre-waxed wire wicks they should stand straight, so just make sure that the wick isn’t bent and that it sits centrally in the circumference of the top of the egg cup.

Step 5

Pour the wax into the egg cup until it is about 1cm (½in) short of the rim. You should have a small amount of wax left – this is so the candle can settle and allows you to make a second pour, as the wax from the first pour will dry into a dip around the wick.

Step 6

Once the wax has set – this should take around two hours or so – then you can make the second pour of the wax, which will give your candle a nice smooth finish. Trim the wick to about 1cm (½in) long, then put the candle to one side for a day so the wax can set completely before lighting.

Egg cup candles


We hope you’ve enjoyed this easy project on how to make eggcup candles. If you’re looking for more easy upcycling homeware projects, why not make these (super easy) wine bottle lights or this brilliant thanksgiving doormat. Check out our upcycling projects for more inspiration!