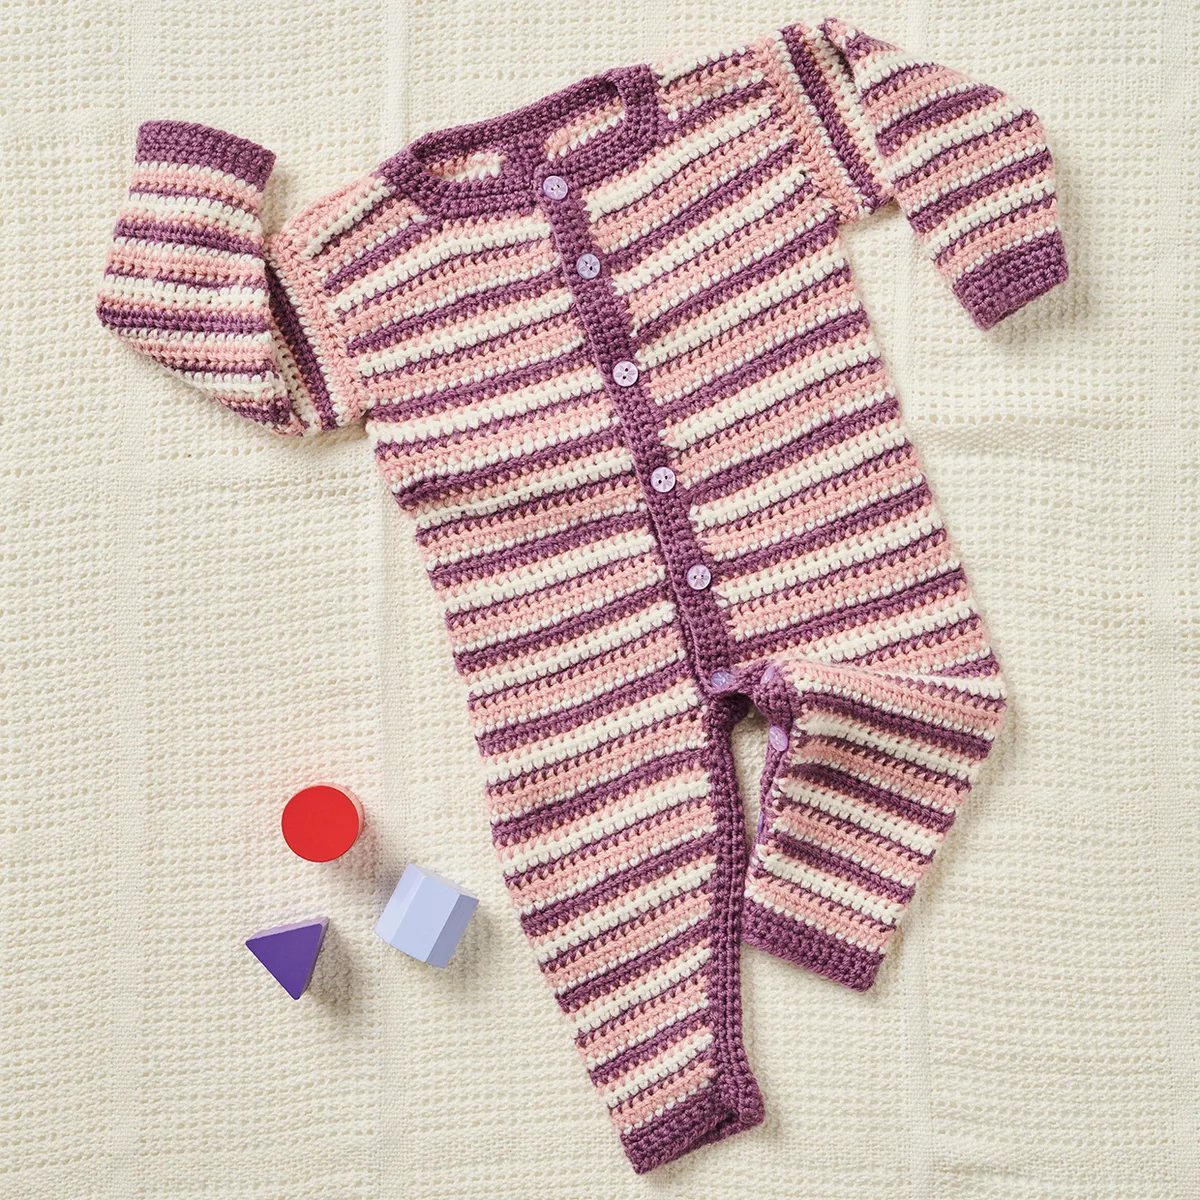
Whatever you call this item of crochet baby clothing - a baby grow, a baby onesie, a baby suit - one thing is for sure, they're going to look unbelievably cute in it!
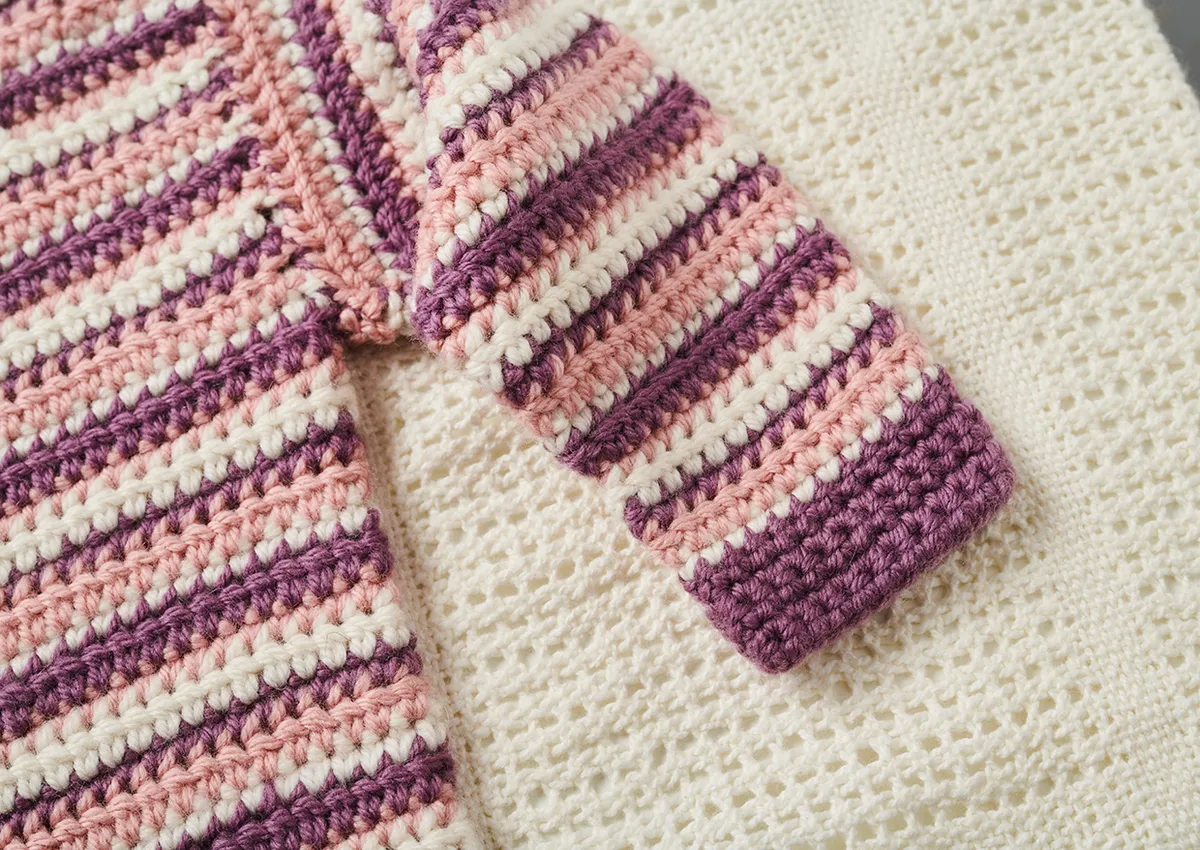
Made in super-soft 100% wool and featuring fab stripes in 3 shades, you'll enjoy hooking it up almost as much as baby will love wearing it. Crochet baby clothing is a relatively simple but incredibly thoughtful gift for new parents, and often become items that are held onto long after baby has grown out of it (or even better, they can be passed down)!
You will need
West Yorkshire Spinners Bo Peep Pure (100% wool; 50g/112m), or alternative DK yarn:
- Yarn A Blackcurrant (319)
- Yarn B Natural (010)
- Yarn C Blush (287)
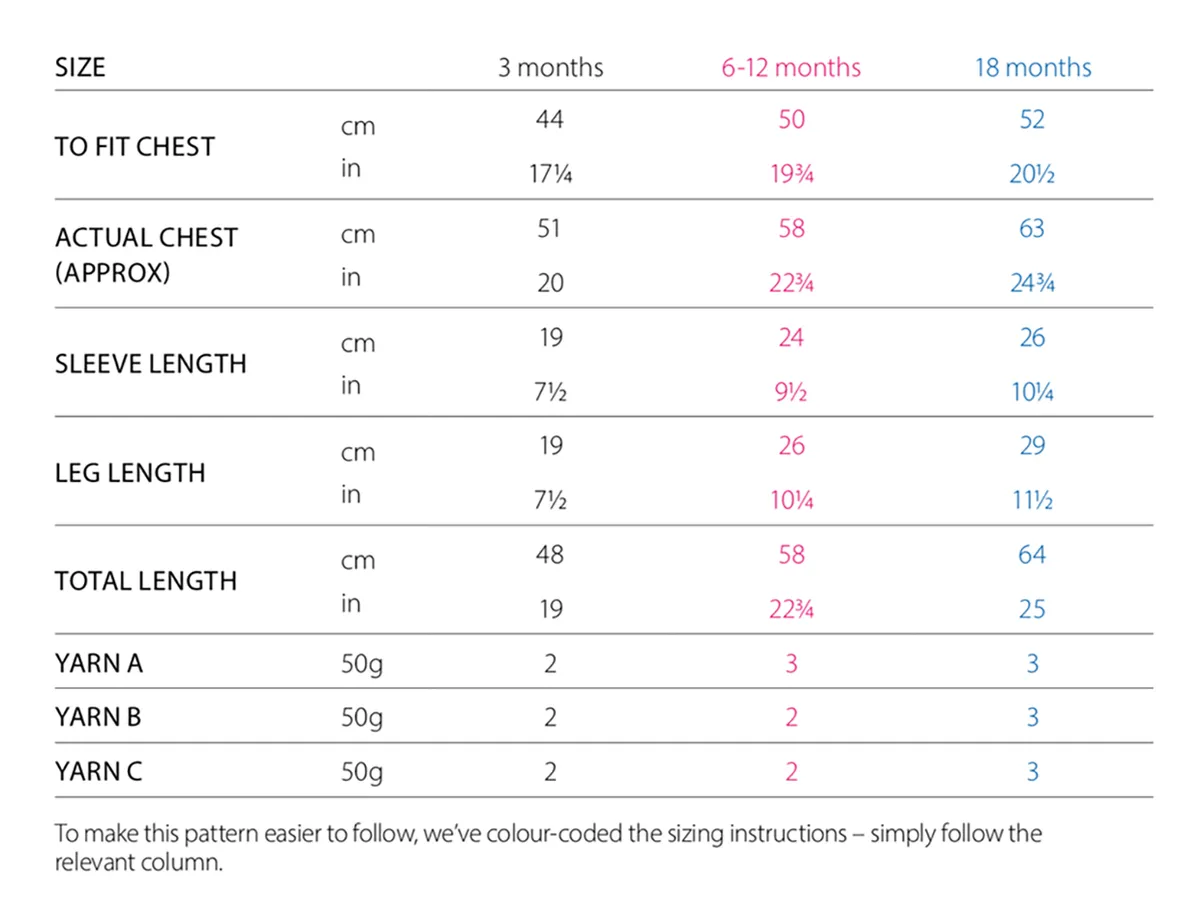
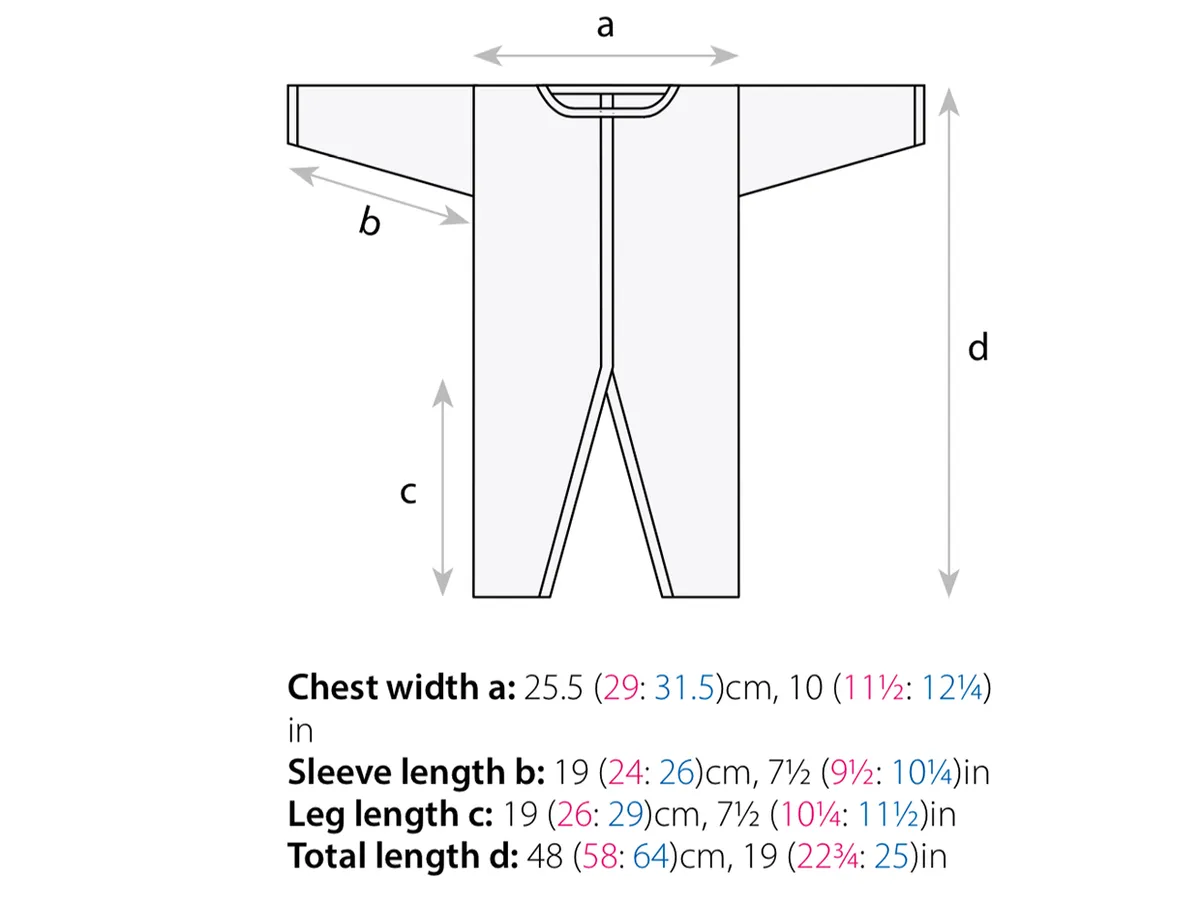
See table for measurements and yarn quantities
12mm buttons x 12 (15: 16)
Yarn Quantities/measurements
For a more budget-friendly make, try King Cole Big Value Baby DK: 1 (2: 2) balls of Yarn A Mulberry (3343), 1 (1: 2) balls of each: Yarn B Cream (046), Yarn C Peach (059). Check hook size, tension and ball length if you use a different yarn
Tension
17 sts and 16 rows to measures 10x10cm (4x4in) over stitch pattern, using a 4.5mm hook or size needed to obtain tension
Abbreviations
You can find a full list of all abbreviations we use in our abbreviations and conversions guide. This free baby onesie crochet pattern is written in UK terminology but you can easily convert it to US terms using the guide.
Notes
Onesie is made in 2 pieces for Right and Left sides, which are joined in the centre. Each piece is worked bottom up in rows for the Leg and continued straight to the armholes, where it is divided for Front and Back. Sleeves are made separately. The body pieces are joined first with a central Back Band, and bands are added to Back Leg edges and Right Front edge. A Buttonhole Band is worked along Front Left edge and a Neckband is added. Change colour in the last yrh of the previous st. Carry yarn up the side of the fabric.
For safety, it is important that all yarn ends are sewn in or crocheted over, and that buttons are attached firmly.
Free baby onesie crochet pattern
Stitch Pattern
Row 1 (RS) With Yarn B, ch1 (does not count as st throughout), dc in each st to end, turn.
Row 2 With Yarn C, ch2 (counts as htr throughout), htr in each st end, turn.
Row 3 With Yarn A, ch1, dc in each st to end, turn.
Row 4 With Yarn B, ch2, htr in each st to end, turn.
Row 5 With Yarn C, ch1, dc in each st to end, turn.
Row 6 With Yarn A ch2, htr in each st to end, turn.
Rep these 6 rows, alternating htr and dc rows and changing colours as set.
Left Side
Leg
Using Yarn A, ch23 (25:28).
Row 1 (RS) Dc in second ch from hook and in each ch to end, turn. [22 (24: 27) sts]
Rows 2-4 Ch1 (does not count as st throughout), dc in each st to end, turn.
Change to Yarn B and, starting from Row 1 of the Stitch Pattern, inc 1 st each end of the third row by working 2dc in the first and last sts of the row.
Rep this inc row every following dc row until there are 40 (46: 50) sts.
Cont in Stitch Pattern without shaping until Leg measures 19 (26: 29)cm.
Body
Place a marker at each end of the last row and work another 18 (20:22)cm from markers ending with a WS row.**
Divide for armholes
Left Back
Next row (RS) Work 20 (23: 25) sts in Stitch Pattern, turn and work on these sts only, until Back measures 11 (12: 13)cm. Fasten off.
Left front
In the foll rows, shaping is worked using decreases at the neckline edge. Work dc2tog as the decrease st on a dc row of the Stitch Pattern, and htr2tog on a htr row.
Rejoin yarn in first unworked st after Back with RS facing. Cont in Stitch Pattern from armhole as set on rem 20 (23: 25) sts until Front measures 8 (9: 10)cm, ending with WS row.
Row 1 (RS) Work in patt for 9 (11: 12) sts, dc2tog or htr2tog depending on patt row, turn leaving rem sts unworked. [10 (12: 13) sts]
Row 2 Work beg ch, then dc2tog or htr2tog depending on patt row, patt to end. [9 (11: 12) sts]
Rep Row 1 another 0 (1: 1) times. [9 (10: 11) sts]
Cont without shaping until Left Front has same number of rows as Left Back.
Fasten off.
Right Side
Work as for Left Side to **. Divide for armholes
Right front
Next row (RS) Work 20 (23: 25) sts in Stitch Pattern, turn and work on these sts only, until Right Front has the same number of rows as Left Front to neckline shaping.
Row 1 Ss over first 10 (11: 12) sts, work beg ch, dc2tog or htr2tog depending on patt row, patt to end, turn. [10 (12: 13) sts]
Row 2 Patt to last 2 sts, dc2tog or htr2tog depending on patt row, turn. [9 (11: 12) sts]
Work 0 (1: 1) more row with a decrease at neckline edge. [9 (10: 11) sts]
Cont without shaping until Right Front has same number of rows as Right Back.
Fasten off.
Right Back
Rejoin yarn in first unworked st after Right Front with RS facing. Work as Left Back. Fasten off.
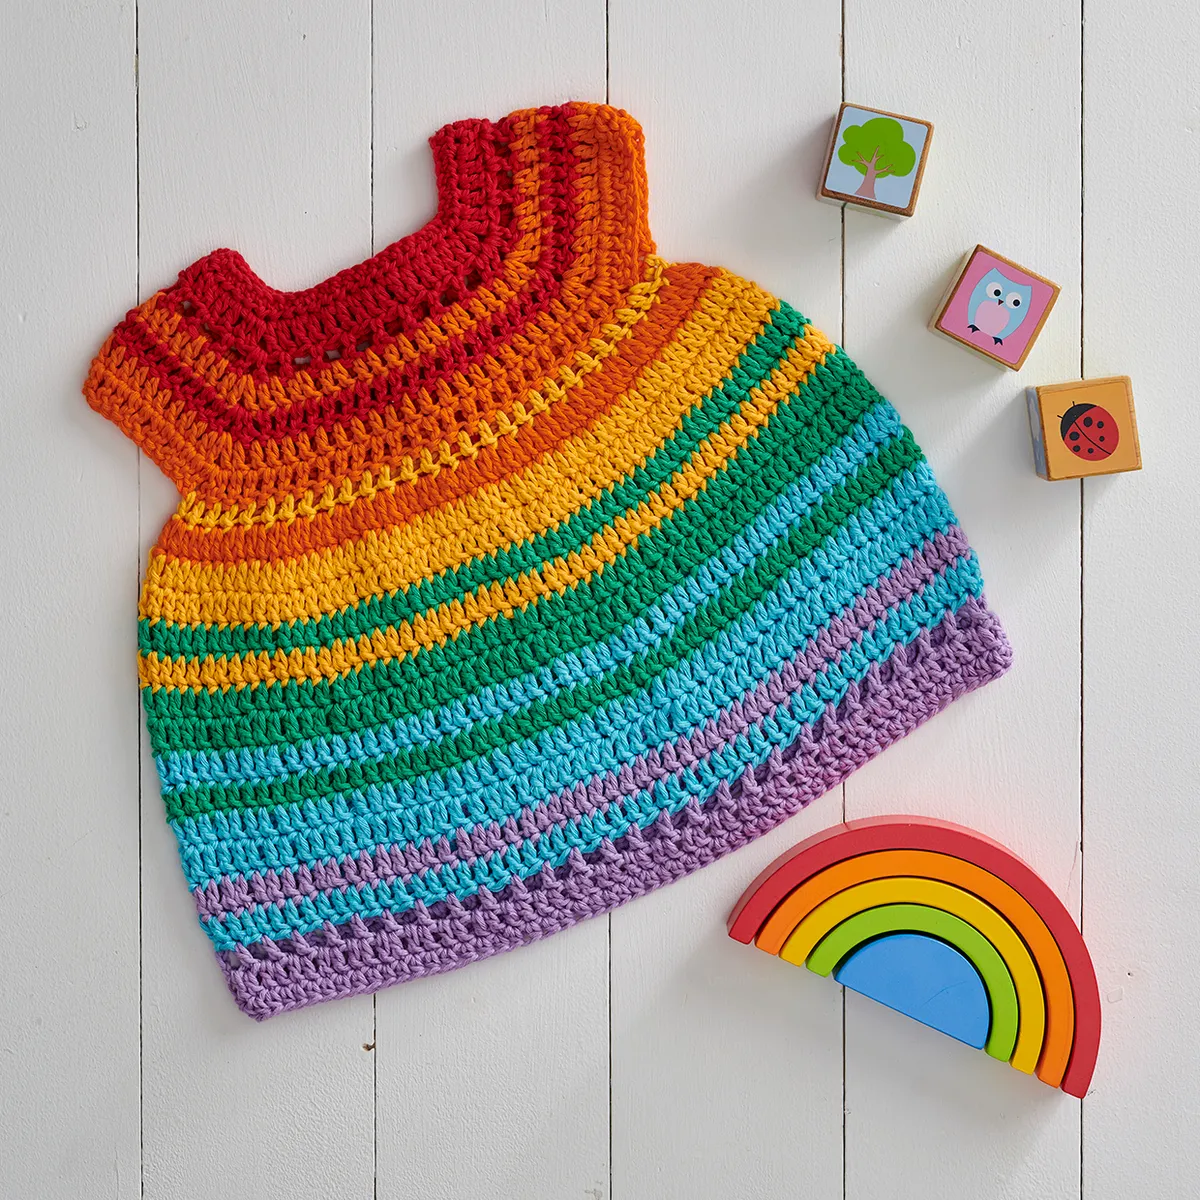
Once you've hooked up this cute crochet baby suit for your little one, why not learn how to crochet baby booties or try hooking up our free baby strawberry crochet hat pattern. Or maybe try hooking up our free baby dress crochet pattern, which can be made in sizes from 6 months to 4 year olds!
Sleeves (make 2)
Using Yarn A, ch25 (27: 31).
Rows 1-4 (RS) As Rows 1-4 of Leg. [24 (26: 30) sts]
Change to Yarn B and start from Row 1 of Stitch Pattern, inc 1 st at each end of every dc row by working 2dc in the first and last sts of the row. Cont this inc patt until there are 38 (40: 44) sts.
Cont in Stitch Pattern without shaping until Sleeve meas 19 (24: 26)cm ending on a WS row.
Fasten off.
Back Band
Stitch counts are provided but may vary. Work dc sts evenly to ensure a flat, even band.
Buttons are placed on the Right side, but can be altered if desired.
Rejoin Yarn A at top of Right Back with RS facing.
Work 54 (58: 60) dc evenly from neck to marker, covering loops of carried yarn. Work 3 more rows of dc on these sts and fasten off.
Sew to Left Back from neck to marker.
Back Leg Band
Rejoin Yarn A at Left Back ankle with RS facing.
Work 66 (84: 96) dc evenly along Left Back Leg edge, across bottom of Back Band and down Right Back Leg edge to ankle.
Work 3 more rows of dc on these sts.
Fasten off.
Sew the edge of the Right Back Leg band to Right Front Leg edge, leaving Left leg and sts at base of Back Band open.
Right Button Band
Rejoin Yarn A on Right Front edge at base of Leg Band with RS facing.
Work 44 (48: 50) dc evenly along Right Front to neck edge. Work 3 more rows of dc on these sts.
Fasten off.
Sew the row-ends at the lower edge of the Band to the Leg Band across the part corresponding to the Back Band.

Buttonhole Band
Rejoin Yarn A at neck edge of Left Front with RS facing.
Row 1 (RS) Ch1, 77 (92: 95) dc evenly from neck edge to Left ankle. Mark position of buttons evenly along this row, remembering that the first button will be on the Neckband, which is still to be worked.
Row 2 (Buttonhole row) Ch1, (dc to marker, ch1, skip 1 st) rep until buttonhole has been worked at last marker, dc in each st to end, turn.
Row 3 Ch1, dc in each st and ch-sp to end, turn.
Row 4 Ch1, dc in each st to end.
Fasten off.
Neckband
Rejoin Yarn A at neck edge of Right Front with RS facing.
Row 1 (RS) Ch1, 9 (10: 11) dc along neck edge, 16 (18: 20) sts around neck curve, 22 (26: 26) dc at back neck, 16 (18: 20) dc around neck curve, 9 (10: 11) dc along neck edge, turn. [72 (82: 88) dc]
Work 3 more rows of dc of these sts, working dc2tog as necessary to maintain a flat band.
Fasten off.
To Make Up
Weave in all ends and oversew any remaining loose loops. Block if desired.
Set in Sleeves and oversew Sleeve seams, catching in loops of yarn carried up the side of the fabric.
Attach buttons firmly to correspond to buttonholes, matching stripes.
If you fancy making a crochet gift for a new arrival but feel like crochet baby clothing is a bit ambitious, then you could always try a sweet but simple crochet baby blanket. Learn how to crochet a baby blanket with corner-to-corner crochet, or keep things simple with our free striped baby blanket crochet pattern or our free granny square baby blanket crochet pattern.
We hope you’ve enjoyed this free crochet baby clothing pattern, don’t forget if you need any help with your crochet stitches you can always check out our crochet for beginners guide and take a look at the rest of our free crochet projects. And if you’re looking to treat yourself, check out our list of the best crochet hooks and the best crochet kits for beginners.