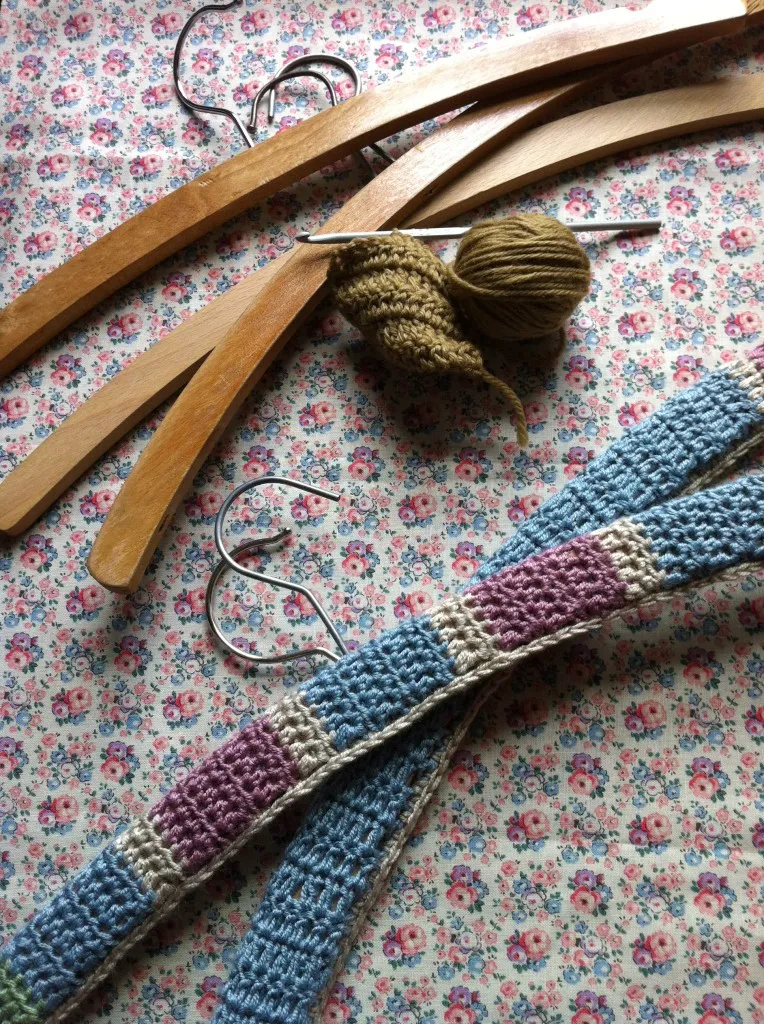
If there's one thing you can say about crocheters, it's that we'll always find some way to incorporate our favourite craft into every aspect of our lives. So if the your wardrobe is looking a bit drab, give it a burst of colour with these fab crochet coathanger covers! We've got a fab pattern by Hannah Cross that is perfect for padded coat hangers and can be made in 3 different ways, plus an extra 2 crochet coat hanger patterns by Kath Eastoe that are great for using with old wooden coat hangers!
You will need
- DROPS Cotton Merino Uni Colour (50% wool, 50% cotton, 50g/110m) or alternative DK yarn, 1 ball of each:
- Forest Green (11)
- Red (06)
- Powder Pink (05)
- Mustard Yellow (15)
- A 4mm (US G/6) hook
- 3 padded coat hangers, 40cm long x 5cm deep
Tension
Tension is not critical for this project but may affect yarn quantities required
Measurements
To fit coat hanger 40cm (15in) long x 5cm (2in) deep
Abbreviations
You can find a full list of all abbreviations we use in our abbreviations and conversions guide. This pattern is written in UK terminology but you can easily convert it to US terms using the guide.
Notes
Make matching sides for each hanger, then join them in the way described for Hanger 1.
Free Coat Hanger Crochet Cover Pattern by Hannah Cross
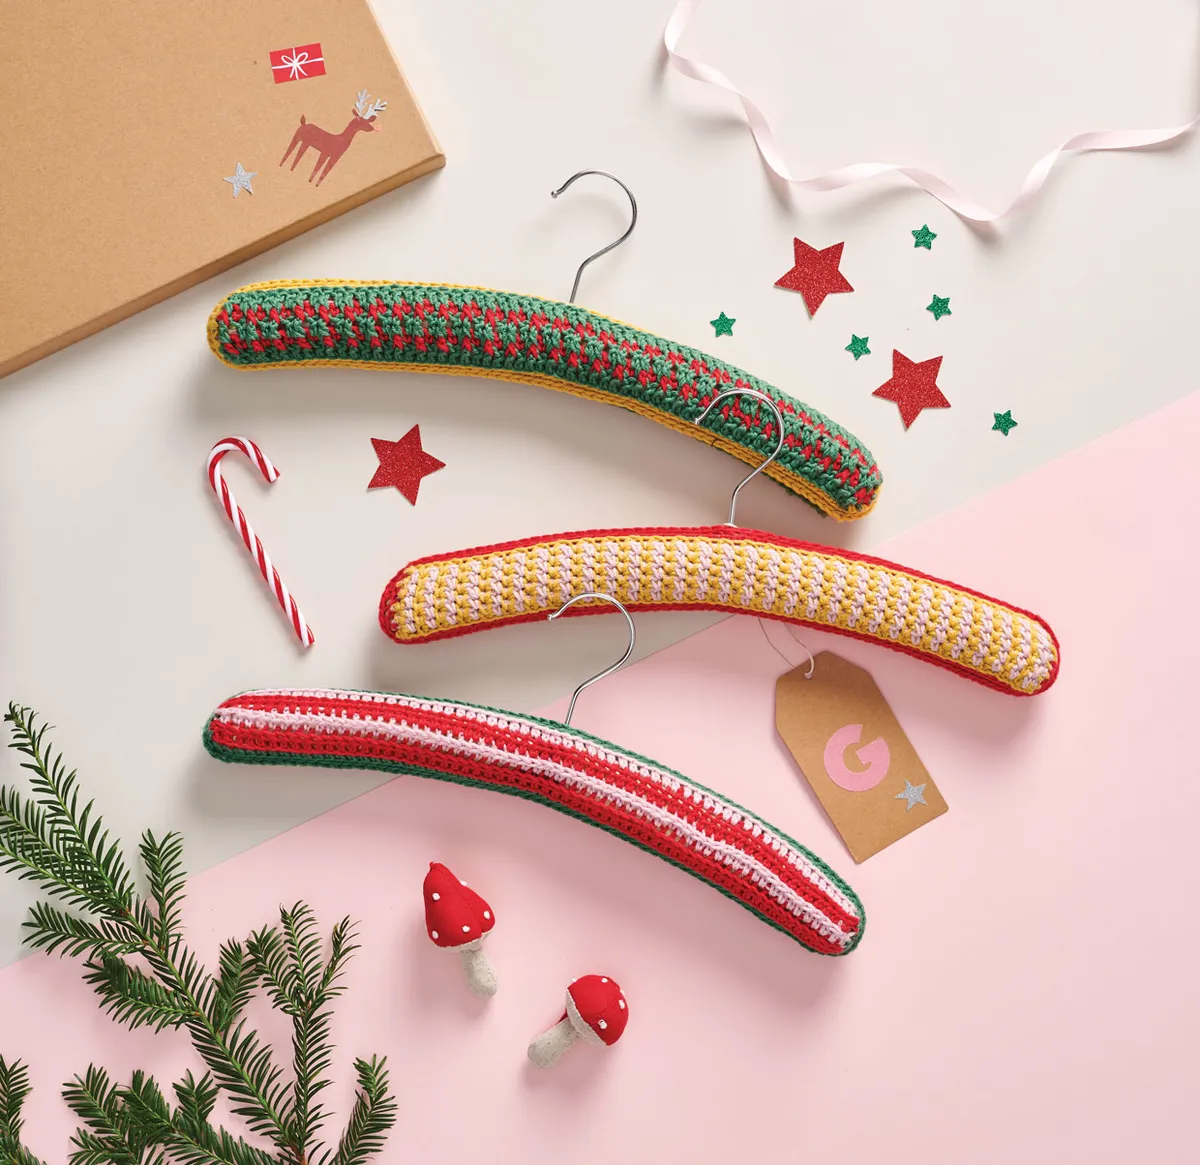
Yellow and Pink Hanger (make 2)
Using Mustard Yellow, ch62.
Row 1 (RS) Dc in second ch from hook, *ch1, skip1ch,dcinnextch;repfrom*toend, changing to Powder Pink on last yrh of last dc, turn. [61 sts] In the following row, for the first Row 2 only, the sts worked in 2 rows below are worked into the foundation chain.
Row 2 Ch1 (does not count as st throughout patts), dc in first st, dc in next st 2 rows below, *ch1, skip 1 st, dc in next st 2 rows below; rep from * to last st, dc in last st, changing to Mustard on last yrh of last dc, turn.
Row 3 Ch1, dc in first st, *ch1, skip next st, dc in next st 2 rows below; rep from * to end, changing to Powder Pink on last yrh of last dc, turn.
Rows 2-3 create the pattern.
Rows 4-11 Repeat pattern for 8 more rows. Fasten off.
Border (Both alike)
Round 1 (RS) Using Red, with RS facing and with Row 1 at top, join with ss to first st of foundation chain, ch1 (does not count as st), dc in next 61 sts, rotate and work 6dc evenly up side, rotate and work dc in next 61 sts of long edge, rotate and work 6dc evenly up side, ss in first dc to join. [134 sts] Fasten off.
Continue using Red.
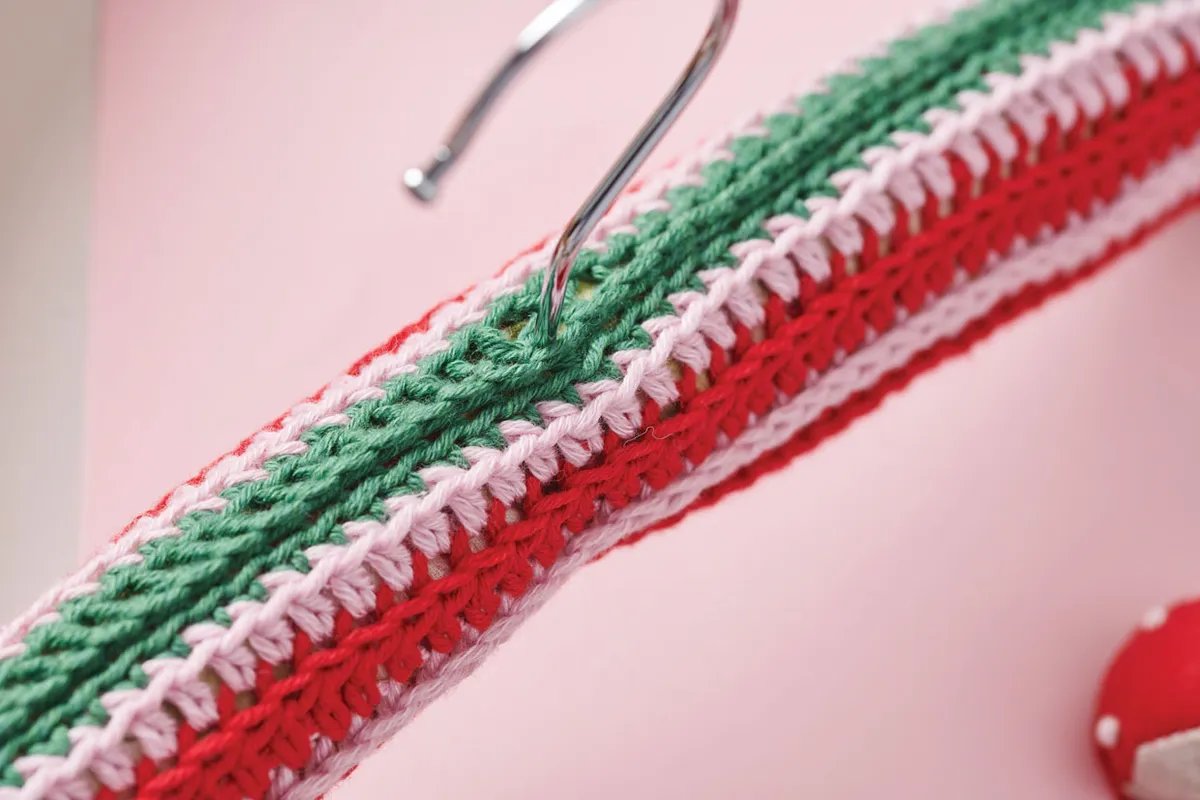
With WS together, align front and back pieces and work a dc seam through both layers in BL only. When you reach the centre top edge of the Hanger, skip 1 st and insert the hanger hook through the hole before continuing the seam, ss to first dc.
Fasten off and weave in ends
Red & Pink Hanger (make 2)
Using Red, ch62.
Row 1 (WS) Htr in second ch from hook, htr in each ch to end, changing to Powder Pink on last yrh of last htr, turn. [61 sts]
Row 2 Ch1, htr in bl of each st to end, changing to Red on last yrh of last htr, turn.
Row 3 Ch1, htr in fl of each st to end, changing to Powder Pink on last yrh of last htr, turn.
Row 4 As Row 2 but do not change colour at end.
Fasten off.
Create border in Forest Green, following Border and joining instructions as given for Yellow & Pink Hanger.
Green & Red Hanger (make 2)
Using Forest Green, ch63.
Row 1 (WS) Tr in fourth ch from hook, tr in each ch to end, changing to Red on last yrh of last tr, turn. [61 sts]
Row 2 Ch1, dc in first st, *FPhtr around next st, dc in next st; rep from * to end, changing to Forest Green on last yrh of last dc, turn.
Row 3 Ch3 (counts as tr), *BPtr around next st, tr in next st; rep from * to end, changing to Red on last yrh of last tr, turn.
Row 4 As Row 2, changing to Forest Green. Row 5 As Row 3 but do not change colour at end.
Fasten off.
Create border in Mustard Yellow, following Border and joining instructions as given for Yellow & Pink Hanger.
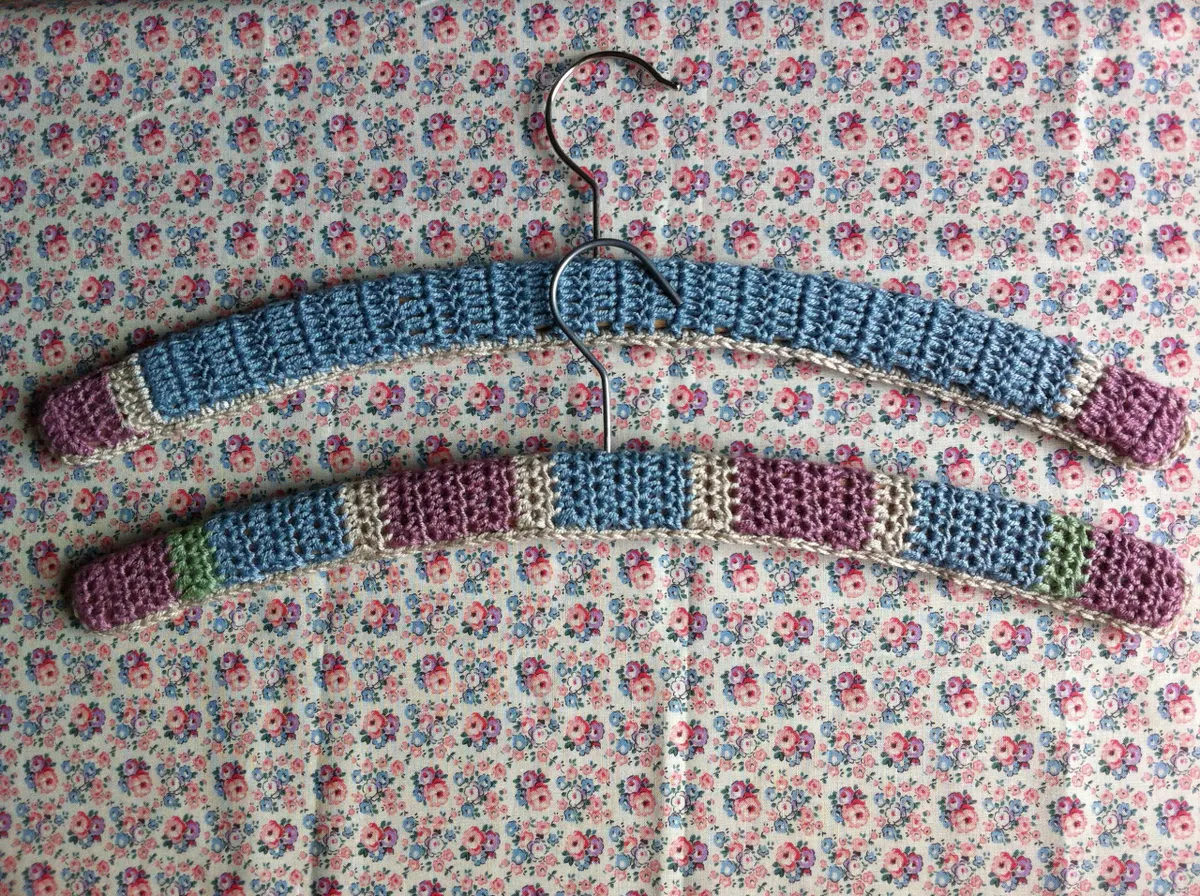
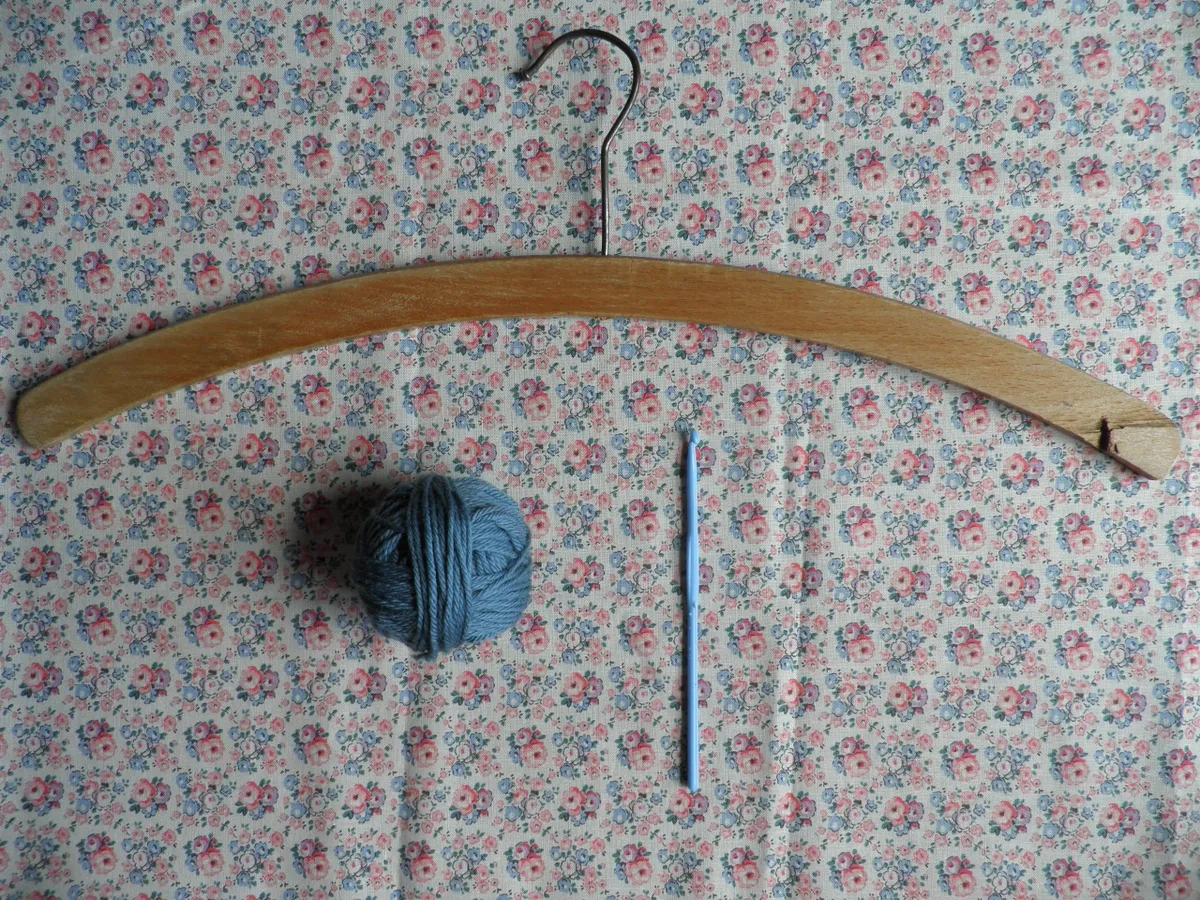
Free Coat Hanger Crochet Pattern by Kath Eastoe
You will need
An old wooden coat hanger
Any DK weight yarn
A little patience
Striped coat hanger
Chain 12 stitches to begin, plus 2 for turning.
Row 1: Work one half treble (htr) into the third chain from the hook, and 1 htr into every chain (ch) until you reach the end, turn.
Row 2: Ch 2, skip first stitch, 1htr into every stitch along until last stitch- work 1 htr into top of ch2 of previous row. This will ensure a very straight, neat edge to your long, skinny piece of crochet.
Repeat row 2 until work measures around 45cm. For this striped effect, I worked six rows of a colour, before changing to the contrasting beige, and working two rows. The effect is quite handsome, I think you’ll agree? You don’t need to weave in your ends, as they’ll be tucked into your solid block of crochet hanger goodness as you go.
Insert the hook of your hanger into the middle of your piece. Take a contrasting colour yarn, and begin to double crochet the edges together along the bottom of the hanger, lining up the stitches as you go. You’ll need to stretch the coat a little to do this. This ‘stitching up’ process can be quite tricksome, but once you get into the rhythm of the ‘fiddliness’ you’ll have a crochet coat hanger in no time.
Plain coat hanger
Chain 12 plus 3 for turning.
Row 1: Work one treble (tr) crochet into the 4th chain from the hook, and in every chain (ch) along. Turn.
Row 2: Ch 3, skip first stitch, and work 1tr into every stitch (top loops of the stitch only, don’t go between the stitches), until the last stitch – working a tr into the top of the ch3 of the previous row. Turn. Once again, you’ll get a lovely neat, straight edge.
Repeat row 2 until your piece measures around 45cm. This treble crochet version is slightly quicker than the htr version, but it has a looser weave which actually I slightly prefer. Insert the hanger hook, take a piece of contrasting yarn, and stretching the piece of crochet, match up the stitches either side of the hanger, double crochet the sides together.
If you liked this crochet pattern, why not check out some of our other free patterns!