How to make a crochet flower bouquet
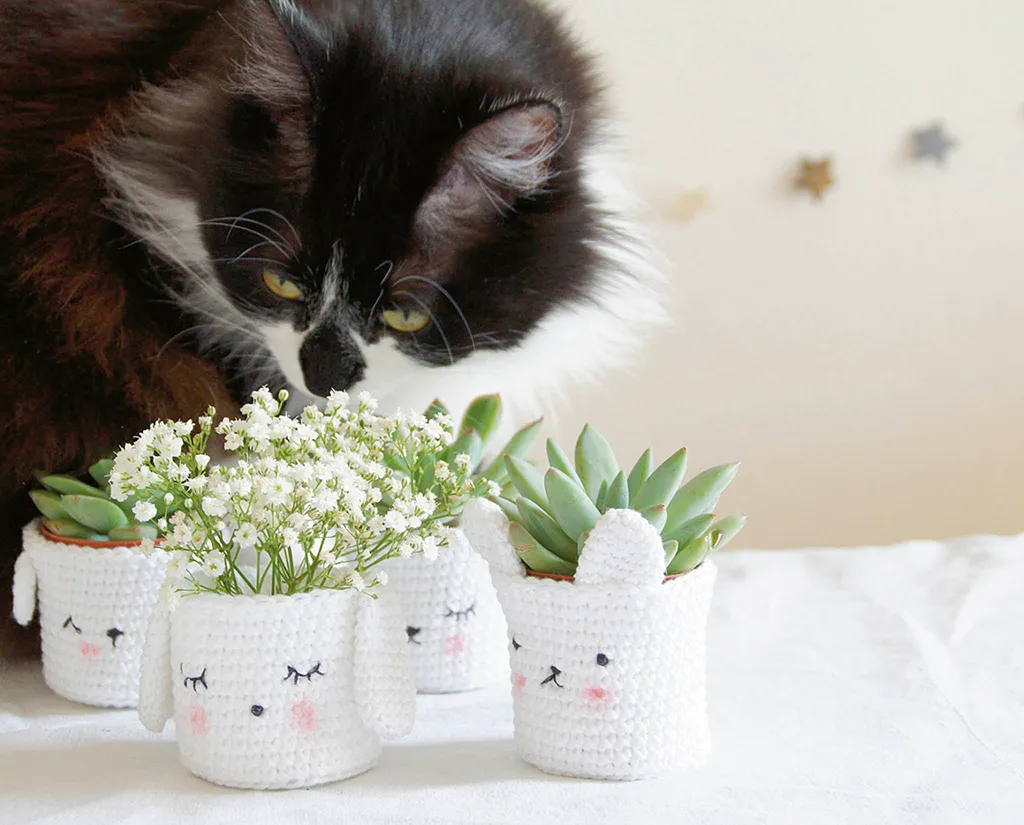
Flowers are a great way of showing you care, but a crochet bouquet of flowers that you’ve made by hand is truly something special!
Whether it’s for a birthday, anniversary, Mother’s Day or even a wedding, your friends and family will be amazed at your skills when you present your crochet bouquet of flowers. Or you could just make some for yourself as a way to brighten up your home (and your day).
You’ll find two different approaches to a crochet flower bouquet pattern free below. Our first pattern allows you to select from a range of different flowers to make and combine into a pretty posy that is perfect for holding or displaying in a vase.
Our second pattern is a completely self-contained crochet flower bouquet that is ideal for giving as a gift – it even comes with a crochet pot! You can use this link to jump straight to our potted crochet flower bouquet pattern
Free crochet flower bouquet pattern
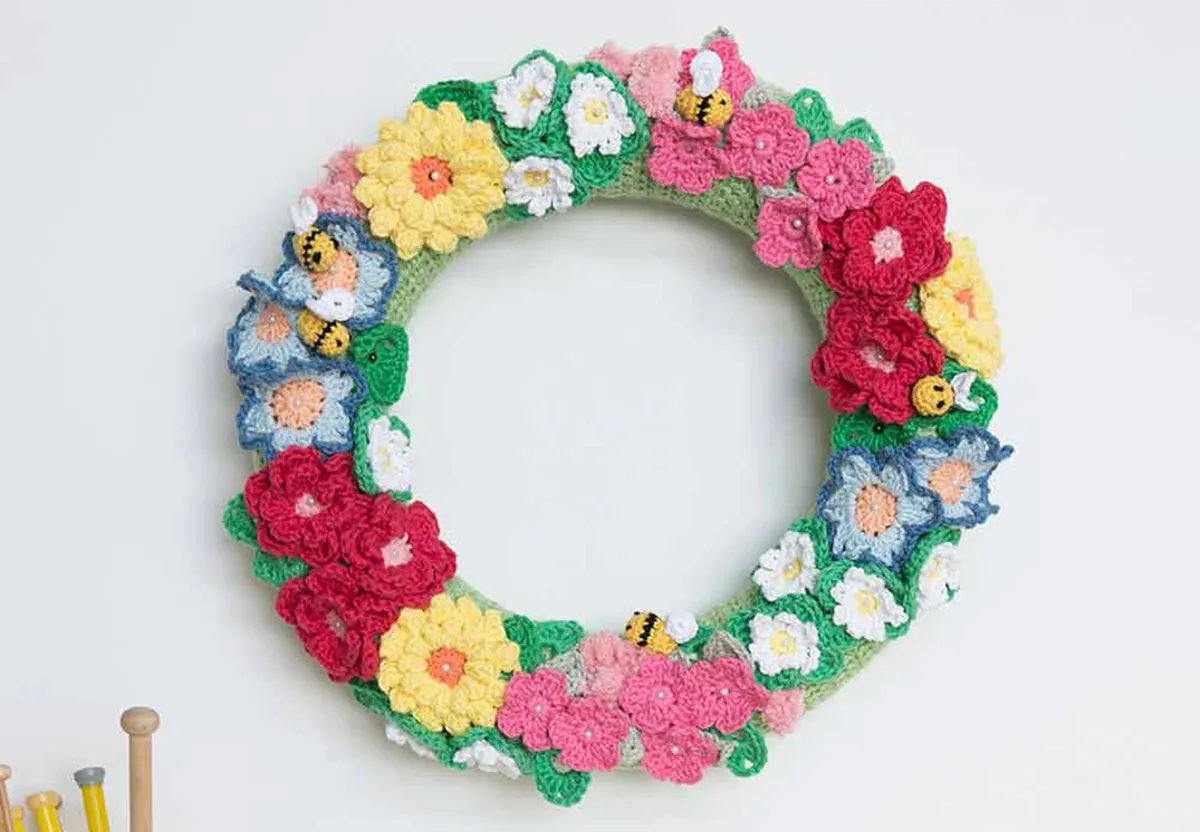
Our beautiful crochet flower bouquet is made up of a selection of six simple flower motifs (plus two types of leaves), ranging from delightful dogwoods to fabulous forget-me-nots!
This pattern allows you to assemble your crochet flower bouquet in two different ways. The first is by pinning your flowers to a polystyrene semi-sphere with a handle to create a perfectly arranged holdable posy. The second is to simply create stems using pipe cleaners to make individual flowers that you can arrange in a vase.

And if you're tempted by the Flower Shawl in the photo too to pair perfectly with your posy, you can find the pattern for it on Ravelry here!
You will need
- Small amounts of any DK 100% cotton yarn (Sirdar Happy Cotton DK yarn comes in bargain 20g balls)
- Fuschia - Pink Sapphire (3702)
- Violet - Delphinium (3706)
- Light Blue - Periwinkle (3726)
- Red - Lipstick Red (3755)
- Yellow - Buttercup (3748)
- Cream - Natural (3718)
- Dark purple - Regal (3708)
- Light green - Chartreuse (3746)
- Green - Sprout (3740)
- A 3.5mm (US E/4) hook
To create a handheld posy
- Foam bouquet holder
- Pearl-headed pins
- Green felt (optional)
Alternatively you can make your own bouquet holder using:
To create individual flowers with stems
- Green pipe cleaners Twine (optional)
Measurements
- Rounded Leaf: 4.5cm (1¾in) long
- Dogwood crochet flower: 7cm (2¾in) diameter
- Small Rounded Leaf: 2½cm (1in) long
- Clematis: 6cm (2¼in) diameter
- Forget-me-not crochet flower: 4cm (1½in) diameter
- Large Daisy crochet flower: 8cm (3in) diameter
- Violet crochet flower: 4.5cm (1¾in) diameter
Abbreviations
You can find a full list of all abbreviations we use in our abbreviations and conversions guide. This pattern is written in UK terminology but you can easily convert it to US terms using the guide.
Notes
See the assembly instructions for details on creating a holdable posy bouquet of crochet flowers or creating individual stems for your crochet flowers.
Free crochet flower bouquet pattern

Make a selection of crochet wedding flowers and leaves from the patterns below, using the image below as a reference.
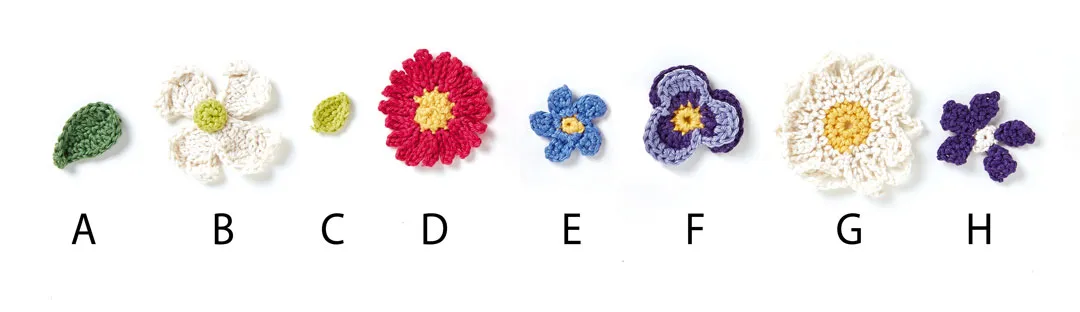
Rounded Leaf (A)
With Green, ch9.
Row 1 (WS) Dc in second ch from hook and in each ch to end, turn.
Round 2 (RS) Tr in first st, 2tr in each of next 2 sts, tr in next st, htr in next st, dc in each of next 2 sts, ss in last st, ch2, ss in beg ch-1 of first row, rotate to work in other side of foundation ch: ss in first st, dc in each of next 2 sts, htr in next st, tr in next st, 2tr in each of next 2 sts, tr in last st, ss in base of leaf.
Fasten off and weave in ends.
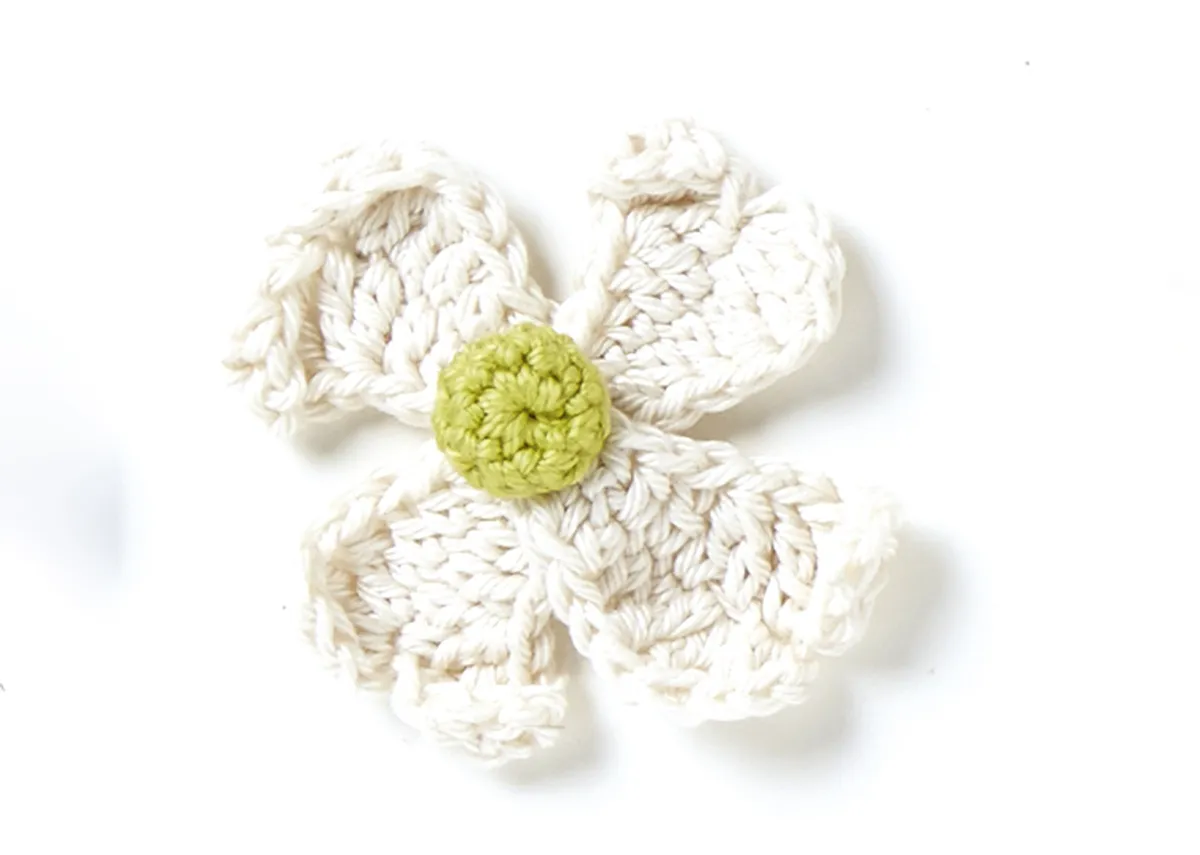
Dogwood crochet flower (B)
Flower Centre
With Light Green, ch2.
Round 1 (RS) 5dc in 2nd ch from hook.
Round 2 Dc in each st around.
Fasten off, leaving a long tail. Thread the tail through the stitches of the last round and pull tight to create a domed shape.
Petal (make 4)
With Cream, ch10.
Round 1 (RS) Dtr in third ch from the hook, dtr in next ch, work a dtr in next ch but leave the last 2 loops of the dtr on the hook, work a tr in the next ch up to the point where you have 3 loops on the hook in total, yrh and draw through all 3 loops (this is a dtr and tr worked tog as a decrease st), tr in next ch, htr in next ch, dc in each of next 2 ch, ch1, rotate to work in other side of foundation ch: dc in each of first 2 sts, htr in next st, tr in next st, work a tr in next st leaving last 2 loops on hook, work a dtr in next st up to the point where you have a total of 3 loops on the hook, yrh and draw through all 3 loops (tr and dtr worked tog), (2dtr, htr, ss) in next st.
Fasten off, leaving the remaining stitch unworked.
To Make Up Overlap 4 petals in the centre and sew together, then secure the Flower Centre on the top.
Small Rounded Leaf (C)
With Light Green, ch6.
Row 1 (WS) Dc in second ch from hook and in each ch to end, turn.
Round 2 (RS) Htr in first st, 2htr in next st, dc in each of next 2 sts, ss in next st, ch2, ss in end of leaf, rotate to work in other side of foundation ch; ss in first st, dc in each of next 2 sts, 2htr in next st, htr in next st, ss in base of leaf.
Fasten off and weave in ends.
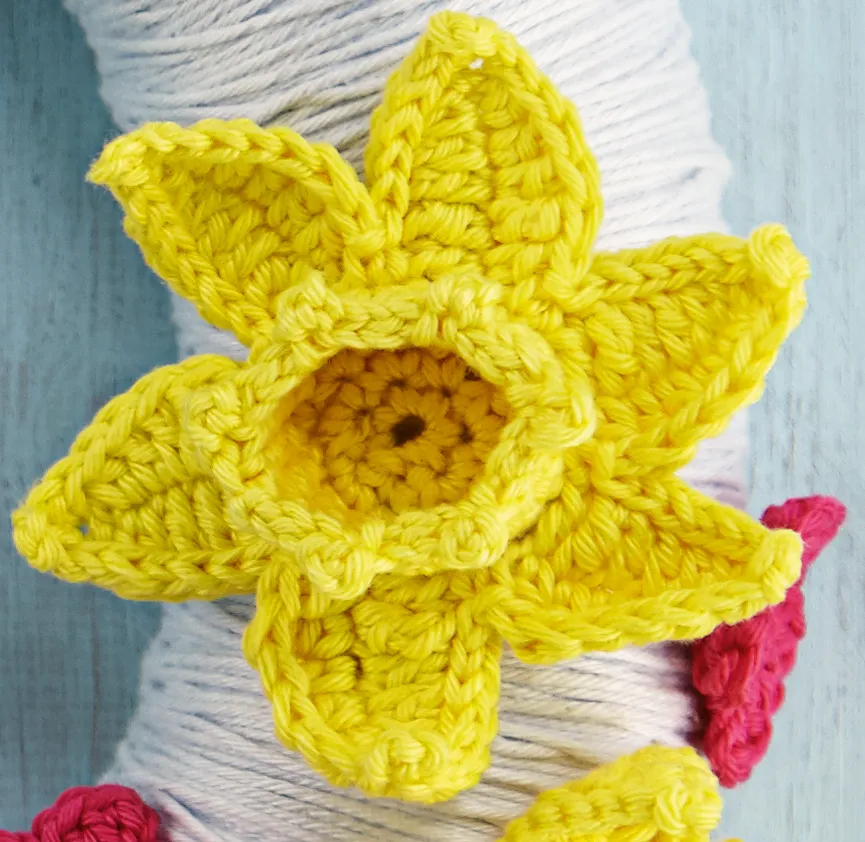
Celebrate spring
When it comes to iconic springtime flowers, it’s hard to beat our free daffodil crochet pattern.
Clematis crochet flower (D)

Centre
With Yellow, ch11.
Row 1 (WS) Dc in second ch from hook and in each ch to end, turn. [10 sts]
Row 2 Ch1 (does not count as st), htr in each st to end.
Fasten off, leaving a long tail. Roll into a spiral and sew together using the tail, so that you can work into the sts of Row 2 around the outside.
Petals
Join Red or Fuschia in any stitch of Row 2 with a ss.
Round 1 (RS) (Ch10, ss in st at base of ch) twice in each st around. [20 petals]
Fasten off.
Forget-me-not crochet flower (E)
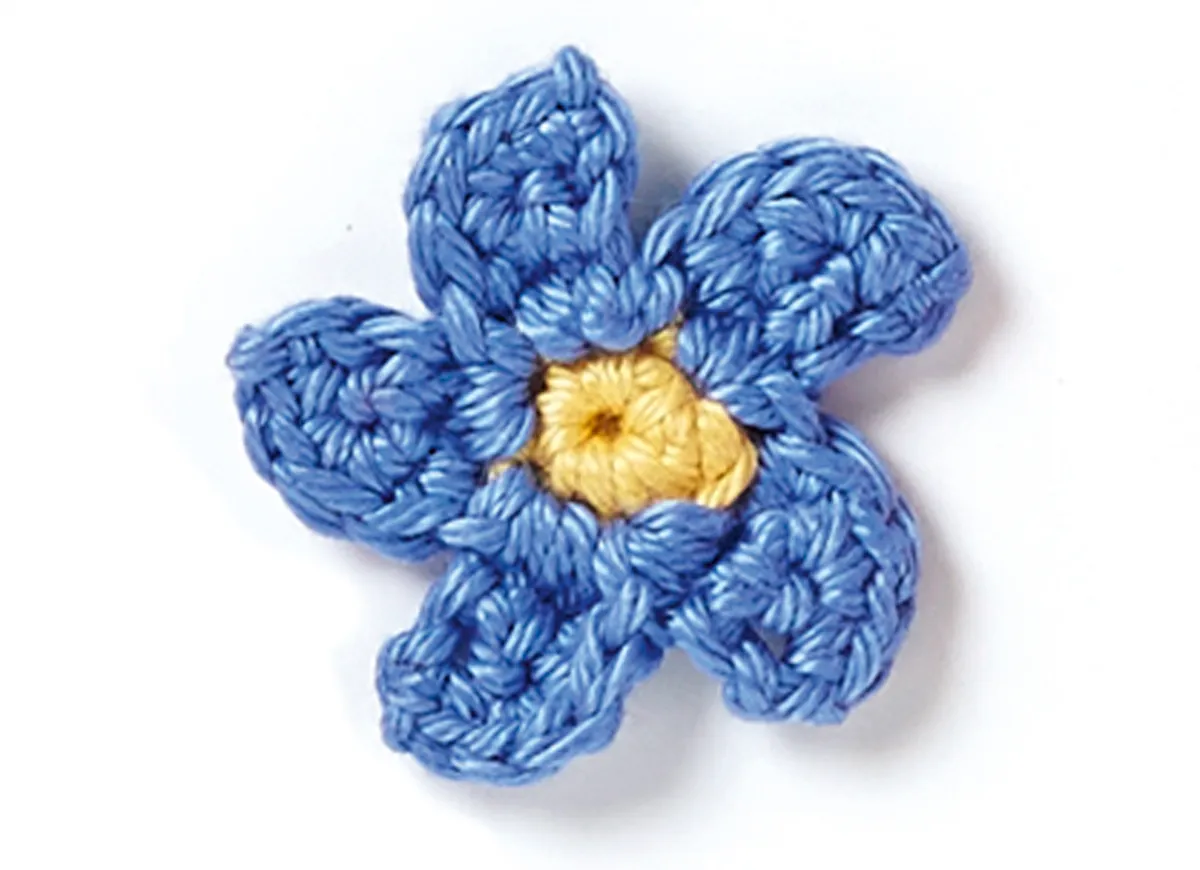
With Yellow, ch4, ss in first ch to make a ring.
Round 1 (RS) Ch1 (does not count as st throughout), 5dc into ring, ss to first dc, change to Light Blue.
Row 2 Ch1, 2dc in next st, turn and work back and forth in rows on these 2 sts:
Row 3 Ch1, 2dc in first st, dc in next st, turn. [3 sts]
Row 4 Ch1, dc in first st, 2dc in next st, dc in next st, ss into next dc of Round 1. Repeat Rows 2-4 to make 5 petals, ss in the first st of Round 1 to join.
Fasten off. Shape the petals so you can just see the Yellow centre.
Pansy crochet flower (F)
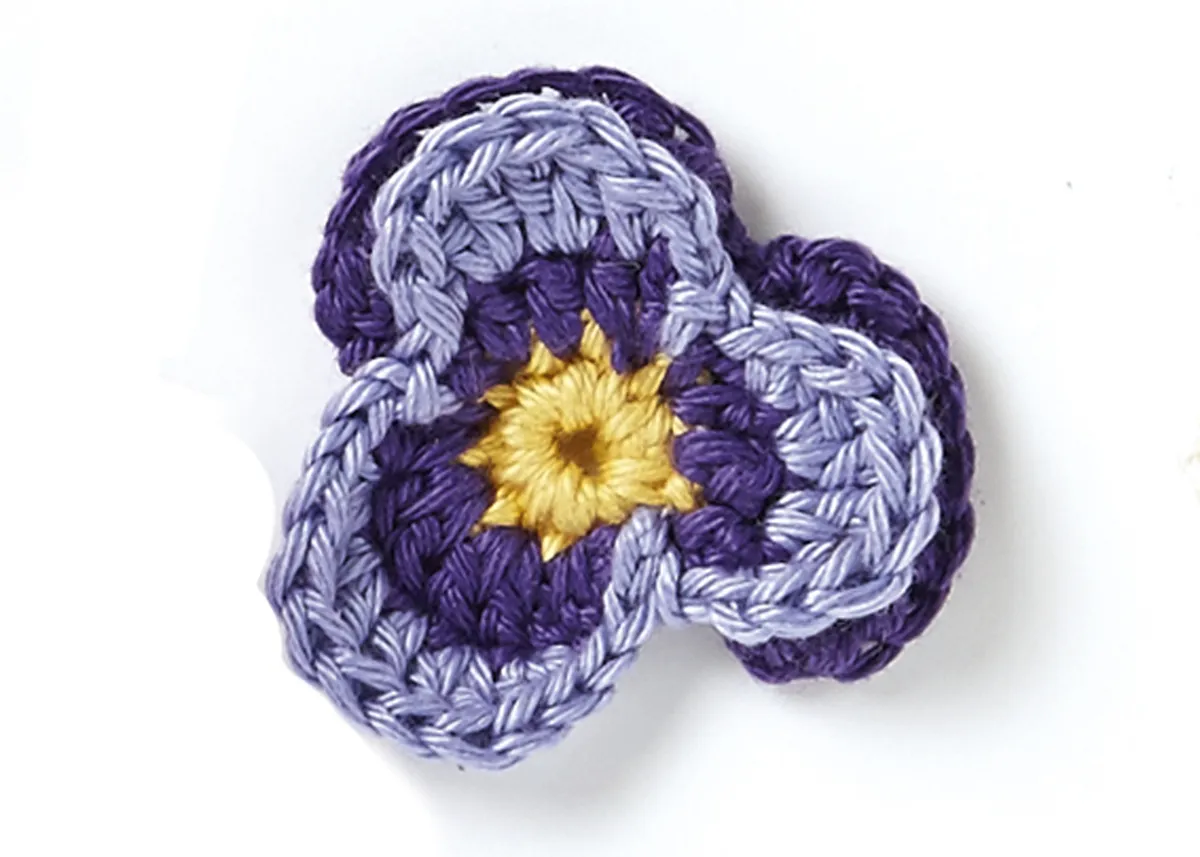
Using Light Green or Yellow, ch5, join with a ss into a ring.
Round 1 (RS) Ch1 (does not count as st), 10dc into the ring. Fasten off.
Round 2 Join Dark Purple or Light Blue in any st with a ss, *(ch2, htr) in next dc, tr in next dc, (htr, ch2, ss) in next dc; rep from * once more, (ch2, htr) in next dc, (2tr in next dc) twice, (htr, ch2, ss) in next dc. [18 sts, counting each ch-2 as a st] Fasten off.
Change to Light Blue or Violet and join with a ss to the beginning of the first small petal.
Round 3 Join Light Blue or Violet between the last petal and the first petal of the previous round, *ch1, ss into top of ch-2, ch1, tr into the next 3 sts, ch1, ss into top of next ch-2, ch1, ss into sp between petals; rep from * on the next small petal, ch1, ss into top of next ch-2, ch1, tr into the next st, htr into next 4 sts, dc into next st, ch1, ss into top of next ch-2, ch1, ss into the first ss. Do not fasten off.
Base petals
With RS facing and working behind existing petals, ss in the back of a Round 1 dc before the first small petal.
Row 1 (RS) Ch3, dc in back of Round 1 dc between the small petals, ch3, ss in back of Round 1 dc between small and large petal on the left-hand side, turn. [2 ch-3 sps]
Row 2 (WS) (Ch2, 2htr, 4tr, 2htr, ch2) into the first ch-3 sp, ss into the dc, (ch2, 2htr, 4tr, 2htr, ch2) into the next ch-3 sp, ss into next ss, turn.
Row 3 Ch1, dc into top of each ch-2 and st on the first petal, ss in between petals, dc into top of each ch-2 and st on the second petal, ss into base of petal.
Fasten off.
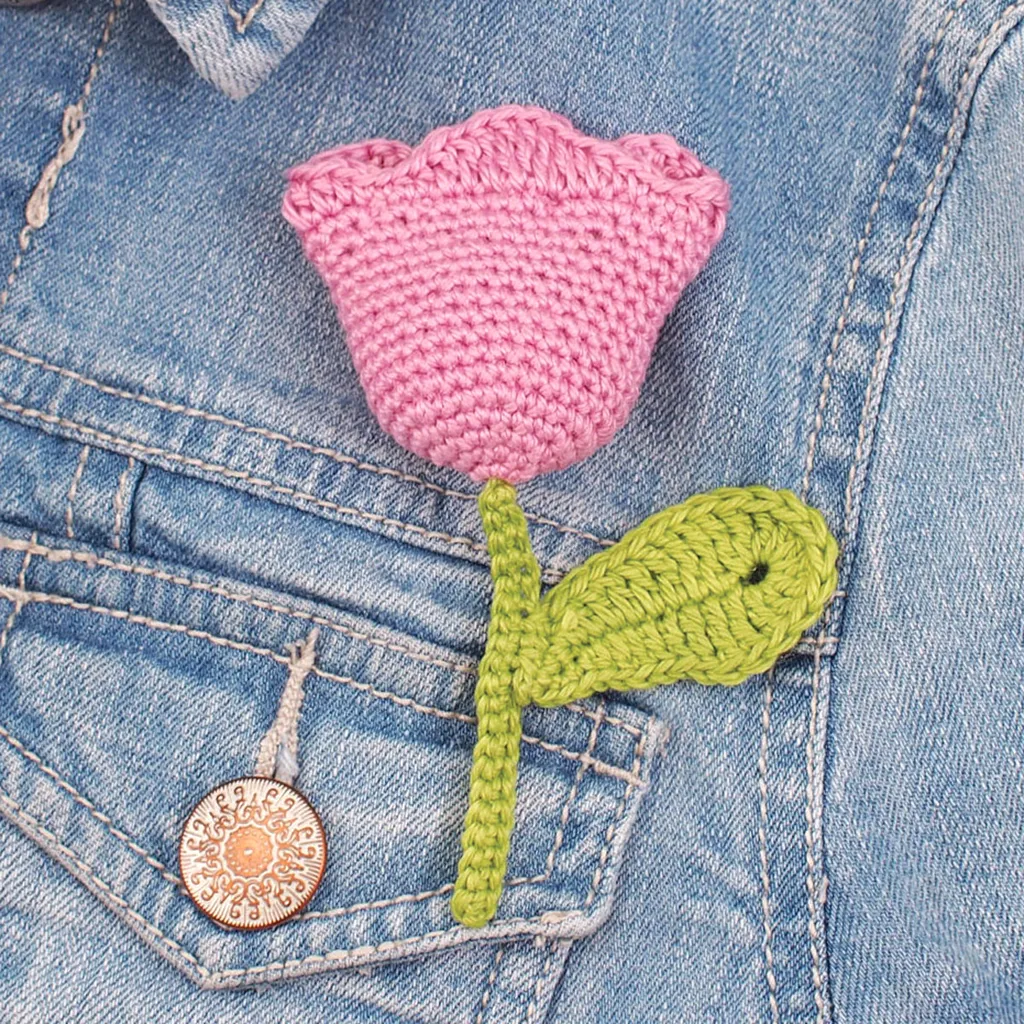
Terrific tulips
You don’t have to head to the Netherlands to enjoy these beauties, you can find our free crochet tulip pattern right here on Gathered!
Large Daisy crochet flower (G)
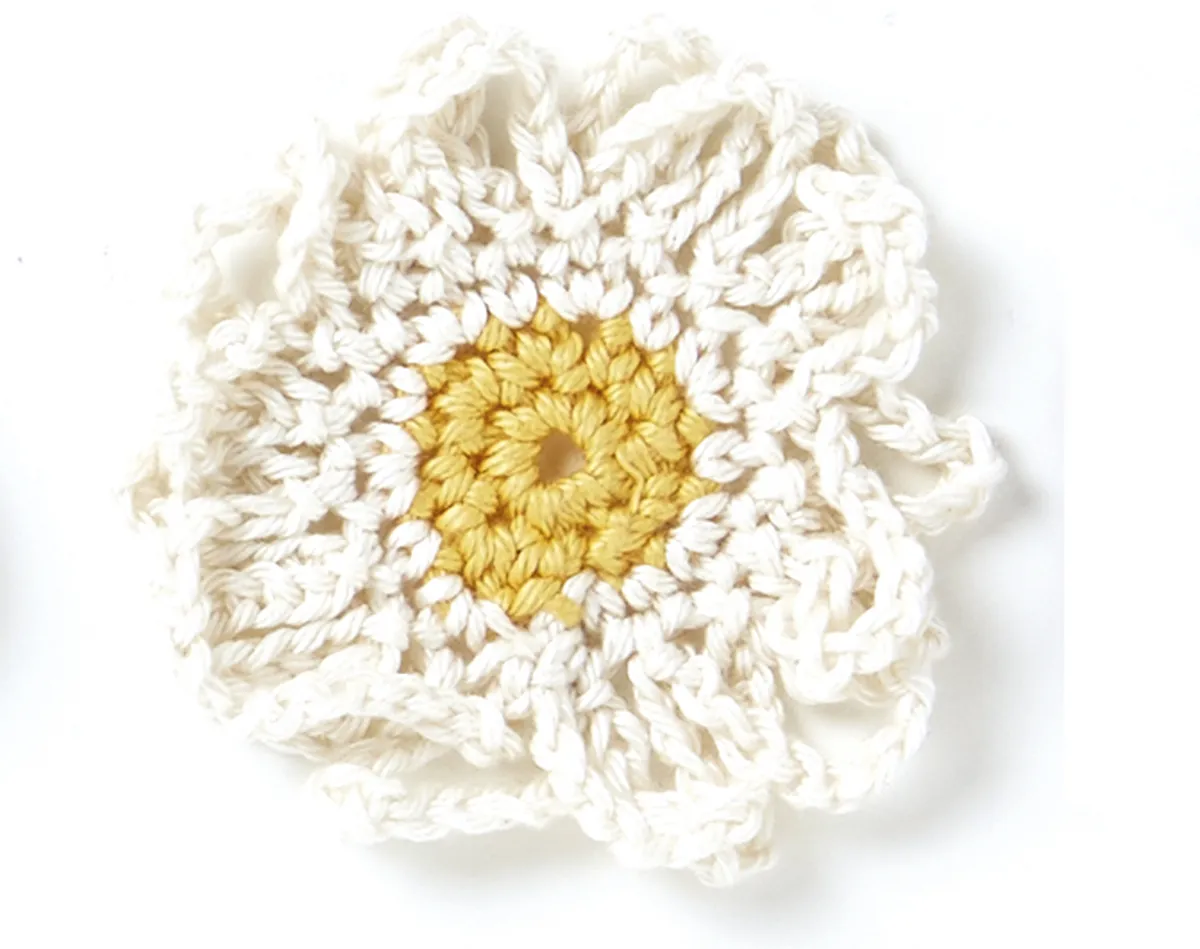
Using Yellow, Make a crochet magic loop.
Round 1 (RS) Ch1 (does not count as st throughout), 10dc into ring, ss to first dc. [10 sts]
Round 2 Ch1, (1dc into next st, 2dc into next st) 5 times, ss to first dc. [15 sts]
Round 3 Ch1, (2dc, 2dc into next st) 5 times, ss to first dc, change to Cream. [20 sts]
Round 4 Ch1, (dc in next st, ch12, skip next st) 10 times, ss to first dc. [10 petals]
Round 5 Working behind existing petals and into unworked sts from Round 3; (dc in next unworked st from Round 3, ch12, skip next dc from Round 4) 10 times, ss to first dc.
Fasten off.
Violet crochet flower (H)
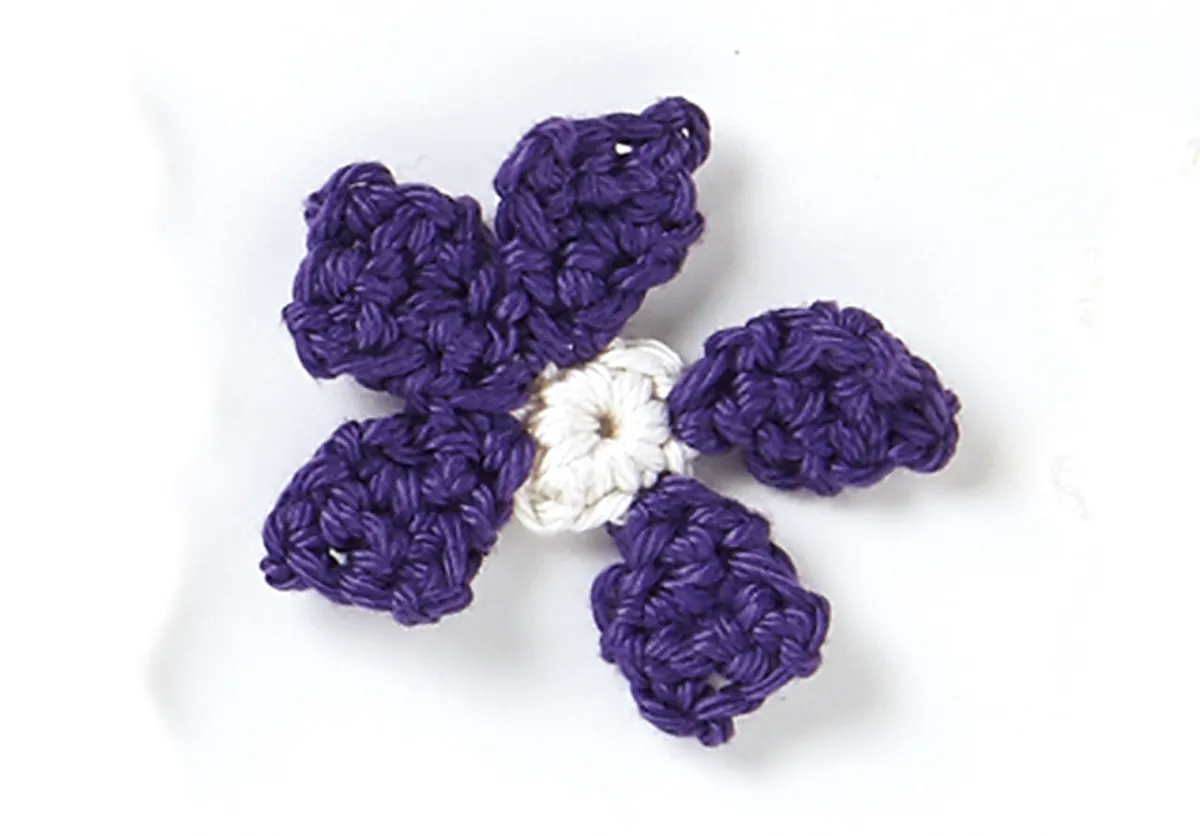
With Cream, ch4, ss into first ch to make a ring.
Round 1 (RS) 7dc in ring, ss in first ch to join, change to Dark Purple.
Petals
The petals are made by working back and forth in rows from the stitches in Round 1. Each petal is made separately and fastened off at the end, so you will need to rejoin the yarn for each petal. Make a petal in the first, second, fourth, fifth and sixth sts of Round 1, skipping the third and seventh sts.
Row 1 (RS) Rejoin yarn and ch1 (does not count as st throughout), dc in st of Round 1, turn.
Row 2 Ch1, 2dc in st from Row 1, turn. [2 sts]
Row 3 Ch1, 2dc in each st, turn. [4 sts]
Row 4 Ch1, (dc2tog) twice.
Fasten off and weave in ends. Loosely sew together the 3 bottom petals to make the shape of the violet.
Assembly
For individual flowers with stems
Wrap a pipe cleaner tightly with green yarn to form a firm stem. Using the tail of green yarn and a yarn needle, sew the underside of the flower to the top of the stem, keeping your stitches hidden.
Alternatively you could use craft glue to attach your flowers to the top of your stems. Then tie up the bundle of stems with twine.
For a holdable posy
Cover the polystyrene dome of your foam bouquet holder with the green felt and pin the flowers and leaves on top.
If you are making your own foam bouquet holder, bind several pipe cleaners with garden twine and secure to the underside of the dome to form a stem-like handle.
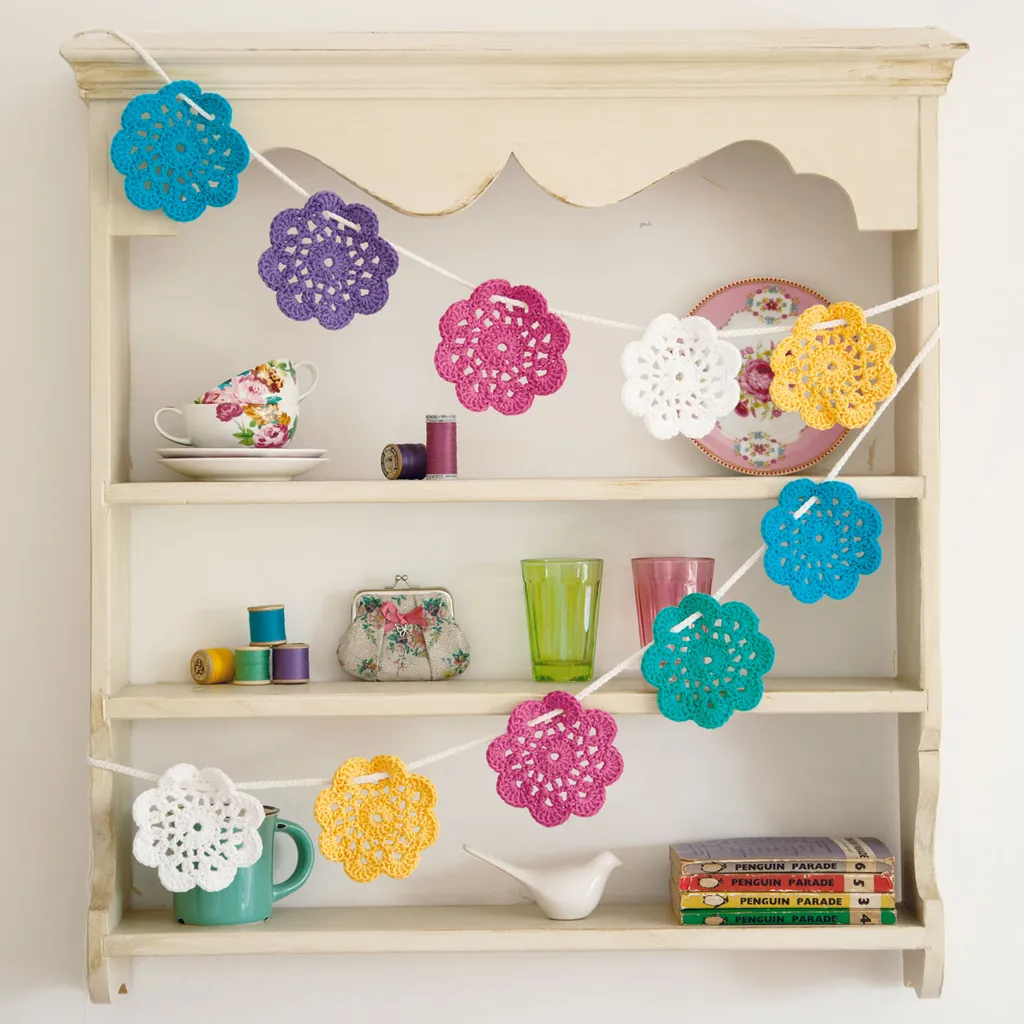
Blooming bunting
Add a splash of floral colour to your home with our fabulous free crochet flower bunting pattern.
Free potted bouquet of flowers crochet pattern
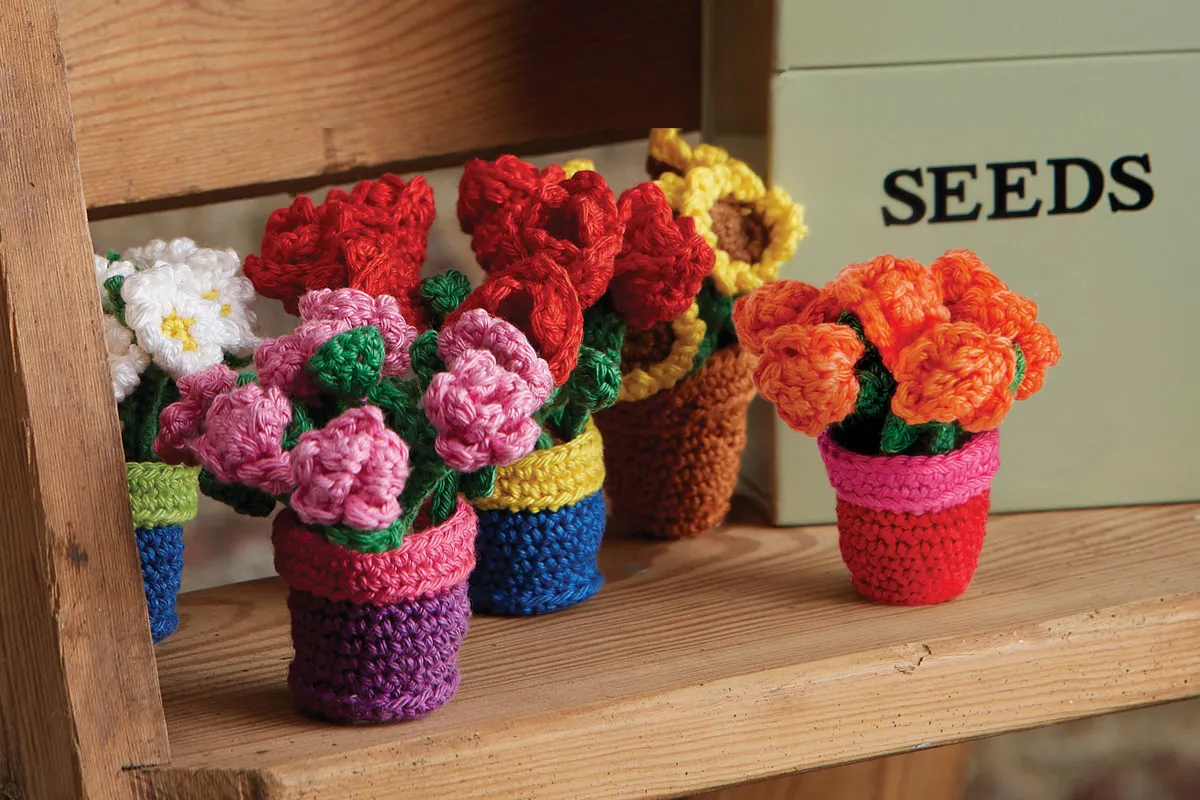
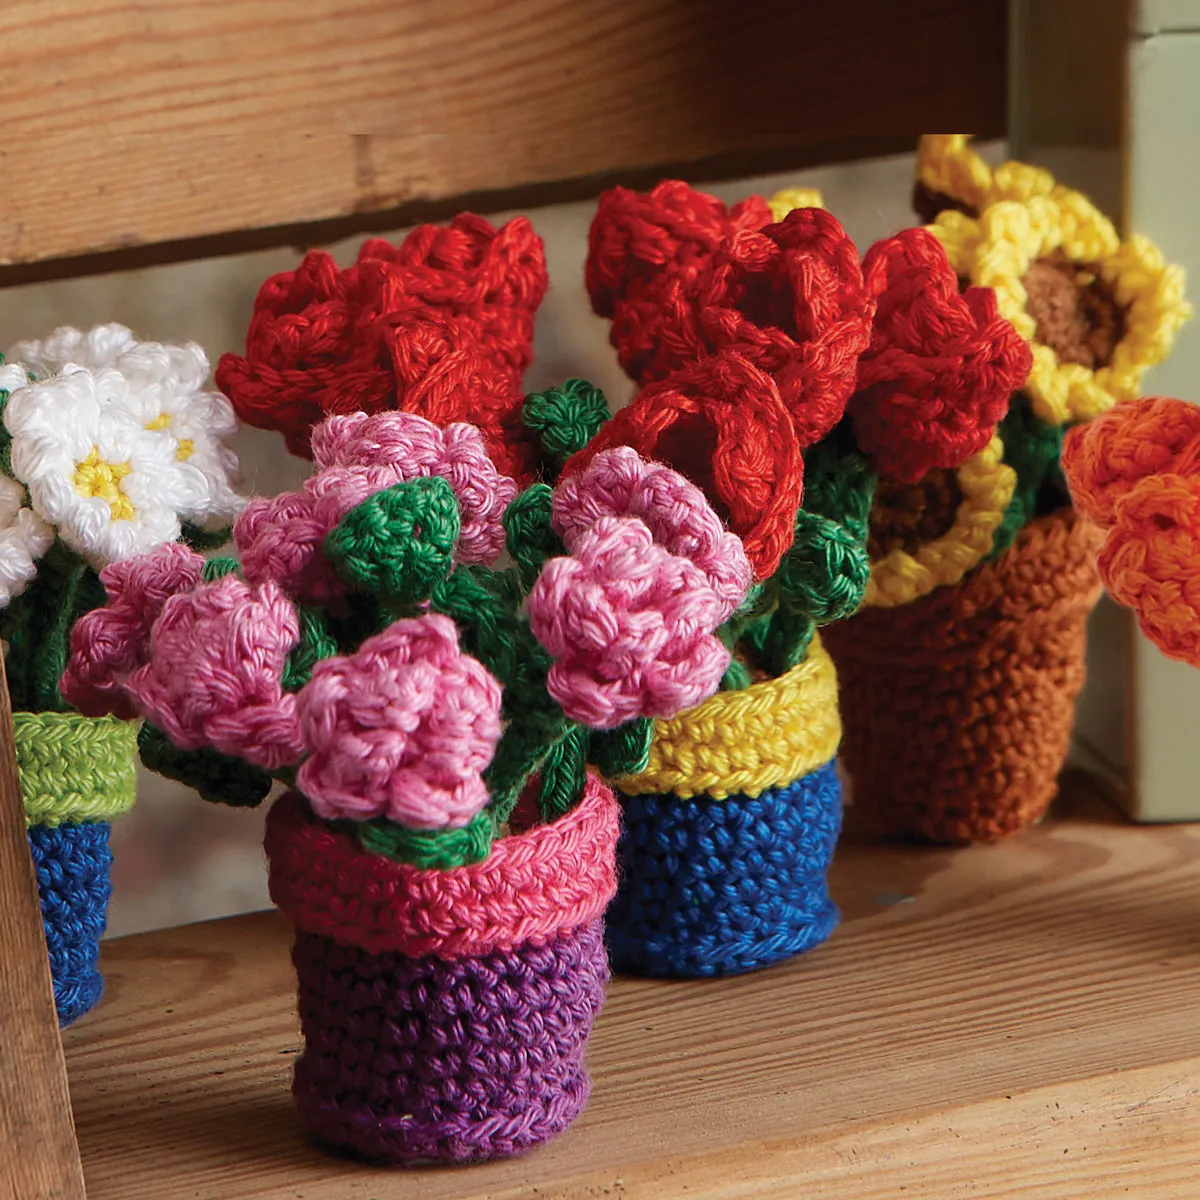
Our next crochet flower bouquet pattern by Anja Toonen makes a perfect present and can be easily made from items you already have in your craft stash.
You don’t need to worry about finding a vase or trying to achieve a beautiful arrangement, as this crochet flower bouquet includes a crochet pot and even a layer of crochet soil!
As the flowers are secured to the pot, it’s a completely self-contained item that is easy to hand over as a gift. It would make a super-sweet Mother’s Day or house-warming gift, or even just a fun way to add a splash of colour to a windowsill or mantlepiece.
There’s also a choice of flowers to choose from, so you can mix them up for a bit of variety or stick to one type to match your colour scheme.
You will need
- Scheepjes Catona (100% cotton, 50g/125m) or any other 4ply cotton yarn. You can use various shades for the pots and flowers, but the essential colours are
1 ball of each:
- Plum
- Fuschia
- Dark brown
- Green
- Pink
- A 2.5mm (US B/1 or C/2) hook
- Paperclips
- Fine-nosed pliers
- Polyester stuffing
Measurements
Your crochet bouquet pots measure 3½cm (1¼in) high. Pots with flowers measure 7-9cm (2¾-3½in) high.
Abbreviations
You can find a full list of all abbreviations we use in our abbreviations and conversions guide. This crochet bouquet pattern is written in UK terminology but you can easily convert it to US terms using the guide.
Notes
Leave the tails of yarn in place as you will need them when attaching the flowers to the Soil and the Pot.
Free potted bouquet of flowers crochet pattern
Flower Pot
Use mid-brown throughout, or change shade for the rim.
Make a crochet magic loop.
Round 1 (RS) 6dc into magic loop, ss to first dc. [6 sts]
Round 2 Ch1 (does not count as st throughout), 2dc in each st around, ss to first dc. [12 sts]
Round 3 Ch1, (dc in next st, 2dc in next st), ss to first dc. [18 sts]
Round 4 Working in front loop only: ch1, dc in each st around, ss to first dc.
Round 5 Working in back loop only: ch1, dc in each st around, ss to first dc.
Round 6 Insert hook into both the first rem loop of Round 5 and first rem loop of Round 4 (on the WS) and dc through both. Cont in each st around, ss to first dc.
Round 7 Ch1, dc in each st to last st, 2dc in last st, ss to first dc. [19 sts]
Round 8 Ch1, 9dc, 2dc in next st, 9dc, ss to first dc. [20 sts]
Round 9 Ch1, 4dc, 2dc in next st, 15dc, ss to first dc. [21 sts]
Round 10 Ch1, 15dc, 2dc in next st, 5dc, ss to first dc. [22 sts]
Round 11 Ch1, dc in each st to last st, 2dc in last st, ss to first dc. [23 sts]
Rim
Round 12 Working in front loop only: ch1, *3dc, 2dc in next st, 4dc, 2dc in next st; rep from *, 3dc, 2dc in next st, dc in last st, ss to first dc. [28 sts]
Rounds 13-14 Working in back loop only: ch1, dc in each st around, ss to first dc.
Fasten off and weave in ends.
Perfect pots
If you’re just as obsessed with real plants as well as crochet ones, make sure your pots are looking on point with our free indoor plant pot cover patterns.
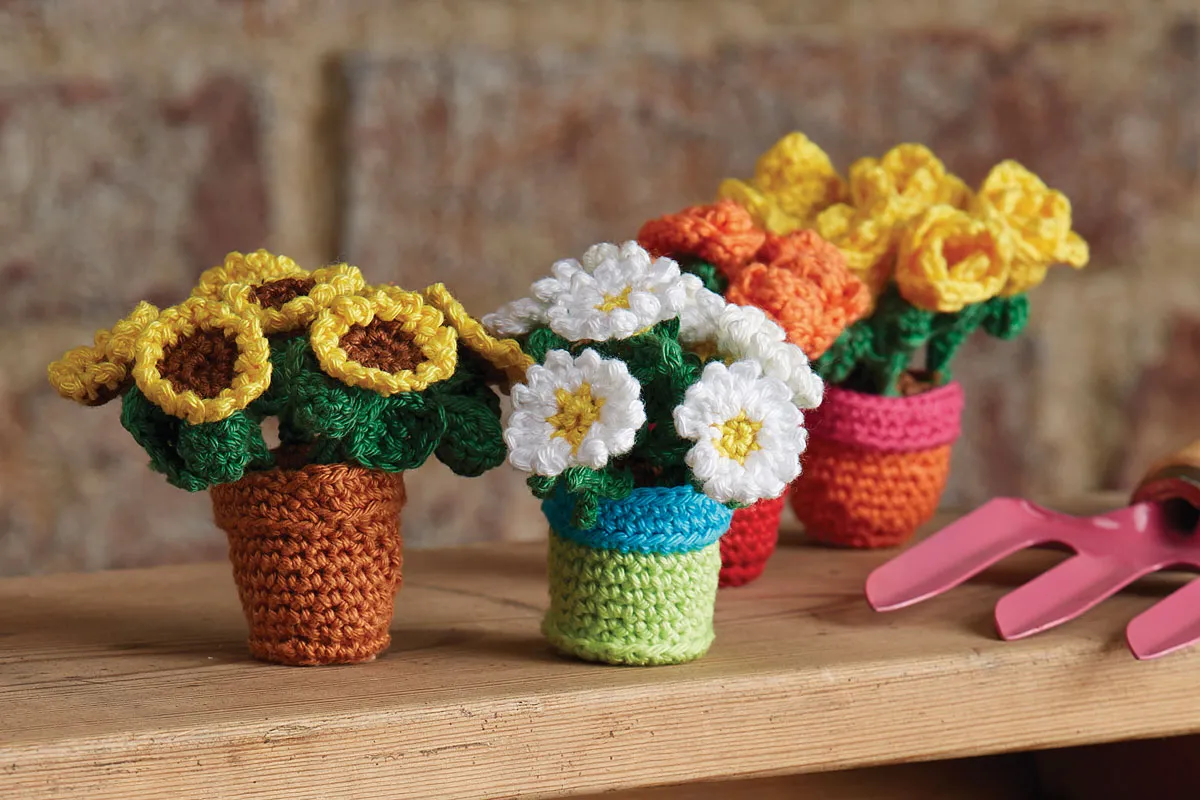
Daisies
Make 7 for each Pot.
Stem and Leaves
Each time you work a section of ch, you will turn and ss back down the ch just worked, beg with second ch from hook.
Using green, ch6.
Round 1 Ss in second ch from hook and next 4 ch, ch4, ss in next 3 ch, ch12, ss in next 7 ch, leaving last 4 ch unworked, *ch5, ss in next 3 ch, leaving last ch unworked, (ch4, ss in next 3 ch) twice, ss in last unworked ch of prev ch-5,** ss in next 2 unworked ch of prev ch-12; rep from * to **, ss in next unworked ch of prev ch-12, change to yellow, ss to last unworked ch of prev ch-12.
Flowers
Round 2 Ch1 (does not count as st), 6dc in same st as last ss, ss to first dc, change to white.
Round 3 (Ss, ch3, ss into second ch from hook and next ch) twice into each dc around. Fasten off. [12 petals]
Roses
Make 7 for each Pot.
First Leaf
The instructions for the Leaves and Stem are worked in a continuous round without fastening off.
With green, ch6.
Tr in third ch from the hook, tr in next ch, dc in next ch, ss in next ch, ch2. Rotate to work on other side of the foundation ch; ss in first st, dc in next st, tr in each of next 2 sts, ss to first ch of beg ch-6.
Stem
Ch12, ss in second ch from hook and next 6 ch, leaving rem 4 ch unworked.
Second Leaf
Ch5, dc into second ch from hook and next 2 ch, ss in next ch, turn.
Ch1 (counts as dc), skip ss, tr in next st, dc in next st, ss in next st, ch2. Rotate to work on the other side of the foundation ch; ss in first st, dc in next st, tr in next st, dc in next st, ss in base of leaf and in each rem unworked ch of stem until last ch before first leaf, change to pink, ss in last ch, do not fasten off.
Flower
Round 1 Ch1 (does not count as st), 5dc in same st as last ss, ss to first dc.
Round 2 (Ch1, ss, 2dc, ss) in the front loop of each st around.
Round 3 (Ch1, ss, 3dc, ss) in the rem back loop of each st around. Fasten off.
Tulips
Make 7 for each Pot.
Stem
The instructions for the Leaves and Stem are worked in a continuous round without fastening off.
With green, ch14.
Ss in second ch from hook and in next 5 ch.
First Leaf
*Ch8, ss in second ch from hook, dc in next ch, tr in each of next 5 ch, ss in same st as last ss of stem.**
Stem
Ch1, ss into next 3 unworked ch of Stem.
Second Leaf
Repeat from * to **.
Stem
Ch1, ss into next 3 unworked ch of Stem, change to red, ss in last ch of Stem, do not fasten off.
Flower
Round 1 Ch1 (does not count as st throughout), 6dc in same st as last ss, ss to first dc.
Round 2 Ch1, 2dc in each st around, ss to first dc. [12 sts]
Round 3 Ch1, (2dc in next st, 3dc) 3 times, ss to first dc. [15 sts]
Round 4 Ch1, (dc2tog, 3dc) 3 times, ss to first dc. [12 sts]
Round 5 Working in back loop only; *ch2, tr3tog over st at base of ch and next 2 sts [petal made], ch1, ss down side of petal towards prev round, ss in next st; rep from * twice more.
Round 6 Bring yarn to front of work, ss in first 2 rem front loops of prev round. Rep Round 5, working in the rem front loops to create 3 more petals and using the 2 sts at beg of round to complete last petal. Fasten off.
Sunflowers
Make 7 for each Pot.
First Leaf
The instructions for the Leaves and Stem are worked in a continuous round without fastening off.
With green, ch8.
Dc into second ch from hook, tr in next ch, dtr in next ch, tr in next ch, dc in each of next 2 ch, ss in next ch, ch2, rotate to work on the other side of the foundation ch; ss in first st, dc in each of next 2 sts, tr in next st, dtr in next st, tr in next st, ss in next st.
Stem
Ch12, ss in 2nd ch from hook and next 5 ch.
Second Leaf
Ch6, dc into second ch, and in each of next 4 ch, turn.
Ch1, skip first dc, dc into next st, tr in next st, dc in next st, ss in next st, ch2 and rotate to work on the other side of the foundation ch; ss in next st, dc in next st, tr in next st, ss in next st.
Stem
Ss in base of leaf and in next 4 unworked ch of Stem, change to dark brown, ss in next unworked ch, do not fasten off.
Flower
Round 1 Ch1, 6dc in same st as last ss, ss to first dc.
Round 2 Ch1, 2dc in each st around, ss to first dc, change to yellow. [12 sts]
Round 3 Working in front loop only; (ss, ch3) in each st around, ss to base of first ch-3. Fasten off.

Cute corsage
Looking to add a bit of crochet style to a special outfit? Then try our beautiful free crochet corsage pattern.
Soil
Make 1 for each Pot.
Using dark brown, make a magic loop.
Round 1 Ch1, 6dc into loop, ss to first dc.
[6 sts]
Round 2 Ch1, 2dc in each st around, ss to first dc. [12 sts]
Round 3 Ch1, (2dc in next st, 2dc) 4 times, ss to first dc. [16 sts]
Round 4 Ch1, (2dc in next st, 2dc) 5 times, 2dc in next st, ss to first dc. [22 dc]
Fasten off.
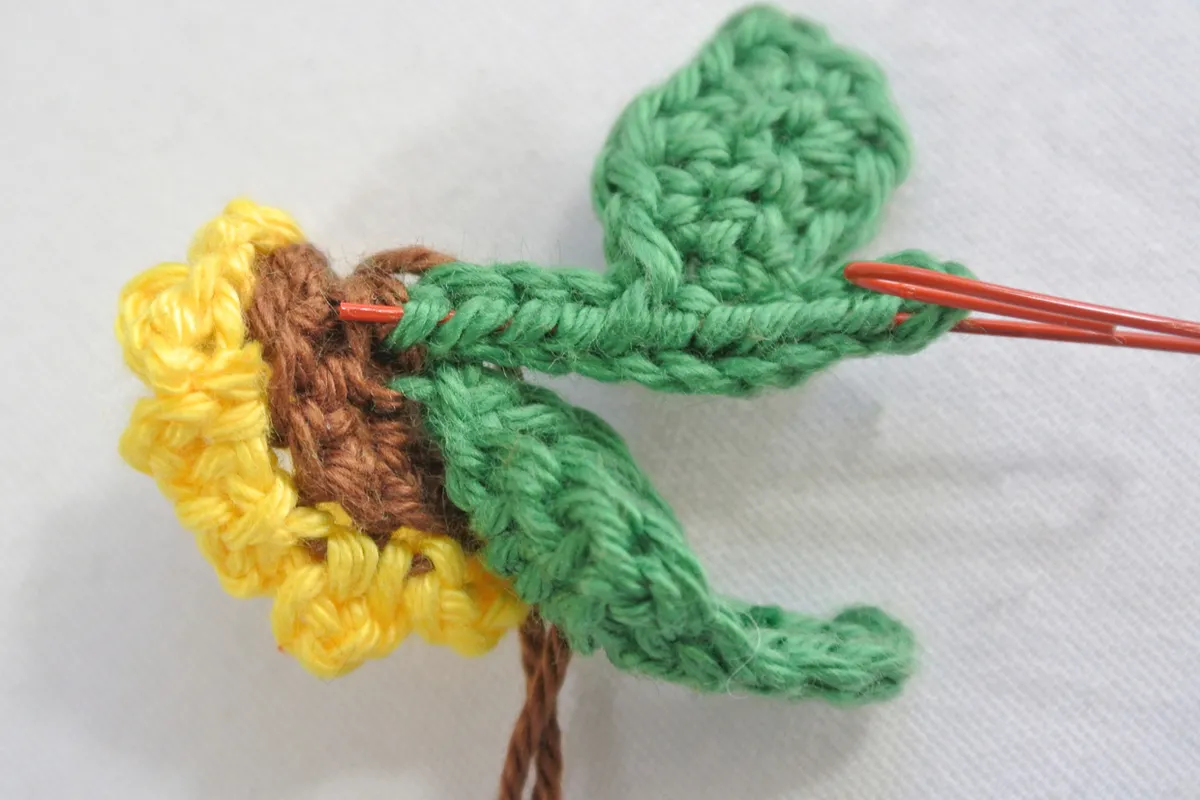
To make up
Bend one side of each paper clip straight and slip this side through the sts of a flower stem up to the bottom of the crochet flower. Paper clip should be hidden inside the sts.
Bend the end that is at the base of the flower head into a small loop with pliers, and sew through this loop into the flower to secure.
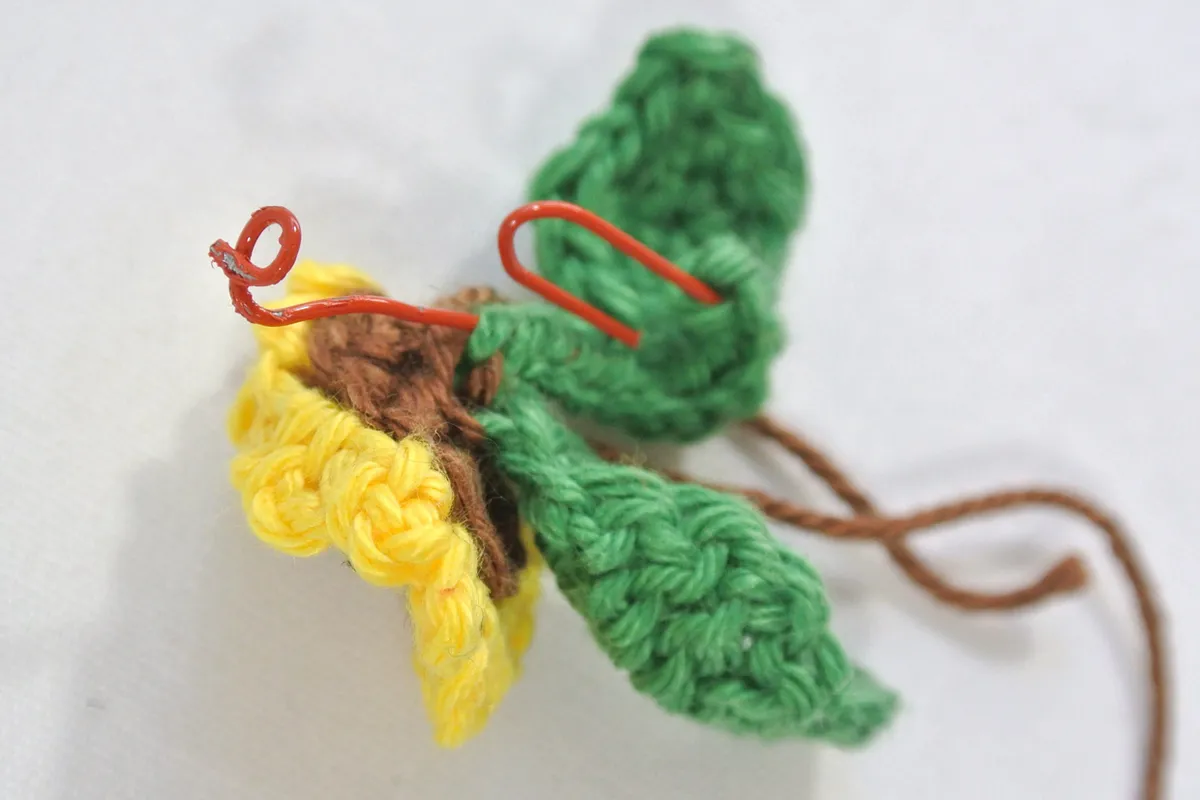
Bend the other end of the paper clip straight and insert into the soil. Pass the yarn of the flower stem down through the soil at the same point. Make a small loop on the other end of the paper clip and sew the clip to the soil through this loop on the underside.

Place stuffing inside Pot and sew Soil to inside of Pot rim.
Celebrate a special occasion with a crochet flower bouquet
There’s never a bad time to hook up a crochet bouquet of flowers. Whether you’re celebrating an important event, or just want to cheer up a friend, a crochet flower bouquet shows that you have put thought and time into your gift, and best of all, it’ll last forever!
Keep on crafting even more beautiful blooms
You don’t have to be a botanist to appreciate the huge array of flowers on this planet. In fact, you’ll be amazed at how many different varieties you can hook – take a look at our pick of the best crochet flower patterns and get inspired with Gathered.