When it comes to amigurumi, there are lots of little tricks that professional designers use to make their crochet look picture perfect, and one of the easiest techniques is the crochet invisible decrease. If you already know how to decrease in crochet stitches with the standard dc2tog crochet stitch, then you're already halfway there - the invisible decrease crochet stitch is just an ever so slightly different way of doing this that produces a neater result!
But what's wrong with doing a dc2tog... well, absolutely nothing really, it's still the fundamental decrease stitch, and you would still want to use it on any projects where you'd turn the work. The main reason for using an invisible decrease crochet stitch is that a standard dc2tog decrease is effectively stretching two stitches into becoming one, which can leave a slight hole where it's trying to bridge the gap to the next stitch. The beauty of the invisible decrease crochet stitch is that it's... well, almost invisible! It works by crocheting in the front loops only, which have a bit more flexibility than if you go under both loops - this means those front loops can rise up a bit and almost mimic the strands that you would see in a normal dc stitch. The difference is subtle and not immediately obvious, but once you get a few rounds in you'll start to notice the difference. If you're new to crocheting in the front loops of your crochet, you can find out more in our guide on how to crochet in the front and back loops.
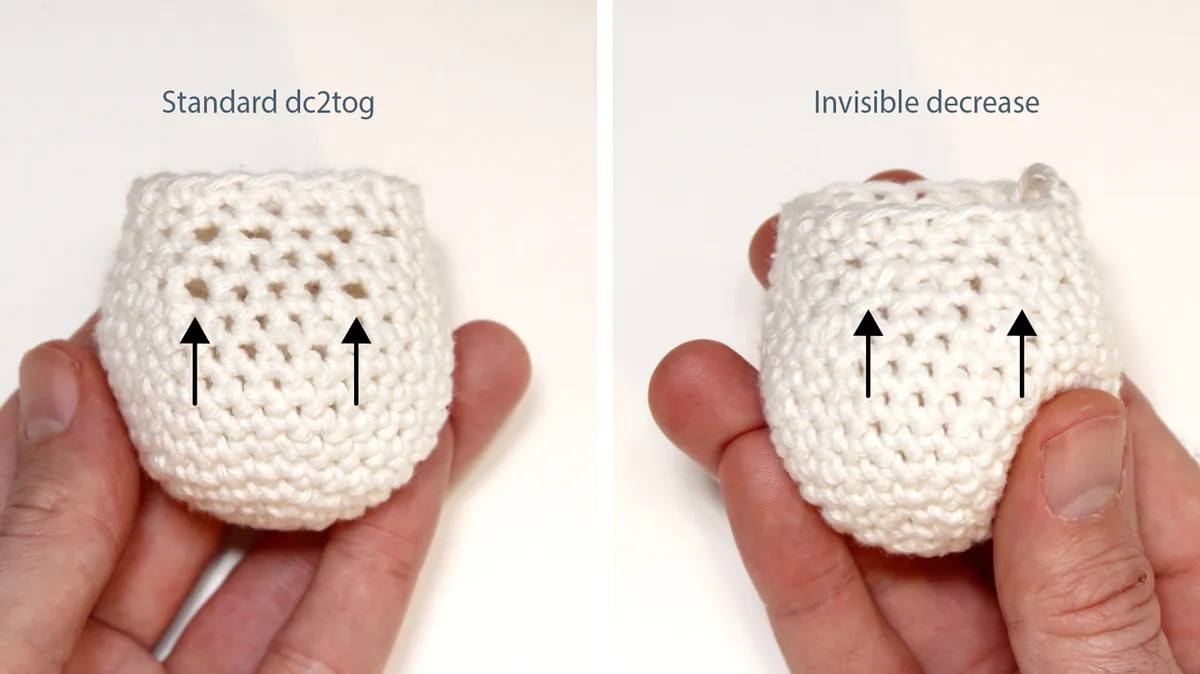
The picture below shows the difference between the standard dc2tog decrease and an invisible decrease crochet stitch. We've marked the first round of decreases so that you can easily see the differences, and if you look closely you can see that theres another row of unmarked decreases - notice how you can probably spot them on the standard dc2tog crochet stitch, but they're pretty much hidden with the invisible decrease crochet stitches!