How to make a cross stitch snowman tree decoration
We show you how to make a 3D snowman hanging for your Christmas tree using the exclusive kit with your issue 340 (Special 2023) of The World of Cross Stitching magazine.

Published:
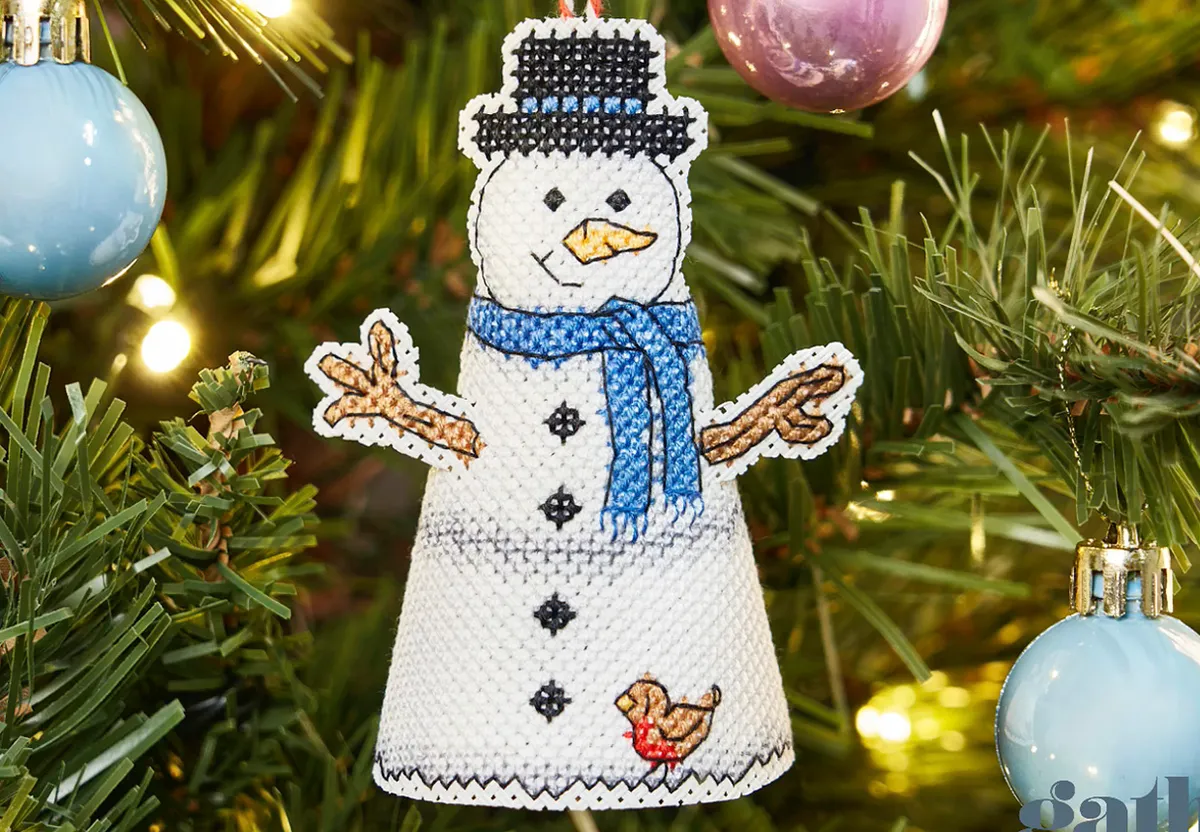
Who doesn’t love adding handmade decorations to their Christmas tree? The World of Cross Stitching magazine issue 340 (Special 2023) includes this exclusive fun 3D ornament kit to make a cheeky-looking snowman, designed by Heather Nugent.
We’ll show you how to turn your stitching into a handmade 3D Christmas decoration. You’ll need the chart and all the materials from your kit listed below, plus a size 24 tapestry needle and scissors. Or you can follow along using your own materials.
This pattern is perfect for beginners, but if you are new to cross stitching we have lots of helpful guides available – find out how to cross stitch or learn more about cross stitch needle sizes.
Watch our video tutorial or scroll down to follow the step-by-step instructions.
Snowman decoration cross stitch video tutorial
Snowman cross stitch fact box
- Stitching time – 9 hours
- Types of stitches – Cross stitch, backstitch
- Easy of stitching – Beginner
What you’ll need for the snowman cross stitch decoration:
- 14-count white plastic aida – 13x13cm
- Stranded cotton
- Size 24 tapestry needle
- Baker’s twine – 20cm
- Scissors
- Colour chart and key (from issue 340 of The World of Cross Stitching magazine)
Cross stitch snowman pattern
Get your snowman kit containing the plastic aida, twine and threads plus the chart and key with issue 340 (Special 2023) of The World of Cross Stitching magazine. Order back issues whilst stocks last, or you can find the chart and key inside the digital edition available to download at any time on The World of Cross Stitching app.

You Will Need
- 14-count white plastic aida (13x13cm)
- Stranded cotton
- Size 24 tapestry needle
- Baker’s twine (20cm)
- Scissors
Total time:
Step 1
Use a ruler to find the centre of the plastic aida and start stitching the centre of the design from there.

Step 2
Once you’ve finished stitching, use sharp scissors to cut a border around the edge of the stitched design, following the cutting line on the chart as a guide. Be careful not to snip into any holes containing stitches.

Step 3
Use a craft knife to carefully cut around the snowman’s arms, following the cutting line on the chart as a guide.

Step 4
Bend the plastic aida to line up the straight edges. The arms should remain poking out straight at the sides. Starting at the bottom of the snowman’s body, use whipstitch in white thread to join the edges together. Continue working up the entire edge. You could change the thread colour as you go to match adjacent stitches.

Step 5
Create a loop with your baker’s twine and tie the ends together in a double knot. Attach to the back of the snowman’s hat with a few stitches in black thread to secure in place.

Step 6
Now your 3D snowman decoration is ready to hang on your Christmas tree!

Get the set of 3D cross stitch decorations
If you loved making this snow cross stitch decoration, you’ll enjoy collecting and stitching the whole set of 3D baubles for your Christmas tree – find a friendly Santa (issue 288, Christmas 2019), angelic angel (issue 301, Christmas 2020), cheeky elf (issue 314, Special 2021) and Rudolph the reindeer (issue 325, Nov 2022) of The World of Cross Stitching.
Don’t worry if you missed out on any of these, you can still find the patterns in their digital editions available to download via their app.
Try our festive angel Christmas tree decoration
We also have an exclusive download version of the angel chart from issue 301 just for you. You can use perforated paper or plastic canvas in place of the plastic aida that came with the kits if preferred.

Â