
Master the Danish Knot and stitch our embroidered Easter bunny!
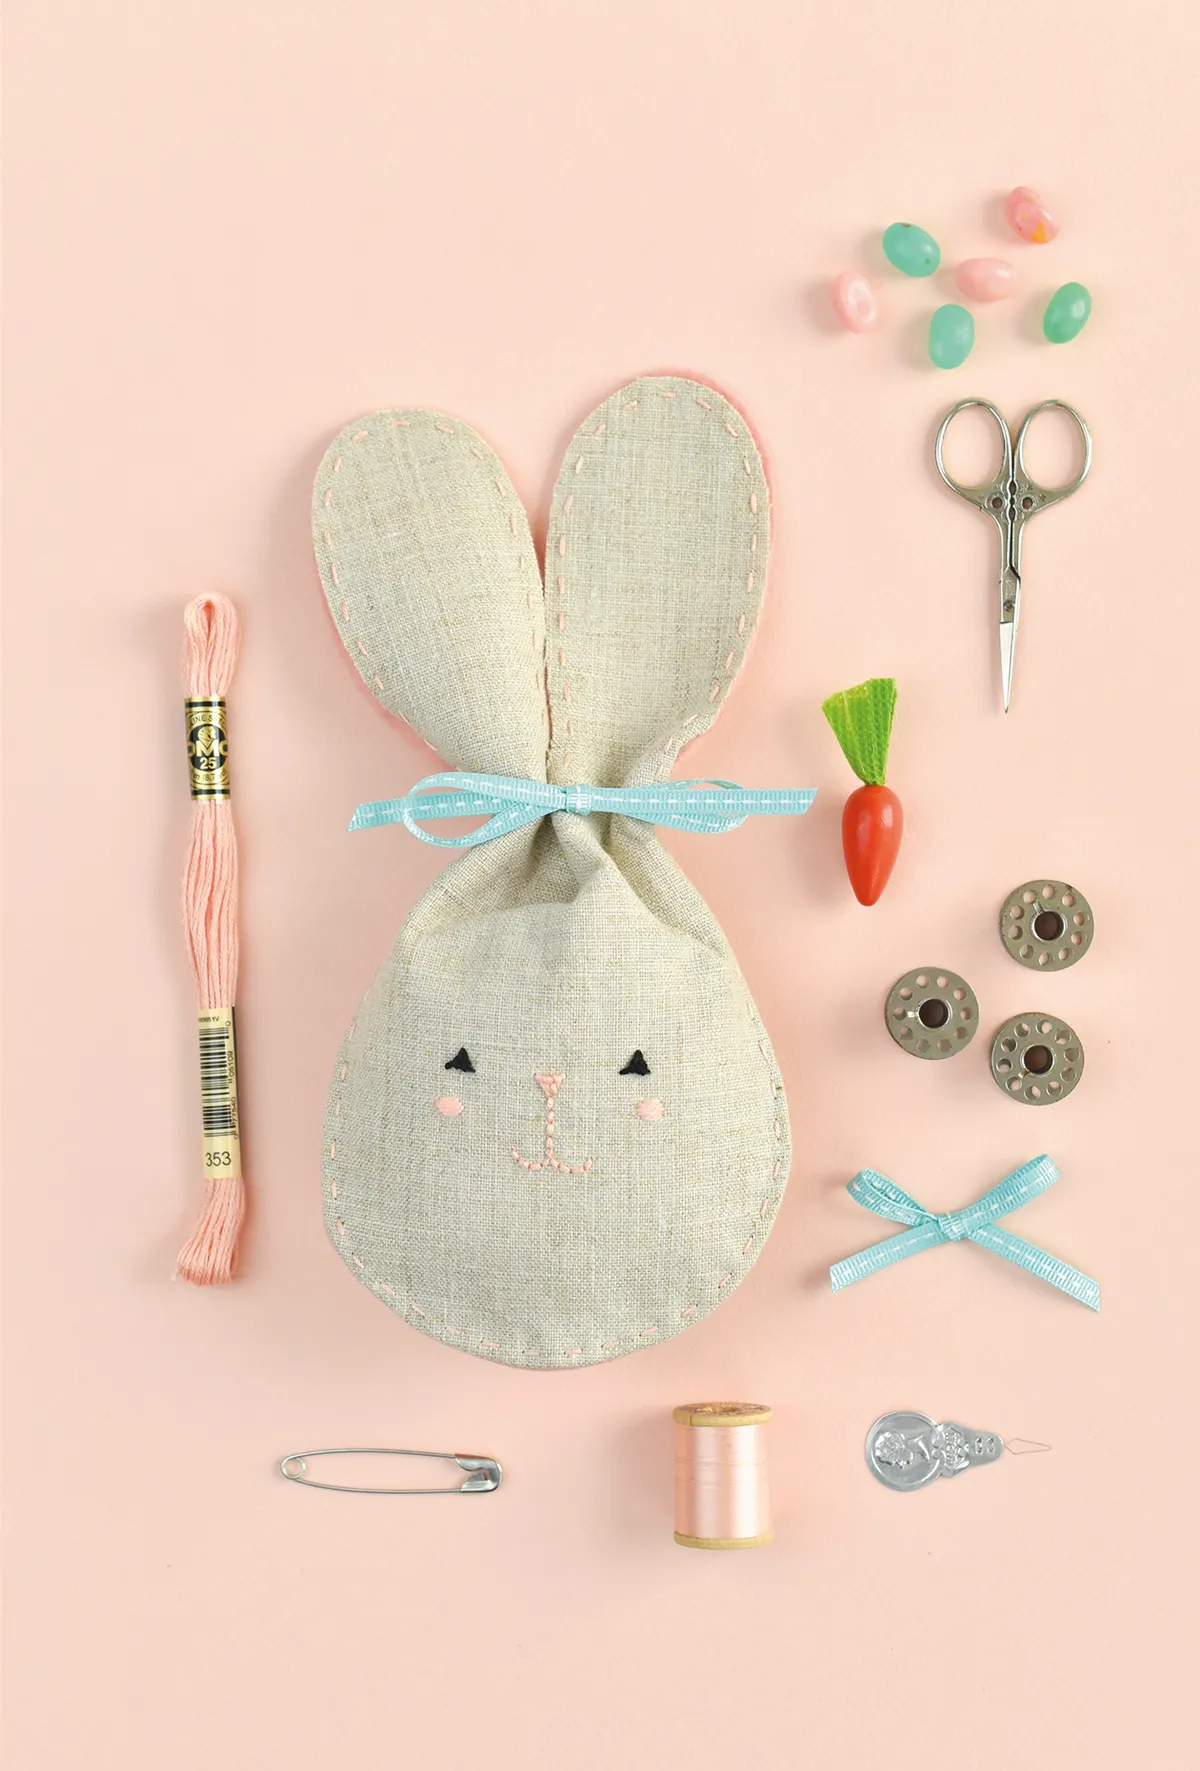
Mollie Johanson’s embroidered Easter bunny pouch is the perfect way to gift chocolate treats this Easter. The top of the embroidered Easter bunny pouch is left open, so you can secure the treats inside by tying a ribbon bow around the embroidered easter bunny's ears. How cute!
Not only is this project great for stitching this Easter but it will also teach you a new skill. Through stitching your embroidered Easter bunny face, you'll learn how to make Danish embroidery knots.
This versatile stitch is perfect for creating the sweet bunny nose and can be used in plenty of other embroidery patterns to add texture.
Keep scrolling to learn how to work the Danish embroidery knot and how to make your adorable bunny pouch.
How to make your embroidered Easter bunny pouch: materials and notes
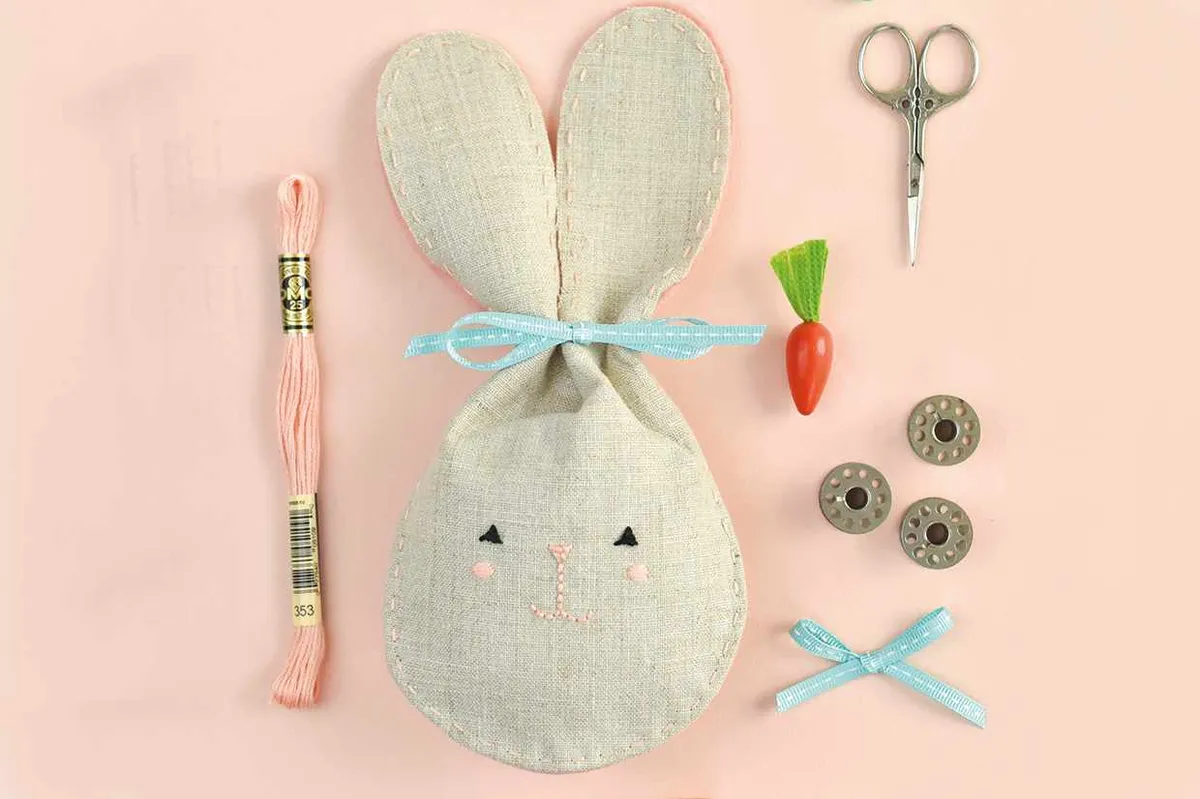
You will need
- Linen fabric: 25x15cm (10x6in), bag front
- Felt: 25x30cm (10x12in), bag front lining and back
- Bondaweb: 25x15cm (10x6in)
- Narrow ribbon: 50cm (20in)
- Stranded cotton: black and pink
- Matching thread
- Basic sewing kit
Notes
- Use a 5mm (¼in) seam allowance.
- Download our embroidered easter bunny pattern

Looking for more spring embroidery patterns?
You’ll also enjoy our bee embroidery and flower embroidery designs.
How to work a Danish embroidery knot
Step 1
Make a straight stitch and then bring the needle up a short distance below.
Step 2
Slide the needle under the straight stitch, keeping the working thread to the right of the needle.
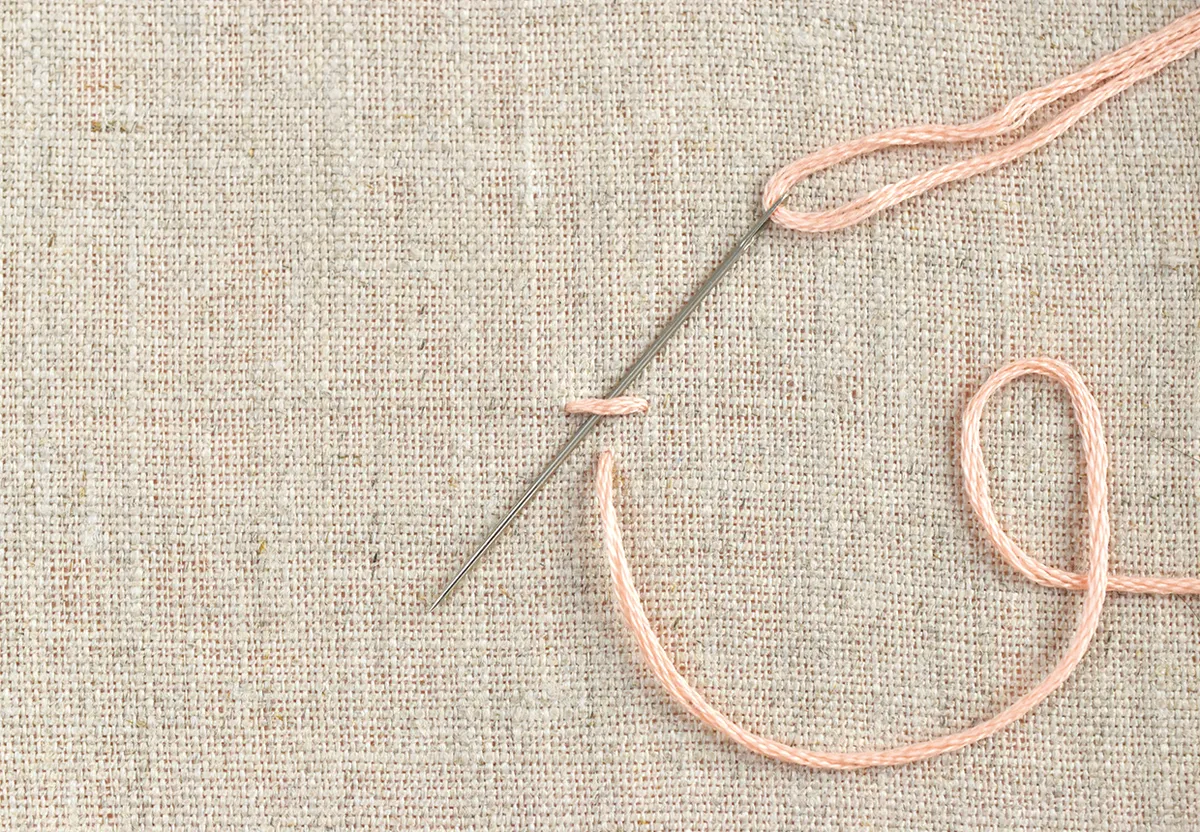
Step 3
Pull the thread taut, but not tight.
Step 4
Slide the needle under the straight stitch again, keeping the working thread under the needle. Pull the thread taut again.
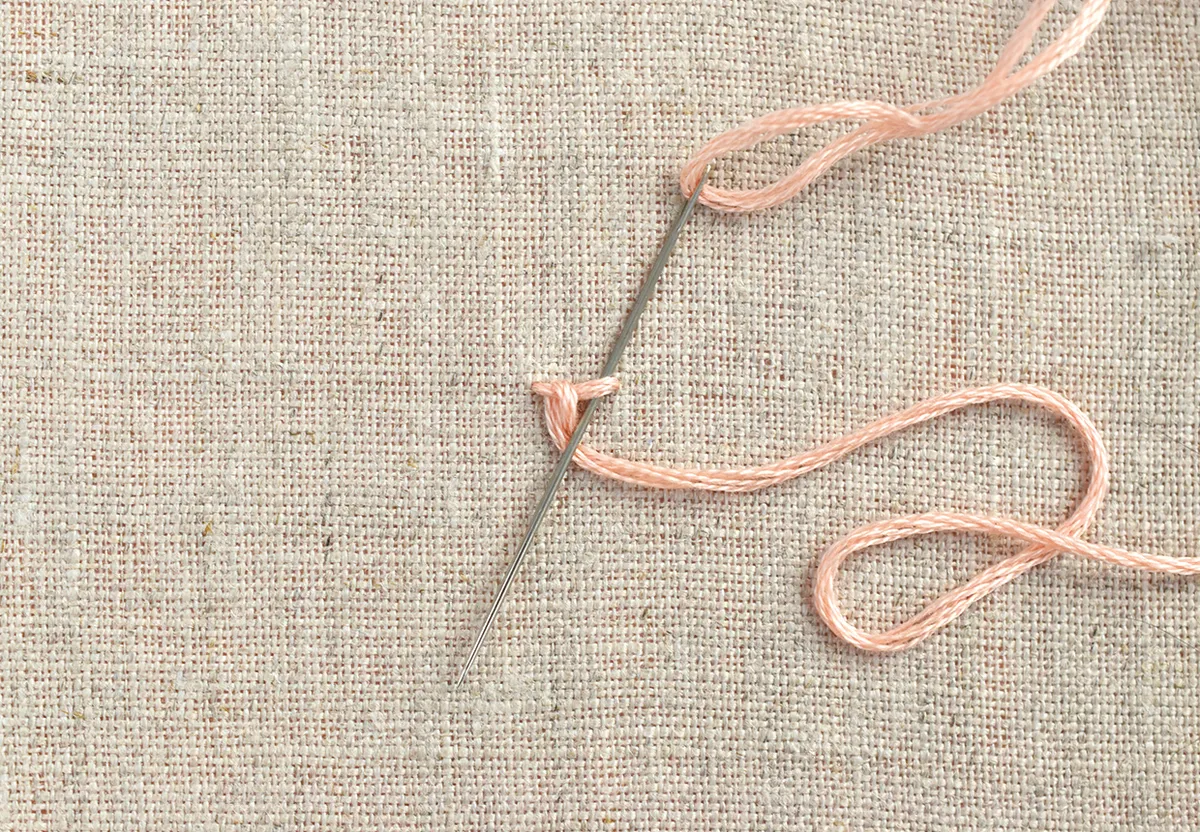
Step 5
Tack down the knot by going down through the fabric at the bottom of the triangular knot.

Step 6
If necessary, shape the knot slightly with your finger.
How to make your embroidered easter bunny pouch
Cutting out
Step 1
Download and print out the embroidered easter bunny pattern and cut it out.
Step 2
Cut the felt in half to make two pieces each measuring 25x15cm (10x6in).
Step 3
Press the Bondaweb paper side up onto the wrong side (WS) of the linen fabric.
Step 4
Peel off the paper backing then place the linen right sides (RS) up onto one piece of felt and press into place.
Step 5
Place the template on the centre of the RS of the linen, draw around it and cut it out.
Step 6
Place the template on the centre of the other half of the felt, draw around it and cut out.

Stitch your way through spring
We also have cute Easter cross stitch designs in our chicken cross stitch patterns and our Easter bunny cross stitch patterns if cross stitch is your thing.
Embroidering the face using Danish knots
Step 1
Place the cut out linen/felt shape on top of the template and trace over the facial features. Tape the template and fabric onto a window to trace if necessary.
Step 2
Stitch the features using six strands of stranded cotton.
Step 3
Work the eyes as Danish knots in black and the nose as a pink Danish knot.
Step 4
Stitch the mouth in pink backstitch and the cheeks in pink satin stitch.
Assembling your embroidered easter bunny pouch
Step 1
Pin the linen/felt front and felt back bunny shapes RS together.
Step 2
On the felt back, mark the lines from the template where the ears and head meet.

Step 3
Sew around the bottom of the head, starting and stopping at the marked lines, and backstitching at either end to secure.
Finishing off your embroidered easter bunny pouch
Step 1
Turn the bunny bag RS out then press carefully so the curved seam lies on the edge.
Step 2
Stitch around the shape by hand in running stitch using pink stranded cotton. Stitch through both layers of the head and only through the top layer of the ears.
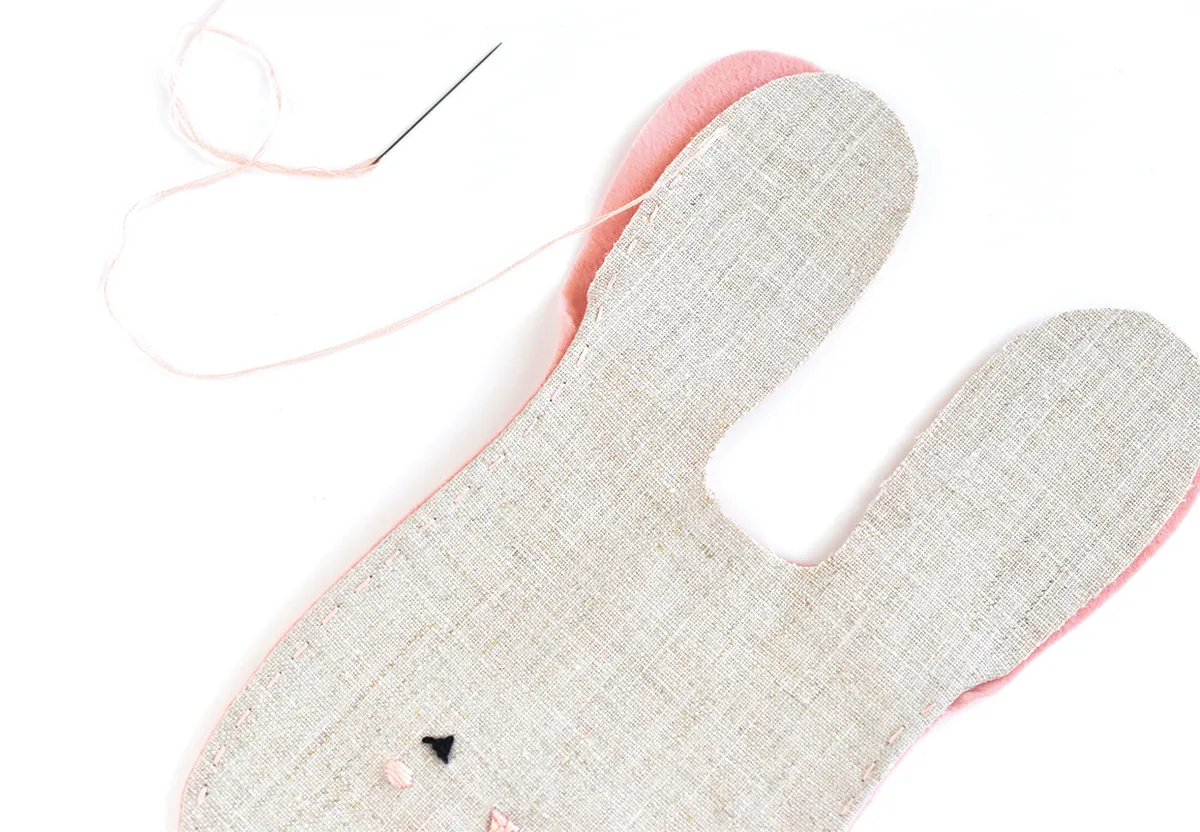
Step 3
After you have filled the bag, tie ribbon around it in a bow below the ears to hold it closed.
Use your new skills to sew your embroidered Easter bunny pouch
The Danish embroidery Knot is a brilliant stitch and can be used in a multitude of embroidery projects but we love using it in an embroidered Easter bunny pouch. Stitch a bunch of pouches, fill them with mini eggs and gift them to your friends, family or colleagues.
Discover more Easter embroidery patterns with Gathered
We have more great designs for you right here on Gathered. If you are in the mood for more Easter embroidery, try our bunny embroidery pattern and our chicken embroidery design.


