Create your own bookmark: hummingbird embroidery

Celebrate the glorious hummingbird with this beautiful bookmark pattern designed by Heather Nugent.

Try 6 issues of Love Embroidery magazine for just £9.99| SAVE 77%

Published: February 21, 2023 at 8:00 am

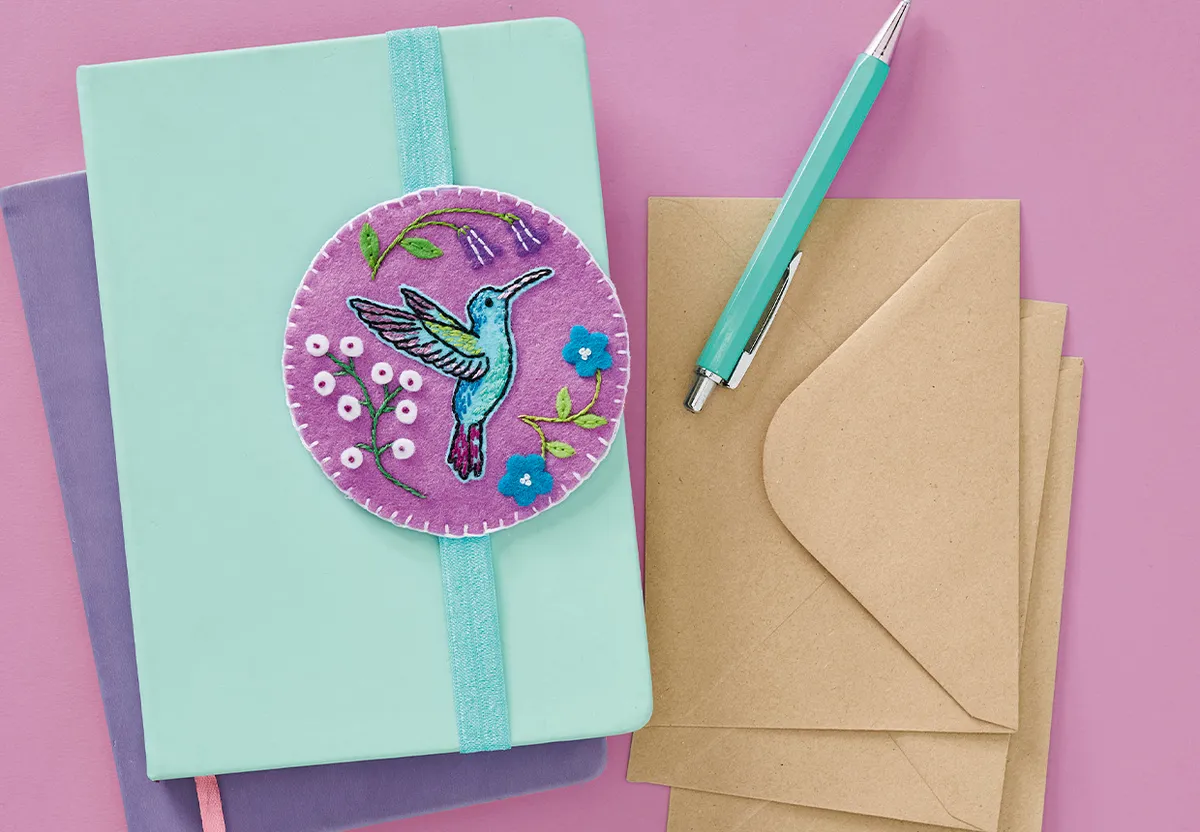
Make this beautiful hummingbird embroidery bookmark for yourself or a friend using simple stitches worked on felt. It’s a beginner-friendly project and the perfect opportunity to have a go at working with felt. It only requires four stitches, for which you can find guides below if you need a hand.

This project is a great way to use up scraps if you already work with felt or have some lying around the house. You can also be creative with it, you don't have to stick with our colour scheme. Choose your own favourites!

Below we’ll walk you through step-by-step how to create this lovely hummingbird bookmark, and you’ll find all the advice and top tips from our embroidery experts!

Why embroidery on felt?

Felt is a great material to embroider onto because it doesn’t fray and can therefore easily be transformed into items such as bookmarks, brooches, or decorations.

Felt is a great material to embroider onto because it doesn’t fray and can therefore easily be transformed into items such as bookmarks, brooches, or decorations.

100% wool felt or blended wool felt is most commonly used for embroidery as it’s naturally softer and easier to stitch through, but you can use other types of felt just try to make sure it’s nice and soft. Find out more about the best fabric for embroidery.

The hummingbird embroidery design was created by Heather Nugent and was originally published in Love Embroidery issue 12. Get your digital edition and discover the rest of the issue.

Make your own hummingbird bookmark

What stitches will I need?

Looking for more tips and tricks to upgrade your stitching? Check out our embroidery stitch library.

Free hummingbird template

Download the free hummingbird embroidery template

How to make the hummingbird embroidery hoop step-by-step

You will need:

  • Felt (15x15cm, light blue; 30x15cm, light purple)
  • Felt scraps (dark purple, teal, white, lime green and green)
  • Stranded cotton (1 skein each of black, blue, sky blue, green, lime green, dark green, light pink, purple, light purple, magenta and turquoise)
  • Bondaweb
  • Fabric glue
  • Elastic (1.5cm width, light blue)
  • Embroidery hoop (10cm diameter)
  • Basic embroidery kit

Step 1

Transfer the hummingbird design onto the felt

Transfer the hummingbird motif onto your light blue felt using your preferred method. We used black carbon paper to transfer the design and traced over the outline using a heat-erasable pen to make the lines clearer.

Then, mount in your hoop.

hummingbird embroidery step 1

Step 2

Backstitch the outline of the hummingbird

Outline the hummingbird in Backstitch using two strands of black.

Add Straight Stitch to the hummingbird

Add scattered Straight Stitches to the bird using two strands of light purple, purple, magenta, lime green, turquoise, sky blue, blue and light pink.

Use French knots to add the eyes to the hummingbird

Add a French Knot in three strands of black to make the eye.

hummingbird embroidery step 2

Step 3

Create the flowers and cut out

Trace the flower and leaf outlines onto the backing paper of the Bondaweb, then iron onto the back of the felt and cut out. Carefully cut out the hummingbird motif with a border of around 1mm.

hummingbird embroidery step 3

Step 4

Attach all the pieces into position

Transfer the stem lines onto your light purple felt and then iron all of the felt pieces into position. Use fabric glue to attach the hummingbird to the centre.

Step 5

Stitch the flower details

Add Stem Stitch using two strands of lime green, green and dark green for the flower stems.

Using two strands, add three white French Knots to the centre of the teal flowers, and a single magenta French Knot to the centre of the buds.

Backstitch lines in white to the dark purple bells and Backstitch down the centre of each leaf in grass green and lime green.

hummingbird embroidery step 4

Step 6

Measure out your elastic

Now, wrap your length of elastic around the front cover of the book, with the tension stretched but not tight, and pin it together. Cut the elastic so that it has a 3cm overlap and then stitch the ends together.

hummingbird embroidery step 5

Step 7

Finishing your bookmark

Cut out your design along the template outline and a matching piece of felt for the back. Still, on the book, sandwich your elastic between the felt and pin. Remove from the book and then work blanket stitch around the edge using four strands of white.

hummingbird embroidery step 6

Adding an extra dimension to your stitching

Using felt to stitch will allow you to create more sturdy items like bookmarks and accessories. Felt also does not fray, which makes it easier to manage.

More embroidery on felt projects to get stuck into

If you enjoy stitching on felt we have plenty more free patterns for you to try. Take a look at this beautiful plant pot embroidery.

plant embroidery