All products were chosen independently by our editorial team. This review contains affiliate links and we may receive a commission for purchases made. Please read our affiliates FAQ page to find out more.

Cheer up your stationery with our smiley sloth embroidery

Embellish a plain pencil case with an easy-to-stitch sloth motif that’s almost too cute for school.

Try 6 issues of Love Embroidery magazine for just £9.99| SAVE 77%

Published: December 19, 2022 at 10:00 am

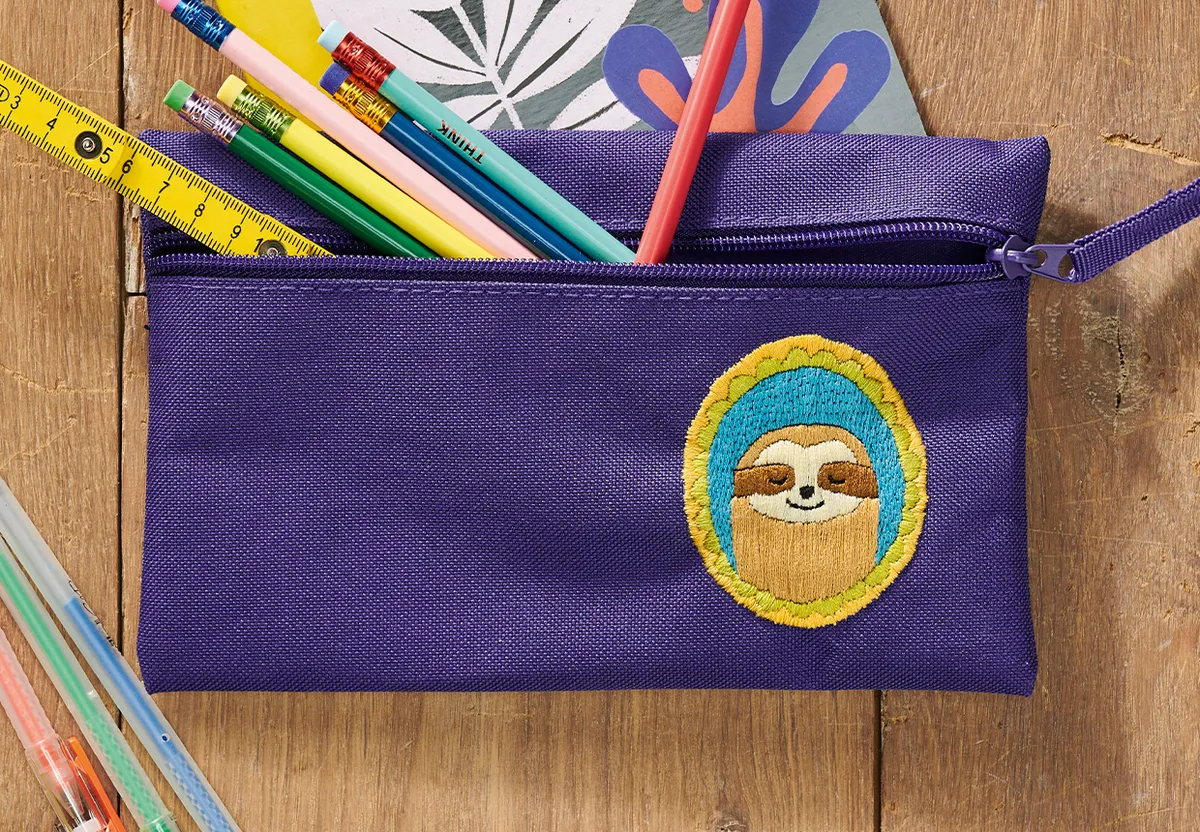
Our sweet sloth embroidery will brighten up any plain pencil case and it’s easy to stitch too! All you’ll need is a pre-made pencil case in a plain colour (we chose purple) and your embroidery kit.

Our sloth pencil case design is a great way to get the kids excited for their return to school. It’ll give them somewhere to store all their favourite pens and pencils, plus they can show it off to their friends. We just need to think of a name for him… Simon the sloth?

For this embroidery project, we’ve only used four stitches which are listed below should you need any extra guidance. The majority of the sloth is worked in satin stitch which will give your finished design a lovely smooth sheen.

The great thing about this cute design is that you can stitch it anywhere you like. Embellish it onto bags, t-shirts, jumpers and even socks! He’ll liven up any garment or accessory, and make you fall in love with it all over again.

This sloth pencil case was designed by Clare Albans and was originally published in Love Embroidery issue 17.

Stitching your adorable sloth pencil case

What stitches will I need to complete the sloth pencil case?

Note: Use three strands of thread throughout the design

Looking for more tips and tricks to upgrade your stitching? Check out our embroidery stitch library.

What materials do I need to create the sloth embroidery?

How to make an embroidered sloth step-by-step

You will need:

  • Fabric pencil case (with a minimum stitchable area of 9x8cm, purple)
  • Stranded cotton (1 skein each of black, brown, light brown, cream, teal, yellow and green-yellow)
  • Adhesive soluble stabiliser
  • Basic embroidery kit

Step 1

Transferring your sloth design to your pencil case

Transfer the design from the template onto your adhesive soluble stabiliser.

Trim the excess from around the edge, leaving a border of approximately 1cm – this will help to make sure the full design area is securely stuck to the pencil case. Peel off the backing paper and attach it to the pencil case in your desired position.

Alternatively, if your pencil case is difficult to stitch through, you can stitch the design onto fabric or felt first and then appliqué it onto the pencil case.

sloth embroidery step 1

Step 2

Start stitching the face using padded satin stitch

Start by stitching the eyes and mouth with small backstitches using black. Keep your stitches nice and short to help create smooth curves in the facial features.

Add the nose with vertical satin stitch, also using black.

Next, work the areas around the eyes using padded satin stitch in brown. We laid a foundation of small seed stitch before adding satin stitch over the top, but you can use your preferred padding stitch.

sloth embroidery step 2

Step 3

Use vertical satin stitch to fill in the sloth’s face

Stitch the rest of the face area using cream, carefully stitching vertical satin stitch around the facial features. To work the body, use the same vertical satin stitch technique but in light brown instead.

sloth embroidery step 3

Step 4

Fill in the background using brick stitch

Next, stitch the background of the portrait using brick stitch in teal. Use vertical stitches for this, as it’s easier to work them around the sloth in this direction.

sloth embroidery step 4

Step 5

Fill in the frame using satin stitch

Lastly, work the frame of the design using satin stitch. Work the curved green-yellow areas by placing a single stitch in the centre of each curve, then working outwards to complete the shape.

When the green-yellow area is complete, repeat with the yellow around the edge to finish the frame.

sloth embroidery step 5

Step 6

Washing off your soluble stabiliser

Fill a bowl with lukewarm water and carefully wash off the soluble stabiliser following the packet instructions. Leave the pencil case to dry fully before filling it with your favourite stationery!

sloth embroidery step 6

Brighten up your accessories with sweet motifs

Simply adding a small sloth motif to a plain piece of clothing or accessory can bring it to life! We’re all about upcycling here at Gathered and giving a new lease of life to an old item certainly helps the planet.

Treat yourself and spruce up your tote bags

Now the kids are sorted, it’s time to jazz up your old tote bags with this sweet bunny embroidery pattern. The bunny is made up of delicate stitches and surrounded by swirling florals, once you’re finished it’ll certainly turn heads!