Free patchwork chevron table runner quilt pattern
Learn how to make a quilted table runner with Laura Jane Taylor's geometric twist on traditional tableware.

Published:
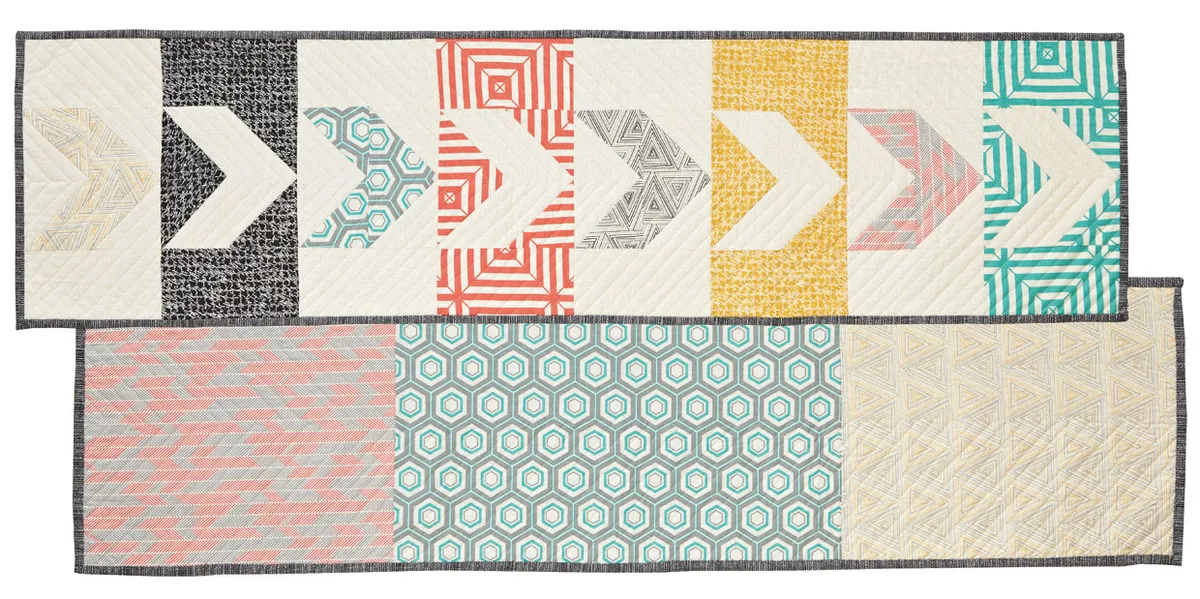
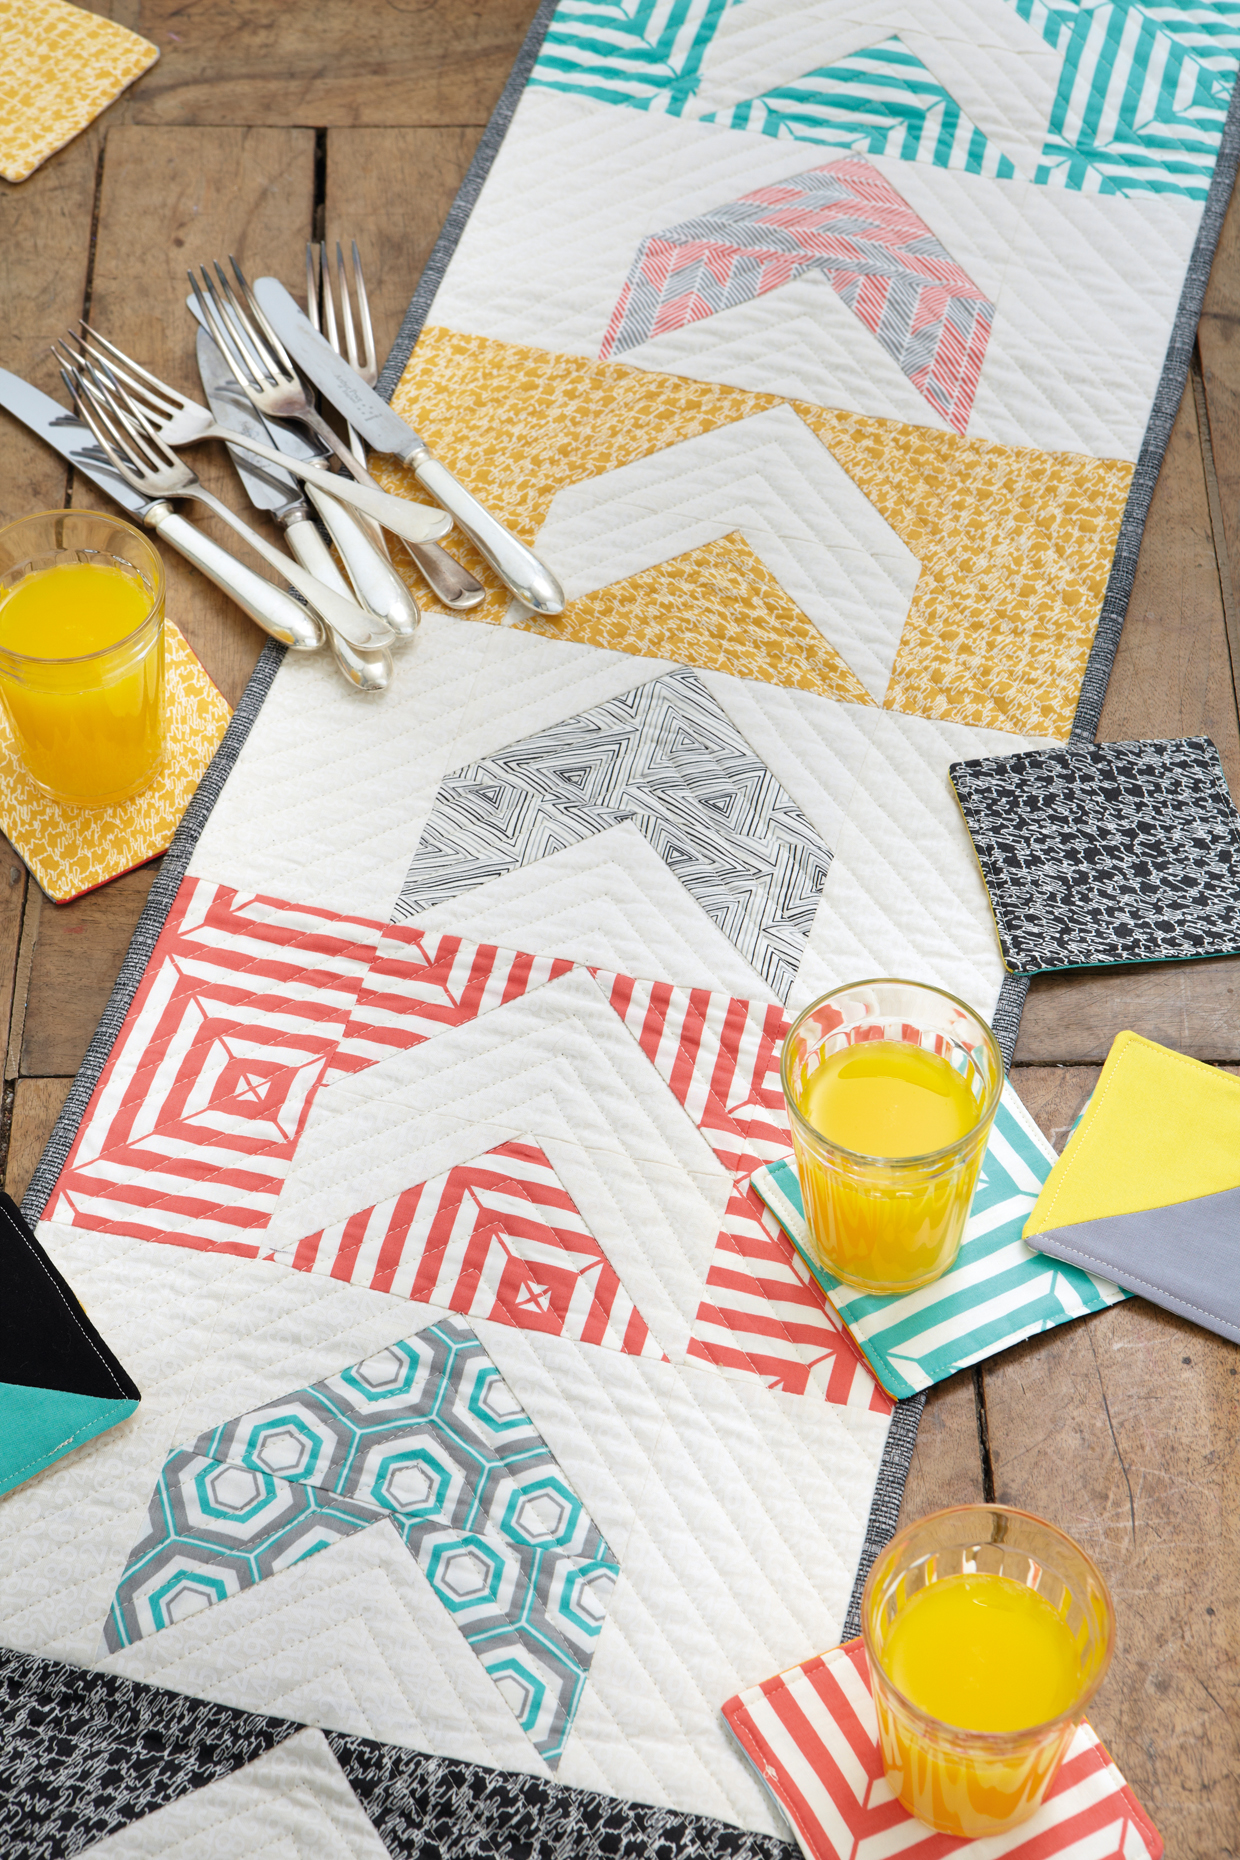
We love a good geometric print, and with this modern chevrons patchwork pattern by Laura Jane Taylor you can make your own table runner with your favourite stylish fabrics. We made this table runner quilting pattern using Minimalista by Art Gallery Fabrics but you can use any fat quarters from your stash. We’ll talk you through every step to how to whip up your very own table runner below. This project was first featured in Love Patchwork & Quilting magazine.
In need of a new sewing machine? Scroll through our best sewing machines for beginners round-up, or browse our favourite sewing machines for quilting. Or if you’re new to quilting, we’ve also got a handy guide to quilting for beginners.
Table runner quilt pattern: step by step tutorial
You will need
- White fabric for background 1yd
- Eight fat quarters, four light and four dark
- Wadding 16in x 52in
- Binding fabric ¼d
- Sewing machine
- Basic sewing supplies
Finished size
12in x 48in
Notes
- Use ¼ in seam allowances.
- Press all seams open unless otherwise noted.
- WOF = width of fabric.
Fabrics used
- Minimalista by Art Gallery Fabrics (provided by hantex.co.uk)
Free table runner quilting pattern
You Will Need
- Fabric
- Sewing machine
- Iron
- Wadding
Total time:
Step 1
Cutting out
From the white fabric cut:
sixteen 6½in x 3½in rectangles and sixteen 3½in squares.
Step 2
From the four light prints cut: four 6½ in x 3½ in rectangles and eight 3½ in squares.
Step 3
From the four dark prints cut: twelve 6½ in x 3 ½in rectangles and eight 3½ in squares.
Step 4
From the binding fabric cut three strips 2¼ in x WOF.
Step 5
Making the flying geese blocks
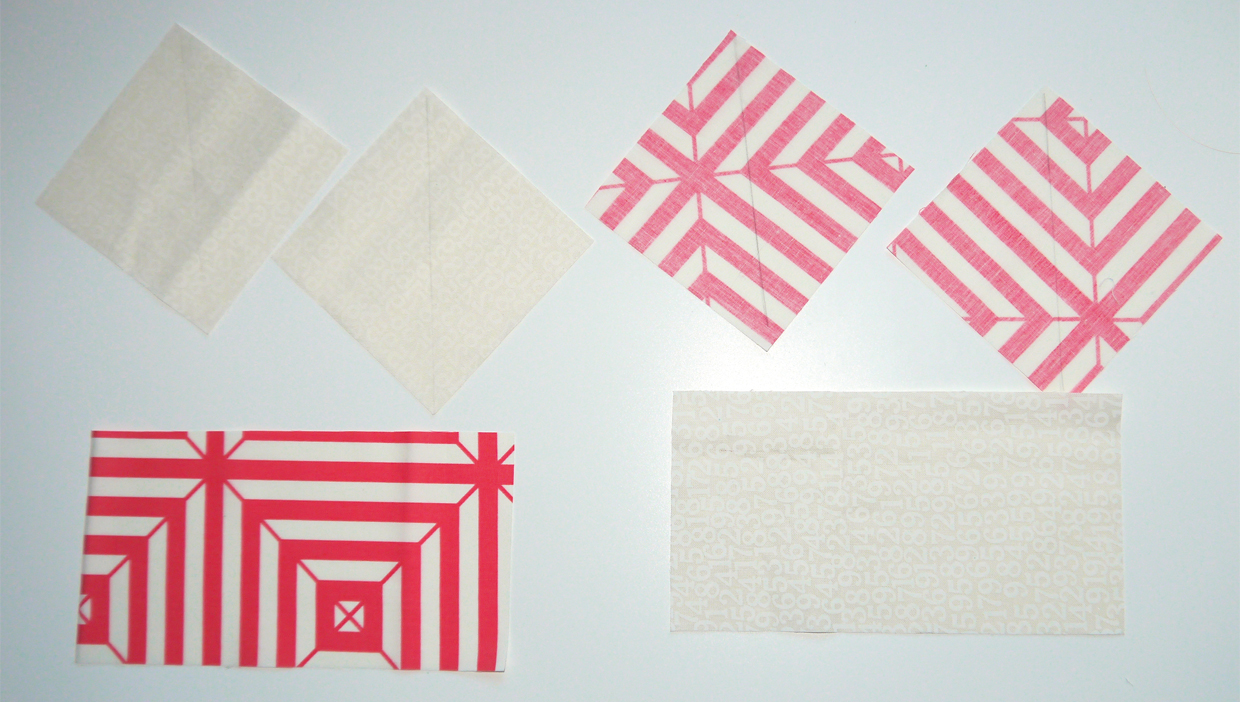
Draw a diagonal line from corner to corner on the wrong side of each white 31⁄2in square. Place a white square right side down on a light print rectangle (right side up), aligning the outer corners. Pin together and sew along the marked line. Flip the square over along the stitched line to create a corner triangle and press. Trim excess fabric at the back. Sew the second white square to the rectangle in the same way in the opposite corner. Once sewn and pressed, this square will overlap the one already sewn in place. Make four Flying Geese units like this.
Step 6
Repeat this process with four white 6½ in x 3½ in rectangles and eight light print 3½ in squares.

Step 7
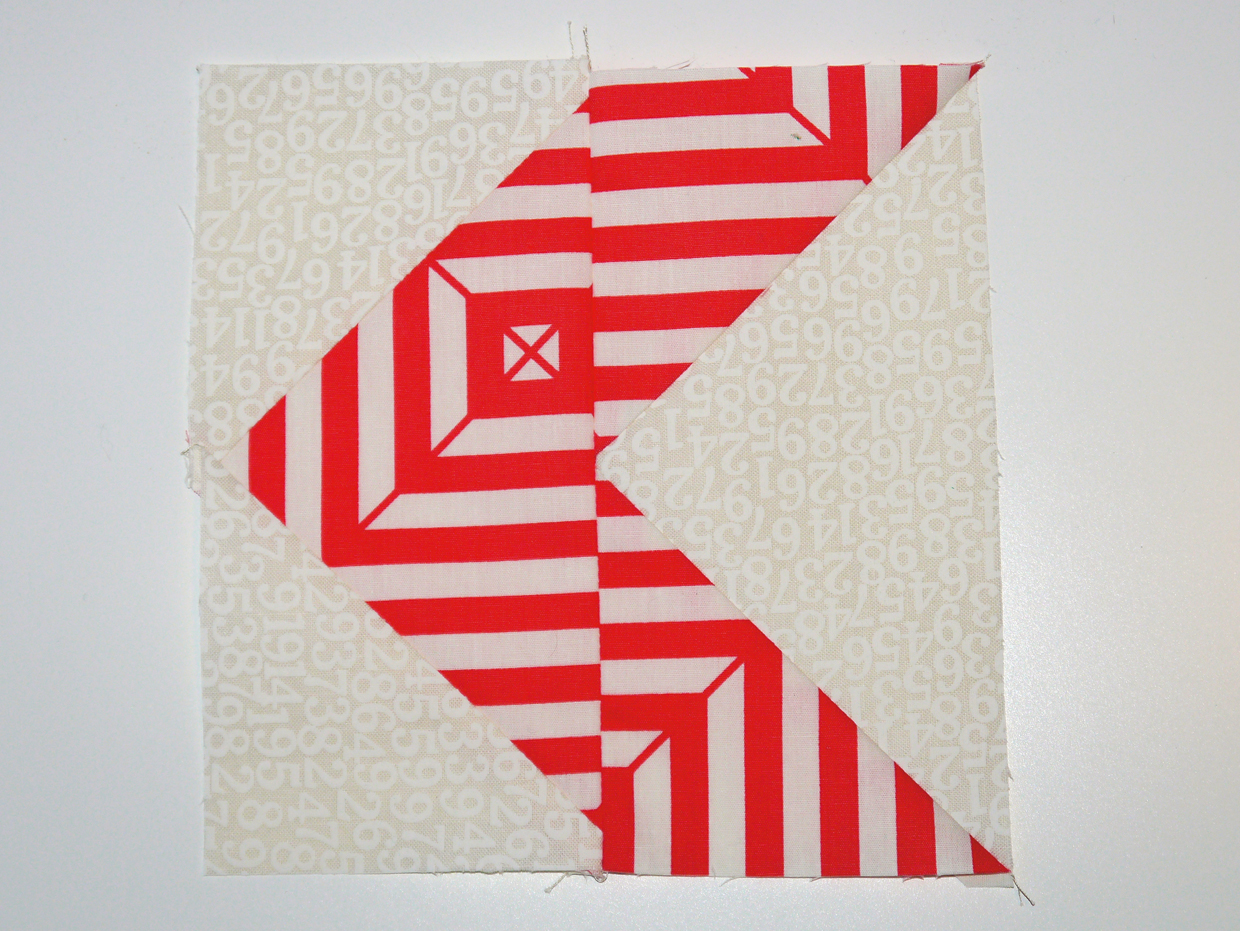
Now sew a white/light print Flying Geese unit to a light print/white Flying Geese unit to make a square block, rotating the units so that a chevron is created with the light print fabric, as shown. Place right sides together and join along the long edge.

Step 8
Repeat steps 5–7 with four more white rectangles and eight dark print squares, and then four dark print rectangles with white squares.
Step 9
Joining the blocks
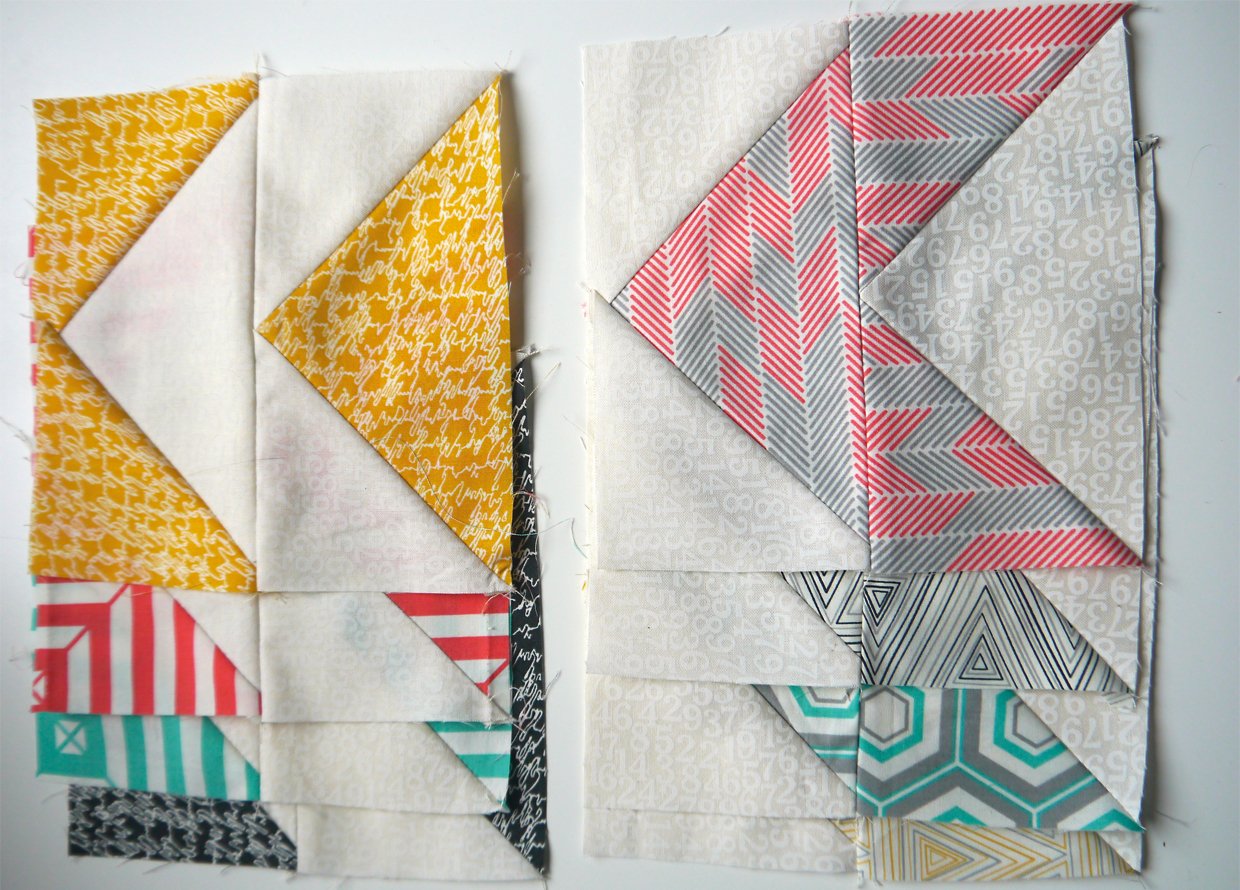
You should now have eight blocks. Separate the blocks into white chevrons and print chevrons, as shown. To the left- and right-hand side of each white chevron, sew a rectangle of the corresponding dark print. To the left- and right-hand side of each coloured chevron, join a white rectangle.

Step 10
Sew the units together into one long column, alternating print chevrons and white chevrons, and then press seams
Step 11
Quilting the runner
To make the backing, piece the remaining fat quarters together into a strip that is long enough for the runner. Alternatively, cut a piece of fabric 16in x 52in. Press the backing and runner top well.
Step 12
Make a quilt sandwich of the backing fabric (right side down), the batting and the runner (right side up). Baste and quilt as desired. This runner was quilted using straight line quilting, echoing the shape of the chevrons.
Step 13
Join the binding strips together at the short ends and press the seams. Press the strip of fabric in half lengthwise. Use this strip to bind the runner using your preferred method.