Cutting Out
Step 1
From the white fabric cut:
- One (1) 4¾in x 30½ in strip.
- One (1) 8¾ in x 30½ in strip.
- Five (5) 2¼ in x WOF strips for binding.
Step 2
From the grey fabric cut:
- Two (2) 8½ in x 2½ in pieces.
- Two (2) 8½ in x 1½ in pieces.
- Twenty one (21) 3in squares.
- Six (6) 2½ in x 3½ in pieces.
- Eighteen (18) 2½ in squares.
- Six (6) 2½ in x 1½ in pieces.
- Six (6) 1½ in x 5in pieces.
Step 3
From the blue fabric cut:
- Six (6) 3in squares.
- Two (2) 2in squares.
- Fourteen (14) 1½ in squares
Step 4
From the tan fabric cut:
- Twelve (12) 2in squares.
- Five (5) 1½ in x 4½ in pieces.
- Three (3) 1½ in squares.
Step 5
From the cream fabric cut:
- Sixteen (16) 3in squares.
- Ten (10) 2in squares.
- Ten (10) 1½ in x 3½ in pieces.
- Twenty (20) 1½ in x 2½ in pieces.
- Twenty (20) 1½ in squares.
Step 6
From the green fabric cut:
- Six (6) 3in squares.
- Two (2) 2in squares.
- Fourteen (14) 1½ in squares.
Step 7
From the hot pink fabric cut:
- One (1) 4½ in square.
- Fourteen (14) 3in squares.
- Two (2) 2½ in x 4½ in pieces.
- Two (2) 2½ in squares.
- Two (2) 2in squares.
- Two (2) 1½ in squares.
- Two (2) 1in x 15½ in pieces.
Step 8
From the pale pink fabric cut:
- Four (4) 2½ in squares.
- Ten (10) 2in squares.
- Six (6) 1½ in x 3½ in pieces.
- Fourteen (14) 1½ in x 2½ in pieces.
- Eighteen (18) 1½ in squares.
Step 9
From the red fabric cut:
- Two (2) 4½ in squares.
- Eleven (11) 3in squares.
- One (1) 2½ in x 4½ in piece.
- One (1) 2½ in square.
- Two (2) 2in squares.
- Eight (8) 1½ in squares.
- Two (2) 1in x 15½ in pieces.
Piecing the HST rows
Step 1
Mark a diagonal line from corner to corner on the reverse of eight cream 3in squares. Place each RST with a red 3in square and sew ¼ in either side of the drawn line. Cut down the line, press seams open and trim each HST unit to 2½ in square.
Step 2
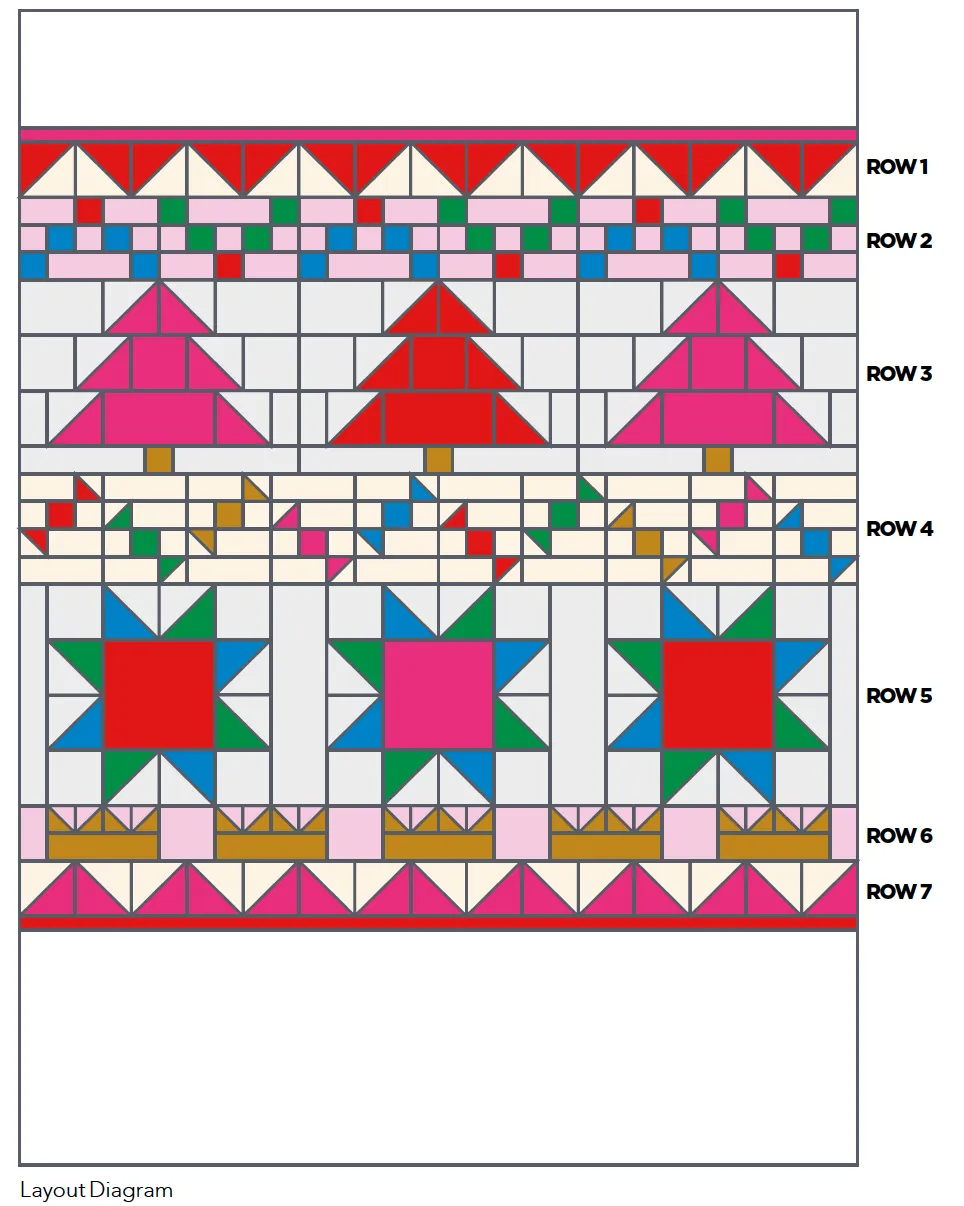
You should have sixteen cream/red HST units – discard one. Sew the HSTs together to form Row 3, referring to the Layout Diagram for placement. Repeat steps 10–11 with hot pink and cream 3in squares to make Row 7.
Piecing the holly row
Step 1

Sew a pale pink 1½ in x 2½ in piece either side of a red 1½ in square. Join three pale pink 1½ in squares and two blue 1½ in squares into a row, alternating the colours. Sew a blue 1½ in square either end of a pale pink 1½ in x 3½ in strip. Press each row and join together as shown to make one blue holly block (Fig 1).
Step 2
Repeat step 12 to make three blue holly blocks and three green holly blocks. Sew the six blocks together in alternate directions, to complete Row 2.
Piecing the tree row
Step 1

Follow step 10 to make twelve grey/hot pink HSTs and six grey/red HSTs, trimming each to 2½ in square.
Step 2

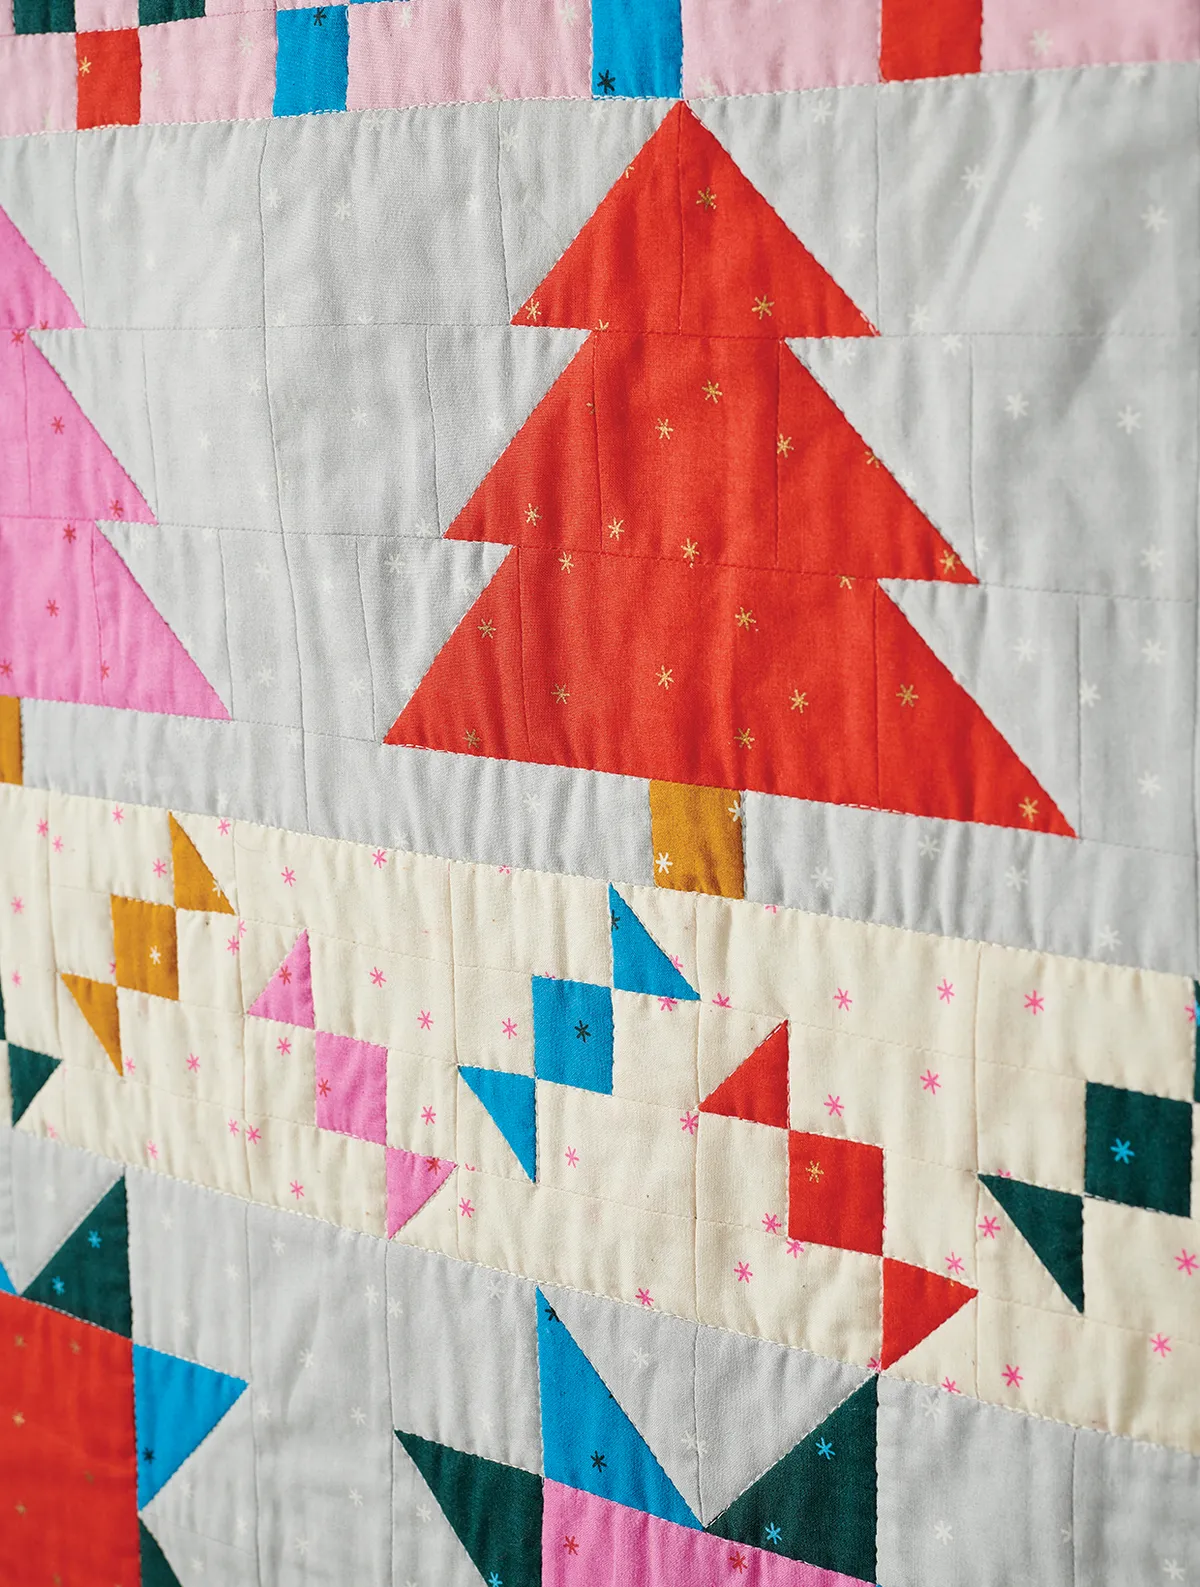
To make the red tree, join two HSTs together to make a red triangle. Join a grey 2½ in x 3½ in piece either side. Sew an HST either side of a red 2½ in square, then join a grey 2½ in square either side. Add an HST either side of a red 2½ in x 4½ in piece, then join a grey 2½ in x 1½ in strip either side. Sew a grey 1½ in x 5in strip either side of a tan 1½ in square. Press each row and join together to make one tree block (Fig 2).
Step 3
Repeat step 15 to make a two more tree blocks, using hot pink pieces instead of red. Sew the three tree blocks together to make Row 3.
Piecing the sweets row
Step 1
Follow step 10 to make HSTs, using 2in squares and trimming the units to 1½ in square, in the following combinations:
- Four red/cream.
- Four green/cream.
- Four tan/cream.
- Four hot pink/cream.
- Four blue/cream.
Step 2

To make a hot pink sweet block 1, sew a cream 1½ in x 2½ in strip to the left of a hot pink/cream HST. Join a cream 1½ in square either side of a hot pink 1½ in square. Sew a cream 1½ in x 2½ in strip to the right of a hot pink/cream HST. Sew the three rows together, joining a cream 1½ in x 3½ in strip to the bottom (Fig 3).
Step 3

To make a hot pink sweet block 2, repeat step 18 with the HSTs on the other side of the cream strips to make a mirror image block. Add the cream 1½ in x 3½ in strip to the top, instead of the bottom (Fig 4).
Step 4
Repeat steps 18–19 to make a block 1 and block 2 from each colour, for a total of ten sweet blocks. Sew the blocks into a row, to complete Row 6.
Piecing the star row
Step 1

Make twelve grey/blue HSTs and twelve grey/green HSTs, as in step 10, trimming to 2½ in square.
Step 2
Sew the HSTs into pairs with one grey/blue and one green/blue each. The grey triangles should join in the centre to make a triangle. Join a grey 2½ in square either side of six HST pairs.
Step 3

Join the remaining HST pairs either side of the two red and one hot pink 4½ in squares. Add a one of the longer HST strips from step 22 to the top and bottom of each unit to make three star blocks (Fig 5). Sew the three blocks together, with a grey 8½ in x 2½ in strip in between each one. Add a grey 8½ in x 1½ in strip either end of the row to complete Row 5.
Piecing the crown row
Step 1
Follow step 10 to make twenty pale pink/tan HSTs, using 2in squares and trimming the units to 1½ in square.
Step 2

Sew the HSTs into pairs, then sew the pairs into rows of four HSTs, referring to Fig 6. Join each row of HSTs to the top of a tan 1½ in x 4½ in strip to make five crown units. Sew the crown units into a row, with a pale pink 2½ in square in between each one. Add a pale pink 2½ in x 1½ in piece either end to complete Row 6.
Assembling the quilt top
Step 1
Sew the rows together, referring to the Layout Diagram for row order. Join the hot pink 1in x 15½ in strips together along the short edges to make one 1½ in x 30½ in strip. Press the seam open and sew to the top of the quilt top, matching the seam with the centre of the quilt. Repeat with the red strips and join to the bottom.
Step 2
Add the white 4¾ in x 30½ in strip to the top of the quilt, and the white 8¾ in x 30½ in strip to the bottom to complete the quilt top. Press the seams towards the pink and red strips.
Quilting and Finishing
Step 1
Press the quilt top and backing well. Make a quilt sandwich by placing the backing fabric right side down, the batting on top, then place the quilt top centrally and right side up. Baste the layers together using your preferred method.
Step 2
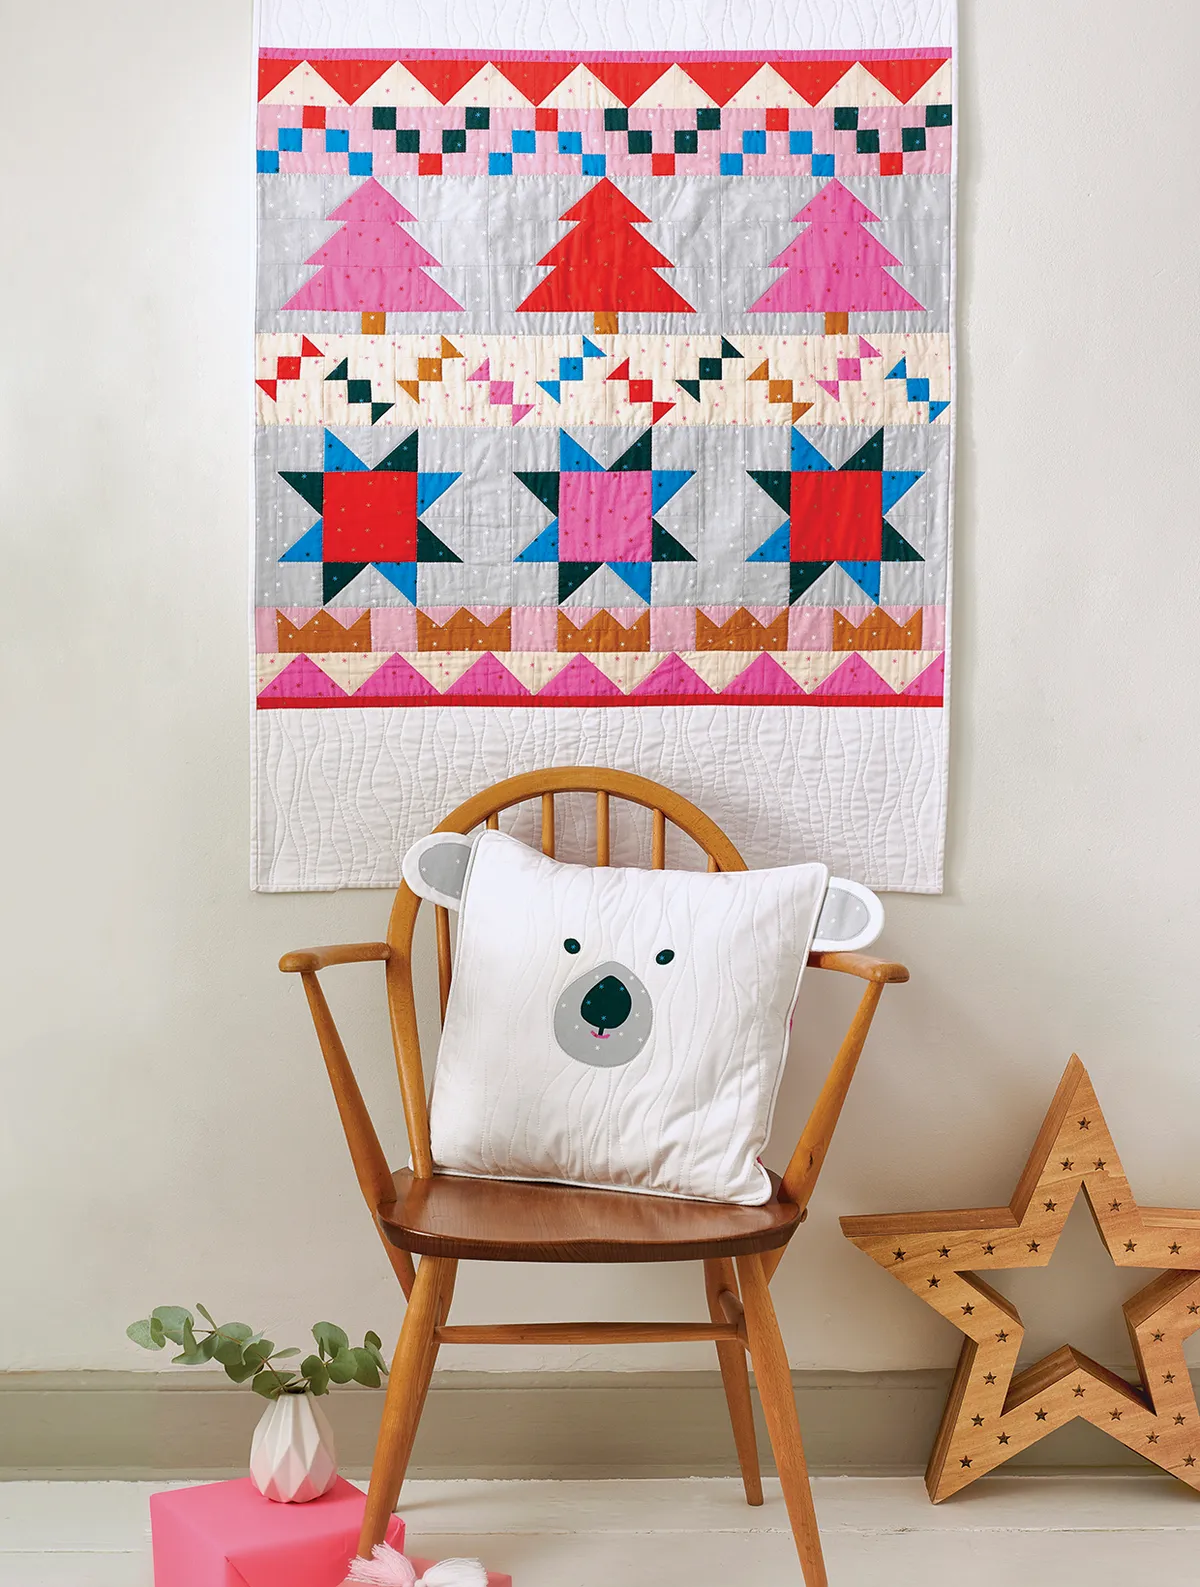
Quilt as desired. Jess quilted around the individual elements and along the rows, with a free-motion wavy design to echo polar bear fur vertically along the white bands. Trim off the excess batting and backing fabric and square up the quilt.
Step 3
Sew the binding strips together end-to-end using diagonal seams. Press the seams open and trim away the dog ears. Fold in half lengthways, wrong sides together, and press.
Step 4
Sew the binding to the right side of the quilt, creating a neat mitre at each corner. Fold the binding over to the back of the quilt and hand stitch in place around the edge to finish.