How to make a four or nine patch quilt block

Get ready to discover these easy quilt block patterns for beginners! Whip up quick and easy groups of fabric squares with our step by step guide to turn into your first quilts and patchwork projects

Published: April 20, 2021 at 2:55 pm

When you're new to patchwork, four-patch and nine-patch quilt blocks are great way to group your patchwork squares neatly for a neat finish. These two easy quilt block patterns will soon become the building blocks of your quilting know-how. They are what they sound like – square quilt blocks formed of several smaller square units of fabric. Once you've mastered how to sew them together, you can quickly whip up a batch of them, then group them together to make larger groups until you've pieced whole quilt tops. Or if you want to start small, try out our simple four-patch pin cushion project at the bottom of this post to practise your skills.

Four patch quilt blocks and nine patch quilt blocks are, well, exactly what they sound like! They're really simple to make – simply cut a batch of fabric squares or strips (see our guide below), then sew them together to make larger squares, or mix and match your fabrics to create a checkered effect.

If you're new to quilt-making, learn the ropes wit our guides to quilting for beginners, how to make half square triangles, and how to make a flying geese quilt,

By the end of this tutorial you will be confident sewing these essential building blocks of so many future quilt projects. This tutorial has 3 sections, to teach you two methods plus a practise project.

1. Four patch quilt blocks: starter method

In the first section of this guide below, we'll show you how to start to build up quilt blocks from 4 smaller fabric squares so that the seams from your different rows will come together at different points. Lining up these seams neatly is the secret to neater patchwork. Seams intersect in patchwork in many styles, and it’s worth taking a bit of time to line them up, especially where blocks are joined together to make up a quilt top. They can become quite bulky, especially with thick fabrics, but – don’t worry – we’re here to help you sew them all up with a nice, flat finish you’ll be pleased with.

An intersecting seam is simply a joining seam – where one seam meets another. For the best results, follow our guide to ensure a neat effect. It’s not the end of the world if your seams don’t meet neatly, but the finished effect is much more satisfying if they do! Making a Four Patch block is the perfect way to practise neat seam sewing.

In this post, first we'll talk you through how to sew a simple four patch quilt block from four smaller square of fabric.

2. Four and nine patch quilt blocks: strip piecing method

Then in the second part of this tutorial, we'll move on to how to quickly piece four or nine patch blocks using strip piecing. Strip piecing is a great way to speed up making these easy quilt block patterns – with this method, you'll sew two or more strips of fabric together, then sub-cut them into ready-to-go rows of squares. You can then sew these groups (or "units") together to create larger quilt blocks. Using strip piecing not only saves time, but also gives you more uniform results, since the units come from the same piece of fabric. Once you get the hang of strip piecing, you can use it to create more complicated designs like Rail Fence or Windmill blocks too.

3. Four patch quilt blocks: try it out

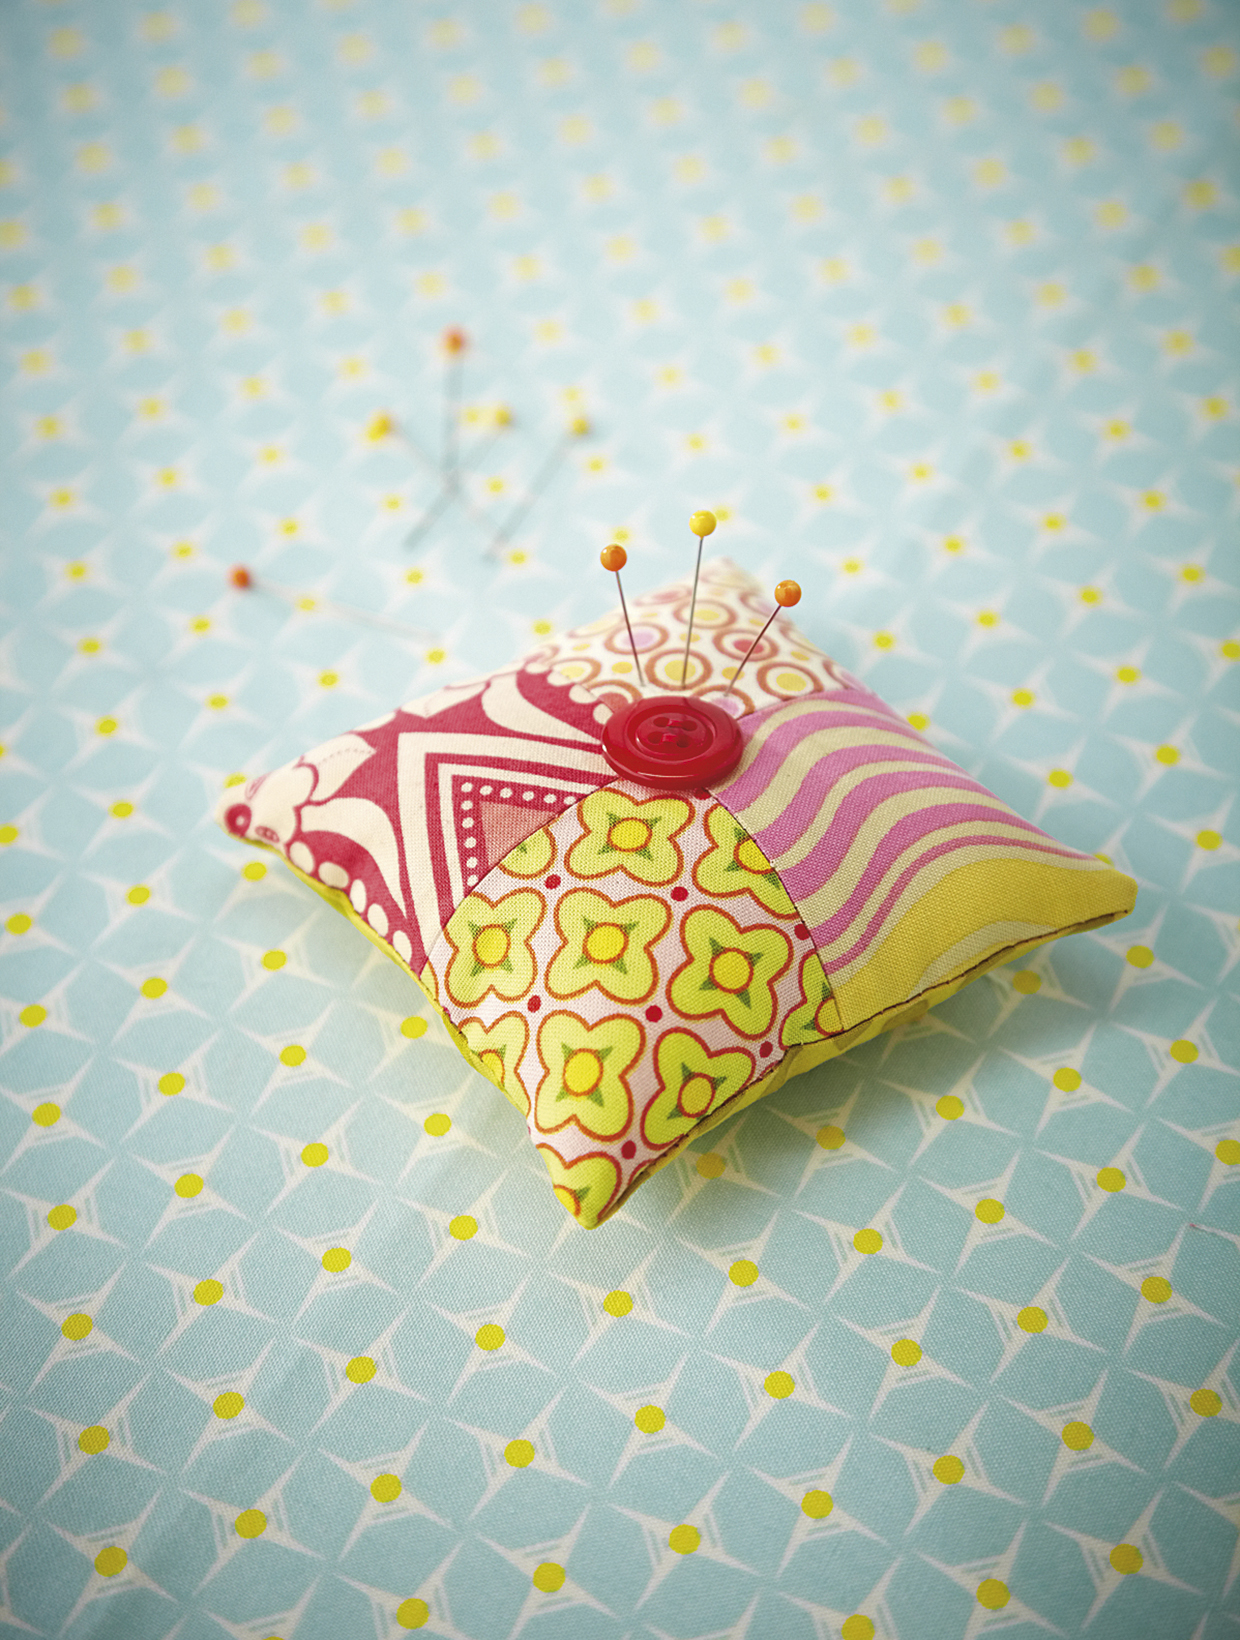
Finally try out your new skills with our really simple four patch pin cushion project.
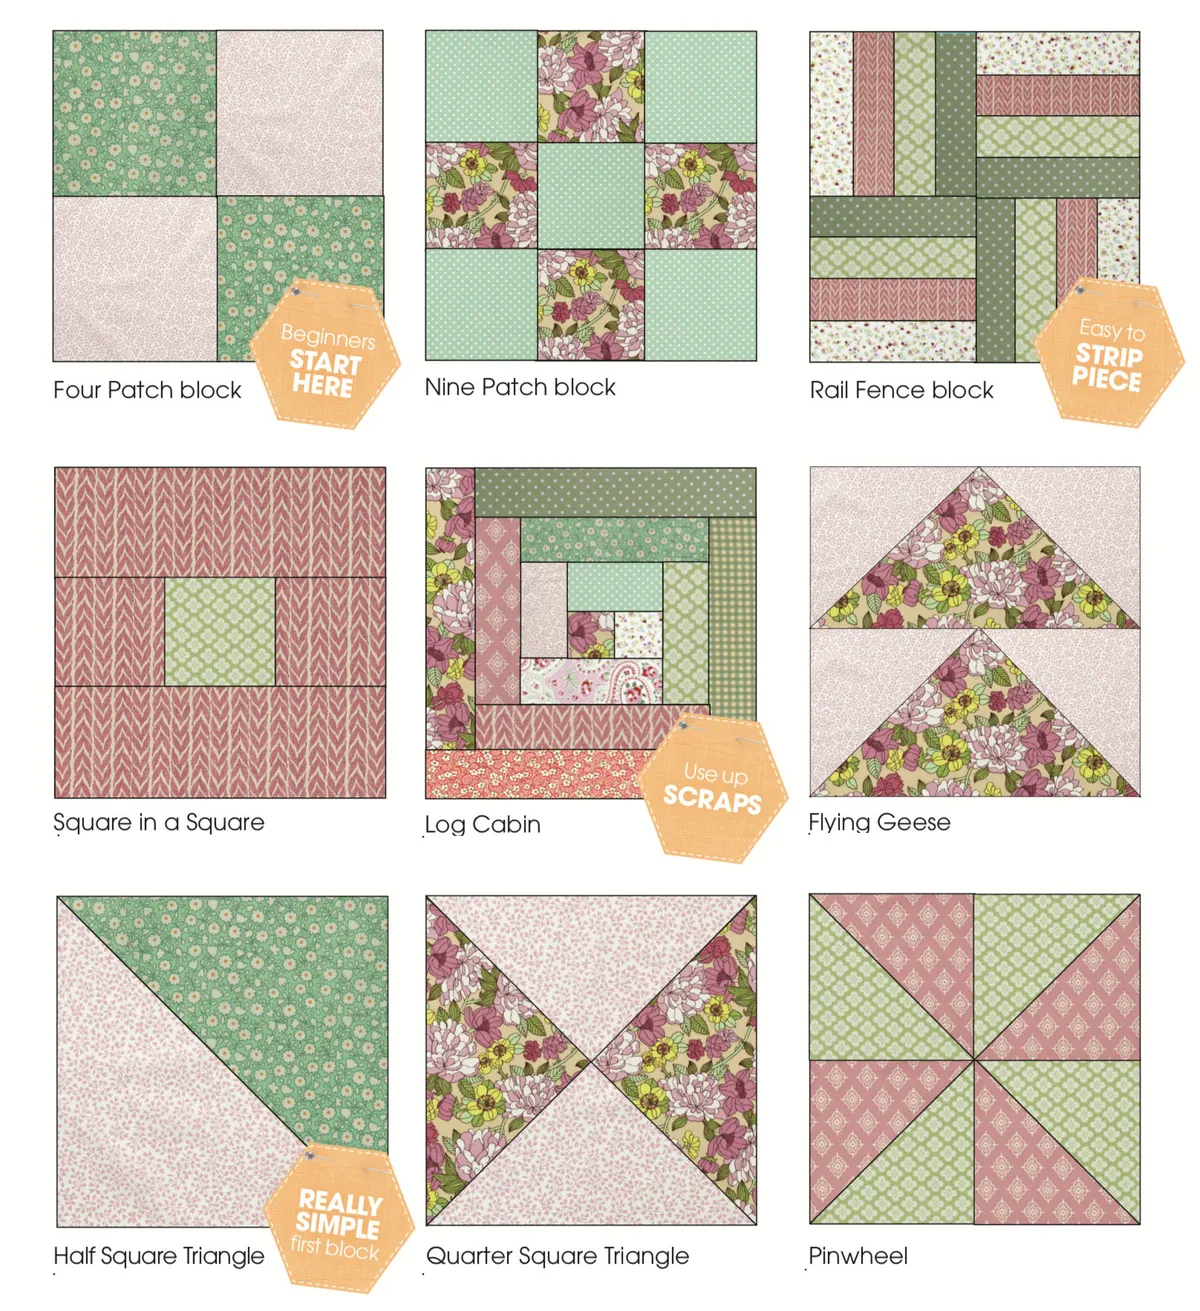
Easy quilt blocks for beginners
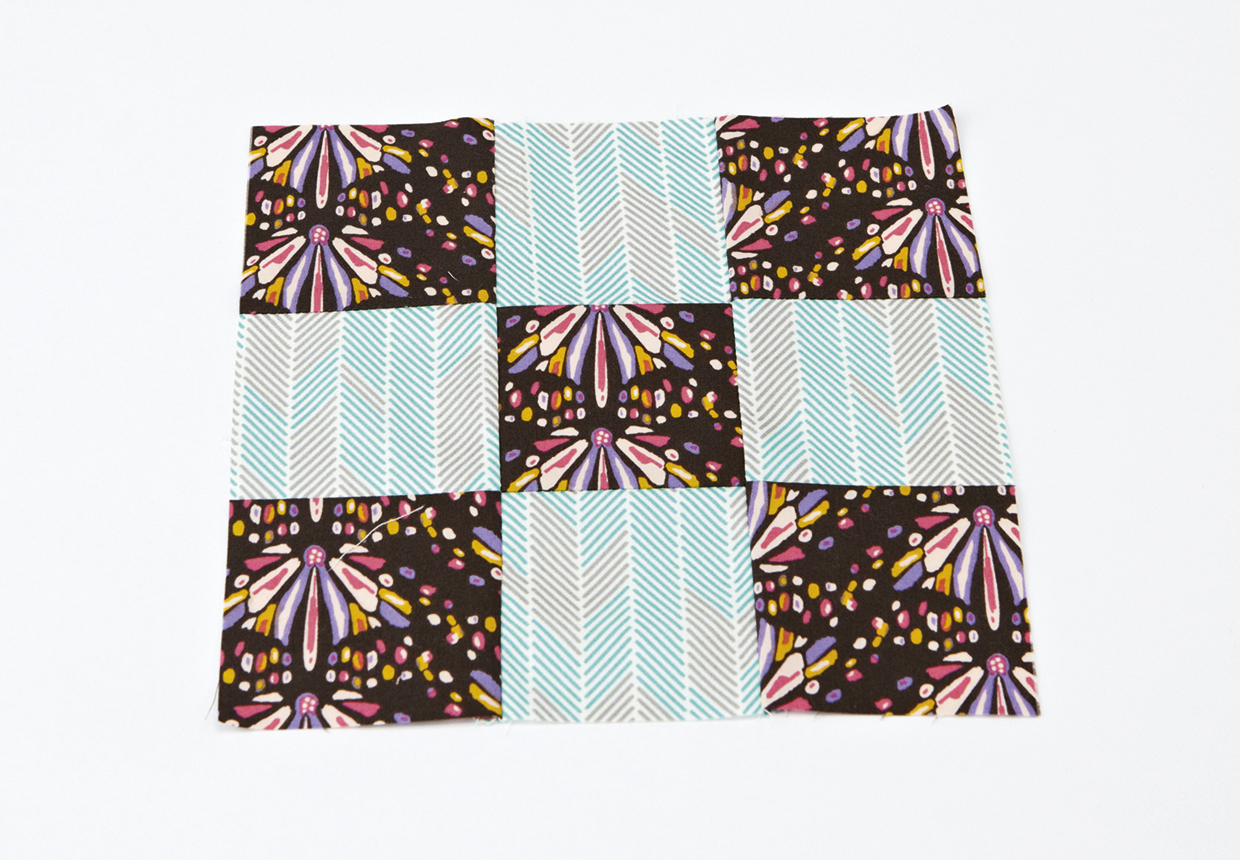
Easy quilt blocks for beginners: In this post you'll learn how to make the first two – a nine patch and four patch quilt block.

You will need:

  • Fabric
  • Rotary cutter
  • Quilting ruler
  • Cutting mat
  • Sewing machine
  • Thread

How to make a four patch quilt block (starter method)

Step 1

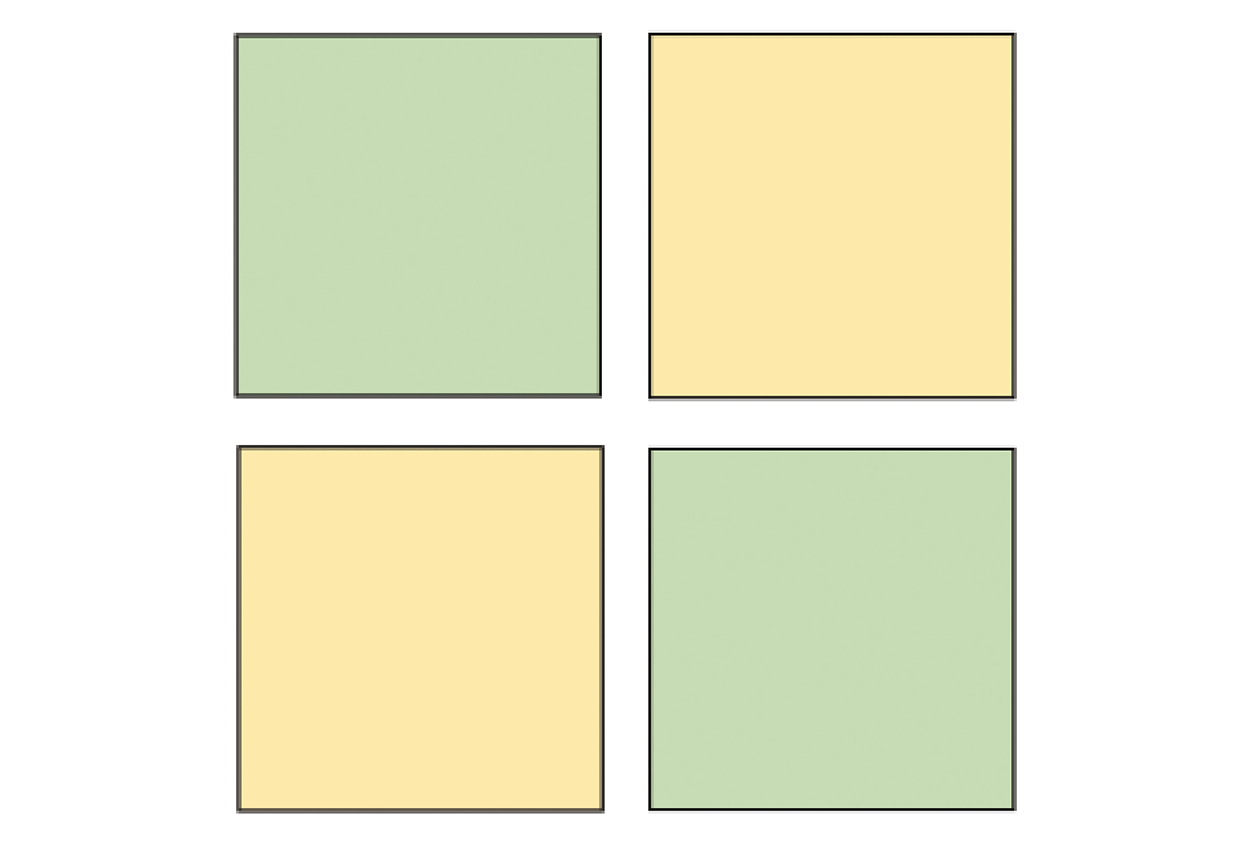
Cut out four equal-sized squares of fabric – the basic elements of your Four Patch block. You could opt for two different colours or all four can be different colours.

How to make a four patch quilt block step 1

Step 2

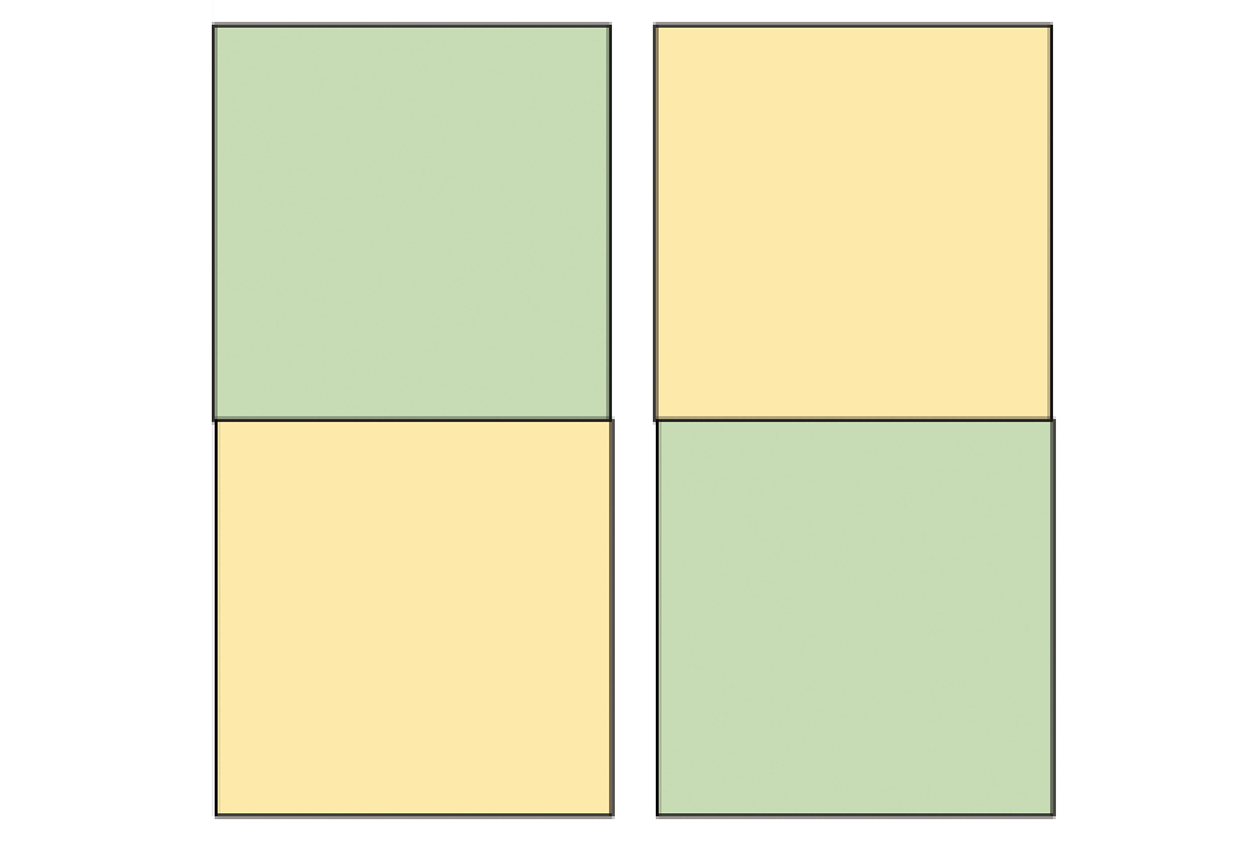
Place the top two two squares, right sides together. Pin them along the central edge. Using a ¼in seam, sew along the edge. Press the seam open or to one side. Repeat with the other squares, to make two pairs.

How to make a four patch quilt block step 2

Step 3

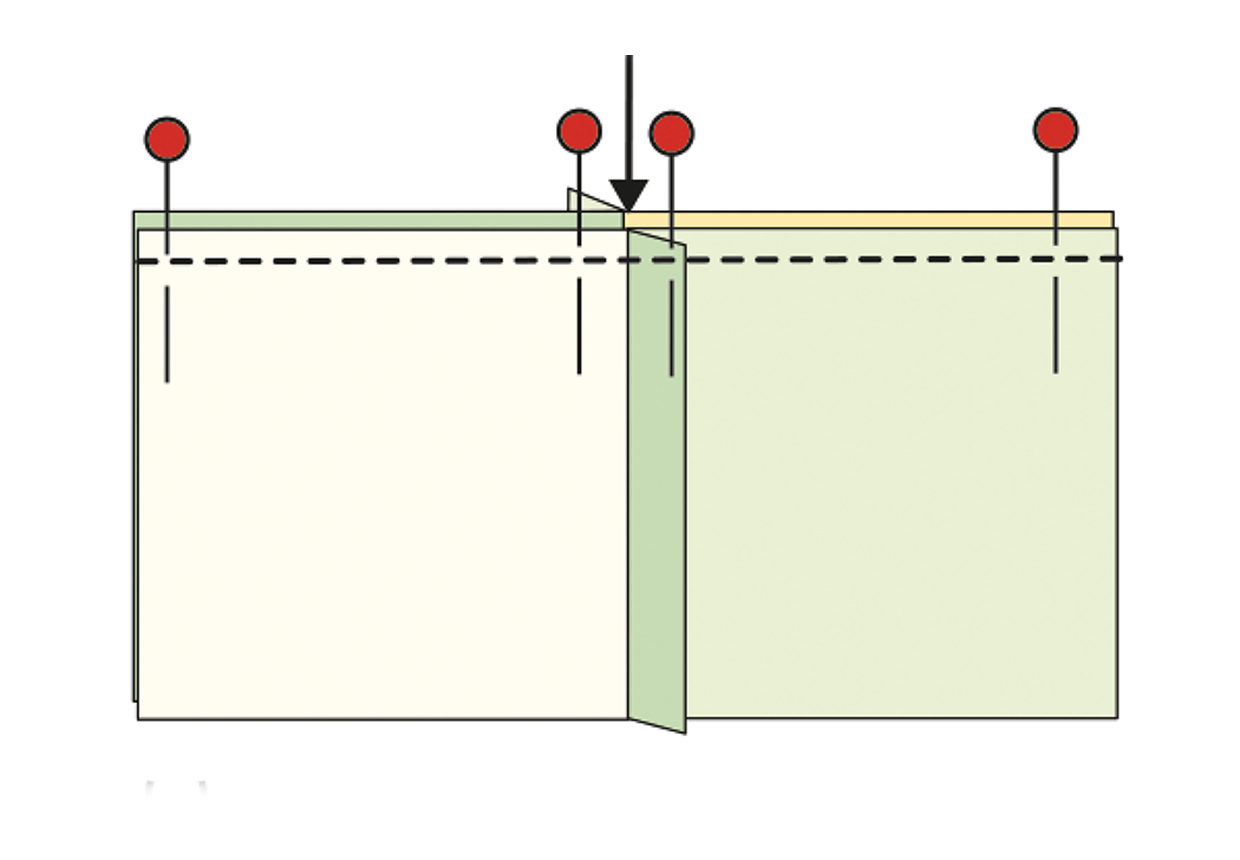
Now put the pairs right sides together, aligning the edges at the top and bottom, and making sure the seams at the centre match our illustration below. Pin and sew together and then press the seam.

How to make a four patch quilt block step 3

Step 4

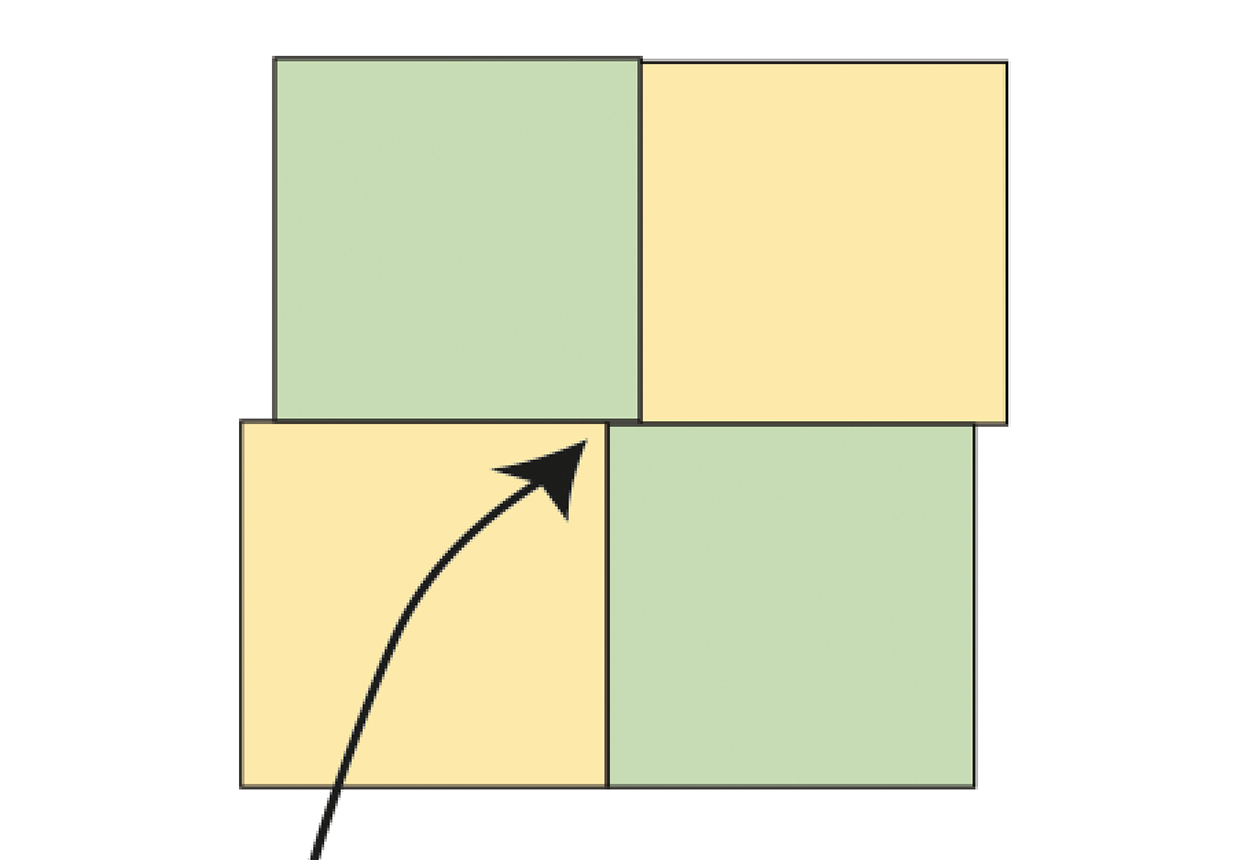
Turn your quilt block right side up. The point where all four squares meet should match up. If it looks like this, your seams must have not quite lined up evenly. No problem – grab a couple more fabric scraps and try again!

How to make a four patch quilt block step 4

How to sew four patch quilt block using strip piecing

Step 1

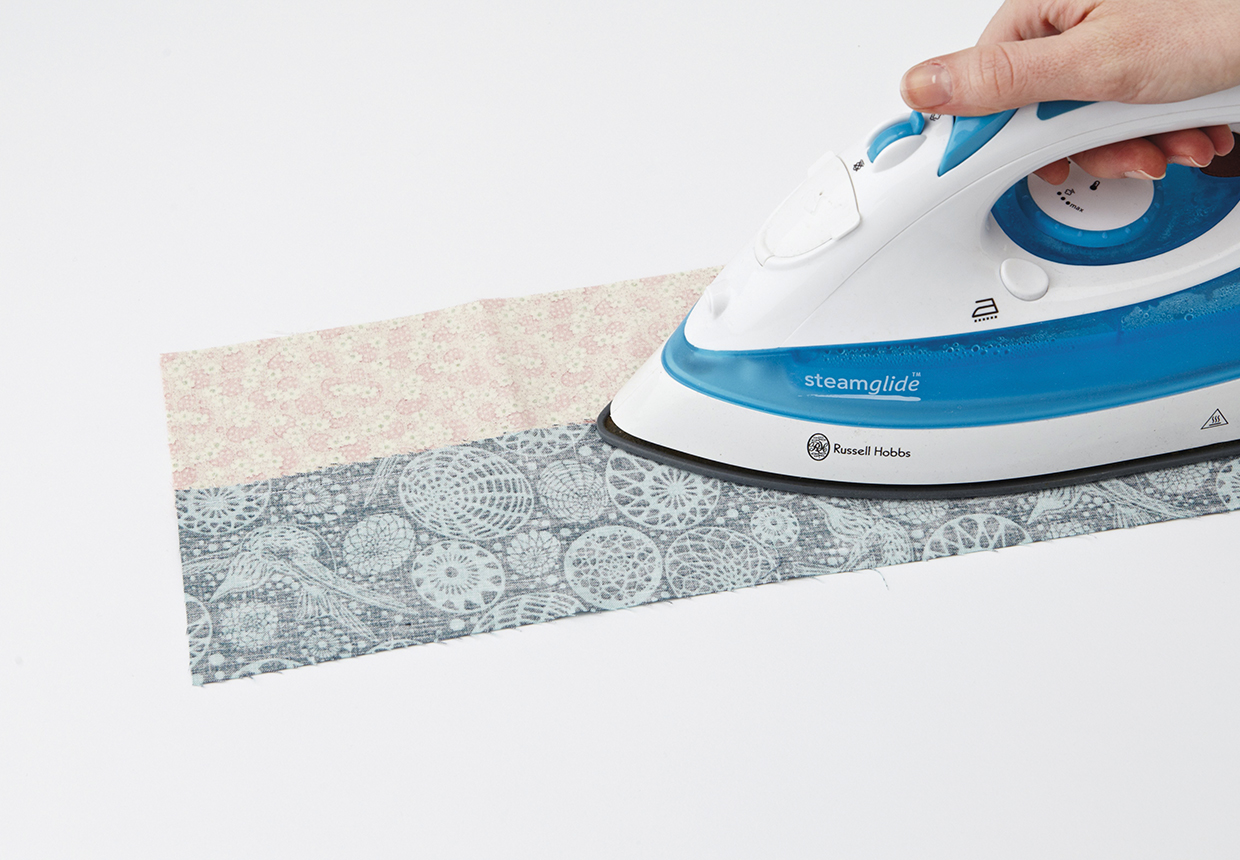
Cut two long strips with a matching width from two contrasting fabrics, one light and one dark. Sew the strips together along the length with a ¼in seam and press the seam to one side.

How to make a four patch quilt block

Step 2

Cut the strip into segments, with the width of a segment equal to the width of the original single strip width. Take a pair of units and rotate one 180°. Sew together, matching seams at the centre, and press.

How to make a four patch quilt block

How to sew a nine patch quilt block using strip piecing

Step 1

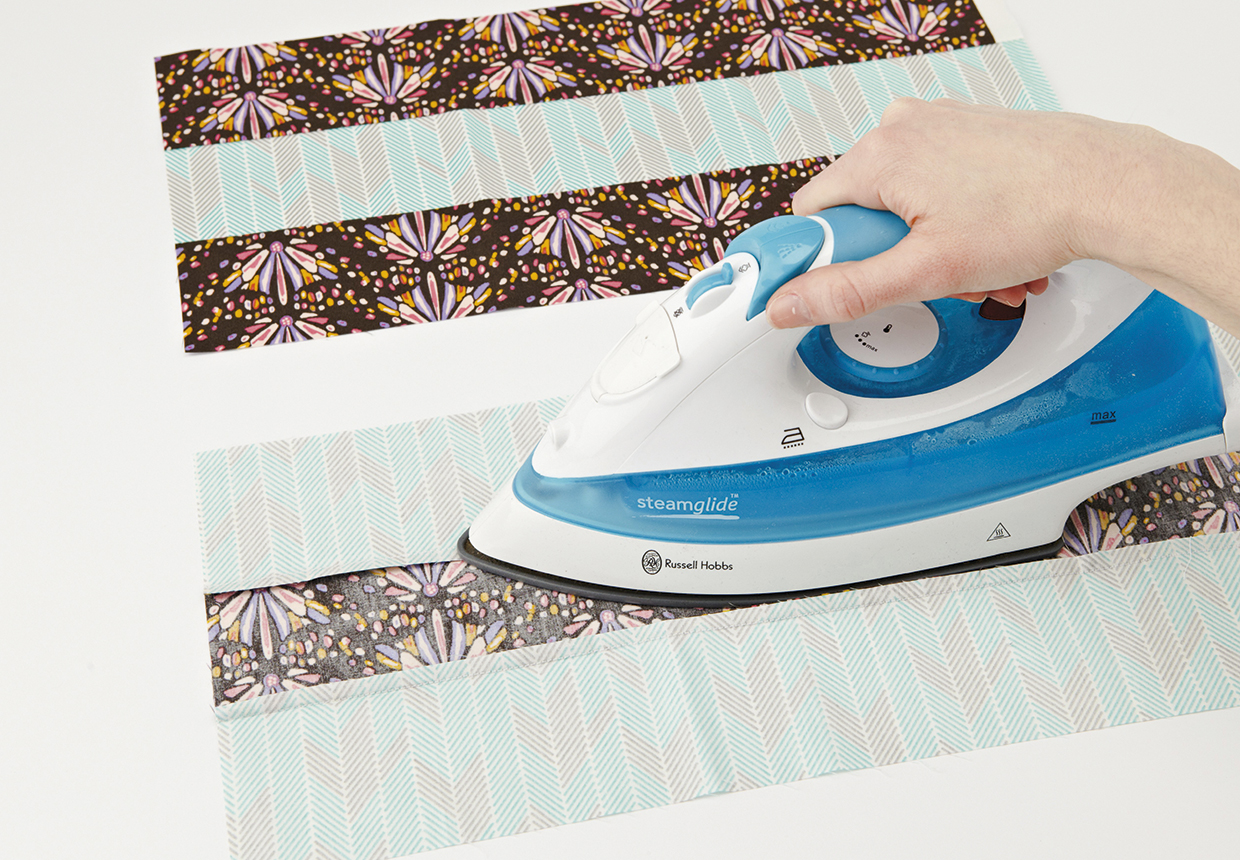
For a 9-patch block cut two strips of dark and one of light fabric. With the light strip in the middle, sew the strips along the length with a ¼in seam (unit 1). Repeat with two light strips and one dark strip (unit 2). Press.

How to make a nine patch quilt block

Step 2

Cut both units into segments, so the width of the segments is equal to the width of the original strip width. Take two unit 1 segments and one unit 2 segment and sew together as shown. Press again.

How to make a nine patch quilt block

Try it out: How to make a 4 patch pin cushion

You will need…

  • Four 2½in (6.3cm) squares, each cut from a different fabric, for the front
  • One 4½in (11.5cm) square of fabric, for the back
  • One button for the centre
  • Toy stuffing or cotton wool

Start sewing…

  1. Sew two 2½in (6.3cm) squares right sides together to form a rectangle.
  2. Repeat with the remaining 2½in (6.3cm) squares. Press both seams open.
  3. Right sides together, sew the two rectangles along one of the long edges to form a 4-patch square. Press the seam open.
  4. Sew a button to the middle on the right side.
  5. Carefully cut a 1in (2.5cm) opening in the centre of the backing fabric.
  6. Lay the backing fabric and 4-patch square right sides together and sew all the way around.
  7. Turn the pincushion the right way out through the hole in the backing fabric.

To finish…

Fill with toy stuffing or cotton wool until firm but not over stuffed. Neatly hand stitch the opening closed.

how to make a four patch pin cushion