Download your own printable traditional log cabin quilt pattern!
Our team independently selects products featured in our editorial content. Some articles may contain affiliate links and we may earn a small commission through them. For more information, please see our Affiliates FAQ
Download your own printable traditional log cabin quilt pattern!
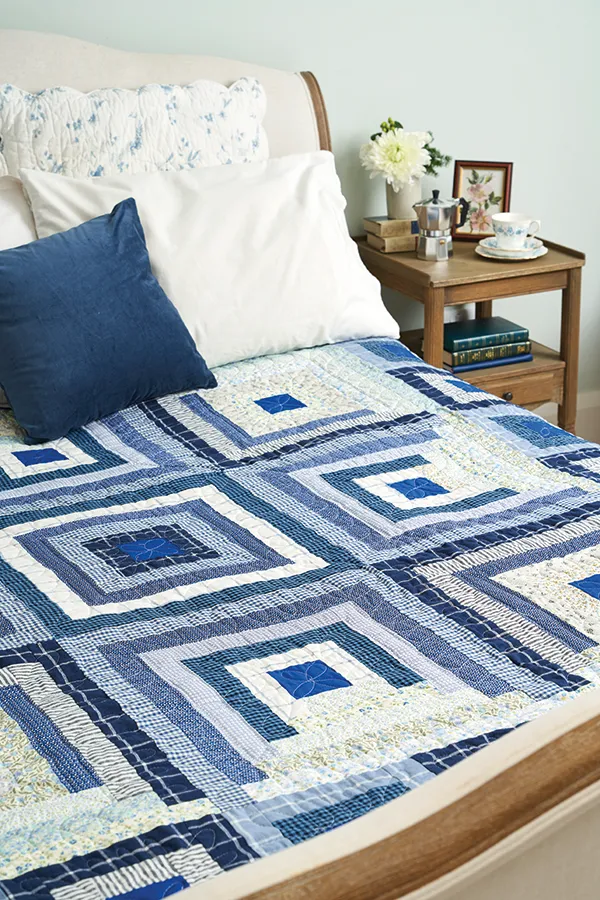
Stitch the winter blues away with Karen Lewis’ printable traditional log cabin quilt pattern. It’s the perfect quilt to keep you warm during the chilly months.
Transition into winter with Karen Lewis’ cosy blue and white quilt.
This printable traditional log cabin quilt pattern is ideal for those of you wanting to make a statement design. The single repeated block creates a stunning pattern which catches the eye of all who see it.
Karen says: “I played around with the colour placement and layout of the classic Log Cabin block to create a star. ”
This entire tutorial can be printed as we’ve included a PDF download of the pattern. Alternatively, you can just read the tutorial here on Gathered! Save some printer ink and keep these instructions up on your device so you can refer back to them while you sew.
Now it’s over to Karen for the tutorial!
Your printable traditional log cabin quilt pattern
The quilt seam allowances are ¼in, unless otherwise noted
Press all seams open, unless otherwise instructed
Wash and press all fabrics well before cutting
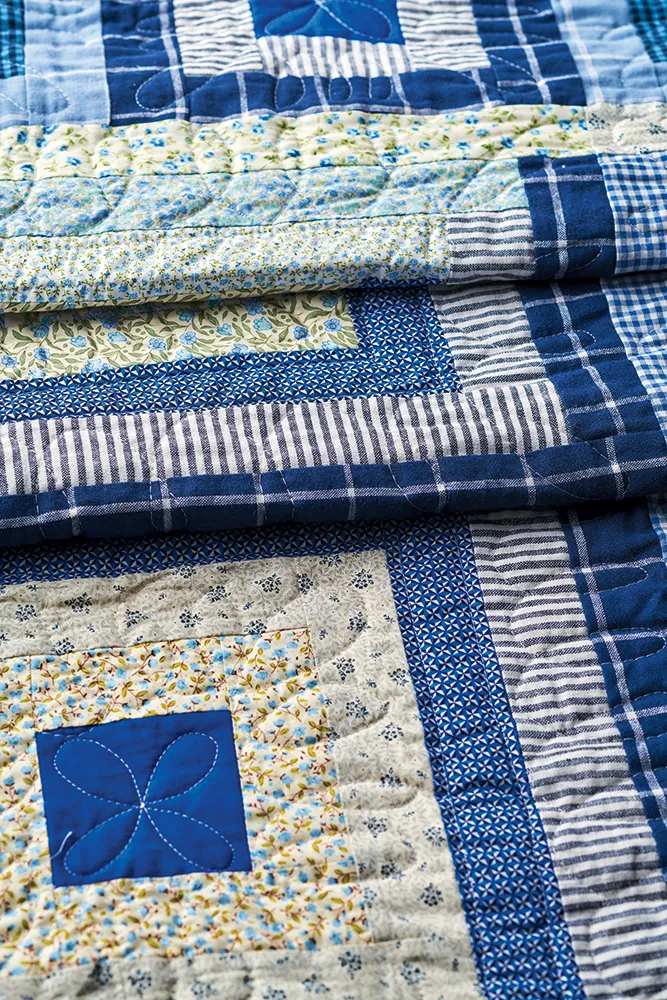
The fabrics we used are from the “Essex Yarn Dyed Classic Wovens” by Robert Kaufman. We also used a range of floral fabrics from Sevenberry.
Finished traditional log cabin quilt size
Your finished traditional log cabin quilt will measure approximately 72in x 72in.
You will need:
Log Cabin centre fabric (½yd)
Assorted dark blues (Colour 1) (1¾yd)
Assorted light blues (Colour 2) (1¾yd)
Background fabrics (2yds)
Backing fabric (4yds)
Batting (85inch square)
Binding fabric (22in x width of fabric)
Step 1
Cutting out your fabrics
Cut the Colour 1, Colour 2 and background fabrics into 2in x width of fabric strips. You may want to cut a few at a time to save leftover fabric.
Step 2
Cut the Log Cabin centre fabric into 3½in strips. Sub-cut into thirty-seven 31½in squares.
Step 3
Cut out the following pieces from Colour 1
From Colour 1 (your darker fabric), sub-cut the following length strips (keep the pieces for each block together in labelled piles):
For the centre block cut:
One 2in x 3½in
Two 2in x 5in
One 2in x 6½in
One 2in x 9½in
Two 2in x 11in
One 2in x 12½in
One 2in x 15½in
Two 2in x 17in
One 2in x 18½in
For the corner block cut:
Four 2in x 9½in
Four 2in x 11in
Four 2in x 15½in
Four 2in x 17in
For the middle side blocks cut
Four 2in x 6½in
Four 2in x 8in
Four 2in x 9½in
Four 2in x 12½in
Four 2in x 14in
Four 2in x 15½in
For the border Log Cabins cut:
Twelve 2in x 3½in (block A)
Twelve 2in x 5in (block A)
Twelve 2in x 6½in (block A)
Twelve 2in x 6½in (block B)
Twelve 2in x 8in (block B)
Twelve 2in x 9½in (block B)
For the border corners blocks cut:
Two 2in x 3½in (corner block A)
Two 2in x 5in (corner block A)
Two 2in x 6½in (corner block B)
Two 2in x 8in ( corner block B)
Step 4
From Colour 2 (your light fabric), sub-cut the following length strips:
For the centre block cut:
One 2in x 6½in
Two 2in x 8in
One 2in x 9½in
One 2in x 12½in
Two 2in x 14in
One 2in x 15½in
For the corner block cut:
Four 2in x 12½in
Four 2in x 14in
For the middle side blocks cut:
Four 2in x 3½in
Four 2in x 5in
Four 2in x 6½in
Four 2in x 9½in
Four 2in x 11in
Four 2in x 12½in
Four 2in x 15½in
Four 2in x 17in
Four 2in x 18½in
For the border Log Cabins cut:
Twelve 2in x 6½in (block A)
Twelve 2in x 8in (block A)
Twelve 2in x 9½in (block A)
Twelve 2in x 3½in (block B)
Twelve 2in x 5in (block B)
Twelve 2in x 6½in (block B)
For the border corners blocks cut:
Two 2in x 6½in (corner block A)
Two 2in x 8in (corner block A)
Two 2in x 3½in (corner block B)
Two 2in x 5in (corner block B)
Step 5
From the background fabric, cut the following length strips:
For the corner blocks cut:
Four 2in x 3½in
Eight 2in x 5in
Eight 2in x 6½in
Eight 2in x 8in
Four 2in x 9½in
Four 2in x 11in
Four 2in x 12½in
Four 2in x 14in
Four 2in x 15½in
Four 2in x 17in
Four 2in x 18½in
For the middle side blocks cut:
Four 2in x 5in
Four 2in x 8in
Four 2in x 11in
Four 2in x 14in
Four 2in x 17in
For the border Log Cabins and corners cut:
Twenty-eight 2in x 5in
Twenty-eight 2in x 8in
Four 2in x 6½in
Four 2in x 9½in
Step 6
Making the centre star for your quilt
For the centre block, take one 3½in square and add a 2in x 3½in Colour 1 strip to the bottom.
Add a 5in Colour 1 strip to the left side.
Add a 5in Colour 1 strip to the top and a 6½in Colour 1 strip to the right side to complete Round 1, (use the diagrams above).
Step 7
To complete the centre block, continue to add strips. Work in a clockwise order (referring to the diagram above), as follows:
Round 2:
Colour 2 – 6½in strip
Colour 2 – 8in strip
Colour 2 – 8in strip
Colour 2 – 9½in strip
Round 3:
Colour 1 – 9½in strip
Colour 1 – 11in strip
Colour 1 – 11in strip
Colour 1 – 12½in strip
Round 4:
Colour 2 – 12½in strip
Colour 2 – 14in strip
Colour 2 – 14in strip
Colour 2 – 15½in strip
Round 5:
Colour 1 – 15½in strip
Colour 1 – 17in strip
Colour 1 – 17in strip
Colour 1 – 18½in strip
Step 8
Corner block – make 4
Take all the corner block strips and make four blocks, adding strips in sequence following the fabric positions shown in the diagram above. Make four corner blocks.
Take all the middle side block strips and make four blocks, adding strips in sequence following the fabric positions shown in the diagram above. Make four middle side blocks.
Step 10
Lay out the nine large blocks in the centre to create your star (shown above). Sew together in three rows of three and then sew the three rows together.
Step 11
Making the border of your quilt
Take all the strips for the border Log Cabin corner squares and make two of each corner block A and corner block B, (as shown above).
Note: these only have two rounds of strips.
Step 12
Take all the strips for the border Log Cabin side squares. Make twelve each of block A and block B, as shown in the diagram above.
Step 13
Lay out the twenty-four border Log Cabin blocks, alternating block A and B in four rows of six, as shown in diagram above. Sew the blocks together.
Step 14
Make 2
Take two of the rows. Sew a corner block A to one end, and a corner block B to the other end, alternating the colours (shown in the diagram above).
Step 15
Sew the shorter borders to the sides of the quilt, and the borders with corner blocks to the top and bottom to complete the quilt top.
Step 16
Quilting and finishing log cabin quilt
Sew the two pieces of backing fabric together along the long side using a ½in seam. Press the seam open.
Step 17
Make a quilt sandwich, basting together the backing – right side down, batting and quilt top – right side up.
Step 18
Quilt as desired and then trim square. Karen quilted in a free-motion quilting design, emphasising the centre of the Log Cabins using a pale grey 40wt Aurifil thread.
Step 19
Cut the binding fabric into eight 2½in wide strips.
Sew the strips together end-to-end to make one long binding strip and press in half lengthways, wrong sides together. Bind the quilt, carefully sewing the binding around the corners.
Decorate your home with your new blue and white quilt
Karen’s printable log cabin quilt pattern is the ideal winter project. Stitched in cool tone blues, it’s a quilt which will look great in your home throughout January and into spring.
Throw it over the back of your sofa or spread it over your bed for a warm and handmade-look. All you need now is to make some matching decor!
Sew more winter projects with Gathered
You’ve downloaded your printable traditional log cabin quilt pattern, now you need a matching cushion project! Stitch a complimentary geometric quilted cushion with our pattern.
Karen Lewis is a screen printer, fabric designer, quilter and
author living in Leeds, West Yorkshire, with her husband and
three children. Much-adored Cockapoo, Scout, has recently
joined the clan and, when Karen isn’t knee-deep in paint and
fabric and designing for Robert Kaufman, she and Scout can
be found out in the fields by their house. Karen teaches printing
and textiles at workshops around the UK and overseas.
This website is owned and published by Our Media Ltd. www.ourmedia.co.uk