Cutting out
Step 1
From each of the background/ main bag fabric and lining fabric, cut as follows:
- Two (2) 2in x WOF strips, subcut to lengths of 22in.
- Two (2) 14in x 17in rectangles.
- From the background fabric only, also cut one (1) 15in square.
Making the appliqué
Step 1
Fold the 15in background square in half twice and then in half again diagonally and press to give you centre markings on both the straight cross and bias cross of the square.
Step 2
Fold the orange fabric in half twice as with background and press. Cut out the paper pattern along the straight and bias fold line to give you a wedge shape. Lay this pattern on top of the folded foreground fabric, matching straight and bias fold lines. Pin in place.
Step 3
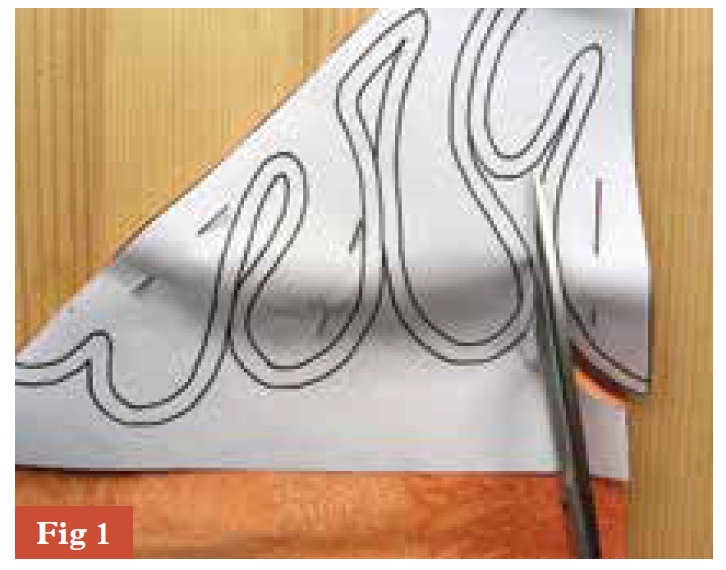
With sharp scissors, cut out the pattern shape (outer line) through both paper and fabric (Fig 1).
Step 4
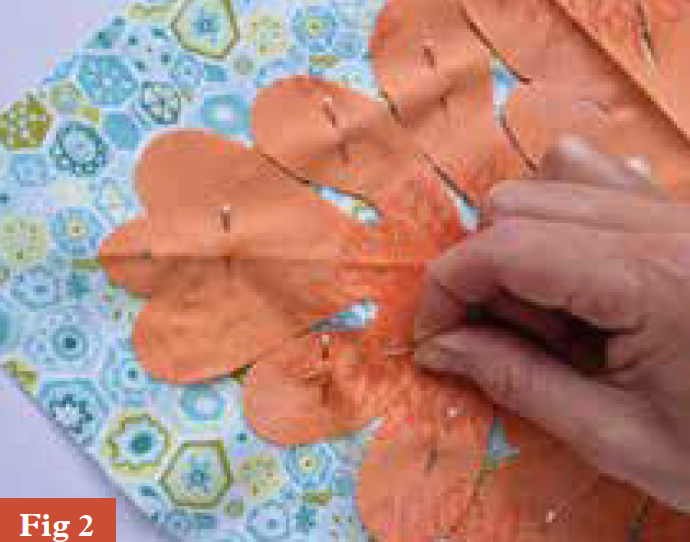
Carefully unfold the fabric and place on top of the background, using the pressed centre markings to line it up. Pin in place. Using a large running stitch tack all around the edge of the pattern leaving at least ½in between the raw edge and the tacking stitch (Fig 2).
Step 5
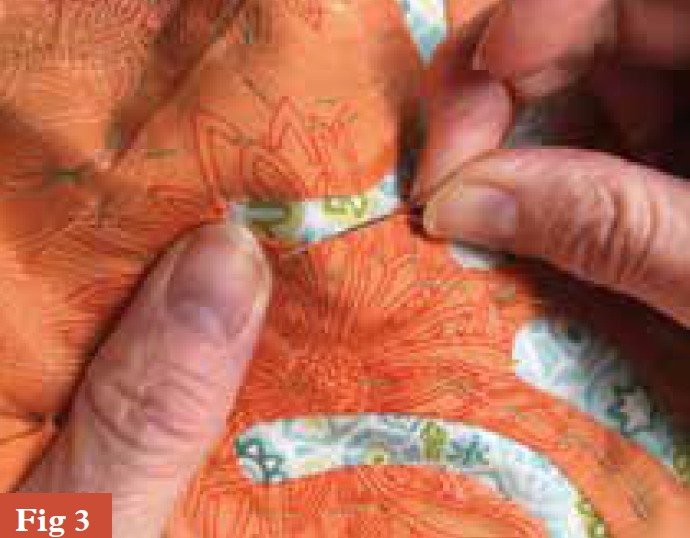
Begin turning under your raw edges using an approx. ³∕₁₆in seam allowance (halfway between ¼in and ⅛in). Find a straight edge of the pattern to start with. Finger press an area of seam ahead by about a thumbs width and then use tiny slip stitches, just catching the fabric very close to the fold and stitching straight down without slanting your stitch (Fig 3). Stitches should be at least the same distance apart as your seam allowance. Any ‘travelling’ between stitches should happen at the back of the work (your stitches should look longer there). Work around the pattern, using your needle to turn under the raw edges before you stitch them down. 5 Carefully unfold the fabric and place on top of the background, using the
Step 6
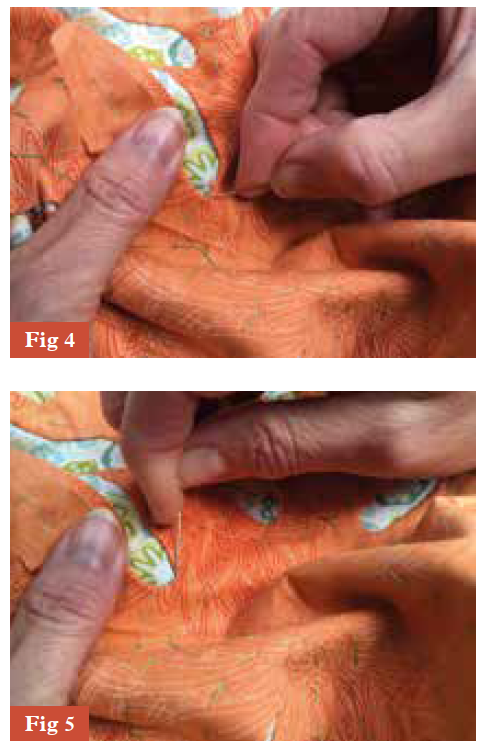
When you get to an inner curve, you will need to snip into the seam allowance by approx. ⅛in. The tighter the curve the more snips you will need. Use your needle to ‘swoop’ around the curves taking all the snipped seam under in a smooth motion (Fig 4 and 5). Place your stitches closer together on curves.
Techincal Tip
Keep a small moist sponge beside you for wetting your needle (safer than licking!). A wet needle will give you extra purchase on the fabric when turning the edges under, it’s especially useful when tackling inner curves.
Step 7
There is no need to snip on outer curves, just carefully fold under your extra fabric a little at a time so as not to get it bunched up.
Step 8
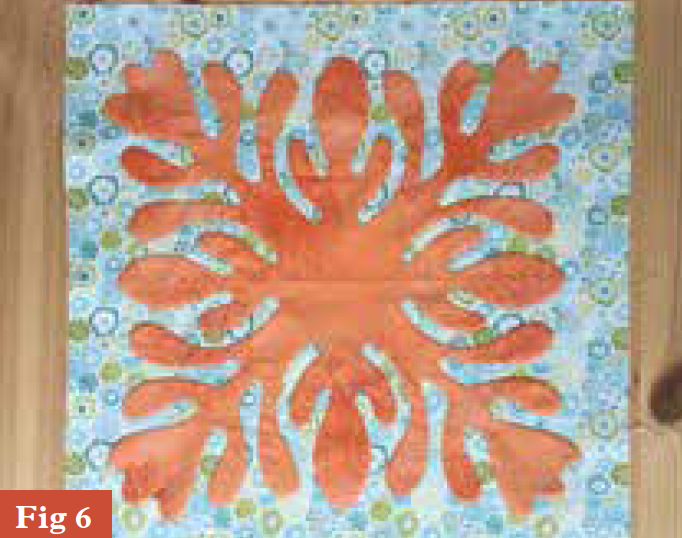
When you have stitched around the whole pattern, remove all the tacking stitches and press well (Fig 6). Trim to a 14in square.
Techincal Tip
When hand sewing, it’s always best to start with a slightly bigger piece of fabric than you need as the edges will fray quite a bit through the frequent handling.
Making the bag
Step 1
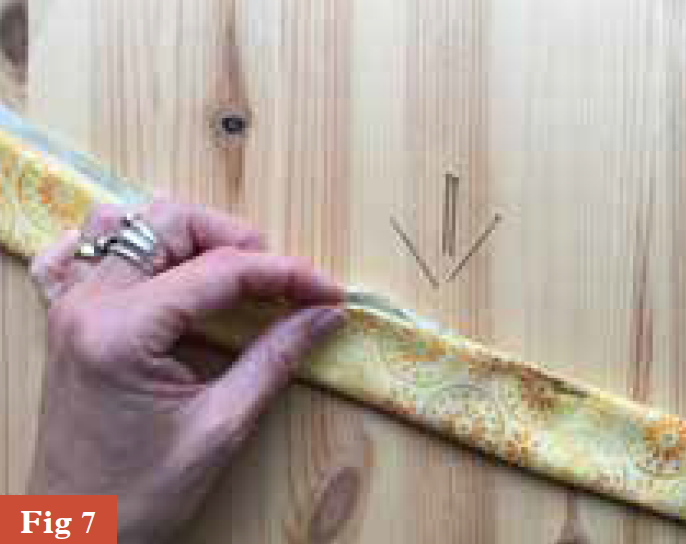
Take a lining and main bag strap strip and, with RST, sew together along the long edge. Press seams open then refold along the seam line, wrong sides together, and press. Open out again and press over a ¼in seam to the wrong side along both outer edges. Press back in half with wrong sides together and pin closed (Fig 7). Top stitch by machine close to the edge along both sides. Repeat with the other strap.
Step 2
Place the 14in pocket lining square right sides together with the finished appliqué square and sew a ¼in seam along the top edge. Turn and press so that wrong sides are together. Top stitch along top edge close to the fold.
Step 3
Place the lined pocket on top of one of the 14in x 17in main bag rectangles, both right sides up, and matching the bottom edges. Sew along both side seams, ⅛in from edge to fix pocket in place.
Step 4
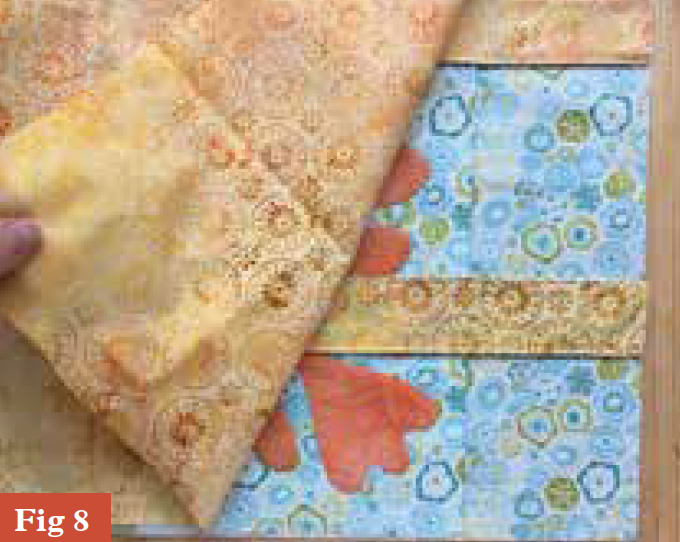
Pin one (1) of the straps in place aligning the raw edges with the top edge of the bag front. There should be a 3½in space between the outer edge of strap and sides of bag front. Place one of the 14in x 17in lining rectangles on top of the main bag front, right sides together, and matching top edge (with straps sandwiched between) (Fig 8). Sew along the top using a ½in seam. Press seams towards main fabric.
Step 5
Repeat step 13 with the other 14in x 17in main bag and lining rectangles and the other strap.
Step 6
Place both sides of the bag, right sides together, matching the two lining pieces and the two main bag fabrics together. Pin in place. Ensure the straps are tucked out of the way. Stitch all the way around using ½in seam, leaving a 7in gap in the middle of the bottom edge of the lining.
Step 7
Snip corners and turn inside out through gap. Sew the gap closed before placing the lining inside bag. Press, then finally top stitch all around the top edge close to the fold.
