DIY fabric pumpkins
Use Ouissi Gresty fabric pumpkin pattern to make your own cloth pumpkins for Halloween. These DIY fabric pumpkins can be brought out year after year and will never spoil!

Published:
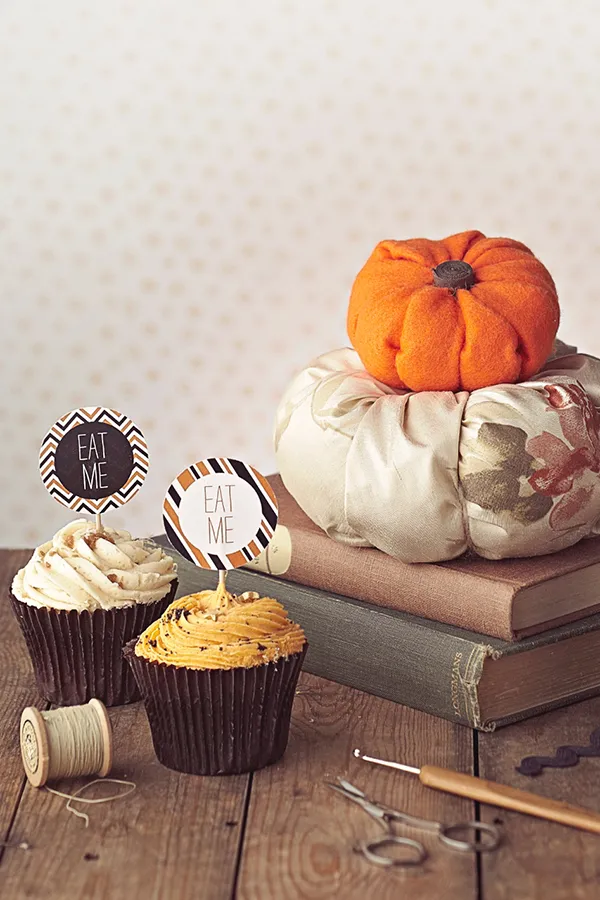
Get ready for Halloween with Ouissi Gresty’s adorable fabric pumpkin pattern. Fabric pumpkins are a great alternative to the real thing as no messy carving is required! Plus they’re super sustainable as you can make them from leftover fabric (we love stash buster projects) and bring them out every Autumn. You can make your no-sew fabric pumpkins from whatever material you like so if you fancy a traditional pumpkin choose a lightweight orange material or go all out and pick velvet. DIY velvet pumpkins are super on-trend and you can keep them in your home all Autumn long. Whether you pop your pumpkins on your table, on your porch, or on your windowsill, they make great budget DIY Halloween decorations, especially when coupled with our DIY Halloween banner or our Halloween garland!
Another reason we love these DIY fabric pumpkins is they can stay in your home throughout the Autumnal season. You could even use your fabric pumpkins as pincushions, as a bed for furry friends, or simply as homemade Fall decor. No matter what you use your pumpkins for, make sure you tag us in a finished photo of your creations over on Instagram. But now it’s over to Ouissi Gresty so she can show you how to make your DIY fabric pumpkins.

You will need:
• Your choice of fabric or felt
• Soft toy stuffing
• Wool or embroidery thread to match or contrast with your fabric
• Bias tape, ribbon or a strip of felt
If you’re new to the world of sewing don’t worry. We have a complete sewing for beginners guide here on Gathered to help you. If you want to make your fabric pumpkins using a sewing machine we’ve also got you! Head to our how to use a sewing machine tutorial to get started and take a look at our best sewing machines for beginners guide too.
DIY fabric pumpkins
You Will Need
- Fabric
- Thread
- Toy stuffing
- Bias tape
Total time:
Step 1

Cut out a circle from your fabric or felt about three times wider than you wish for the width of your pumpkin. Sew around the edge of your circle with a running stitch, leaving the end of the thread free.
Step 2

Form a doughnut shape out of your soft toy stuffing, and place in the centre of your circle of fabric. Pull the two ends of the thread, gathering up the fabric, and tie the ends tightly.
Step 3

Sew through the pumpkin’s centre, from the gathered side out through the smooth side. Loop round to enter again through the gathered side and leave the end of your wool/ribbon free. Space stitches evenly and pull tightly to form the pumpkin’s bumps.
Step 4

Tie the ends of the thread/wool on the smooth side in a knot and cut off the ends. Take your bias tape, ribbon or felt and roll into a tube shape. Keep going until you have a stalk that’s wide enough to cover the hole in your pumpkin’s gathered base.
Step 5

Cut the tape and sew along the edge to form a disc. Sew the stalk to the bottom of the pumpkin, making sure you cover the hole where the fabric was gathered.
Step 6

Repeat steps 4 and 5 to make a smaller stalk. Sew this on top of the knot, which is on the top of the pumpkin. There you have it: DIY fabric pumpkin complete!
Pop your DIY fabric pumpkins around the house and welcome in the spooky season! If you’re crafting with little ones check out our easy Halloween crafts for kids or if you’re a solo crafter then we have loads of projects for adults too. Use our trick or treat knitting pattern and our halloween embroidery hoop to make more homemade Halloween peices.
Meet the Maker
Ouissi is a whiz with a needle and thread. Best known for stitching delicious sculptures of popular treats from felt, she shares her tricks for making plushie pumpkins.