How to make a sausage dog softie toy
Make the most of your print fabric scraps and use them to bring a ditsy duo of canine softies to life with Lucy Ward's free dog sewing patterns and step-by-step guide.

Published:
We’ve got the perfect quick sewing project for you to brighten up your day – learn how to sew sausage dog softie toys!
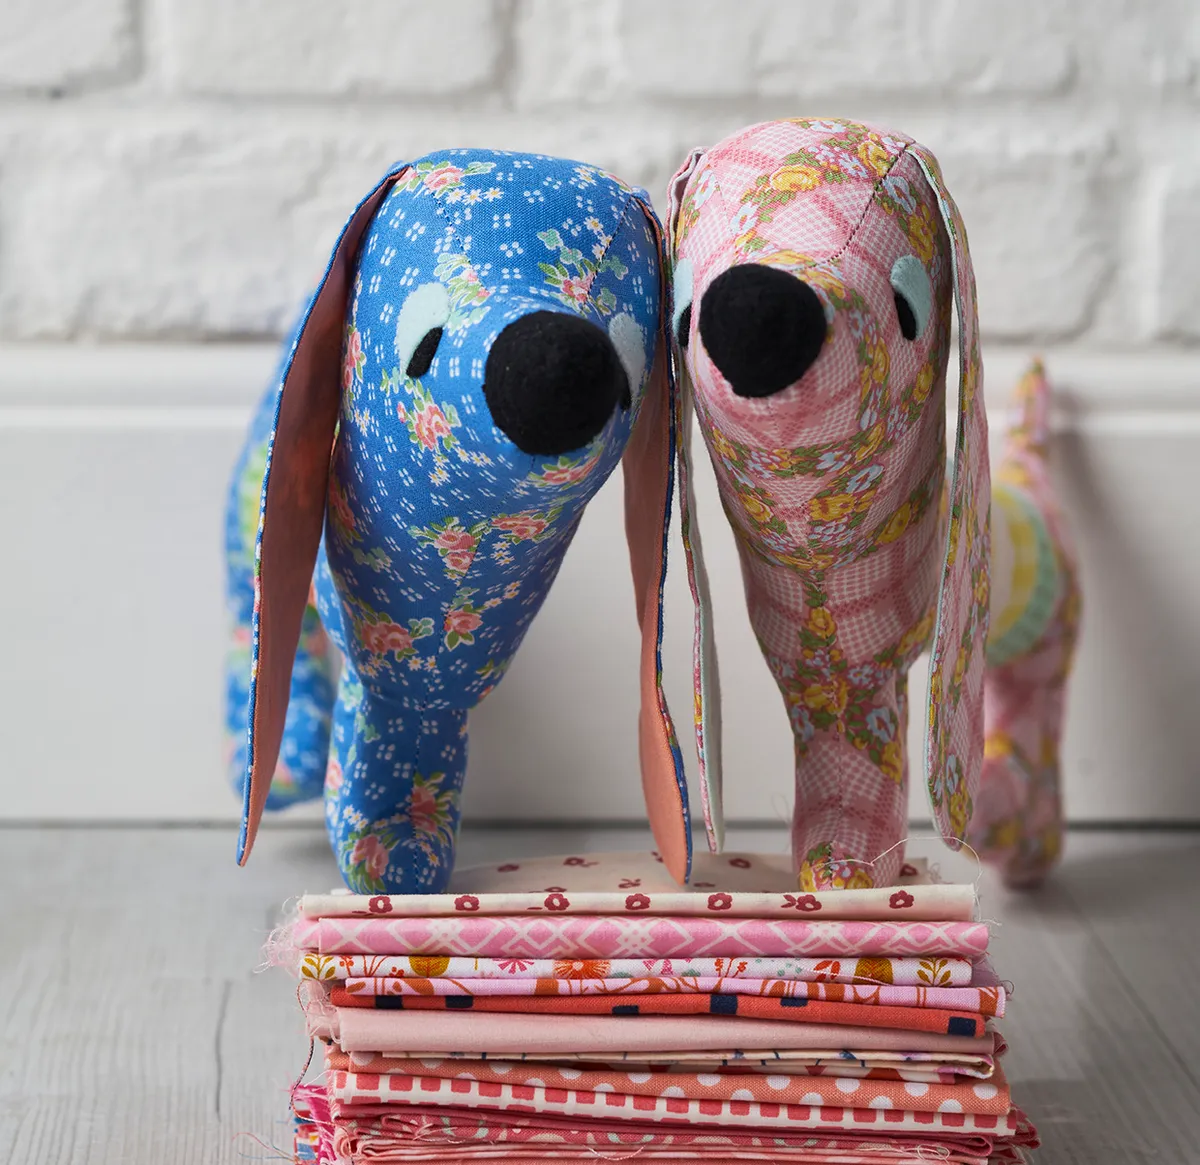
We’ll show you how to make this scrap-busting pair of plushies to use up all those beautiful prints from past projects that you’ve been holding on to for the right patchwork opportunity to come along. Lucy Ward‘s dog sewing pattern was first seen in Love Patchwork & Quilting magazine and we’re excited to bring this fun project to Gathered for you. It is just the thing for a confident sewing beginner or intermediate maker. Create different characters for each pooch through your choice of fabrics. To see more of Lucy’s work, follow her on instagram @thewhistlingcowgirl.
If you’re just starting out learning to sewing, check out our beginners guide to sewing and if you like to make toys, you might also like this our Rabbit sewing pattern. Completely new to this and don’t know even have a sewing machine? Our round up of the best sewing machines for beginners can help you get the right kit set up.

You will need
Makes one (1) dog:
- Floral fabric: ½yd – you can find some beautiful fabrics on Etsy
- Solid fabric: 7in x 9in
- Mix of five (5) spot, solid or stripe fabric scraps: each at least 4in square
- Black fleece fabric: 3½in x 2½in
- Polyester toy stuffing
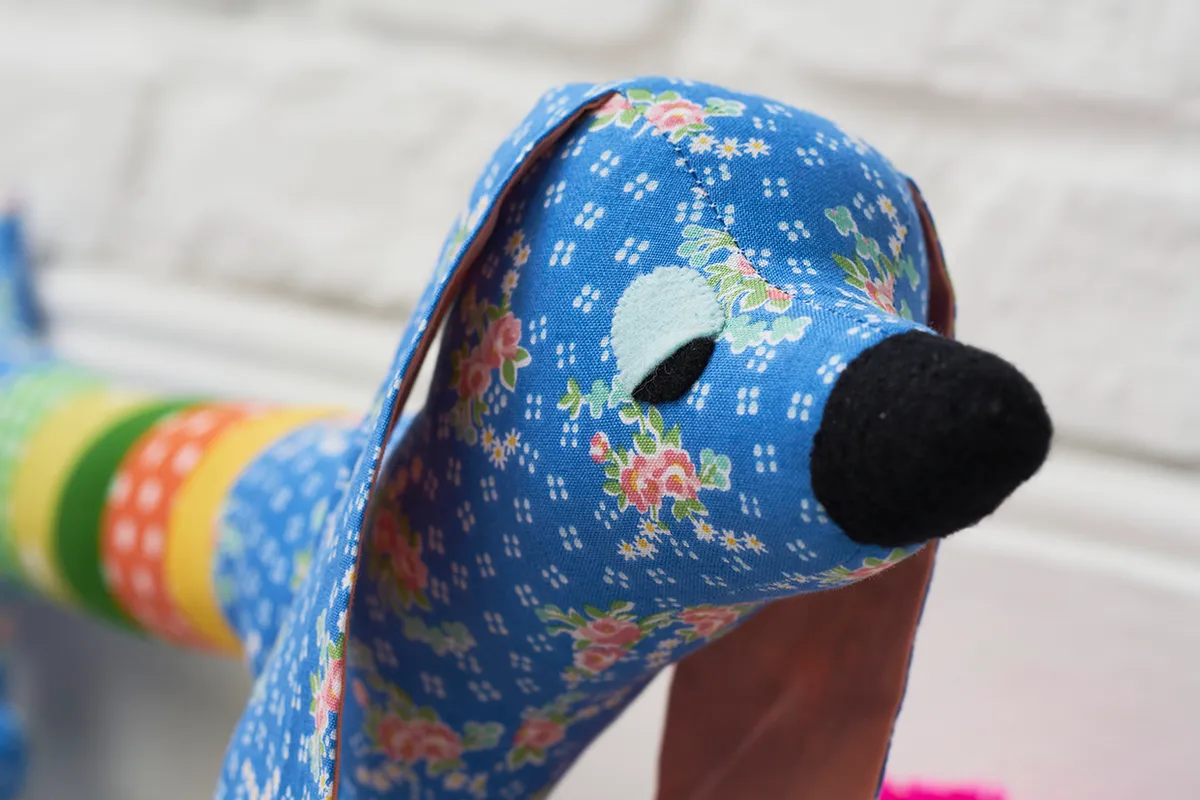
- Blue and black wool felt scraps
- One (1) copy of the Ear, Stripe, Eyelid, Eye, Nose, Head Gusset, Back Side Body and Front Side Body Sausage Dog templates
- Sewing machine
- Basic sewing supplies
Finished size
- 21in x 8in
Notes
- Download our Free Sausage Dog Sewing Templates here
- Seam allowances are ¼in, unless otherwise noted.
- RST = right sides together.
- RS = right side.
- When cutting two of a template piece, cut on a folded layer of fabric to make one regular and one mirror image piece.
- Templates include seam allowances where necessary.
- Mark positions and openings on the reverse of the fabrics using a pencil.
- Clip notches into the curves and corners for a smooth finish.
- Instructions are based on the blue dog.
Fabrics used
Blue floral fabric is Bouquet Blue and pink floral is Trellis Pink, both from the Mae Flowers collection by Penny Rose.

You Will Need
- Fabric (See materials list)
- Fleece (Black, 3½in x 2½in)
- Soft toy stuffing
- Felt (Scraps)
- Templates (Download our free Dog sewing pattern)
- Sewing machine
- Basic sewing kit
Total time:
Cutting out
Step 1
From the floral fabric cut:
- Two (2) pieces using the Front Side Body template.
- Two (2) pieces using the Back Side Body template.
- Two (2) pieces using the Ear template.
- One (1) piece using the Head Gusset template.
Step 2
From the solid fabric cut:
- Two (2) pieces using the Ear template.
Step 3
From each of the patchwork fabrics, use the Stripe template to cut:
- Two (2) rectangles (ten (10) in total).
Step 4
From the black fleece cut:
- One (1) piece using the Nose template.
Step 5
From the pale blue wool felt cut:
- Two (2) pieces using the Eyelid template.
Step 6
From the black wool felt cut:
- Two (2) pieces using the eye template
Making the dog
Step 1
Pin and sew a floral and solid ear piece RST, leaving the short ends open. Clip notches in the curves on the seam allowances before turning the ear RS out. Repeat for the other ear and press them both flat.
Step 2
Lay the head gusset piece on top of one front side body piece, RST, matching A and B points. Sandwich one ear between them, where marked, with its RS facing towards you. Pin the head gusset along the top edge of the head between A and B. Take time to manipulate the fabrics until they lie smoothly together. Baste first, which will also help to create a smooth shape for sewing (Fig A). Sew in place with the gusset piece on top and be sure not to bunch the fabric underneath the seam. Remove the basting stitches, trim the seams and clip small notches into the curves, taking care not to snip the seam.

Step 3
Pin the remaining front side body piece to the other side of the head gusset, RST, sandwiching the other ear between, as before (Fig B). Baste, making sure the ears are aligned, then sew and finish the seam as in step 8.

Step 4
Lay out five body rectangles, alternating the solid and print fabrics as shown. Pin and sew the pieces RST, along the long edges (Fig C). Press the seams open. Repeat with the remaining body rectangles.

Step 5
Pin the pieced body to the short end of the matching front and back side body pieces. Pin and carefully sew the pieces RST (Fig D). Press.

Step 6
Lay the two body sides RST and begin pinning at point B on the head. Make sure to align the patched stripes on either side of the body. Work around the body and legs and back up to meet the seam of the head gusset at point A. Tuck the ears out of the way of the stitching. Baste first if you prefer, then sew, leaving an opening on the hind leg.
Step 7
Trim the seam allowances and clip notches into the corners of the seam allowances, particularly around the legs. Turn the dog RS out, pushing out the legs and head using your fingers, along with a wooden stick or paintbrush end. Press first and then begin to stuff the dog, firmly but carefully, taking care not to burst the seams. Begin at the nose and head and gradually fill up the legs and then the body and tail. Push lots of stuffing in, so the dog is really nice and firm. Once stuffed, ladder stitch or overstitch the opening closed.
Making the face
Step 1
Wrap and pin the fleece nose triangle over the end of the dog’s muzzle, blunt tip out. Overstitch in black all along the tip of the stuffed nose (Fig E). Once you have sewn all the way around, continue sewing up the centre to draw the open sides together, up to the tip of the triangle. Then fold the flap of fabric over onto itself, lining the end up with the edge of the nose base. Sew this securely with overstitches, then finally sew up each side of the nose to finish it off (Fig F).

Step 2
Refer to the photos as a guide to position and pin the eye pieces on both sides of the head. Make sure they are level with one another by viewing from all sides. Lightly mark the position using a pencil or chalk marker. Sew on the black felt eyes first, using tiny overstitches in black thread (Fig G).

Then lay the blue eyelid piece halfway over the top of the eye. Pin in place and overstitch in coordinating thread along the upper edge only (Fig H). Leave the straight bottom edge of the eyelid unsewn.

Ta da! Your softie dog is complete. Now why not make another to create a pair of plushie pooches?
