Sew this cute snowman pattern for Christmas
No need to wait for a white Christmas – you can sew your own frosty friend with Jo Carter’s smiley snowman pattern. Read on for our free snowman pattern and step-by-step guide to how to make a snowman toy.

Published:
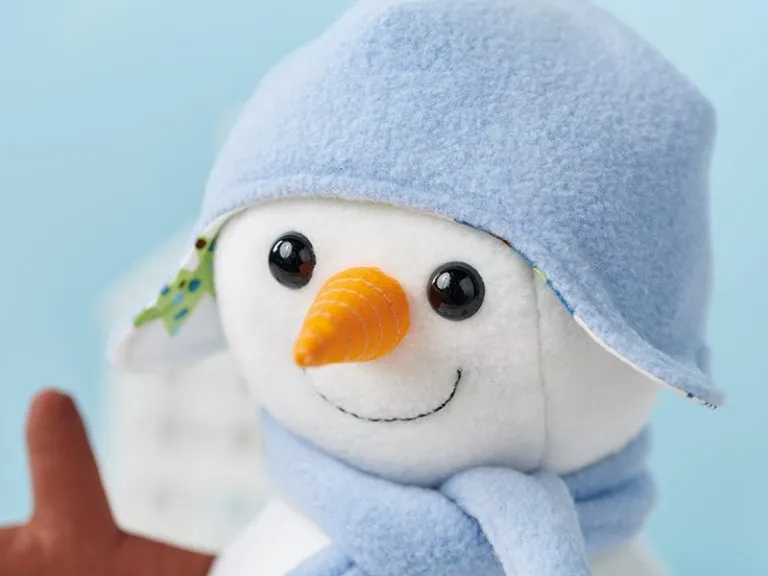
This adorable snowman sewing pattern is bound to bring some festive joy into your home this Christmas. You can use him to brighten a room or he makes the perfect quick gifts to sew for a young child this Christmas.
Our cheerful snowman pattern is made using snuggly fleece fabric – making him perfect for cuddling on cold December days. He’s wrapped up in a beautiful pastel blue scarf and matching hat, but you could choose any colour you like.
When you’re making this snowman sewing pattern, ensure the pom pom, joins and back seam are sewn securely for durability. Sew a few lines of quilting to create a realistic carrot nose detail for your snowman.
You can find Jo Carter’s full step-by-step tutorial for this snowman pattern below…

Things to know before you start making your snowman
Download your snowman sewing pattern templates here
Notes
- Approx 30cm (12in) tall with the hat or 26cm (10in) tall without the hat.
- Use a 6mm (¼in) seam allowance unless otherwise stated.
- The templates include seam allowances where necessary.
- Arrows on the pattern pieces indicate pattern/pile direction for marking and cutting out.
- When the pattern specifies to cut two or more of a pattern piece, after marking out half of the pieces required the template needs to be turned over to mark out the remaining half so that the pieces are cut as mirror images.
- This snowman has been made mainly using stretchy fleece fabric so clipping into internal curves and making notches around external curves is not always instructed for fleece. When clipping always take care to avoid any stitching.
- Due to the curved shape of the snowman using cotton fabric is not recommended, with the exception of the arms, nose and hat lining.
- As the arms are sewn directly into seams, sew over the joins so they are well secured and to reduce the likelihood of them being pulled out.
If you’re new to sewing, you may find it helpful to check out our how to guides before you get started.
Check out our sewing for beginners, how to use a sewing machine, best sewing machines for beginners and sewing kits for beginners guides.
Materials
Looking for materials to make this snowman sewing pattern with? We’ve found some suppliers below to make it easier for you to get started…
- Buy white fleece fabric from Minerva for £9 per half metre
- Buy brown cotton fabric from Etsy for £4.50 for half a metre
- Buy orange cotton fabric from Etsy for £4.50 for half a metre
- Buy pale blue fleece fabric from MyFabrics for £8.95 for half a metre
- Buy black plastic safety eyes from Amazon for £2.83
- Buy polyester toy filling from Amazon for £6.45 for 1kg
- Buy wadding from Amazon for £3.99 for ¼ metre
Your snowman sewing pattern – step by step instructions
You Will Need
- Fabric A (50x50cm (20x20in)), white fleece fabric for the main body
- Fabric B (22x22cm (9x9in)), cotton fabric for the arms
- Fabric C (10x10cm (4x4in)), cotton fabric for the nose
- Fabric D (25x56cm (10x22in)), fleece fabric for the hat and scarf
- Fabric E (16x36cm (7x14in)), cotton fabric for the hat lining
- 12mm black plastic safety eyes (a pair)
- Black embroidery thread
- Polyester toy filling
- Wadding/felt scrap (21x12cm (5x5in))
- Pair of buttons (18mm (¾in) diameter)
- Basic sewing kit
Total time:
Step 1
Download, print out and then cut out the templates.
Step 2
We recommend that you draw out the pattern pieces onto the reverse of the fabric before cutting.
Step 3
Cutting out your snowman pattern pieces
From Fabric A, cut out the following pieces:
- Face: Cut one.
- Side head: Cut two.
- Tummy: Cut one.
- Side body: Cut two.
- Base: Cut one.
- Hat pom pom: Cut one.
Step 4
From Fabric B cut out:
- Arm: Cut four.
Step 5
From Fabric C cut out:
- Nose: Cut one.
Step 6
From Fabric D cut out:
- Hat outer: Cut one.
- Scarf: Cut one measuring 7x56cm (2¾ x 221⁄8in)
Looking for more festive craft projects to make?
Try our crochet Christmas decorations, free Christmas knitting patterns and learn how to make a Christmas stocking.
Step 7
Step seven From Fabric E cut out:
- Hat lining: Cut one.
Step 8
Making your snowman toy’s head
With the right sides (RS) together, sew a side head piece to its corresponding side of the face.
Repeat to attach the other side head to the remaining side of the face.

Step 9
Close the dart in each of the side head pieces with RS facing, tapering the end.

Step 10
Sewing your snowman toy’s body
Sew a side body piece to its corresponding side of the tummy with RS together.
Repeat to attach the other side body to the remaining side of the tummy.

Step 11
Place two mirror-image arm pieces RS facing and sew around the sides, leaving the bottom end open.
Clip the seam allowance at the internal corners and clip V-shaped notches around the external curves.
Turn it RS out, stuff and then tack the end closed.

Step 12
With RS together, fold the dart over in a side body piece and sandwich the arm in place – checking that it is facing the correct way up – at the bottom of the dart, pinning in place if necessary. Sew the dart closed.
Step 13
Repeat for the remaining arm and side body pieces.

Step 14
Assembling the snowman sewing pattern
Sew the bottom of the head to the top of the body with RS together.

Step 15
Starting at the back of the body, sew the base to the bottom of the body with the RS of the fabric together and ensuring that the markers line up.

Step 16
Make the smallest holes possible through which to allow the shank of the eye in the face piece where marked.
Fit the eyes into place according to manufacturer’s instructions. Sew the back of the head and body, leaving a 6-8cm (2-3in) opening in the back.

Step 17
Turn RS out and stuff.
Fallen in love with this snowman sewing pattern?
You might also like to have a go at making this festive reindeer pattern designed by Lucy Ward.
Step 18
Making your snowman toy’s face
With the RS facing up, place the carrot nose on top of the scrap of wadding/felt and quilt horizontal lines.
Start quilting 6mm (¼in) or so from the point as it may help to clip away a little extra bit of the wadding at the tip of the nose when turning RS out.

Step 19
Trim away the excess wadding overhanging the sides of the nose. RS together, fold the nose in half and sew along the side.
Clip the seam allowance at the tip of the nose.

Step 20
Turn the nose RS out and stuff. Hand-sew a running stitch around the top within the 6mm (¼in) seam allowance and pull on the thread to gather the end of the nose, folding the raw edges inside.
Secure the thread to hold the gathering in place and then hand-sew the nose to the face, sewing twice around to make sure it is well-secured.

Step 21
Using three strands of black stranded cotton, embroider a smile onto the face.
Sew two buttons onto the front of the snowman, ensuring they are fully secured in place.

Step 22
Making your snowman toy’s hat and scarf
Close the centre dart only on the hat outer and lining pieces, RS together. Sew the outer hat to the lining along the bottom edge.
Clip the seam allowance around the internal corners and clip V-shaped notches around the external curves.

Step 23
With RS together, sew the back of the outer hat together, continuing down to sew the back of the lining together.

Step 24
Line up the front centre dart in the hat outer with the seam along the back and sew this opening closed (similar to a boxed corner) with RS together, tapering the ends of the seam.
Turn the hat RS out through the same opening in the lining. Topstitch around the bottom edge of the hat.

Step 25
As for the nose, hand-sew a running stitch around the edge within the 6mm (¼in) seam allowance of the hat pom pom and gather to form a cup shape.
Add filling and then draw up fully, folding the raw edges inside, and secure the thread to hold it into a ball shape.

Step 26
Hand-sew the pom pom to the hat, sewing around twice to make sure that it is secured in place. Close the opening in the top of the lining.

Step 27
Fold the scarf lengthways RS together and sew the open sides together, but leaving a 6-8cm (2-3in) opening in the long side. Clip the seam allowance at the two unfolded corners and turn RS out. Sew the opening closed.

Step 28
Finishing your snowman sewing pattern
Adjust the stuffing in the head. Securely close the opening in the back and add the hat and scarf to finish.
You’ve finished! You now know how to make this sweet little snowman pattern.

Use our snowman sewing pattern to create a special Christmas gift
Handmade gifts are extra special and we know this adorable snowman toy will be treasured for years to come.
Use our free snowman sewing pattern as a base but feel free to customise your toy however you like!
Then pop him in your little ones stocking and watch as their faces light up.
Make your new snowman a festive friend
Looking for more Christmas sewing projects? Take a look at 32 of the best free Christmas sewing patterns.
